
The Legend of Zelda: Tears of the Kingdom
- 100% walkthrough
- English
- No Commentary
- WhirlingCow
- 234 episodes
100% walkthrough of The Legend of Zelda: Tears of the Kingdom on Nintendo Switch: 234 videos, 257 hours 44 minutes, no commentary, by WhirlingCow.
- Total walkthrough
- 257h 44m
- Walkthrough
- 100%
- Console
- Nintendo Switch
- Language
- English
3 walkthroughs for this game
Choose the one you want to watch
 84h 53m
BeardBear
Zelda: Tears of the Kingdom - Full Game 100% Walkthrough
- English
- No Commentary
- Nintendo Switch
- 100% walkthrough
- 1 episode
 59h 46m
AbdallahSmash
The Legend of Zelda: Tears of the Kingdom Gameplay 100% Walkthrough (Nintendo Switch)
- English
- Voice Commentary
- Nintendo Switch
- Full game
- 104 episodes
- Indexed · 222 pick-ups
 257h 44m
WhirlingCow
The Legend Of Zelda: Tears of The Kingdom - 100 Percent Walkthrough (TOTK 100% Walkthrough, 100% Guide, All Collectibles, All Side Quests & More)
- English
- No Commentary
- Nintendo Switch
- 100% walkthrough
- 234 episodes
- Indexed · 1.829 pick-ups

About this walkthrough
The Legend of Zelda: Tears of the Kingdom (2023) is the sequel to Breath of the Wild on the Nintendo Switch. Below Hyrule Castle, Link and Zelda find an ancient mummy, and when it wakes up, a disaster hits the kingdom. Zelda disappears and Link loses his powers.
Hyrule now has three layers: the land you know, islands floating in the sky and the dark Depths underground. Link's new arm gives him powers that change how you solve problems. Ultrahand lets you glue objects together to build vehicles, Fuse joins items to weapons and shields, Ascend lets you rise up through ceilings and Recall makes objects go back in time.
Slowly Link finds out what happened to Zelda, and who is behind the gloom spreading over Hyrule. Shrines, Lightroots, caves and Korok seeds are spread across all three layers.
Chapters
Click a chapter and the video starts at that moment.
- 0:00:00 Intro
- 0:00:15 Prologue - Task Started (Go through Hyrule Castle Ruins)
- 0:14:50 Prologue - Task Completed (Go through Hyrule Castle Ruins)
- 0:17:20 Prologue - Task Started (Leave Hyrule Castle Ruins)
- 0:19:30 Chest (Archaic Legwear)
- 0:20:10 Prologue - Task Continued (Leave Hyrule Castle Ruins)
- 0:21:00 Prologue - Task Completed (Leave Hyrule Castle Ruins)
- 0:22:00 Location (Great Sky Island)
- 0:22:30 Prologue Task Started (Find Steward Construct)
- 0:27:50 Prologue - Task Completed (Find Steward Construct)
- 0:29:55 Main Quest - Find Princess Zelda - Task Started (Reach Temple of Time)
- 0:34:20 Korok Seed
- 0:35:00 Main Quest - Find Princess Zelda - Task Continued (Reach Temple of Time)
- 0:46:40 Cooking up some recipes
- 0:48:00 Main Quest - Find Princess Zelda - Task Continued (Reach Temple of Time)
- 0:50:45 Location (Temple of Time)
- 0:51:35 Main Quest - Find Princess Zelda - Task Completed (Reach Temple of Time)
- 0:53:30 Main Quest - The Closed Door - Task Started (Finish Ukouh Shrine)
- 1:00:00 Shrine - Started (Ukouh Shrine)
- 1:01:30 Unlocking Ability (Ultra Hand)
- 1:02:00 Shrine - Continued (Ukouh Shrine)
- 1:03:40 Chest (Amber)
- 1:04:00 Shrine - Continued (Ukouh Shrine)
- 1:05:00 Shrine - Completed (Ukouh Shrine)
- 1:05:25 Main Quest - The Closed Door - Task Completed (Finish Ukouh Shrine)
- 1:07:50 Outro
- 0:00 Intro
- 0:10 Main Quest - The Closed Door - Task Started (Finish In-Isa Shrine)
- 3:30 Korok Seed
- 4:00 Main Quest - The Closed Door - Task Continued (Finish In-Isa Shrine)
- 14:30 Chest (Amber)
- 14:55 Main Quest - The Closed Door - Task Continued (Finish In-Isa Shrine)
- 15:40 Korok Seed
- 16:05 Main Quest - The Closed Door - Task Continued (Finish In-Isa Shrine)
- 22:00 Cooking up some recipes
- 24:00 Main Quest - The Closed Door - Task Continued (Finish In-Isa Shrine)
- 29:00 Chest (Opal)
- 29:30 Main Quest - The Closed Door - Task Continued (Finish In-Isa Shrine)
- 30:10 Korok Seed x2
- 32:55 Main Quest - The Closed Door - Task Continued (Finish In-Isa Shrine)
- 38:00 Chest (Amber)
- 38:45 Main Quest - The Closed Door - Task Continued (Finish In-Isa Shrine)
- 44:00 Shrine - Started (In-Isa Shrine)
- 44:45 Unlocking Ability (Fuse)
- 46:00 Shrine - Continued (In-Isa Shrine)
- 46:45 Chest (Arrows)
- 47:55 Chest (Small Key)
- 51:30 Shrine - Completed (In-Isa Shrine)
- 52:00 Main Quest - The Closed Door - Task Completed (Finish In-Isa Shrine)
- 53:00 Energy Cell
- 53:59 Chest (Arrows)
- 54:55 Outro
- 0:00:00 Intro
- 0:00:10 Placing markers on the map
- 0:02:25 Scavenging for resources
- 0:10:00 Main Quest - The Closed Door - Task Started (Finish Gutanbac Shrine)
- 0:11:30 Korok Seed
- 0:12:00 Main Quest - The Closed Door - Task Continued (Finish Gutanbac Shrine)
- 0:14:30 Chest (Soldier Reaper)
- 0:15:00 Main Quest - The Closed Door - Task Continued (Finish Gutanbac Shrine)
- 0:16:45 Korok Seed
- 0:17:15 Main Quest - The Closed Door - Task Continued (Finish Gutanbac Shrine)
- 0:18:30 Location (Pondside Cave)
- 0:19:15 Bubbul Gem
- 0:20:45 Chest (Archaic Tunic)
- 0:21:20 Main Quest - The Closed Door - Task Continued (Finish Gutanbac Shrine)
- 0:28:00 Chest (Amber)
- 0:28:30 Main Quest - The Closed Door - Task Continued (Finish Gutanbac Shrine)
- 0:33:30 Korok Seed
- 0:34:15 Main Quest - The Closed Door - Task Continued (Finish Gutanbac Shrine)
- 0:37:00 Chest (Opal)
- 0:38:15 Main Quest - The Closed Door - Task Continued (Finish Gutanbac Shrine)
- 0:39:15 Location (Mining Cave)
- 0:41:20 Bubbul Gem
- 0:43:30 Special Shop (Great Sky Island Forge)
- 0:45:05 Main Quest - The Closed Door - Task Continued (Finish Gutanbac Shrine)
- 0:47:55 Device Dispenser
- 0:50:00 Chest (Energizing Elixir)
- 0:51:00 Main Quest - The Closed Door - Task Continued (Finish Gutanbac Shrine)
- 0:52:30 Korok Seed x2
- 0:55:00 Chest (Zonaite)
- 0:55:30 Main Quest - The Closed Door - Task Continued (Finish Gutanbac Shrine)
- 0:58:00 Chest (Portable Pot)
- 0:58:30 Main Quest - The Closed Door - Task Continued (Finish Gutanbac Shrine)
- 0:59:30 Location (Pit Cave)
- 1:01:20 Boss (Flux Construct 1)
- 1:04:45 Outro
- 0:00 Intro
- 0:10 Main Quest - The Closed Door - Task Started (Finish Gutanbac Shrine)
- 1:10 Cooking up some cold resistance meals
- 2:10 Main Quest - The Closed Door - Task Continued (Finish Gutanbac Shrine)
- 3:30 Bubbul Gem
- 7:30 Korok Seed
- 8:40 Korok Seed
- 9:10 Main Quest - The Closed Door - Task Continued (Finish Gutanbac Shrine)
- 14:40 Location (Bottomless Cave)
- 15:00 Bubbul Gem
- 15:50 Chest (Amber)
- 16:30 Main Quest - The Closed Door - Task Continued (Finish Gutanbac Shrine)
- 17:30 Chest (Opal)
- 19:30 Chests (Opal, Flame Emitter)
- 20:30 Main Quest - The Closed Door - Task Continued (Finish Gutanbac Shrine)
- 22:30 Chest (Amber)
- 23:00 Main Quest - The Closed Door - Task Continued (Finish Gutanbac Shrine)
- 24:45 Chest (Opal)
- 25:30 Main Quest - The Closed Door - Task Continued (Finish Gutanbac Shrine)
- 27:45 Shrine - Started (Gutanbac Shrine)
- 28:30 Unlocking Ability (Ascend)
- 29:45 Chest (Stone Axe)
- 30:45 Chest (Construct Bow)
- 31:30 Shrine - Continued (Gutanbac Shrine)
- 32:30 Shrine - Completed (Gutanbac Shrine)
- 33:00 Main Quest - The Closed Door - Task Completed (Finish Gutanbac Shrine)
- 34:00 Main Quest - The Closed Door - Task Started (Open the Closed Door)
- 36:10 Chest / Armor / Costume (Archaic Warm Greaves)
- 36:45 Korok Seed
- 37:15 Main Quest - The Closed Door - Task Continued (Open the Closed Door)
- 38:10 Device Dispenser
- 39:40 Chest (Wing x3)
- 40:10 Main Quest - The Closed Door - Task Continued (Open the Closed Door)
- 44:15 Chest (Wing x3)
- 44:45 Main Quest - The Closed Door - Task Completed ( Open the Closed Door)
- 48:20 Unlocking Ability (Recall)
- 49:30 Main Quest - Find Princess Zelda - Task Started (Explore Temple of Time)
- 50:10 Goddess Statue
- 50:30 Main Quest - Find Princess Zelda - Task Continued (Explore Temple of Time)
- 52:00 Main Quest - Find Princess Zelda - Task Completed (Explore Temple of Time)
- 53:05 Outro
- 0:00 Intro
- 0:20 Placing markers on the map
- 1:20 Korok Seed
- 2:30 Cooking up some recipes
- 5:30 Scavenging for resources & exploring alternate route to the top of Great Sky Island
- 6:50 Chest (Arrow x5)
- 7:30 Scavenging for resources & exploring alternate route to the top of Great Sky Island
- 10:00 Chest (Fan x3)
- 10:35 Scavenging for resources & exploring alternate route to the top of Great Sky Island
- 13:40 Korok Seed
- 14:05 Scavenging for resources & exploring alternate route to the top of Great Sky Island
- 23:40 Main Quest - Find Princess Zelda - Task Continued (Finish Nachoyah Shrine)
- 25:00 Special Sop (Great Sky Island Refinery)
- 25:50 Shrine - Started (Nachoyah Shrine)
- 27:35 Chest (Arrow x10)
- 28:00 Shrine - Continued (Nachoyah Shrine)
- 28:45 Shrine - Completed (Nachoyah Shrine)
- 29:15 Main Quest - Find Princess Zelda - Task Completed (Finish Nachoyah Shrine)
- 31:00 Scavenging for resources & exploring rest of Great Sky Island
- 31:50 Chest (Wing x3)
- 32:20 Korok Seed
- 33:00 Scavenging for resources & exploring rest of Great Sky Island
- 35:00 Korok Seed
- 35:30 Scavenging for resources & exploring rest of Great Sky Island
- 38:45 Chest (Large Zonai Charge)
- 39:20 Main Quest - Find Princess Zelda - Task Started (Open Second Door in Temple of Time)
- 42:45 Heart Container
- 43:30 Main Quest - Find Princess Zelda - Task Completed (Open Second Door in Temple of Time)
- 45:50 Main Quest - To the Kingdom of Hyrule - Found / Started
- 51:40 Outro
- 0:00 Intro
- 0:25 Placing markers on the map
- 2:45 Exploring North Hyrule Field (Lookout Landing area)
- 4:10 Korok Seed
- 4:40 Exploring North Hyrule Field (Lookout Landing area)
- 6:00 Chest (Soldiers Shield)
- 6:30 Exploring North Hyrule Field (Lookout Landing area)
- 6:45 Korok Seed
- 7:15 Exploring North Hyrule Field (Lookout Landing area)
- 7:45 Location (Bottomless Pond Well)
- 11:30 Chest (Boomerang)
- 12:15 Exploring North Hyrule Field (Lookout Landing area)
- 15:00 Chest (Travelers Bow)
- 15:30 Exploring North Hyrule Field (Lookout Landing area)
- 21:40 Korok Seed x2
- 25:50 Chest (Rocket x3)
- 26:20 Exploring North Hyrule Field (Lookout Landing area)
- 32:30 Chest (Arrow x5)
- 33:00 Exploring North Hyrule Field (Lookout Landing area)
- 34:50 Chest (Opal)
- 35:20 Exploring North Hyrule Field (Lookout Landing area)
- 35:50 Korok Seed
- 36:20 Exploring North Hyrule Field (Lookout Landing area)
- 38:00 Chest (Red Rupee)
- 38:30 Exploring North Hyrule Field (Lookout Landing area)
- 39:45 Location (Ranch Ruins Cave)
- 41:00 Bubbul Gem
- 41:50 Chest (Travelers Sword)
- 42:20 Location (Mabe Village Ruins)
- 42:50 Exploring North Hyrule Field (Lookout Landing area)
- 45:00 Korok Seed
- 45:30 Exploring North Hyrule Field (Lookout Landing area)
- 47:00 Korok Seed
- 47:55 Shrine - Started (Jiosin Shrine)
- 50:15 Chest (Hasty Elixir)
- 50:45 Shrine - Continued (Jiosin Shrine)
- 51:45 Shrine - Completed (Jiosin Shrine)
- 53:20 Outro
- 0:00:00 Intro
- 0:00:30 Location (Hyrule Field Chasm)
- 0:01:00 Exploring North Hyrule Field (Lookout Landing area)
- 0:05:00 Location (Mabe Village Ruins Well)
- 0:07:40 Miniboss (Boss Bokoblin)
- 0:09:40 Main Quest - To the Kingdom of Hyrule - Task Started (Go to Lookout Landing)
- 0:11:30 Town (Lookout Landing)
- 0:12:50 Special Shop (Lookout Landing General Store)
- 0:14:40 Main Quest - To the Kingdom of Hyrule - Task Continued (Go to Lookout Landing)
- 0:18:30 Main Quest - To the Kingdom of Hyrule - Task Completed (Go to Lookout Landing)
- 0:19:00 Main Quest - Crisis at Hyrule Castle - Task Started (Find Captain Hoz)
- 0:20:00 Exploring North Hyrule Field (Lookout Landing area)
- 0:40:00 Side Quest - Todays Menu - Task Started (Give Burmano an Apple)
- 0:41:00 Side Quest - Todays Menu - Task Completed (Give Burmano an Apple)
- 0:41:10 Exploring North Hyrule Field (Lookout Landing area)
- 0:44:30 Goddess Statue
- 0:49:30 Armor / Costume (Hylian Hood)
- 0:49:45 Armor / Costume (Hylian Trousers)
- 0:50:00 Armor / Costume (Hylian Tunic)
- 0:50:20 Location (Lookout Landing Well)
- 0:51:05 Chest (Royal Claymore)
- 0:51:35 Exploring North Hyrule Field (Lookout Landing area)
- 0:53:30 Placing markers on the map
- 0:55:30 Exploring North Hyrule Field (Lookout Landing area)
- 0:56:25 Korok Seed
- 0:57:20 Chest (Red Rupee)
- 0:58:10 Korok Seed
- 0:59:00 Exploring North Hyrule Field (Lookout Landing area)
- 0:59:45 Helping Addison with his sign
- 1:01:30 Location (Central Square)
- 1:04:30 Korok Seed
- 1:06:20 Shrine - Started (Kyononis Shrine)
- 1:09:15 Chest (Zonaite Sword)
- 1:09:35 Shrine - Completed (Kyononis Shrine)
- 1:11:00 Location (Hyrule Castle Town Ruins)
- 1:11:30 Exploring North Hyrule Field (Lookout Landing area)
- 1:13:00 Outro
- 0:00 Intro
- 0:30 Korok Seed
- 1:10 Main Quest - Crisis at Hyrule Castle - Task Continued (Find Captain Hoz)
- 3:00 Korok Seed
- 3:30 Main Quest - Crisis at Hyrule Castle - Task Continued (Find Captain Hoz)
- 7:05 Chest (Soldier's Bow)
- 7:35 Main Quest - Crisis at Hyrule Castle - Task Continued (Find Captain Hoz)
- 9:20 Location (West Passage)
- 9:50 Chest (Soldier's Bow)
- 11:20 Korok Seed
- 12:35 Main Quest - Crisis at Hyrule Castle - Task Continued (Find Captain Hoz)
- 14:10 Korok Seed
- 15:25 Korok Seed
- 15:45 Main Quest - Crisis at Hyrule Castle - Task Continued (Find Captain Hoz)
- 18:10 Location (First Gatehouse)
- 20:00 Korok Seed
- 20:35 Main Quest - Crisis at Hyrule Castle - Task Continued (Find Captain Hoz - Completed)
- 22:45 Exploring North Hyrule Field (Lookout Landing area)
- 23:50 Korok Seed
- 25:00 Korok Seed
- 25:30 Exploring North Hyrule Field (Lookout Landing area)
- 30:00 Chest (Blue Rupee)
- 30:30 Exploring North Hyrule Field (Lookout Landing area)
- 30:50 Korok Seed
- 31:15 Exploring North Hyrule Field (Lookout Landing area)
- 31:40 Chest (Red Rupee)
- 32:00 Exploring North Hyrule Field (Lookout Landing area)
- 34:30 Main Quest - Crisis at Hyrule Castle - Task Completed (Return to Purah in Lookout Landing)
- 37:15 Main Quest - Crisis at Hyrule Castle - Task Started (Activate Lookout Landing Skyview Tower)
- 40:00 Unlocking Special Weapon/Ability (Paraglider)
- 41:15 Main Quest - Crisis at Hyrule Castle - Task Completed (Activate Lookout Landing Skyview Tower)
- 49:00 Exploring North Hyrule Field (Lookout Landing area)
- 51:45 Korok Seed
- 52:30 Exploring North Hyrule Field (Lookout Landing area)
- 54:15 Location (Passeri Greenbelt Cave)
- 55:15 Chest (Spiky Spear)
- 55:45 Bubbul Gem
- 58:00 Outro
- 0:00:00 Intro
- 0:00:25 Placing markers on the map
- 0:02:20 Exploring North Hyrule Field (Lookout Landing area)
- 0:04:15 Korok Seed
- 0:04:45 Exploring North Hyrule Field (Lookout Landing area)
- 0:06:15 Miniboss (Boss Bokoblin)
- 0:08:15 Chest x3 (Arrow x5, Amber, Hinox Hammer)
- 0:09:00 Exploring North Hyrule Field (Lookout Landing area)
- 0:12:30 Chest (Rock Salt)
- 0:13:10 Korok Seed
- 0:13:55 Exploring North Hyrule Field (Lookout Landing area)
- 0:17:30 Korok Seed
- 0:18:05 Exploring North Hyrule Field (Lookout Landing area)
- 0:20:40 Chest (Large Zonai Charge)
- 0:21:40 Exploring North Hyrule Field (Lookout Landing area)
- 0:23:25 What just happened? (lol)
- 0:24:00 Exploring North Hyrule Field (Lookout Landing area)
- 0:25:45 Shrine - Started (Susuyai Shrine)
- 0:27:15 Chest (Arrow x5)
- 0:27:45 Shrine - Continued (Susuyai Shrine)
- 0:31:20 Shrine - Completed (Susuyai Shrine)
- 0:33:15 Exploring North Hyrule Field (Lookout Landing area)
- 0:35:30 Chest (Soldier's Spear)
- 0:36:00 Exploring North Hyrule Field (Lookout Landing area)
- 0:36:45 Korok Seed x2
- 0:44:45 Chest (Amber)
- 0:46:00 Building a wonky rain shelter
- 0:48:45 Cooking up some elixirs
- 0:49:45 Exploring North Hyrule Field (Lookout Landing area)
- 0:50:15 Location (Hyrule Garrisson Ruins)
- 0:50:35 Chest (Purple Rupee)
- 0:51:00 Exploring North Hyrule Field (Lookout Landing area)
- 0:52:45 Chest (Soldier's Broadsword)
- 0:53:30 Chest (Brightbloom Seed x5)
- 0:54:45 Korok Seed
- 0:55:15 Exploring North Hyrule Field (Lookout Landing area)
- 0:59:00 Side Adventure - Bring Peace to Hyrule Field - Task Started (Defeat all enemies)
- 1:01:15 Side Adventure - Bring Peace to Hyrule Field - Task Completed(Defeat all enemies)
- 1:02:30 Exploring North Hyrule Field (Lookout Landing area)
- 1:04:00 Location (Hyrule Field Chasm)
- 1:04:45 Korok Seed
- 1:05:15 Exploring the more parts of The Great Sky Island)
- 1:07:30 Korok Seed
- 1:11:05 Chest (Large Zonaite)
- 1:13:00 Chest (Opal)
- 1:15:05 Main Quest - Camera Work in the Depths - Task Started (Meet Robbie at the Chasm)
- 1:18:15 Light Root - Found (Nisoij Light Root)
- 1:19:30 Outro
- 0:00:00 Intro
- 0:00:25 Placing markers on the map
- 0:03:30 Main Quest - Camera Work in the Depths - Task Continued (Meet Robbie at the Chasm)
- 0:17:25 Light Root - Found (Iayusus Light Root)
- 0:19:15 Main Quest - Camera Work in the Depths - Task Completed (Meet Robbie at the Chasm)
- 0:21:00 Main Quest - Camera Work in the Depths - Task Started (Return to Josha & Robbie in Lookout Landing)
- 0:23:00 Main Quest - Camera Work in the Depths - Task Completed (Return to Josha & Robbie in Lookout Landing)
- 0:26:00 Prepping for some depths exploring & cooking up some glow recipes
- 0:30:20 Exploring the depths of Lookout Landing area (mainly looting bomb flowers, poes & gems / zonaite)
- 0:32:50 Chest (Giant Brightbloom Seed x5)
- 0:33:20 Exploring the depths of Lookout Landing area (mainly looting bomb flowers, poes & gems / zonaite)
- 0:37:30 Mounting a Stalhorse
- 0:38:00 Exploring the depths of Lookout Landing area (mainly looting bomb flowers, poes & gems / zonaite)
- 0:44:00 Chest (Arrow x10)
- 0:44:30 Exploring the depths of Lookout Landing area (mainly looting bomb flowers, poes & gems / zonaite)
- 1:02:30 Miniboss (Stone Talus)
- 1:04:10 Exploring the depths of Lookout Landing area (mainly looting bomb flowers, poes & gems / zonaite)
- 1:12:00 Reading Hyrule Compendium Entries
- 1:13:30 Outro
- 0:00 Intro
- 0:25 Dealing with the Bargainer
- 1:25 Armor / Costume (Dark Tunic)
- 4:00 Cooking some gloom resistant recipes
- 4:30 Exploring the depths of Lookout Landing area (mainly looting bomb flowers, poes & gems / zonaite)
- 27:30 Chest (Amber)
- 28:00 Exploring the depths of Lookout Landing area (mainly looting bomb flowers, poes & gems / zonaite)
- 29:30 Chest (Opal)
- 0:00:00 Intro
- 0:00:30 Placing markers on the map
- 0:03:00 Side Quest - Wanted: Talus, Hinox, Molduga - Found / Started
- 0:05:45 Stamina Vessel
- 0:06:30 Exploring North Hyrule Field (Lookout Landing area)
- 0:10:25 Korok Seed
- 0:11:30 Location (Hyrule Castle Moat West Chasm)
- 0:12:00 Quick Mapping of Hyrule Castle Moat West Chasm (return later)
- 0:18:35 Korok Seed
- 0:20:00 Miniboss (Battle Talus)
- 0:22:10 Chest (Ruby)
- 0:25:45 Korok Seed
- 0:27:55 Korok Seed x2
- 0:32:50 Exploring North Hyrule Field (Lookout Landing area)
- 0:35:00 Korok Seed
- 0:35:30 Location (Castle Town Prison)
- 0:36:05 Korok Seed
- 0:37:45 Korok Seed
- 0:39:55 Korok Seed
- 0:41:00 Location (Water Reservoir)
- 0:41:30 Chest (Blue Rupee)
- 0:42:00 Chest (Opal)
- 0:43:30 Chest (Ruby)
- 0:44:45 Chest (Green Rupee)
- 0:45:45 Korok Seed
- 0:48:35 Chest (Amber)
- 0:49:00 Chest (Red Rupee)
- 0:49:30 Chest (Saphire)
- 0:49:45 Location (Castle Town Watchtower)
- 0:49:55 Chest (Red Rupee)
- 0:50:45 Chest (Green Rupee)
- 0:51:05 Korok Seed
- 0:51:15 Location (Hyrule Cathedral)
- 0:51:25 Chest (Blue Rupee)
- 0:51:55 Location (Hyrule Castle Town Ruins Well)
- 0:53:20 Chest (Knight's Halberd)
- 0:57:00 Side Quest - Misko's Treasure - Found / Started
- 0:59:45 Exploring North Hyrule Field (Lookout Landing area)
- 1:01:50 Miniboss (Battle Talus)
- 1:03:30 Chest (Ruby)
- 1:05:15 Korok Seed
- 1:06:00 Location (Boneyard Bridge)
- 1:07:45 Korok Seed
- 1:08:05 Location (Hyrule Forest Park)
- 1:08:20 Main Quest - Impa and The Geoglyphs - Found / Started
- 1:10:45 Chest (Brightbloom Seed x5)
- 1:11:30 Shrine - Started (Sepapa Shrine)
- 1:13:00 Chest (Strong Construct Bow)
- 1:14:00 Shrine - Continued (Sepapa Shrine)
- 1:16:15 Shrine - Completed (Sepapa Shrine)
- 1:18:30 Reading Hyrule Compendium Entries
- 1:21:30 Outro
- 0:00:00 Intro
- 0:00:30 Placing markers on the map
- 0:03:15 Buying Crystallized Charges and Zonai Devices
- 0:07:30 Miniboss (Flux Construct 1)
- 0:09:05 Fusing Flux Construct weapon
- 0:12:00 Exploring North Hyrule Field (Lookout Landing area)
- 0:13:20 Location (Helmhead Bridge)
- 0:13:40 Korok Seed
- 0:14:00 Exploring North Hyrule Field (Lookout Landing area)
- 0:14:45 Korok Seed x2
- 0:19:05 Exploring North Hyrule Field (Lookout Landing area)
- 0:22:15 Summoning Satori
- 0:23:45 Shrine - Started (Yamio Shrine)
- 0:26:15 Chest (Bomb Flower x3)
- 0:26:45 Shrine - Completed (Yamio Shrine)
- 0:28:45 Korok Seed
- 0:29:30 Exploring North Hyrule Field (Lookout Landing area)
- 0:32:30 Chest (Bomb Flowerx3)
- 0:33:00 Miniboss (Blue Boss Bokoblin)
- 0:35:30 Chest (Hinox Hammer)
- 0:36:00 Exploring North Hyrule Field (Lookout Landing area)
- 0:37:00 Korok Seed x2
- 0:40:00 Chest (Travelers Shield)
- 0:42:15 Side Quest - Misko's Treasure - Task Started (Find Misko's Powerful Outfit)
- 0:45:15 Location (Crenel Hills Cave)
- 0:46:00 Miniboss (Stone Talus)
- 0:48:00 Side Quest - Misko's Treasure - Task Continued (Find Misko's Powerful Outfit)
- 0:49:30 Chest (Barbarian Armor)
- 0:50:30 Bubbul Gem
- 0:51:00 Exploring North Hyrule Field (Lookout Landing area)
- 0:55:00 Miniboss (Battle Talus)
- 0:56:00 Exploring North Hyrule Field (Lookout Landing area)
- 0:56:45 Location (Orsedd Bridge)
- 0:57:15 Exploring North Hyrule Field (Lookout Landing area)
- 0:58:30 Helping Addison
- 1:01:00 Korok Seed
- 1:01:30 Exploring North Hyrule Field (Lookout Landing area)
- 1:06:15 Chest (Time Bomb)
- 1:06:50 Reading Hyrule Compendium Entries
- 1:08:00 Outro
- 0:00:00 Intro
- 0:00:25 Placing markers on the map
- 0:03:00 Exploring North Hyrule Field (Lookout Landing area)
- 0:05:40 Chest (Large Zonai Charge)
- 0:06:10 Exploring North Hyrule Field (Lookout Landing area)
- 0:09:25 Chest (Arrow x5)
- 0:10:00 Exploring North Hyrule Field (Lookout Landing area)
- 0:17:00 Chest (Large Zonai Charge)
- 0:18:15 Chest (Wing x3)
- 0:18:45 Korok Seed
- 0:19:15 Exploring North Hyrule Field (Lookout Landing area)
- 0:20:15 Chest (Throwing Spear)
- 0:21:00 Exploring North Hyrule Field (Lookout Landing area)
- 0:30:05 Location (Rebonae Bridge Well)
- 0:30:30 Side Quest - Fell Into A Well - Task Started (Repair the ladder)
- 0:31:30 Side Quest - Fell Into A Well - Task Completed (Repair the ladder)
- 0:32:30 Location (Rebonae Bridge)
- 0:33:30 Korok Seed
- 0:34:10 Exploring North Hyrule Field (Lookout Landing area)
- 0:35:25 Location (Rebonae Bridge Cave)
- 0:37:40 Chest (Bomb Flower x3)
- 0:38:20 Chest (Soldier's Spear)
- 0:38:40 Bubbul Gem
- 0:39:30 Exploring North Hyrule Field (Lookout Landing area)
- 0:41:00 Chest (Saphire)
- 0:42:20 Chest (Large Zonai Charge)
- 0:43:20 Stable (Wetland Stable)
- 0:43:45 Registering the first horse
- 0:46:00 Exploring Wetland Stable Area
- 0:53:00 Side Quest - An Uninvited Guest - Task Started (Defeat the monsters)
- 0:54:30 Side Quest - An Uninvited Guest - Task Completed (Defeat the monsters)
- 0:56:05 Location (Wetland Stable South Well)
- 0:57:00 Side Quest - Where Are The Wells - Task Started (Find all 58 wells)
- 0:59:10 Side Quest - An Uninvited Guest - Task Completed (Talk to Ami)
- 0:59:30 Equipment (Towing Harness)
- 1:00:15 Exploring Wetland Stable Area
- 1:01:30 Shrine - Started (Tukarok Shrine)
- 1:06:00 Chest (Strong Zonaite Sword)
- 1:07:00 Shrine - Completed (Tukarok Shrine)
- 1:09:00 Exploring North Hyrule Field (Lookout Landing area)
- 1:13:00 Korok Seed
- 1:13:30 Exploring North Hyrule Field (Lookout Landing area)
- 1:17:15 Location (Hyrule Castle Moat East Chasm)
- 1:18:00 Light Root - Found (Apapes Light Root)
- 1:19:00 Quick mapping of Hyrule Castle Moat East Chasm (returning later)
- 1:20:30 Exploring North Hyrule Field (Lookout Landing area)
- 1:22:00 Reading Hyrule Compendium Entries
- 1:23:45 Outro
- 0:00:00 Intro
- 0:00:25 Placing markers on the map
- 0:00:50 Building a rocket/fan powered glider
- 0:02:40 Location (Moat Bridge)
- 0:03:05 Exploring North Hyrule Field (Outer Hyrule Castle Area)
- 0:06:20 Chest (Soldier's Spear)
- 0:07:00 Chest (Traveler's Bow)
- 0:08:20 Chest (Soldier's Spear)
- 0:09:15 Chest (Soldier's Broadsword)
- 0:10:40 Chest (Soldier's Shield)
- 0:11:35 Location (Dining Hall)
- 0:11:55 Exploring North Hyrule Field (Outer Hyrule Castle Area)
- 0:16:00 Korok Seed
- 0:17:15 Chest (Traveler's Bow)
- 0:18:00 Exploring North Hyrule Field (Outer Hyrule Castle Area)
- 0:19:20 Korok Seed
- 0:20:25 Chest (Knight's Broadsword)
- 0:21:00 Exploring North Hyrule Field (Outer Hyrule Castle Area)
- 0:24:25 Chest (Soldier's Broadsword)
- 0:25:45 Korok Seed
- 0:26:45 Chest (Soldier's Bow)
- 0:27:55 Chest (Knight's Claymore)
- 0:29:25 Korok Seed
- 0:30:00 Location (Docks)
- 0:30:50 Chest (Royal Broadsword)
- 0:31:35 Chest (Arrow x10)
- 0:33:20 Chest (Hylian Shield)
- 0:34:15 Exploring North Hyrule Field (Outer Hyrule Castle Area)
- 0:36:20 Location (Lockup)
- 0:38:20 Chest (Soldier's Spear)
- 0:38:45 Korok Seed
- 0:40:00 Chest (Soldier's Broadsword)
- 0:41:00 Chest (Soldier's Spear)
- 0:41:20 Exploring North Hyrule Field (Outer Hyrule Castle Area)
- 0:44:30 Korok Seed
- 0:45:00 Location (Hyrule Castle Chasm)
- 0:45:40 Light Root - Found (Camobatures Light Root)
- 0:46:40 Quick mapping of Hyrule Castle Chasm (returning later)
- 0:48:40 Prepping for the depths
- 0:51:15 Cooking up some hasty elixirs & gloom resistant recipes
- 0:54:30 Placing markers on the map
- 0:55:05 Exploring the depths of Lookout landing Area (mainly for armor/costumes)
- 0:56:05 Location (Daphnes Canyon Mine)
- 0:56:30 Exploring the depths of Lookout landing Area (mainly for armor/costumes)
- 0:58:40 Chest (Miner's Top)
- 0:59:10 Exploring the depths of Lookout landing Area (mainly looting bomb flowers, poes & gems / zonaite)
- 1:07:10 Reading Hyrule Compendium Entries
- 1:08:50 Outro
- 0:00:00 Intro
- 0:00:25 Trying to get an overview of the depths Lookout Landing Area
- 0:01:25 Placing markers on the map
- 0:06:15 Exploring the depths of Lookout Landing area (looting bombs, poes, gems, zonaite & crystallized charges)
- 0:15:30 Location (Giant's Grove)
- 0:16:55 Chest (Large Crystallized Charge)
- 0:17:15 Exploring the depths of Lookout Landing area (looting bombs, poes, gems, zonaite & crystallized charges)
- 0:22:20 Miniboss (Stalnox)
- 0:24:55 Exploring the depths of Lookout Landing area (looting bombs, poes, gems, zonaite & crystallized charges)
- 0:35:50 Chest (Sundelion)
- 0:36:20 Exploring the depths of Lookout Landing area (looting bombs, poes, gems, zonaite & crystallized charges)
- 0:42:30 Miniboss (Stalnox)
- 0:44:30 Exploring the depths of Lookout Landing area (looting bombs, poes, gems, zonaite & crystallized charges)
- 0:47:30 Location (Gustaf Canyon Mine)
- 0:53:00 Chest (Large Crystallized Charge)
- 0:53:20 Exploring the depths of Lookout Landing area (looting bombs, poes, gems, zonaite & crystallized charges)
- 1:01:20 Light Root - Found (Gadohsi Light Root)
- 1:03:00 Reading Hyrule Compendium Entries
- 1:03:15 Outro
- 0:00:00 Intro
- 0:00:25 Buying Crystallized Charges
- 0:04:40 Energy Well
- 0:05:55 Prepping for next depths visit
- 0:09:20 Cooking up some recipes
- 0:15:20 Placing markers on the map
- 0:18:15 Exploring the depths of Lookout Landing area (looting bombs, poes, gems, zonaite & crystallized charges)
- 0:22:15 Chest (Sundelion)
- 0:22:45 Exploring the depths of Lookout Landing area (looting bombs, poes, gems, zonaite & crystallized charges)
- 0:26:00 Miniboss (Frox)
- 0:27:30 Exploring the depths of Lookout Landing area (looting bombs, poes, gems, zonaite & crystallized charges)
- 0:41:00 Making a skateboard shield
- 0:42:00 Exploring the depths of Lookout Landing area (looting bombs, poes, gems, zonaite & crystallized charges)
- 0:45:15 Light Root - Found (Sinonoyk Light Root)
- 0:46:20 Exploring the depths of Lookout Landing area (looting bombs, poes, gems, zonaite & crystallized charges)
- 0:47:55 Placing markers on the map
- 0:51:15 Exploring the depths of Lookout Landing area (looting bombs, poes, gems, zonaite & crystallized charges)
- 0:54:20 Miniboss (Blue Boss Bokoblin)
- 0:56:00 Exploring the depths of Lookout Landing area (looting bombs, poes, gems, zonaite & crystallized charges)
- 1:13:30 Light Root - Found (Oyimay Light Root)
- 1:14:45 Reading Hyrule Compendium Entries
- 1:15:45 Outro
- 0:00:00 Intro
- 0:00:25 Placing markers on the map
- 0:04:35 Exploring the depths of Lookout Landing area (looting bombs, poes, gems, zonaite & crystallized charges)
- 0:09:55 Location (Applean Grove)
- 0:10:25 Exploring the depths of Lookout Landing area (looting bombs, poes, gems, zonaite & crystallized charges)
- 0:12:05 Chest (Large Crystallized Charge)
- 0:12:30 Exploring the depths of Lookout Landing area (looting bombs, poes, gems, zonaite & crystallized charges)
- 0:19:30 Chest (Giant Brightbloom Seed x5)
- 0:20:00 Exploring the depths of Lookout Landing area (looting bombs, poes, gems, zonaite & crystallized charges)
- 0:22:05 Miniboss (Stone Talus)
- 0:23:00 Exploring the depths of Lookout Landing area (looting bombs, poes, gems, zonaite & crystallized charges)
- 0:26:00 Miniboss (Blue Boss Bokoblin)
- 0:27:25 Exploring the depths of Lookout Landing area (looting bombs, poes, gems, zonaite & crystallized charges)
- 0:39:40 Miniboss (Hinox)
- 0:40:35 Exploring the depths of Lookout Landing area (looting bombs, poes, gems, zonaite & crystallized charges)
- 0:51:30 Chest (Giant Brightbloom Seed x5)
- 0:52:00 Exploring the depths of Lookout Landing area (looting bombs, poes, gems, zonaite & crystallized charges)
- 1:17:30 Reading Hyrule Compendium Entries
- 1:18:05 Outro
- 0:00:00 Intro
- 0:00:35 Exploring the depths of Lookout Landing area (looting bombs, poes, gems, zonaite & crystallized charges)
- 0:15:00 Miniboss (Flux Construct 1)
- 0:16:25 Exploring the depths of Lookout Landing area (looting bombs, poes, gems, zonaite & crystallized charges)
- 0:18:05 Plains Bargainer Statue
- 0:19:15 Armor / Outfit (Tunic of The Depths)
- 0:19:30 Special Weapon (Magic Rod)
- 0:20:00 Exploring the depths of Lookout Landing area (looting bombs, poes, gems, zonaite & crystallized charges)
- 0:22:30 Light Root - Found (Stakijat Light Root)
- 0:24:20 Making an Ice Rod (Saphire Rod)
- 0:24:50 Exploring the depths of Lookout Landing area (looting bombs, poes, gems, zonaite & crystallized charges)
- 0:30:55 Light Root - Found (Netinet Light Root)
- 0:32:20 Exploring the depths of Lookout Landing area (looting bombs, poes, gems, zonaite & crystallized charges)
- 0:34:10 Chest (Amber)
- 0:35:00 Chest (Soldier's Sheild)
- 0:35:20 Chest (Arrow x10)
- 0:36:00 Exploring the depths of Lookout Landing area (looting bombs, poes, gems, zonaite & crystallized charges)
- 0:38:00 Miniboss (Frox)
- 0:40:00 Exploring the depths of Lookout Landing area (looting bombs, poes, gems, zonaite & crystallized charges)
- 0:49:30 Buying Crystallized Charges
- 0:51:00 Returning to the surface
- 0:51:50 Energy Well
- 0:52:40 Placing markers on the map
- 0:55:10 Miniboss (Hinox)
- 0:57:15 Cooking in during the blood moon for more potent recipes
- 1:04:30 Korok Seed
- 1:05:30 Exploring Hyrule Ridge and Tabantha Frontier (Lindor’s Brow area)
- 1:05:55 Korok Seed
- 1:07:35 Failing to get the fallen star (to close to morning)
- 1:12:30 Exploring Hyrule Ridge and Tabantha Frontier (Lindor’s Brow area)
- 1:13:30 Korok Seed
- 1:14:00 Side Quest - Misko's Treasure - Task Started (Find Misko's Climbing Outfit)
- 1:14:45 Location (North Hyrule Plain Cave)
- 1:15:50 Chests (Traveler's Shield x2)
- 1:18:20 Chest (Climbing Gear)
- 1:18:55 Exploring Hyrule Ridge and Tabantha Frontier (Lindor’s Brow area)
- 1:20:20 Bubbul Gem
- 1:21:00 Exploring Hyrule Ridge and Tabantha Frontier (Lindor’s Brow area)
- 1:22:00 Stable (New Serenne Stable)
- 1:23:10 Chest (Red Rupee)
- 1:24:15 Reading Hyrule Compendium Entries
- 1:25:15 Outro
- 0:00 Intro
- 0:30 Side Quest - Horse-Drawn Dreams - Task Started (Repair the wagon)
- 2:00 Side Quest - Horse-Drawn Dreams - Task Completed (Repair the wagon)
- 2:50 Side Quest - Horse-Drawn Dreams - Task Started (Catch a horse)
- 4:30 Side Quest - Horse-Drawn Dreams - Task Completed (Catch a horse)
- 4:55 Side Quest - Horse-Drawn Dreams - Task Completed (Return to Zumi)
- 7:00 Taking out my horse and attaching the harness
- 9:55 Equipment (Horse-God Fabric)
- 12:05 Location (New Serenne Stable Well)
- 13:15 Chest (Purple Rupee)
- 15:15 Shrine - Started (Sinakawak Shrine)
- 21:35 Chest (Opal)
- 22:15 Shrine - Completed (Sinakawak Shrine)
- 24:00 Placing markers on the map
- 25:15 Stamina Vessel
- 27:20 Trying out the harness
- 29:40 Exploring Hyrule Ridge and Tabantha Frontier (Lindor’s Brow area)
- 30:30 Side Quest - Hestus Concern - Task Started (Defeat the trees and give Hestu a Korok Seed)
- 32:00 Side Quest - Hestus Concern - Task Completed (Defeat the trees and give Hestu a Korok Seed)
- 35:00 Exploring Hyrule Ridge and Tabantha Frontier (Lindor’s Brow area)
- 36:55 Skyview Tower (Lindor's Brow Skyview Tower)
- 41:20 Location (Courage Island)
- 42:00 Exploring Courage Island
- 46:35 The Dive Ceremony
- 48:30 Outfit (Glide Shirt)
- 49:20 The Dive Ceremony(High score)
- 51:50 Shrine - Started (Taunhiy Shrine)
- 55:20 Chest (Strong Construct Bow)
- 55:40 Shrine - Completed (Taunhiy Shrine)
- 57:30 Reading Hyrule Compendium Entries
- 58:25 Outro
- 0:00:00 Intro
- 0:00:25 Placing markers on the map
- 0:03:30 Talking to Hestu to expand inventory
- 0:10:20 Fetching some left overs in North Hyrule Field/Lookout Landing area
- 0:12:00 Korok Seed
- 0:12:30 Fetching some left overs in North Hyrule Field/Lookout Landing area
- 0:13:25 Korok Seed
- 0:14:15 Fetching some left overs in North Hyrule Field/Lookout Landing area
- 0:14:50 Helping Addison
- 0:16:20 Fetching some left overs in North Hyrule Field/Lookout Landing area
- 0:17:30 Chest (Topaz)
- 0:18:25 Chest (Ruby)
- 0:18:45 Fetching some left overs in North Hyrule Field/Lookout Landing area
- 0:20:30 Location (Mount Gustaf Well)
- 0:20:50 Chest (Soldier's Shield)
- 0:21:15 Chest (Traveler's Shield)
- 0:21:30 Fetching some left overs in North Hyrule Field/Lookout Landing area
- 0:25:20 Chest (Soldier's Broadsword)
- 0:26:00 Fetching some left overs in North Hyrule Field/Lookout Landing area
- 0:29:20 Miniboss (Blue White Frox)
- 0:33:00 Fetching some left overs in North Hyrule Field/Lookout Landing area
- 0:48:00 Miniboss (Blue White Frox)
- 0:51:15 Returning to Hyrule Ridge and Tabantha Frontier (Lindor’s Brow area)
- 0:52:20 Korok Seed
- 0:52:45 Exploring Hyrule Ridge and Tabantha Frontier (Lindor’s Brow area)
- 0:54:30 Korok Seed
- 0:55:10 Location (Lindor's Brow Cave)
- 0:56:20 Miniboss (Gloom Spawn & Phantom Ganon)
- 1:02:20 Bubbul Gem
- 1:03:05 Shrine - Started (Taki-Ihaban Shrine)
- 1:03:45 Chest (Large Zonai Charge)
- 1:04:05 Shrine - Completed (Taki-Ihaban Shrine)
- 1:06:15 Reading Hyrule Compendium Entries
- 1:08:45 Outro
- 0:00:00 Intro
- 0:00:25 Placing markers on the map
- 0:03:15 Exploring Hyrule Ridge and Tabantha Frontier (Lindor’s Brow area)
- 0:04:15 Miniboss (Battle Talus)
- 0:07:20 Chest (Lizal Reaper)
- 0:07:45 Exploring Hyrule Ridge and Tabantha Frontier (Lindor’s Brow area)
- 0:10:40 Main Quest - Impa and The Geoglyphs - Task Completed (Talk to Impa)
- 0:13:00 Main Quest - Impa and The Geoglyphs - Task Completed (Repair the baloon and Fly Up)
- 0:15:00 Main Quest - Impa and The Geoglyphs - Task Completed (Recover Memory from Geoglyph)
- 0:18:40 Main Quest - The Dragon’s Tears - Task Started (Talk to Cado at The Forgotten Temple)
- 0:19:15 Korok Seed
- 0:20:05 Exploring Hyrule Ridge and Tabantha Frontier (Lindor’s Brow area)
- 0:21:00 Helping Addison
- 0:24:15 Chest (Zonaite x3)
- 0:24:30 Exploring Hyrule Ridge and Tabantha Frontier (Lindor’s Brow area)
- 0:33:20 Chest (Throwing Spear)
- 0:34:15 Korok Seed
- 0:39:30 Exploring Hyrule Ridge and Tabantha Frontier (Lindor’s Brow area)
- 0:43:35 Korok Seed
- 0:44:15 Exploring Hyrule Ridge and Tabantha Frontier (Lindor’s Brow area)
- 0:49:10 Location (Royal Ancient Lab Ruins)
- 0:50:45 Miniboss (Boss Bokoblin)
- 0:51:20 Exploring Hyrule Ridge and Tabantha Frontier (Lindor’s Brow area)
- 0:53:40 Korok Seed
- 0:54:00 Exploring Hyrule Ridge and Tabantha Frontier (Lindor’s Brow area)
- 1:00:30 Korok Seed
- 1:00:55 Exploring Hyrule Ridge and Tabantha Frontier (Lindor’s Brow area)
- 1:05:10 Chest (Opal)
- 1:05:30 Exploring Hyrule Ridge and Tabantha Frontier (Lindor’s Brow area)
- 1:07:10 Chest (Soldier's Shield)
- 1:07:45 Location (Irch Plain Well)
- 1:11:35 Chest (Soldier's-Broadsword Spear)
- 1:12:55 Chest (Bomb-Barrel Spear)
- 1:13:35 Exploring Hyrule Ridge and Tabantha Frontier (Lindor’s Brow area)
- 1:16:55 Chest (Opal)
- 1:17:55 Chest (Soldier's Spear)
- 1:18:15 Exploring Hyrule Ridge and Tabantha Frontier (Lindor’s Brow area)
- 1:19:55 Miniboss (Hinox)
- 1:22:30 Shrine - Started (Kiuyoyou Shrine)
- 1:26:05 Chest (Zonaite Spear)
- 1:27:50 Shrine - Completed (Kiuyoyou Shrine)
- 1:29:45 Reading Hyrule Compendium Entries
- 1:30:55 Outro
- 0:00:00 Intro
- 0:00:20 Placing markers on the map
- 0:02:25 Picking up some left overs on the Great Sky Island
- 0:03:40 Chest (Large Zonai Charge)
- 0:04:40 Chest (Zonaite x3)
- 0:05:40 Byuing Crystallized Charges
- 0:09:00 Buying more Zonai Devices
- 0:11:15 Energy Well
- 0:12:30 Shopping and Selling stuff
- 0:14:00 Exploring Hyrule Ridge and Tabantha Frontier (Lindor’s Brow area)
- 0:14:55 Helping Addison
- 0:16:30 Exploring Hyrule Ridge and Tabantha Frontier (Lindor’s Brow area)
- 0:20:15 Cooking up some recipes during the blood moon
- 0:22:15 First Yiga clan fight
- 0:23:00 Exploring Hyrule Ridge and Tabantha Frontier (Lindor’s Brow area)
- 0:24:15 Location (Yiga Clan Marita Branch)
- 0:27:50 Bubbul Gem
- 0:30:00 Armor / Costume (Yiga Tights)
- 0:32:30 Korok Seed
- 0:33:15 Exploring Hyrule Ridge and Tabantha Frontier (Lindor’s Brow area)
- 0:38:20 Location (Rowan Plain Well)
- 0:39:00 Light Root - Found (Uoyoyuik Light Root)
- 0:40:10 Quick scan of the depths below Rowan Plain Well (will return here later)
- 0:40:50 Exploring Hyrule Ridge and Tabantha Frontier (Lindor’s Brow area)
- 0:43:30 Chest (Amber)
- 0:44:00 Exploring Hyrule Ridge and Tabantha Frontier (Lindor’s Brow area)
- 0:45:00 Korok Seed
- 0:46:00 Main Quest - The Dragon’s Tears - Task Started (Talk to Cado at The Forgotten Temple)
- 0:48:20 Main Quest - The Dragon’s Tears - Task Completed (Talk to Cado at The Forgotten Temple)
- 0:49:00 Main Quest - The Dragon’s Tears - Task Started (Find Lady Impa at the Forgotten Temple)
- 0:54:10 Chest (Soldier's Broadsword)
- 0:55:20 Chest (Arrow x10)
- 0:58:30 Chest (Soldier's Bow)
- 1:00:00 Korok Seed
- 1:00:20 Chest (Knight's Halberd)
- 1:02:10 Korok Seed
- 1:03:00 Main Quest - The Dragon’s Tears - Task Completed (Find Lady Impa at the Forgotten Temple)
- 1:03:55 Shrine - Started (Mayausiy Shrine)
- 1:06:55 Chest (Large Zonai Charge)
- 1:08:00 Shrine - Comleted (Mayausiy Shrine)
- 1:10:30 Stamina Vessel
- 1:11:45 Main Quest - The Dragon’s Tears - Task Started (Find "something related to the geoglyphs")
- 1:12:30 Chest (Soldier's Claymore)
- 1:13:40 Chest (Arrow x5)
- 0:00 Intro
- 0:20 Placing markers on the map
- 2:05 Chest (Soldier´s Shield)
- 2:45 Exploring Hyrule Ridge and Tabantha Frontier (Lindor’s Brow area)
- 5:05 Korok Seed
- 5:50 Exploring Hyrule Ridge and Tabantha Frontier (Lindor’s Brow area)
- 7:20 Failed sneak attack on Black Bokoblin
- 8:50 Exploring Hyrule Ridge and Tabantha Frontier (Lindor’s Brow area)
- 14:30 Chest (Amber)
- 15:00 Location (Tanagar Canyon East Cave)
- 16:30 Miniboss (Stalnox)
- 19:00 Exploring Hyrule Ridge and Tabantha Frontier (Lindor’s Brow area)
- 21:40 Chest (Ruby)
- 23:45 Bubbul Gem
- 24:30 Exploring Hyrule Ridge and Tabantha Frontier (Lindor’s Brow area)
- 29:35 Minigame (Take the plushies back)
- 33:05 Exploring Hyrule Ridge and Tabantha Frontier (Lindor’s Brow area)
- 35:30 Miniboss (Boss Bokoblin)
- 0:00:00 Intro
- 0:00:25 Placing markers on the map
- 0:03:00 Exploring Hyrule Ridge and Tabantha Frontier (Lindor’s Brow area)
- 0:05:50 Location (Hyrule Ridge Chasm)
- 0:06:20 Light Root - Found (Tikanur Light Root)
- 0:08:35 Korok Seed
- 0:09:45 Exploring Hyrule Ridge and Tabantha Frontier (Lindor’s Brow area)
- 0:11:45 Miniboss (Hinox)
- 0:14:35 Exploring Hyrule Ridge and Tabantha Frontier (Lindor’s Brow area)
- 0:15:50 Korok Seed
- 0:16:45 Exploring Hyrule Ridge and Tabantha Frontier (Lindor’s Brow area)
- 0:19:30 Building a steerable vehicle
- 0:21:25 Exploring Hyrule Ridge and Tabantha Frontier (Lindor’s Brow area)
- 0:23:30 Location (Tanagar Cavern West Cave)
- 0:24:00 Exploring Tanagar Cavern West Cave
- 0:26:30 Chest (Feathered Spear)
- 0:27:00 Exploring Tanagar Cavern West Cave
- 0:27:40 Bubbul Gem
- 0:28:30 Fairies
- 0:29:30 Exploring Tanagar Cavern West Cave
- 0:31:20 Chest (Hunter's Shield)
- 0:31:45 Exploring Tanagar Cavern West Cave
- 0:33:40 Shrine - Started (Iun-Orok Shrine)
- 0:37:25 Chest (Arrow x10)
- 0:39:05 Shrine - Completed (Iun-Orok Shrine)
- 0:40:35 Exploring Tanagar Cavern West Cave
- 0:43:00 Chest (Kite Shield)
- 0:45:00 Exploring Hyrule Ridge and Tabantha Frontier (Lindor’s Brow area)
- 0:46:25 Minigame (Ultra Ball Haul)
- 0:59:40 Korok Seed
- 1:01:35 Chest (Bomb Flower x5)
- 1:02:00 Exploring Hyrule Ridge and Tabantha Frontier (Lindor’s Brow area)
- 1:03:10 Miniboss (Talus)
- 1:07:00 Korok Seed
- 1:07:50 Reading Hyrule Compendium Entries
- 1:09:40 Outro
- 0:00:00 Intro
- 0:00:20 Placing markers on the map
- 0:01:50 Exploring Hyrule Ridge and Tabantha Frontier (Lindor’s Brow area)
- 0:07:00 Miniboss (Red-Maned Lynel)
- 0:09:50 Chest (Arrow x5)
- 0:10:20 Korok Seed
- 0:11:20 Korok Seed
- 0:17:30 Korok Seed
- 0:18:00 Dragon Tear / Memory
- 0:24:00 Getting a better view of the geoglyph
- 0:28:20 Exploring Hyrule Ridge and Tabantha Frontier (Lindor’s Brow area)
- 0:29:35 Chest (Zonaite x3)
- 0:30:05 Korok Seed
- 0:30:35 Exploring Hyrule Ridge and Tabantha Frontier (Lindor’s Brow area)
- 0:33:00 Chest (Spiky Shield)
- 0:33:30 Exploring Hyrule Ridge and Tabantha Frontier (Lindor’s Brow area)
- 0:35:00 Cooking up some recipes during the blood moon
- 0:38:00 Exploring Hyrule Ridge and Tabantha Frontier (Lindor’s Brow area)
- 0:47:50 Chest (Mirror x3)
- 0:48:20 Exploring Hyrule Ridge and Tabantha Frontier (Lindor’s Brow area)
- 0:50:15 Chest (Soldier's Shield)
- 0:51:50 Korok Seed
- 0:52:20 Exploring Hyrule Ridge and Tabantha Frontier (Lindor’s Brow area)
- 0:54:35 Miniboss (Battle Talus)
- 0:55:50 Exploring Hyrule Ridge and Tabantha Frontier (Lindor’s Brow area)
- 1:00:05 Chest (Bomb Flower x5)
- 1:00:40 Miniboss (Red Boss Bokoblin)
- 1:01:35 Chest (Opal)
- 1:02:00 Exploring Hyrule Ridge and Tabantha Frontier (Lindor’s Brow area)
- 1:02:45 Chest (Saphire)
- 1:03:15 Exploring Hyrule Ridge and Tabantha Frontier (Lindor’s Brow area)
- 1:04:35 Chest (Ancient Blade)
- 1:05:00 Exploring Hyrule Ridge and Tabantha Frontier (Lindor’s Brow area)
- 1:06:30 Reading Hyrule Compendium Entries
- 1:08:40 Outro
- 0:00:00 Intro
- 0:00:25 Placing markers on the map
- 0:03:15 Upgrading the inventory at Hestu
- 0:05:00 Talking to Fera about Well Locations
- 0:06:20 Buying arrows and Crystallized Charges
- 0:09:20 Exploring Hyrule Ridge and Tabantha Frontier (Lindor’s Brow area)
- 0:14:30 Korok Seed
- 0:15:00 Exploring Hyrule Ridge and Tabantha Frontier (Lindor’s Brow area)
- 0:16:30 Chest (Arrow x5)
- 0:17:00 Exploring Hyrule Ridge and Tabantha Frontier (Lindor’s Brow area)
- 0:19:00 Korok Seed
- 0:20:20 Location (Jeddo Bridge)
- 0:20:45 Korok Seed
- 0:21:30 Korok Seed
- 0:22:00 Exploring Hyrule Ridge and Tabantha Frontier (Lindor’s Brow area)
- 0:23:10 Miniboss (Red-Maned Lynel)
- 0:25:00 Exploring Hyrule Ridge and Tabantha Frontier (Lindor’s Brow area)
- 0:27:30 Korok Seed
- 0:28:00 Exploring Hyrule Ridge and Tabantha Frontier (Lindor’s Brow area)
- 0:31:45 Korok Seed
- 0:32:15 Exploring Hyrule Ridge and Tabantha Frontier (Lindor’s Brow area)
- 0:44:35 Chest (Rocket)
- 0:46:15 Chest (Opal)
- 0:47:15 Chest (Fan)
- 0:49:00 Helping Addisson
- 0:51:25 Chest (Arrow x5)
- 0:52:00 Exploring Hyrule Ridge and Tabantha Frontier (Lindor’s Brow area)
- 0:54:20 Chest (Large Zonai Charge)
- 0:55:30 Chest (Large Zonai Charge)
- 0:56:30 Chest (Flame Emitter x3)
- 0:57:30 Exploring Hyrule Ridge and Tabantha Frontier (Lindor’s Brow area)
- 1:00:30 Korok Seed
- 1:01:30 Location (Thundra Plateau)
- 1:01:45 Korok Seed
- 1:02:15 Exploring Hyrule Ridge and Tabantha Frontier (Lindor’s Brow area)
- 1:05:00 Chest (Sticky Elixir)
- 1:07:00 Getting a better view of the Thundra Plateau and it's puzzle
- 1:08:30 Solving the Thundra Plateau puzzle (connect the shadow from the south structure to the north structure before noon)
- 1:13:45 Location (Thundra Plateau Cave)
- 1:14:20 Chest (Mask of Awakening)
- 1:15:15 Bubbul Gem
- 1:16:30 Reading Hyrule Compendium Entries
- 1:17:35 Outro
- 0:00:00 Intro
- 0:00:20 Placing markers on the map
- 0:01:45 Exploring Hyrule Ridge and Tabantha Frontier (Lindor’s Brow area)
- 0:02:45 Miniboss (Hinox)
- 0:04:00 Exploring Hyrule Ridge and Tabantha Frontier (Lindor’s Brow area)
- 0:05:10 Korok Seed
- 0:05:35 Exploring Hyrule Ridge and Tabantha Frontier (Lindor’s Brow area)
- 0:08:15 Korok Seed
- 0:10:00 Exploring Hyrule Ridge and Tabantha Frontier (Lindor’s Brow area)
- 0:17:35 Korok Seed
- 0:18:00 Exploring Hyrule Ridge and Tabantha Frontier (Lindor’s Brow area)
- 0:20:45 Korok Seed
- 0:21:15 Exploring Hyrule Ridge and Tabantha Frontier (Lindor’s Brow area)
- 0:22:15 Miniboss (Boss Bokoblin)
- 0:23:45 Exploring Hyrule Ridge and Tabantha Frontier (Lindor’s Brow area)
- 0:25:55 Helping Addison
- 0:28:00 Exploring Hyrule Ridge and Tabantha Frontier (Lindor’s Brow area)
- 0:31:45 Korok Seed & Stable (Tabantha Bridge Stable)
- 0:35:20 Exploring Hyrule Ridge and Tabantha Frontier (Lindor’s Brow area)
- 0:42:45 Chest (Purple Rupee) & Location (Tabantha Bridge Stable Well)
- 0:46:45 Chest (Purple Rupee)
- 0:47:15 Exploring Hyrule Ridge and Tabantha Frontier (Lindor’s Brow area)
- 0:49:30 Korok Seed
- 0:50:20 Shrine - Started (Makurukis Shrine)
- 0:53:25 Chest (Strong Construct Bow)
- 0:53:45 Shrine - Completed (Makurukis Shrine)
- 0:55:20 Korok Seed
- 0:56:35 Korok Seed
- 0:57:00 Exploring Hyrule Ridge and Tabantha Frontier (Lindor’s Brow area)
- 1:01:30 Korok Seed
- 1:01:55 Exploring Hyrule Ridge and Tabantha Frontier (Lindor’s Brow area)
- 1:03:30 Helping Addison
- 1:05:30 Exploring Hyrule Ridge and Tabantha Frontier (Lindor’s Brow area)
- 1:06:45 Light Root - Found (Sikurukam Light Root)
- 1:09:15 Reading Hyrule Compendium Entries
- 1:10:45 Outro
- 0:00:00 Intro
- 0:00:25 Placing Light Root Markers on the map
- 0:02:00 Heading straight for Nabahi-Ikat Light Root
- 0:05:00 Light Root Found (Nabahi-Ikat Light Root)
- 0:06:50 Heading straight for Kawakanis Light Root
- 0:12:15 Light Root Found (Kawakanis Light Root)
- 0:13:20 Placing markers on the map
- 0:17:30 Exploring the depths of Lindor's Brow area (looting bombs, poes, gems, zonaite & crystallized charges)
- 0:24:30 Miniboss - SUPER HARD, I recommend returning later (White-Maned Armored Lynel)
- 0:30:40 Exploring the depths of Lindor's Brow area (looting bombs, poes, gems, zonaite & crystallized charges)
- 0:32:20 Shortcut to the surface (Lighthouse)
- 0:33:20 Exploring the depths of Lindor's Brow area (looting bombs, poes, gems, zonaite & crystallized charges)
- 0:34:15 Miniboss (Obsidian Frox)
- 0:36:55 Exploring the depths of Lindor's Brow area (looting bombs, poes, gems, zonaite & crystallized charges)
- 0:49:15 Chest (Sundelion)
- 0:49:45 Exploring the depths of Lindor's Brow area (looting bombs, poes, gems, zonaite & crystallized charges)
- 0:57:30 Miniboss (Flux Construct 2)
- 1:00:10 Reading Hyrule Compendium Entries
- 1:01:40 Outro
- 0:00:00 Intro
- 0:00:20 Placing Markers on the map
- 0:02:40 Exploring the depths of Lindor's Brow area (looting bombs, poes, gems, zonaite & crystallized charges)
- 0:26:50 Location (Lindor Canyon Mine)
- 0:28:15 Chest (Tunic of Time)
- 0:28:50 Exploring the depths of Lindor's Brow area (looting bombs, poes, gems, zonaite & crystallized charges)
- 0:35:40 Buying Crystallized Charges
- 0:37:30 More shopping
- 0:38:50 Upgrading inventory at Hestus
- 0:39:20 Energy Well
- 0:40:30 Exploring the depths of Lindor's Brow area (looting bombs, poes, gems, zonaite & crystallized charges)
- 1:05:40 Exploring the depths of Lindor's Brow area (looting bombs, poes, gems, zonaite & crystallized charges)
- 1:15:15 Yiga Clan Camp in The Depths
- 1:18:30 Chest (Large Crystallized Charge & Yiga Schematic (Cargo Carrier))
- 1:20:10 Reading Hyrule Compendium Entries
- 1:21:50 Outro
- 0:00:00 Intro
- 0:00:25 Placing Markers on the map
- 0:03:15 Exploring the depths of Lindor's Brow area (looting bombs, poes, gems, zonaite & crystallized charges)
- 0:20:25 Miniboss (Obsidian Frox)
- 0:22:45 Exploring the depths of Lindor's Brow area (looting bombs, poes, gems, zonaite & crystallized charges)
- 0:35:45 Chest (Arrow x10)
- 0:36:05 Exploring the depths of Lindor's Brow area (looting bombs, poes, gems, zonaite & crystallized charges)
- 0:58:40 Chest (Giant Brightbloom Seed x5)
- 0:59:00 Exploring the depths of Lindor's Brow area (looting bombs, poes, gems, zonaite & crystallized charges)
- 1:09:10 Prepping for a big climb towards Yisuyayam Light Root
- 1:12:40 Big climb towards Yisuyayam Light Root
- 1:16:30 Light Root - Found (Yisuyayam Light Root)
- 1:17:50 Exploring the depths of Lindor's Brow area (looting bombs, poes, gems, zonaite & crystallized charges)
- 1:21:10 Cliff Bargainer Statue
- 1:22:40 Armor / Outfit (Dark Trousers)
- 1:24:45 Reading Hyrule Compendium Entries
- 1:25:00 Outro
- 0:00:00 Intro
- 0:00:25 Placing Markers on the map
- 0:03:30 Exploring the depths of Lindor's Brow area (looting bombs, poes, gems, zonaite & crystallized charges)
- 0:26:20 Miniboss (Stone Talus)
- 0:27:30 Exploring the depths of Lindor's Brow area (looting bombs, poes, gems, zonaite & crystallized charges)
- 0:44:50 Chest (Knight's Bow)
- 0:47:05 Chest (Rock Salt)
- 0:47:20 Chest (Arrow x10)
- 0:48:00 Exploring the depths of Lindor's Brow area (looting bombs, poes, gems, zonaite & crystallized charges)
- 0:50:05 Miniboss (Blue Hinox)
- 0:51:15 Exploring the depths of Lindor's Brow area (looting bombs, poes, gems, zonaite & crystallized charges)
- 0:55:00 Miniboss (Flux Construct 3)
- 0:57:25 Exploring the depths of Lindor's Brow area (looting bombs, poes, gems, zonaite & crystallized charges)
- 1:06:45 Reading Hyrule Compendium Entries
- 1:08:20 Outro
- 0:00:00 Intro
- 0:00:20 Placing Markers on the map (they are a bit off in this one, sorry about that)
- 0:03:25 Exploring the depths of Lindor's Brow area (looting bombs, poes, gems, zonaite & crystallized charges)
- 0:47:40 Chest (Giant Brigtbloom Seed x5)
- 0:48:10 Exploring the depths of Lindor's Brow area (looting bombs, poes, gems, zonaite & crystallized charges)
- 1:03:20 Yiga Camp
- 1:07:30 Chest (Large Crystallized Charge, Yiga Schematic (Bomb Bouquet))
- 1:10:25 Energy Well
- 1:11:40 Buying Crystallized Charges
- 1:15:50 Cooking Up Some Recipes
- 1:17:50 Quick way back to the Yiga Camp
- 1:21:15 Reading Hyrule Compendium Entries
- 1:21:30 Outro
- 0:00:00 Intro
- 0:00:25 Placing Markers on the map
- 0:05:30 Cooking up some recipes
- 0:06:00 Exploring the depths of Lindor's Brow area (looting bombs, poes, gems, zonaite & crystallized charges)
- 0:17:30 Miniboss (Obsidian Frox)
- 0:19:15 Exploring the depths of Lindor's Brow area (looting bombs, poes, gems, zonaite & crystallized charges)
- 0:30:30 Chest (Sundelion)
- 0:31:00 Exploring the depths of Lindor's Brow area (looting bombs, poes, gems, zonaite & crystallized charges)
- 0:48:50 Chest (Large Crystallized Charge & Yiga Schematic (Flame Thrower Balloon))
- 0:49:30 Exploring the depths of Lindor's Brow area (looting bombs, poes, gems, zonaite & crystallized charges)
- 0:56:15 Location (Rhoam Canyon Mine)
- 0:58:20 Chest (Large Crystallized)
- 0:59:00 Exploring the depths of Lindor's Brow area (looting bombs, poes, gems, zonaite & crystallized charges)
- 1:12:20 Buying Crystallized Charges
- 1:13:40 Energy Well & Energy Cell
- 1:15:00 Cooking Up some Recipes
- 1:16:50 Shopping
- 1:18:50 Reading Hyrule Compendium Entries
- 1:19:50 Outro
- 0:00:00 Intro
- 0:00:30 Exploring the depths of Lindor’s Brow area (looting bombs, poes, gems, zonaite & crystallized charges)
- 0:16:10 Chest (Arrow x10)
- 0:16:30 Exploring the depths of Lindor’s Brow area (looting bombs, poes, gems, zonaite & crystallized charges)
- 0:46:30 Returning to The Surface
- 0:49:00 Placing Markers on the map
- 0:51:10 Korok Seed
- 0:52:00 Helping Addison
- 0:55:30 Minigame (Rito Training)
- 0:59:30 Exploring Hyrule Ridge and Tabantha Frontier (Lindor’s Brow area)
- 1:00:40 Miniboss (Stone Talus)
- 1:03:50 Korok Seed
- 1:05:20 Korok Seed
- 1:06:10 Reading Hyrule Compendium Entries
- 1:06:55 Outro
- 0:00:00 Intro
- 0:00:25 Placing Markers on the map
- 0:03:50 Exploring Hyrule Ridge and Tabantha Frontier (Lindor’s Brow area)
- 0:04:20 Korok Seed
- 0:04:50 Exploring Hyrule Ridge and Tabantha Frontier (Lindor’s Brow area)
- 0:06:30 Korok Seed
- 0:07:00 Exploring Hyrule Ridge and Tabantha Frontier (Lindor’s Brow area)
- 0:07:30 Korok Seed
- 0:08:00 Exploring Hyrule Ridge and Tabantha Frontier (Lindor’s Brow area)
- 0:12:15 Side Quest - The Hornists Dramatic Escape - Task Started (Free Eustus from The Hole)
- 0:16:55 Side Quest - The Hornists Dramatic Escape - Task Completed (Free Eustus from the Hole)
- 0:19:15 Exploring Hyrule Ridge and Tabantha Frontier (Lindor’s Brow area)
- 0:20:00 Korok Seed
- 0:20:30 Exploring Hyrule Ridge and Tabantha Frontier (Lindor’s Brow area)
- 0:24:40 Miniboss (Stone Talus)
- 0:25:35 Exploring Hyrule Ridge and Tabantha Frontier (Lindor’s Brow area)
- 0:28:30 Korok Seed
- 0:29:00 Exploring Hyrule Ridge and Tabantha Frontier (Lindor’s Brow area)
- 0:31:10 Chest (Large Zonai Charge)
- 0:33:00 Korok Seed x2
- 0:35:10 Exploring Hyrule Ridge and Tabantha Frontier (Lindor’s Brow area)
- 0:38:30 Location (Gisa Crater)
- 0:39:05 Shrine Quest - The Gisa Crater Crystal - Task Started (Find And Transport The Crystal To The Shrine)
- 0:40:30 Chest (Hunter's Shield)
- 0:40:45 Chest (Falcon Bow)
- 0:41:50 Chest (Feathered Spear)
- 0:42:20 Shrine Quest - The Gisa Crater Crystal - Task Completed (Find And Transport The Crystal To The Shrine)
- 0:44:10 Shrine - Started (Ikatak Shrine)
- 0:44:30 Chest (Big Battery)
- 0:44:55 Shrine - Completed (Ikatak Shrine)
- 0:47:50 Stamina Vessel
- 0:49:30 Location (Gisa Crater Cave)
- 0:50:10 Bubbul Gem
- 0:50:30 Exploring Hyrule Ridge and Tabantha Frontier (Lindor’s Brow area)
- 0:52:40 Korok Seed
- 0:53:00 Exploring Hyrule Ridge and Tabantha Frontier (Lindor’s Brow area)
- 0:55:55 Korok Seed
- 0:56:20 Exploring Hyrule Ridge and Tabantha Frontier (Lindor’s Brow area)
- 1:00:55 Korok Seed
- 1:01:30 Exploring Hyrule Ridge and Tabantha Frontier (Lindor’s Brow area)
- 1:03:10 Chest (Opal)
- 1:03:30 Exploring Hyrule Ridge and Tabantha Frontier (Lindor’s Brow area)
- 1:06:15 Miniboss (Flame Gleeok)
- 1:09:15 Reading Hyrule Compendium Entries
- 1:10:15 Outro
- 0:00:00 Intro
- 0:00:20 Exploring Hyrule Ridge and Tabantha Frontier (Lindor’s Brow area)
- 0:00:45 Korok Seed
- 0:02:00 Exploring Hyrule Ridge and Tabantha Frontier (Lindor’s Brow area)
- 0:04:45 Location (Ancient Columns Cave)
- 0:05:00 Chest (Tunic of Awakening)
- 0:06:00 Bubbul Gem
- 0:06:45 Exploring Hyrule Ridge and Tabantha Frontier (Lindor’s Brow area)
- 0:09:55 Korok Seed
- 0:10:45 Exploring Hyrule Ridge and Tabantha Frontier (Lindor’s Brow area)
- 0:16:50 Chest (Arrow x5)
- 0:17:05 Exploring Hyrule Ridge and Tabantha Frontier (Lindor’s Brow area)
- 0:20:05 Korok Seed
- 0:20:30 Exploring Hyrule Ridge and Tabantha Frontier (Lindor’s Brow area)
- 0:22:15 Korok Seed
- 0:24:00 Miniboss (BattleTalus)
- 0:25:00 Chest (Ruby)
- 0:25:30 Exploring Hyrule Ridge and Tabantha Frontier (Lindor’s Brow area)
- 0:26:45 Helping Addison
- 0:28:05 Exploring Hyrule Ridge and Tabantha Frontier (Lindor’s Brow area)
- 0:32:00 Shrine - Started (Oromuwak Shrine)
- 0:34:45 Chest (Ruby)
- 0:35:55 Shrine - Completed (Oromuwak Shrine)
- 0:37:25 Exploring Hyrule Ridge and Tabantha Frontier (Lindor’s Brow area)
- 0:38:00 Chest (Mighty Zonaite Shield)
- 0:39:30 Korok Seed
- 0:41:05 Exploring Hyrule Ridge and Tabantha Frontier (Lindor’s Brow area)
- 0:42:40 Miniboss (Boss Bokoblin)
- 0:44:00 Chest (Spiked Iron-Ball Hammer)
- 0:44:30 Exploring Hyrule Ridge and Tabantha Frontier (Lindor’s Brow area)
- 0:46:30 Side Quest - Cave Mushrooms That Glow - Task Started / Completed (Give Nat Some Brightcaps)
- 0:49:10 Location (Brightcap Cave)
- 0:51:45 Chest (Feathered Spear)
- 0:52:40 Chest (Frostbite Shirt)
- 0:53:25 Bubbul Gem
- 0:53:45 Exploring Hyrule Ridge and Tabantha Frontier (Lindor’s Brow area)
- 0:55:50 Location (Lucky Clover Gazette)
- 0:57:45 Side Adventure - Potential Princess Sightings - Started
- 1:01:15 Reading Hyrule Compendium Entries
- 1:02:15 Outro
- 0:00 Intro
- 0:25 Placing Markers on the map
- 4:00 Backtracking to pick up the side quest "Misko's Treasure of Awakening 2"
- 4:30 Chest (Falcon Bow)
- 4:55 Backtracking to pick up the side quest "Misko's Treasure of Awakening 2"
- 6:30 Side Quest - Misko's Treasure of Awakening 2 - Found / Started
- 7:45 Exploring Hyrule Ridge and Tabantha Frontier (Lindor’s Brow area)
- 8:45 Chest (Falcon Bow)
- 9:00 Exploring Hyrule Ridge and Tabantha Frontier (Lindor’s Brow area)
- 10:50 Korok Seed
- 11:15 Exploring Hyrule Ridge and Tabantha Frontier (Lindor’s Brow area)
- 0:00:00 Intro
- 0:01:00 Looting Fairys and Sundelions
- 0:02:00 Buying Zonai Devices & Crystallized Charges
- 0:07:00 Exploring The Sky Area of Hyrule Ridge and Tabantha Frontier (Lindor’s Brow area)
- 0:11:40 Shrine Quest - The Tabantha Sky Crystal - Task Started (Find And Transport The Crystal To The Shrine)
- 0:13:20 Miniboss (Flux Construct 3)
- 0:16:00 Shrine Quest - The Tabantha Sky Crystal - Task Completed (Find And Transport The Crystal To The Shrine)
- 0:19:05 Shrine - Started (Ganos Shrine)
- 0:19:30 Chest (Diamond)
- 0:19:55 Shrine - Completed (Ganos Shrine)
- 0:21:30 Exploring The Sky Area of Hyrule Ridge and Tabantha Frontier (Lindor’s Brow area)
- 0:25:10 Chest (Old Map)
- 0:26:00 Exploring The Sky Area of Hyrule Ridge and Tabantha Frontier (Lindor’s Brow area)
- 0:28:40 Chest (Old Map)
- 0:29:00 Exploring The Sky Area of Hyrule Ridge and Tabantha Frontier (Lindor’s Brow area)
- 0:29:55 Korok Seed
- 0:30:20 Exploring The Sky Area of Hyrule Ridge and Tabantha Frontier (Lindor’s Brow area)
- 0:34:50 Korok Seed
- 0:35:10 Exploring The Sky Area of Hyrule Ridge and Tabantha Frontier (Lindor’s Brow area)
- 0:37:20 Location (Light Cast Island)
- 0:37:50 Exploring The Sky Area of Hyrule Ridge and Tabantha Frontier (Lindor’s Brow area)
- 0:40:00 Korok Seed
- 0:40:30 Exploring The Sky Area of Hyrule Ridge and Tabantha Frontier (Lindor’s Brow area)
- 0:41:40 Chest (Mirror x3)
- 0:42:10 Exploring The Sky Area of Hyrule Ridge and Tabantha Frontier (Lindor’s Brow area)
- 0:44:50 Chest (Zonaite Helm)
- 0:45:30 Shrine - Started (Ga-Ahisas Shrine)
- 0:46:55 Chest (Star Fragment)
- 0:47:30 Shrine - Completed (Ga-Ahisas Shrine)
- 0:49:00 Exploring The Sky Area of Hyrule Ridge and Tabantha Frontier (Lindor’s Brow area)
- 0:49:20 Device Dispenser
- 0:50:50 Korok Seed
- 0:51:20 Exploring The Sky Area of Hyrule Ridge and Tabantha Frontier (Lindor’s Brow area)
- 0:54:20 Chest (Old Map)
- 0:55:00 Exploring The Sky Area of Hyrule Ridge and Tabantha Frontier (Lindor’s Brow area)
- 0:58:20 Chest (Sage's Will)
- 0:59:20 Picking up a fallen star
- 1:02:40 Reading Hyrule Compendium Entries
- 1:03:30 Outro
- 0:00:00 Intro
- 0:00:25 Placing Markers on the map
- 0:01:20 Heading Towards Raspro Pass Skyview Tower
- 0:03:05 Korok Seed
- 0:03:30 Heading Towards Raspro Pass Skyview Tower
- 0:06:05 Chest (Silver Lizal Reaper)
- 0:06:45 Heading Towards Raspro Pass Skyview Tower
- 0:10:00 Helping Addison
- 0:12:45 Location (Hebra Trailhead Lodge)
- 0:13:55 Korok Seed
- 0:14:15 Heading Towards Raspro Pass Skyview Tower
- 0:18:25 Skyview Tower (Raspro Pass Skyview Tower)
- 0:22:45 Location (Rito Village)
- 0:23:00 Placing Markers on the map
- 0:27:20 Exploring Rito Village
- 0:29:10 Chest (Arrow x5)
- 0:29:50 Chest (Purple Rupee)
- 0:31:45 Korok Seed
- 0:32:10 Chest (Opal)
- 0:33:15 Korok Seed
- 0:33:35 Shrine - Started (Gatakis Shrine)
- 0:35:40 Chest (Mighty Construct Bow)
- 0:36:55 Shrine - Completed (Gatakis Shrine)
- 0:39:20 Stamina Vessel & Goddess Statue
- 0:43:15 Side Quest - Genli's Home Cooking - Task Started / Completed (Give Genli Some Staminoka Bass)
- 0:45:15 Special Shop (Rito Village General Store)
- 0:48:00 Special Shop (Rito Village Armor Shop)
- 0:48:30 Buying the Snowquill Trousers, Snowquill Tunic & Snowquill Headdress
- 0:51:25 Side Quest - Molli The Fletcher's Quest - Task Started / Completed (Give Molli Some Ice Fruit or White Chuchu Jelly)
- 0:53:55 Main Quest - Regional Phenomena - Task Started / Completed (Go to Hebra (Northwest))
- 0:57:40 Main Quest - Tulin of Rito Village - Found / Started
- 0:58:45 Korok Seed
- 0:59:55 Reading Hyrule Compendium Entries
- 1:01:30 Outro
- 0:00:00 Intro
- 0:00:25 Korok Seed
- 0:01:50 Korok Seed
- 0:03:20 Location (Rito Village Chasm)
- 0:03:50 Location (Abandoned Hebra Mine)
- 0:04:05 Light Root - Found (Sikatag Light Root)
- 0:05:00 Placing Markers on the map
- 0:05:20 Exploring Abandoned Hebra Mine
- 0:12:50 Special Shop (Abandoned Hebra Mine Forge)
- 0:13:00 Buying Crystallized Charges
- 0:14:20 Exploring Abandoned Hebra Mine
- 0:15:05 Chest (Large Crystallized Charge)
- 0:17:05 Energy Well
- 0:18:00 Buying Crystallized Charges
- 0:20:40 Location (West Hebra Sky Archipelago)
- 0:21:30 Exploring West Hebra Sky Archipelago
- 0:22:05 Chest (Large Zonai Charge)
- 0:22:30 Exploring West Hebra Sky Archipelago
- 0:24:40 Miniboss (Flux Construct 1)
- 0:25:20 Chest (Old Map)
- 0:25:45 Exploring West Hebra Sky Archipelago
- 0:27:25 Device Dispenser
- 0:29:00 Shrine - Started (Ijo-O Shrine)
- 0:31:35 Chest (Arrow x5)
- 0:32:45 Shrine - Completed (Ijo-O Shrine)
- 0:34:20 Exploring West Hebra Sky Archipelago
- 0:35:25 Chest (Balloon)
- 0:35:40 Chest (Flame Emitter)
- 0:36:00 Exploring West Hebra Sky Archipelago
- 0:37:30 Korok Seed
- 0:38:00 Exploring West Hebra Sky Archipelago
- 0:39:45 Chest (Old Map)
- 0:40:10 Exploring West Hebra Sky Archipelago
- 0:42:05 Heading Towards South Hebra Sky Archipelago
- 0:44:00 Location (South Hebra Sky Archipelago)
- 0:46:00 Chest (Sage's Will)
- 0:46:45 Korok Seed
- 0:47:45 Exploring Hebra Mountains (Raspro Pass Area)
- 0:56:00 Chest (Giant Brightbloom Seed x5)
- 0:57:15 Main Quest - Tulin of Rito Village - Task Completed (Find Harth at the Lodge)
- 0:58:30 Main Quest - Tulin of Rito Village - Task Started (Find Tulin in the Mountain Cave)
- 1:00:25 Side Quest - The Blocked Cave - Task Started / Completed (Clear the Boulders from the Cave Opening)
- 1:01:30 Location (Rospro Pass Cave)
- 1:02:10 Reading Hyrule Compendium Entries
- 1:02:20 Outro
- 0:00:00 Intro
- 0:00:25 Placing Markers on the map
- 0:01:05 Exploring Hebra Mountains (Raspro Pass Area)
- 0:02:10 Bubbul Gem
- 0:02:45 Exploring Hebra Mountains (Raspro Pass Area)
- 0:05:45 Korok Seed
- 0:06:30 Exploring Hebra Mountains (Raspro Pass Area)
- 0:10:30 Side Quest - Crossing The Cold Pool - Task Started / Completed (Give Verla 10 Chillshrooms)
- 0:11:35 Location (Talonto Peak Cave)
- 0:13:10 Bubbul Gem
- 0:13:30 Exploring Hebra Mountains (Raspro Pass Area)
- 0:14:40 Korok Seed
- 0:15:00 Exploring Hebra Mountains (Raspro Pass Area)
- 0:15:15 Shrine - Started (Sahirow Shrine)
- 0:17:45 Chest (Spicy Elixir)
- 0:18:55 Shrine - Completed (Sahirow Shrine)
- 0:20:50 Exploring Hebra Mountains (Raspro Pass Area)
- 0:21:10 Korok Seed
- 0:24:50 Chest (Dragonbone Boko Bow)
- 0:25:10 Exploring Hebra Mountains (Raspro Pass Area)
- 0:27:10 Location (Hebra South Summit Cave)
- 0:27:25 Main Quest - Tulin of Rito Village - Task Continued (Find Tulin in the Mountain Cave)
- 0:32:50 Bubbul Gem
- 0:34:20 Main Quest - Tulin of Rito Village - Task Completed (Find Tulin in the Mountain Cave)
- 0:35:15 Main Quest - Tulin of Rito Village - Task Started (Find Tulin on Tolonto Peak)
- 0:36:05 Helping Addison
- 0:37:25 Main Quest - Tulin of Rito Village - Task Continued (Find Tulin on Tolonto Peak)
- 0:38:20 Chest (Swallow Bow)
- 0:39:00 Main Quest - Tulin of Rito Village - Task Continued (Find Tulin on Tolonto Peak)
- 0:42:00 Korok Seed
- 0:42:30 Main Quest - Tulin of Rito Village - Task Completed (Find Tulin on Tolonto Peak)
- 0:43:25 Main Quest - Tulin of Rito Village - Task Started (Get Back Tulin’s Bow)
- 0:44:00 Main Quest - Tulin of Rito Village - Task Completed (Get Back Tulin’s Bow)
- 0:47:35 Main Quest - Tulin of Rito Village - Task Started (Reach Hebra Peak)
- 0:48:20 Chest (Mighty Zonaite Sword)
- 0:49:20 Main Quest - Tulin of Rito Village - Task Continued (Reach Hebra Peak)
- 0:49:40 Chest (Arrow x5)
- 0:50:00 Main Quest - Tulin of Rito Village - Task Continued (Reach Hebra Peak)
- 0:53:45 Korok Seed x2
- 0:56:50 Main Quest - Tulin of Rito Village - Task Continued (Reach Hebra Peak)
- 0:59:00 Main Quest - Tulin of Rito Village - Task Completed (Reach Hebra Peak)
- 1:00:00 Reading Hyrule Compendium Entries
- 1:00:45 Outro
- 0:00:00 Intro
- 0:00:25 Main Quest - Tulin of Rito Village - Task Started (Reach Rising Island Chain)
- 0:02:15 Location (Rising Island Chain)
- 0:02:45 Main Quest - Tulin of Rito Village - Task Completed (Reach Rising Island Chain)
- 0:03:00 Placing Markers on the map
- 0:04:00 Main Quest - Tulin of Rito Village - Task Started (Investigate the Storm Cloud)
- 0:07:15 Chest (Arrow x5)
- 0:08:00 Shrine - Started (Mayaumekis Shrine)
- 0:10:00 Chest (Arrow x10)
- 0:11:10 Shrine - Started (Mayaumekis Shrine)
- 0:12:45 Main Quest - Tulin of Rito Village - Task Continued (Investigate the Storm Cloud)
- 0:15:00 Korok Seed
- 0:15:45 Main Quest - Tulin of Rito Village - Task Continued (Investigate the Storm Cloud)
- 0:19:30 Chest (Portable Pot x4)
- 0:20:00 Main Quest - Tulin of Rito Village - Task Continued (Investigate the Storm Cloud)
- 0:22:10 Chest (Soldier IV Spear)
- 0:22:50 Main Quest - Tulin of Rito Village - Task Continued (Investigate the Storm Cloud)
- 0:24:20 Miniboss (Flux Construct 1)
- 0:25:05 Chest (Old Map)
- 0:25:30 Main Quest - Tulin of Rito Village - Task Continued (Investigate the Storm Cloud)
- 0:28:00 Chest (Arrow x10)
- 0:28:30 Main Quest - Tulin of Rito Village - Task Continued (Investigate the Storm Cloud)
- 0:38:20 Chest (Large Zonai Charge)
- 0:39:00 Main Quest - Tulin of Rito Village - Task Continued (Investigate the Storm Cloud)
- 0:43:20 Chest (Time Bomb x5)
- 0:43:45 Main Quest - Tulin of Rito Village - Task Continued (Investigate the Storm Cloud)
- 0:44:45 Korok Seed
- 0:45:35 Shrine - Started (Kahatanaum Shrine)
- 0:46:20 Chest (Large Zonai Charge)
- 0:46:30 Shrine - Completed (Kahatanaum Shrine)
- 0:49:00 Buying Crystallized Charges and Arrows (I know I really don't need to :P)
- 0:51:40 Heart Container
- 0:52:45 Energy Well x2 & Energy Cell
- 0:54:00 Main Quest - Tulin of Rito Village - Task Continued (Investigate the Storm Cloud)
- 0:57:45 That View
- 0:58:45 Location (Wind Temple)
- 0:59:20 Main Quest - Tulin of Rito Village - Task Completed (Investigate the Storm Cloud)
- 1:00:20 Main Quest - Tulin of Rito Village - Task Started (Open the 5 Locks on Wind Temple)
- 1:02:50 Reading Hyrule Compendium Entries
- 1:04:00 Outro
- 0:00 Intro
- 0:30 Placing Markers on the map
- 1:20 Main Quest - Tulin of Rito Village - Task Started/Continued (Open the 5 Locks on Wind Temple)
- 2:40 Chest (Opal)
- 2:55 Main Quest - Tulin of Rito Village - Task Continued (Open the 5 Locks on Wind Temple)
- 3:45 Lock 1
- 4:35 Main Quest - Tulin of Rito Village - Task Continued (Open the 5 Locks on Wind Temple)
- 6:00 Chest (Large Zonaite)
- 6:20 Main Quest - Tulin of Rito Village - Task Continued (Open the 5 Locks on Wind Temple)
- 7:55 Chest (Ruby)
- 8:15 Main Quest - Tulin of Rito Village - Task Continued (Open the 5 Locks on Wind Temple)
- 12:10 Lock 2
- 13:15 Main Quest - Tulin of Rito Village - Task Continued (Open the 5 Locks on Wind Temple)
- 14:50 Chest (Captain IV Reaper)
- 15:15 Main Quest - Tulin of Rito Village - Task Continued (Open the 5 Locks on Wind Temple)
- 15:55 Lock 3
- 17:30 Chest (Soldier IV Spear)
- 18:05 Main Quest - Tulin of Rito Village - Task Continued (Open the 5 Locks on Wind Temple)
- 23:00 Chest (Mighty Zonaite Shield)
- 24:00 Main Quest - Tulin of Rito Village - Task Continued (Open the 5 Locks on Wind Temple)
- 25:45 Chest (Mighty Construct Bow)
- 26:25 Main Quest - Tulin of Rito Village - Task Continued (Open the 5 Locks on Wind Temple)
- 27:25 Chest (Saphire)
- 28:20 Main Quest - Tulin of Rito Village - Task Continued (Open the 5 Locks on Wind Temple)
- 29:35 Lock 4
- 30:20 Main Quest - Tulin of Rito Village - Task Continued (Open the 5 Locks on Wind Temple)
- 33:10 Chest (Arrow x10)
- 33:30 Main Quest - Tulin of Rito Village - Task Continued (Open the 5 Locks on Wind Temple)
- 35:00 Lock 5
- 35:50 Main Quest - Tulin of Rito Village - Task Completed (Open the 5 Locks on Wind Temple)
- 36:10 Chest (Soldier IV Blade)
- 36:55 Double Checking a chest location
- 38:05 Main Quest - Tulin of Rito Village - Task Started (Colgera Boss Fight)
- 43:20 Main Quest - Tulin of Rito Village - Task Completed (Colgera Boss Fight)
- 44:30 Heart Container
- 44:50 Cutscene
- 52:20 Main Quest - Tulin of Rito Village - Task Started (Return to Rito Village)
- 55:45 Special Ability (Vow Of Tulin, Sage of Wind)
- 58:25 Reading Hyrule Compendium Entries
- 59:15 Outro
- 0:00:00 Intro
- 0:00:30 Placing Markers on the map
- 0:02:40 Exploring Rito Village after the weather has cleared
- 0:04:25 Side Quest - Fish For Fletching - Task Started / Completed (Give Bedoli some Chill Fin Trout in exchange for arrows)
- 0:07:35 Shrine Quest - The White Bird's Guidance - Found / Started
- 0:09:40 Exploring Rito Village after the weather has cleared
- 0:15:45 Side Quest - Treasure Of The Secret Springs - Found / Started
- 0:16:50 Side Quest - Legacy of The Rito - Task Started / Completed (Give Teba The Materials to Craft a Great Eagle Bow)
- 0:20:45 Shrine Quest - The White Bird's Guidance - Task Started (Find Wao-Os Shrine)
- 0:21:35 Korok Seed & Location (West Lake Totori Cave)
- 0:23:40 Shrine Quest - The White Bird's Guidance - Task Completed (Find Wao-Os Shrine)
- 0:24:00 Shrine - Started (Wao-Os Shrine)
- 0:26:35 Chest (Spicy Elixir)
- 0:27:35 Shrine - Completed (Wao-Os Shrine)
- 0:29:00 Bubbul Gem
- 0:29:30 Exploring Hebra Mountains (Raspro Pass Area)
- 0:31:10 Korok Seed
- 0:31:30 Exploring Hebra Mountains (Raspro Pass Area)
- 0:32:10 Korok Seed
- 0:32:45 Exploring Hebra Mountains (Raspro Pass Area)
- 0:34:00 Korok Seed
- 0:34:45 Korok Seed
- 0:35:30 Making an Offering to Satori
- 0:36:15 Exploring Hebra Mountains (Raspro Pass Area)
- 0:37:00 Korok Seed
- 0:37:20 Exploring Hebra Mountains (Raspro Pass Area)
- 0:39:20 Chest (Rocket x3)
- 0:39:40 Korok Seed
- 0:40:50 Korok Seed
- 0:41:30 Exploring Hebra Mountains (Raspro Pass Area)
- 0:44:00 Miniboss (Battle Talus)
- 0:45:40 Chest (Saphire)
- 0:46:20 Korok Seed
- 0:47:00 Exploring Hebra Mountains (Raspro Pass Area)
- 0:51:20 Korok Seed
- 0:52:00 Exploring Hebra Mountains (Raspro Pass Area)
- 0:54:40 Korok Seed
- 0:55:30 Exploring Hebra Mountains (Raspro Pass Area)
- 0:57:35 It's still not possible to mount a Moose damnit
- 0:58:00 Exploring Hebra Mountains (Raspro Pass Area)
- 1:00:20 Chest (Spiked-Iron-Ball Hammer)
- 1:00:55 Exploring Hebra Mountains (Raspro Pass Area)
- 1:02:50 Location (Dronoc's Pass Well)
- 1:04:30 Exploring Hebra Mountains (Raspro Pass Area)
- 1:05:10 Location (Flight Range)
- 1:05:30 Reading Hyrule Compendium Entries
- 1:06:40 Outro
- 0:00:00 Intro
- 0:00:40 Side Quest - Kaneli's Flight Training - Task Started / Completed (Try Out Kaneli's New Training Course & Pass Through At
- 0:03:50 Minigame (Advanced Flying Course)
- 0:06:35 Korok Seed
- 0:07:05 Exploring The Flight Range
- 0:09:40 Buying Crystallized Charges
- 0:13:30 Checking Out What's New In Lookout Landing
- 0:14:10 Main Quest - A Mystery In The Depths - Found / Started
- 0:18:15 Checking Out What's New In Lookout Landing
- 0:22:00 Upgrading Inventory Slots At Hestu's
- 0:23:20 Side Quest - The Incomplete Stable - Task Started / Completed (Help Karson Finish The Stable Roof)
- 0:25:10 Side Quest - Message From An Ancient Era - Found / Started
- 0:27:20 Checking Out What's New In Lookout Landing
- 0:28:45 Side Adventure - Who Goes There? - Found / Started
- 0:29:45 Location (Royal Hidden Passage)
- 0:30:45 Energy Well
- 0:31:30 Checking Out What's New In Lookout Landing
- 0:37:15 Placing Markers on the map
- 0:39:45 Exploring Hebra Mountains (Raspro Pass Area)
- 0:43:55 Chest (Bomb Flower x5)
- 0:45:30 Korok Seed
- 0:46:50 Korok Seed
- 0:49:50 Exploring Hebra Mountains (Raspro Pass Area)
- 0:51:20 Korok Seed
- 0:52:25 Exploring Hebra Mountains (Raspro Pass Area)
- 0:55:25 Korok Seed
- 0:56:15 Exploring Hebra Mountains (Raspro Pass Area)
- 0:57:25 Chest (Saphire)
- 0:58:00 Exploring Hebra Mountains (Raspro Pass Area)
- 0:59:05 Location (Lake Kilsie Cave)
- 1:00:20 Chest (Feathered Edge)
- 1:01:20 Chest (Frostbite Headdress)
- 1:02:15 Bubbul Gem
- 1:02:45 Exploring Hebra Mountains (Raspro Pass Area)
- 1:04:40 Chest (Opal)
- 1:05:10 Exploring Hebra Mountains (Raspro Pass Area)
- 1:06:50 Korok Seed
- 1:07:35 Reading Hyrule Compendium Entries
- 1:07:50 Outro
- 0:00:00 Intro
- 0:00:30 Placing Markers on the map
- 0:01:10 Exploring Hebra Mountains (Raspro Pass Area)
- 0:03:40 Location (Sturnida Secret Hot Spring)
- 0:06:15 Helping Addison
- 0:08:05 Exploring Hebra Mountains (Raspro Pass Area)
- 0:09:10 Location (Sturnida Spring Cave)
- 0:09:30 Chest (Royal Claymore)
- 0:11:25 Mushroom Haven
- 0:13:37 Bubbul Gem
- 0:15:45 Exploring Hebra Mountains (Raspro Pass Area)
- 0:19:25 Mounting a Bear (got stuck though, first attempt)
- 0:20:30 Exploring Hebra Mountains (Raspro Pass Area)
- 0:22:25 Miniboss (Frost Talus)
- 0:23:00 Exploring Hebra Mountains (Raspro Pass Area)
- 0:27:45 Korok Seed
- 0:28:30 Mounting a Bear (second attempt)
- 0:29:15 Miniboss (Blue-Maned Lynel)
- 0:32:30 Exploring Hebra Mountains (Raspro Pass Area)
- 0:33:25 Chest (Brightbloom Seed x10)
- 0:34:00 Korok Seed
- 0:34:35 Exploring Hebra Mountains (Raspro Pass Area)
- 0:36:55 Shrine - Started (Tauyosipun Shrine)
- 0:38:00 Chest (Mighty Construct Bow)
- 0:40:55 Shrine - Completed (Tauyosipun Shrine)
- 0:41:25 Exploring Hebra Mountains (Raspro Pass Area)
- 0:47:00 Korok Seed
- 0:47:45 Exploring Hebra Mountains (Raspro Pass Area)
- 0:49:25 Miniboss (Frost Talus)
- 0:52:10 Exploring Hebra Mountains (Raspro Pass Area)
- 0:53:05 Korok Seed
- 0:53:40 Exploring Hebra Mountains (Raspro Pass Area)
- 0:55:10 Chest (Falcon Bow)
- 0:55:45 Exploring Hebra Mountains (Raspro Pass Area)
- 0:57:45 Korok Seed
- 0:58:30 Chest (Falcon Bow)
- 0:59:00 Exploring Hebra Mountains (Raspro Pass Area)
- 1:02:50 Reading Hyrule Compendium Entries
- 1:05:20 Outro
- 0:00 Intro
- 0:30 Placing Markers on the map
- 2:10 Exploring Hebra Mountains (Raspro Pass Area)
- 3:15 Chest (Rocket x5)
- 3:45 Exploring Hebra Mountains (Raspro Pass Area)
- 5:00 Chest (Flame Emitter x3)
- 5:30 Exploring Hebra Mountains (Raspro Pass Area)
- 7:45 Korok Seed
- 8:15 Exploring Hebra Mountains (Raspro Pass Area)
- 9:20 Location (Icefall Foothills Cave)
- 10:30 Chest (Bomb Flower x10)
- 11:00 Exploring Icefall Foothills Cave
- 11:35 Bubbul Gem
- 12:00 Exploring Icefall Foothills Cave
- 16:00 Shrine - Started (Otak Shrine)
- 20:40 Chest (Mighty Construct Bow)
- 21:35 Shrine - Completed (Otak Shrine)
- 22:20 Exploring Hebra Mountains (Raspro Pass Area)
- 25:20 Korok Seed
- 26:00 Exploring Hebra Mountains (Raspro Pass Area)
- 29:30 Chest (Mighty Zonaite Shield)
- 32:15 Chest (Large Zonai Charge)
- 33:30 Korok Seed
- 34:15 Exploring Hebra Mountains (Raspro Pass Area)
- 35:40 Korok Seed
- 36:00 Exploring Hebra Mountains (Raspro Pass Area)
- 37:40 Korok Seed
- 38:30 Exploring Hebra Mountains (Raspro Pass Area)
- 39:10 Chest (Cart x3)
- 39:30 Exploring Hebra Mountains (Raspro Pass Area)
- 40:30 Korok Seed
- 40:55 Exploring Hebra Mountains (Raspro Pass Area)
- 43:20 Location (North Biron Snowshelf Cave)
- 43:50 Side Quest - Treasure of The Secret Springs - Task Started (Solve the Secret Hot Springs Riddle)
- 44:25 Chest (Arrow x5)
- 45:00 Side Quest - Treasure of The Secret Springs - Task Continued (Solve the Secret Hot Springs Riddle)
- 49:05 Chest (Vah Medoh Divine Helm)
- 49:25 Side Quest - Treasure of The Secret Springs - Task Completed (Solve the Secret Hot Springs Riddle)
- 50:20 Placing Markers on the map (missed 2 markers before)
- 50:45 Exploring Hebra Mountains (Raspro Pass Area)
- 53:20 Location (East Biron Snowshelf Cave)
- 55:10 Side Quest - The Duchess Who Disappeared - Found / Started
- 56:40 Bubbul Gem
- 57:00 Exploring East Biron Snowshelf Cave
- 58:05 Reading Hyrule Compendium Entries
- 58:55 Outro
- 0:00:00 Intro
- 0:00:30 Placing Markers on the map
- 0:01:50 Exploring Hebra Mountains (Raspro Pass Area)
- 0:06:10 Miniboss (Frost Gleeok)
- 0:08:50 Exploring Hebra Mountains (Raspro Pass Area)
- 0:11:15 Korok Seed
- 0:12:00 Exploring Hebra Mountains (Raspro Pass Area)
- 0:14:00 Chest (Large Zonaite)
- 0:14:30 Exploring Hebra Mountains (Raspro Pass Area)
- 0:15:55 Korok Seed
- 0:16:30 Exploring Hebra Mountains (Raspro Pass Area)
- 0:17:00 Building and using a "Snowmobile"
- 0:19:50 Korok Seed
- 0:20:25 Exploring Hebra Mountains (Raspro Pass Area)
- 0:22:10 Korok Seed x2
- 0:25:00 Building and using a flying machine
- 0:27:45 Korok Seed
- 0:28:35 Exploring Hebra Mountains (Raspro Pass Area)
- 0:30:40 Chest (Kite Shield)
- 0:31:10 Exploring Hebra Mountains (Raspro Pass Area)
- 0:31:45 Location (Hebra Great Skeleton)
- 0:32:15 Exploring Hebra Great Skeleton
- 0:34:00 Bubbul Gem
- 0:34:25 Exploring Hebra Great Skeleton
- 0:37:10 Korok Seed x2 (repair the skeleton in 2 seperate places and shoot the balloons that appear in the skeleton eyes)
- 0:42:30 Exploring Hebra Mountains (Raspro Pass Area)
- 0:49:35 Miniboss (Blue Hinox)
- 0:51:00 Exploring Hebra Mountains (Raspro Pass Area)
- 0:52:00 Korok Seed
- 0:52:40 Chest (Saphire)
- 0:53:10 Exploring Hebra Mountains (Raspro Pass Area)
- 0:55:05 Korok Seed
- 0:55:35 Exploring Hebra Mountains (Raspro Pass Area)
- 0:59:15 Chest (Sled x3)
- 0:59:45 Exploring Hebra Mountains (Raspro Pass Area)
- 1:00:45 Location (Goflam's Secret Hot Spring)
- 1:01:05 Shrine - Started (Eutoum Shrine)
- 1:07:30 Chest (Saphire)
- 1:07:50 Shrine - Completed (Eutoum Shrine)
- 1:08:50 Reading Hyrule Compendium Entries
- 1:09:10 Outro
- 0:00:00 Intro
- 0:00:30 Buying Crystallized Charges
- 0:03:15 Energy Well
- 0:03:55 Buying Crystallized Charges
- 0:06:25 Shopping at Lookout Landing & Expanding Inventory at Hestus
- 0:09:35 Heart Container
- 0:11:00 Placing Markers on the map
- 0:13:15 Exploring Hebra Mountains (Raspro Pass Area)
- 0:17:15 Korok Seed
- 0:17:45 Exploring Hebra Mountains (Raspro Pass Area)
- 0:19:30 Korok Seed
- 0:20:00 Exploring Hebra Mountains (Raspro Pass Area)
- 0:23:55 Korok Seed
- 0:24:30 Exploring Hebra Mountains (Raspro Pass Area)
- 0:28:15 Korok Seed
- 0:28:45 Exploring Hebra Mountains (Raspro Pass Area)
- 0:31:30 Chest (Zonaite x3)
- 0:32:00 Exploring Hebra Mountains (Raspro Pass Area)
- 0:34:45 Korok Seed
- 0:35:15 Exploring Hebra Mountains (Raspro Pass Area)
- 0:36:05 Location (Hebra Mountains Northwest Cave)
- 0:36:20 Bubbul Gem
- 0:36:45 Exploring Hebra Mountains Northwest Cave
- 0:40:20 Chest (Wing x3)
- 0:41:05 Shrine Quest - The Northwest Hebra Cave Crystal - Task Started / Completed (Find And Bring The Crystal to The Shrine)
- 0:43:35 Shrine - Started (Rutafu-Um Shrine)
- 0:44:00 Chest (Topaz)
- 0:44:15 Shrine - Completed (Rutafu-Um Shrine)
- 0:46:05 Side Quest - The Duchess Who Disappeared - Task Started / Completed (Go to The Summit And Talk to Selmie)
- 0:48:20 Minigame (Shield Surfing)
- 1:03:30 Chest (Falcon Bow)
- 1:04:30 Reading Hyrule Compendium Entries
- 1:06:20 Outro
- 0:00:00 Intro
- 0:00:30 Placing Markers on the map
- 0:01:50 Exploring Hebra Mountains (Raspro Pass Area)
- 0:04:50 Korok Seed
- 0:07:30 Exploring Hebra Mountains (Raspro Pass Area)
- 0:10:45 Shrine Quest - The North Hebra Mountain Crystal - Task Started (Find And Bring the Crystal to The Shrine)
- 0:11:40 Miniboss (Frost Talus)
- 0:12:40 Shrine Quest - The North Hebra Mountain Crystal - Task Completed (Find And Bring the Crystal to The Shrine)
- 0:14:30 Shrine - Started (Sisuran Shrine)
- 0:14:50 Chest (Saphire)
- 0:15:05 Shrine - Completed (Sisuran Shrine)
- 0:15:45 Exploring Hebra Mountains (Raspro Pass Area)
- 0:16:40 Location (Pikida Stonegrove Northwest Cave)
- 0:17:00 Exploring Pikida Stonegrove Northwest Cave
- 0:21:25 Korok Seed
- 0:22:30 Exploring Pikida Stonegrove Northwest Cave
- 0:24:00 Chest (Hunter's Shield)
- 0:24:25 Bubbul Gem
- 0:25:00 Exploring Pikida Stonegrove Northwest Cave
- 0:26:15 Chest (Feathered Edge)
- 0:26:45 Chest (Soldier's-Spear Stick)
- 0:27:10 Exploring Pikida Stonegrove Northwest Cave
- 0:27:50 Will return here later
- 0:28:10 Exploring Pikida Stonegrove Northwest Cave
- 0:30:00 Exploring Hebra Mountains (Raspro Pass Area)
- 0:32:00 Korok Seed
- 0:32:30 Exploring Hebra Mountains (Raspro Pass Area)
- 0:33:30 Chest (Swallow Bow)
- 0:33:50 Exploring Hebra Mountains (Raspro Pass Area)
- 0:36:00 Chest (Mighty Zonaite Spear)
- 0:36:30 Exploring Hebra Mountains (Raspro Pass Area)
- 0:39:40 Korok Seed
- 0:40:15 Exploring Hebra Mountains (Raspro Pass Area)
- 0:53:10 Chest (Mighty Construct Bow)
- 0:53:45 Korok Seed
- 0:54:10 Exploring Hebra Mountains (Raspro Pass Area)
- 0:55:00 Chest (Royal Bow)
- 0:55:55 Korok Seed
- 0:56:35 Exploring Hebra Mountains (Raspro Pass Area)
- 0:58:55 Chest (Kite Shield)
- 0:59:45 Exploring Hebra Mountains (Raspro Pass Area)
- 1:02:35 Korok Seed
- 1:03:35 Reading Hyrule Compendium Entries
- 1:04:10 Outro
- 0:00:00 Intro
- 0:00:30 Placing Markers on the map
- 0:03:00 Miniboss (White-Maned Lynel)
- 0:07:20 Device Dispenser
- 0:09:00 Exploring The Last of The Sky in Hebra Mountains (Raspro Pass Area)
- 0:13:00 Miniboss (King Gleeok)
- 0:17:30 Chest (Sage's Will)
- 0:18:00 Exploring The Last of The Sky in Hebra Mountains (Raspro Pass Area)
- 0:20:10 Returning To Lookout Landing
- 0:22:00 Location (Royal Hidden Passage)
- 0:22:30 Side Quest - Who Goes There - Task Started / Completed (Talk to the Horned Statue in the tunnel)
- 0:25:20 Exploring Royal Hidden Passage
- 0:27:50 Side Quest - Who Goes There - Task Started / Completed (Return to Jerrin)
- 0:29:40 Exploring Royal Hidden Passage
- 0:31:30 Chest (Royal Shield)
- 0:31:50 Exploring Royal Hidden Passage
- 0:35:50 Chest (Royal Shield)
- 0:36:20 Chest (Soldier's Greaves)
- 0:37:15 Chest (Royal Claymore)
- 0:38:30 Exploring Royal Hidden Passage
- 0:47:15 Miniboss (Stalnox)
- 0:49:00 Exploring Royal Hidden Passage
- 0:54:40 Chest (Royal Shield)
- 0:55:00 Chest (Soldier's Helm)
- 0:55:45 Chest (Royal Broadsword)
- 0:56:10 Exploring Royal Hidden Passage
- 1:04:50 Chest (Knight's-Halberd Halberd)
- 1:05:10 Exploring Royal Hidden Passage
- 1:10:10 Reading Hyrule Compendium Entries
- 1:12:20 Outro
- 0:00:00 Intro
- 0:00:25 Placing Markers on the map
- 0:01:00 Exploring Royal Hidden Passage
- 0:04:55 Chest (Soldier's Armor)
- 0:05:15 Exploring Royal Hidden Passage
- 0:08:50 Chest (Royal Bow)
- 0:09:15 Exploring Royal Hidden Passage
- 0:10:10 Bubbul Gem
- 0:10:30 Exploring Royal Hidden Passage
- 0:15:45 Chest (Royal Shield)
- 0:16:10 Exploring Royal Hidden Passage
- 0:16:50 Chest (Royal Halberd)
- 0:17:10 Exploring Royal Hidden Passage
- 0:18:25 Location (Guards Chamber)
- 0:20:10 Chest (Royal Guard Uniform)
- 0:20:40 Exploring Rest of Hyrule Castle
- 0:24:00 Location (Observation Room)
- 0:25:00 Location (Dining Hall)
- 0:25:30 Exploring Rest of Hyrule Castle
- 0:30:40 Chest (Royal Halberd) & Chest (Royal Bow)
- 0:31:30 Chest (Diamond)
- 0:32:00 Exploring Rest of Hyrule Castle
- 0:35:50 Location (West Passage)
- 0:36:20 Exploring Rest of Hyrule Castle
- 0:41:20 Location (Lockup)
- 0:41:50 Exploring Rest of Hyrule Castle
- 0:43:30 Chest (Royal Shield) & Chest (Royal Bow)
- 0:44:15 Exploring Rest of Hyrule Castle
- 0:48:45 Chest (Royal Hyrulian Fabric)
- 0:49:20 Exploring Rest of Hyrule Castle
- 0:50:40 Location (Docks)
- 0:51:00 Miniboss (Gloom Spawn & Phantom Ganon)
- 0:52:15 Exploring Rest of Hyrule Castle
- 0:57:15 Location (East Passage)
- 0:57:45 Chest (Royal Shield)
- 0:58:30 Chest (Red Rupee)
- 0:59:05 Cooking up some recipes
- 1:02:00 Buying Crystallized Charges
- 1:04:50 Energy Well x2
- 1:05:45 Reading Hyrule Compendium Entries
- 1:06:25 Outro
- 0:00:00 Intro
- 0:00:25 Placing Markers on the map
- 0:01:40 Buying Crystallized Charges
- 0:04:00 Shopping & Selling items
- 0:08:30 Side Quest - The Rito Rope Bridge - Found / Started
- 0:10:15 Side Quest - The Rito Rope Bridge - Started / Completed (Talk to Karson)
- 0:14:00 Side Quest - The Rito Rope Bridge - Task Started / Completed (Give Karson 20 Pieces of Wood)
- 0:17:40 Going down into the depths of Raspro Pass area
- 0:18:20 Heading Straight for Koro-Nui Light Root
- 0:24:45 Light Root - Found (Koro-Nui Light Root)
- 0:26:45 Heading Straight for Kawumoro Light Root
- 0:28:30 Light Root - Found (Kawumoro Light Root)
- 0:29:50 Placing Markers on the map
- 0:30:20 Heading Straight for Kataki Light Root
- 0:31:05 Miniboss (Blue-White Frox)
- 0:36:10 Heading Straight for Kataki Light Root
- 0:36:55 Light Root - Found (Kataki Light Root)
- 0:37:35 Placing markers on the map
- 0:38:10 Heading Straight for So-Oaw Light Root
- 0:45:20 Light Root - Found (So-Oaw Light Root)
- 0:45:40 Placing Markers on the map
- 0:46:55 Heading Straight for Worihas Light Root
- 0:54:10 Chest (Arrow x10)
- 0:54:30 Heading Straight for Worihas Light Root
- 0:55:20 Miniboss (Frost Talus)
- 0:56:45 Heading Straight for Worihas Light Root
- 1:00:25 Light Root - Found (Worihas Light Root)
- 1:01:00 Location (Corvash Canyon Mine)
- 1:01:15 Reading Hyrule Compendium Entries
- 1:02:00 Outro
- 0:00:00 Intro
- 0:00:25 Placing Markers on the map
- 0:01:45 Exploring Corvash Canyon Mine
- 0:03:45 Chest (Trousers of The Hero)
- 0:04:30 Exploring Corvash Canyon Mine
- 0:08:00 Heading Straight for Mu-Ufatur Light Root
- 0:10:25 Miniboss (Blue-White Frox)
- 0:13:30 Heading Straight for Mu-Ufatur Light Root
- 0:21:00 Chest (Kite Shield)
- 0:22:15 Chest (Sundelion)
- 0:22:40 Heading Straight for Mu-Ufatur Light Root
- 0:23:30 Light Root - Found (Mu-Ufatur)
- 0:24:50 Placing Markers on the map
- 0:25:30 Exploring Area Around Mu-Ufatur Light Root
- 0:36:10 Heading Straight for ... Light Root
- 0:42:50 Light Root - Found (Narusis Light Root)
- 0:43:35 Placing Markers on the map
- 0:44:05 Boss (Colgera)
- 0:47:25 Chest (Huge Crystallized Charge)
- 0:47:45 Exploring Area around Colgera Boss Fight
- 1:03:35 Reading Hyrule Compendium Entries
- 1:04:25 Outro
- 0:00:00 Intro
- 0:00:30 Placing Markers on the map
- 0:01:20 Exploring the area Around Mu-Ufatur Light Root
- 0:06:00 Chest (Yiga Schematic (Floodlights)) & Chest (Large Crystallized Charge)
- 0:06:30 Exploring the area Around Mu-Ufatur Light Root
- 0:07:45 Location (Hebra Canyon Mine)
- 0:08:00 Exploring Hebra Canyon Mine
- 0:10:30 Chest (Sea-Breeze Boomerang)
- 0:11:20 Exploring Hebra Canyon Mine
- 0:13:50 Heading Straight for Muotue Light Root
- 0:18:50 Location (Goflams Lavafalls)
- 0:20:10 Light Root - Found (Muotue Light Root)
- 0:21:10 Placing Markers on the map
- 0:22:40 Prepping for some lava falls exploration
- 0:26:20 Cooking up some Fireproof Elixirs & more
- 0:28:45 Exploring Goflams Lavafalls
- 0:30:15 Chest (Large Crystallized Charge)
- 0:31:00 Exploring Goflams Lavafalls & surrounding area
- 0:37:10 Heading Straight for Kato Light Root
- 0:37:50 Location (Hebra Dark Skeleton)
- 0:38:15 Heading Straight for Kato Light Root
- 0:42:05 Chest (Cap of The Wild)
- 0:43:00 Heading Straight for Kato Light Root
- 0:50:00 Light Root - Found (Kato Light Root)
- 0:51:05 Placing Markers on the map
- 0:52:30 Exploring area around Kato Light Root
- 0:54:20 Exploring area around Kato Light Root
- 0:55:10 Going back for a Miniboss near Muotue Light Root
- 0:59:30 Miniboss (Black Hinox)
- 1:02:00 Exploring area around Kato Light Root
- 1:02:15 Location (Sherfins Lava Falls)
- 1:02:40 Chest (Large Crystallized Charge)
- 1:03:00 Exploring Sherfins Lava Falls
- 1:05:30 Miniboss (Stone Talus)
- 1:07:50 Reading Hyrule Compendium Entries
- 1:08:00 Outro
- 0:00:00 Intro
- 0:00:30 Heading directly towards Nupisoyuat Light Root
- 0:10:20 Light Root - Found (Nupisoyuat Light Root)
- 0:11:15 Placing Markers on the map
- 0:13:45 Boss (Colgera)
- 0:17:10 Chest (Huge Cyrstallized Charge)
- 0:17:30 Exploring the depths of Raspro Pass area (looting chests, bombs, crystallized charges, zonaite & gems)
- 0:22:10 Buying Crystallized Charges
- 0:26:50 Buying and selling items
- 0:28:20 Energy Well x5
- 0:29:25 Cooking up some recipes
- 0:33:40 Exploring the depths of Raspro Pass area (looting chests, bombs, crystallized charges, zonaite & gems)
- 0:37:10 Miniboss (Blue-White Frox)
- 0:39:00 Exploring the depths of Raspro Pass area (looting chests, bombs, crystallized charges, zonaite & gems)
- 0:44:50 Chest (Cap of Time)
- 0:45:35 Exploring the depths of Raspro Pass area (looting chests, bombs, crystallized charges, zonaite & gems)
- 0:56:10 Chest (Yiga Schematic) & Chest (Large Crystallized Charge)
- 0:56:45 Exploring the depths of Raspro Pass area (looting chests, bombs, crystallized charges, zonaite & gems)
- 1:10:10 Boss (Colgera)
- 1:15:10 Reading Hyrule Compendium Entries
- 1:15:25 Outro
- 0:00:00 Intro
- 0:00:25 Placing Markers on the map
- 0:03:10 Exploring the depths of Raspro Pass area (looting chests, bombs, crystallized charges, zonaite & gems)
- 0:12:40 Miniboss (Flux Construct 3)
- 0:14:30 Exploring the depths of Raspro Pass area (looting chests, bombs, crystallized charges, zonaite & gems)
- 0:16:00 Miniboss (Stone Talus)
- 0:19:25 Exploring the depths of Raspro Pass area (looting chests, bombs, crystallized charges, zonaite & gems)
- 0:24:35 Miniboss (Battle Talus)
- 0:25:45 Exploring the depths of Raspro Pass area (looting chests, bombs, crystallized charges, zonaite & gems)
- 0:43:15 Miniboss (Black Hinox)
- 0:44:50 Exploring the depths of Raspro Pass area (looting chests, bombs, crystallized charges, zonaite & gems)
- 0:59:00 Miniboss (Blue-White Frox)
- 1:00:15 Exploring the depths of Raspro Pass area (looting chests, bombs, crystallized charges, zonaite & gems)
- 1:06:25 Reading Hyrule Compendium Entries
- 1:07:15 Outro
- 0:00:00 Intro
- 0:00:25 Placing Markers on the map
- 0:01:40 Exploring the depths of Raspro Pass area (looting chests, bombs, crystallized charges, zonaite & gems)
- 0:12:10 2 Grand Poes & Yiga Clan member
- 0:13:00 Exploring the depths of Raspro Pass area (looting chests, bombs, crystallized charges, zonaite & gems)
- 0:29:05 Miniboss (Flux Construct 3)
- 0:31:30 Exploring the depths of Raspro Pass area (looting chests, bombs, crystallized charges, zonaite & gems)
- 0:36:00 Shortcut to the surface (Lighthouse)
- 0:37:30 Miniboss (Blue-White Frox)
- 0:39:30 Exploring the depths of Raspro Pass area (looting chests, bombs, crystallized charges, zonaite & gems)
- 0:54:15 Miniboss (Battle Talus)
- 0:55:20 Exploring the depths of Raspro Pass area (looting chests, bombs, crystallized charges, zonaite & gems)
- 0:58:20 Miniboss (Stone Talus)
- 0:59:30 Exploring the depths of Raspro Pass area (looting chests, bombs, crystallized charges, zonaite & gems)
- 1:02:20 Outro
- 0:00:00 Intro
- 0:00:30 Placing Markers on the map
- 0:02:30 Exploring the depths of Raspro Pass area (looting chests, bombs, crystallized charges, zonaite & gems)
- 0:05:30 Chest (Giant Brightbloom Seed x5)
- 0:05:45 Exploring the depths of Raspro Pass area (looting chests, bombs, crystallized charges, zonaite & gems)
- 0:13:40 Chest (Yiga Schematic (All Purpose Raft)) & Chest (Large Crystallized Charge)
- 0:14:00 Exploring the depths of Raspro Pass area (looting chests, bombs, crystallized charges, zonaite & gems)
- 0:29:15 Light Root - Found (Sasag Light Root)
- 0:30:35 Exploring the depths of Raspro Pass area (looting chests, bombs, crystallized charges, zonaite & gems)
- 0:36:30 Miniboss (Blue-White Frox)
- 0:38:25 Exploring the depths of Raspro Pass area (looting chests, bombs, crystallized charges, zonaite & gems)
- 0:51:20 Miniboss (Blue-White Frox)
- 0:52:30 Exploring the depths of Raspro Pass area (looting chests, bombs, crystallized charges, zonaite & gems)
- 0:53:30 Buying Crystallized Charges & more
- 0:59:45 Cooking up some recipes
- 1:01:30 Energy Well x4 & Energy Cell
- 1:03:15 Outro
- 0:00:00 Intro
- 0:00:25 Placing Markers on the map
- 0:03:30 Exploring the depths of Raspro Pass area (looting chests, bombs, crystallized charges, zonaite & gems)
- 0:06:40 Location (Cuho Canyon Mine)
- 0:07:00 Exploring Cuho Canyon Mine)
- 0:11:15 Chest (Tunic of The Wind)
- 0:12:15 Exploring the depths of Raspro Pass area (looting chests, bombs, crystallized charges, zonaite & gems)
- 0:17:50 Chest (Hunter's Shield)
- 0:19:15 Chest (Feathered Edge)
- 0:19:30 Chest (Arrow x10)
- 0:20:00 Exploring the depths of Raspro Pass area (looting chests, bombs, crystallized charges, zonaite & gems)
- 0:25:45 Chest (Hunter's Shield)
- 0:26:30 Chest (Hunter's Shield)
- 0:26:45 Chest (Sundelion)
- 0:27:10 Exploring the depths of Raspro Pass area (looting chests, bombs, crystallized charges, zonaite & gems)
- 0:33:30 Miniboss (Stalnox)
- 0:34:55 Exploring the depths of Raspro Pass area (looting chests, bombs, crystallized charges, zonaite & gems)
- 0:48:00 Returning to the surface
- 0:48:50 Shopping at Beedles
- 0:50:30 Side Adventure - The Beast And The Princess - Found / Started
- 0:51:45 Side Quest - A Picture For New Serenne Stable - Task Started (Take a picture of the Geoglyphs right outside New Serenne
- 0:55:15 Side Quest - A Picture For New Serenne Stable - Task Completed (Take a picture of the Geoglyphs right outside New Serenn
- 0:55:50 Side Quest - A Picture For New Serenne Stable - Task Started/Completed (Talk to Sprinn and show him the picture)
- 0:58:00 Shopping at Beedles
- 0:58:45 Cooking up some recipes
- 1:01:25 Side Quest - A Picture For Tabantha Bridge Stable - Found / Started (Take a picture of The Ancient Columns)
- 1:02:30 Outro
- 0:00:00 Intro
- 0:00:25 Placing Markers on the map
- 0:00:45 Side Quest - A Picture For Tabantha Bridge Stable - Task Started (Take a picture of The Ancient Columns)
- 0:06:30 Miniboss (Flame Gleeok)
- 0:10:35 Side Quest - A Picture For Tabantha Bridge Stable - Task Continued / Completed (Take a picture of The Ancient Columns)
- 0:12:40 Side Quest - A Picture For Tabantha Bridge Stable - Task Started / Completed (Talk to Dabi and show him the picture)
- 0:14:45 Side Adventure - White Goats Gone Missing - Task Started / Completed (Talk to Chork)
- 0:16:25 Side Adventure - White Goats Gone Missing - Task Started (Find the goats)
- 0:18:05 Side Adventure - White Goats Gone Missing - Task Completed (Find the goats)
- 0:21:10 Heading for Pikida Stonegrove Skyview Tower
- 0:22:00 Miniboss (Frost Talus)
- 0:24:00 Heading for Pikida Stonegrove Skyview Tower
- 0:28:20 Chest (Feathered Spear)
- 0:29:30 Ches (Soldier's-Spear Stick)
- 0:30:00 Heading for Pikida Stonegrove Skyview Tower
- 0:36:20 Skyview Tower - Found (Pikida Stonegrove Skyview Tower)
- 0:39:50 Placing Markers on the Map
- 0:42:20 Exploring the sky of Tabantha Tundra (Pikida Stonegrove area)
- 0:47:55 Korok Seed
- 0:48:30 Exploring the sky of Tabantha Tundra (Pikida Stonegrove area)
- 0:49:05 Device Dispenser
- 0:49:55 Exploring the sky of Tabantha Tundra (Pikida Stonegrove area)
- 0:50:25 Shrine Quest - The East Hebra Sky Crystal - Task Started (Find and bring the Crystal to the Shrine)
- 0:51:50 Korok Seed
- 0:52:20 Shrine Quest - The East Hebra Sky Crystal - Task Continued (Find and bring the Crystal to the Shrine)
- 0:57:10 Chest (Old Map)
- 0:57:40 Shrine Quest - The East Hebra Sky Crystal - Task Continued (Find and bring the Crystal to the Shrine)
- 1:01:30 Shrine Quest - The East Hebra Sky Crystal - Task Completed (Find and bring the Crystal to the Shrine)
- 1:02:20 Shrine - Started (Taninoud Shrine)
- 1:02:40 Chest (Topaz)
- 1:03:00 Shrine - Completed (Taninoud Shrine)
- 1:03:40 Exploring the sky of Tabantha Tundra (Pikida Stonegrove area)
- 1:05:20 Reading Hyrule Compendium Entries
- 1:05:45 Outro
- 0:00:00 Intro
- 0:00:25 Placing Markers on the map
- 0:00:45 Exploring Tabantha Tundra (Pikida Stonegrove area)
- 0:05:35 Chest (Zonai Charge)
- 0:05:50 Exploring Tabantha Tundra (Pikida Stonegrove area)
- 0:08:45 Korok Seed x2
- 0:11:30 Exploring Tabantha Tundra (Pikida Stonegrove area)
- 0:13:20 Helping Addison
- 0:14:30 Exploring Tabantha Tundra (Pikida Stonegrove area)
- 0:23:55 Korok Seed
- 0:24:50 Miniboss (Frost Gleeok)
- 0:27:25 Exploring Tabantha Tundra (Pikida Stonegrove area)
- 0:32:00 Great Fairy (Cannot be unlocked yet, will return later)
- 0:32:30 Exploring Tabantha Tundra (Pikida Stonegrove area)
- 0:33:05 Chest (Arrow x5)
- 0:33:30 Exploring Tabantha Tundra (Pikida Stonegrove area)
- 0:36:05 Shrine - Found (Orochium Shrine)
- 0:39:20 Chest (Arrow x5)
- 0:44:10 Shrine - Completed (Orochium Shrine)
- 0:45:55 Stable (Snowfield Stable)
- 0:47:35 Side Adventure - Zelda's Golden Horse - Found / Started
- 0:51:10 Chest (Purple Rupee)
- 0:51:35 Location (Snowfield Stable Well)
- 0:53:10 Korok Seed
- 0:54:10 Side Quest - The Captured Tent - Found / Started
- 0:55:45 Shopping at Beedle's
- 0:57:50 Side Quest - A Picture For Snowfield Stable - Found / Started
- 0:59:55 Exploring Tabantha Tundra (Pikida Stonegrove area)
- 1:01:20 Korok Seed x2
- 1:03:10 Side Quest - The Captured Tent - Task Started (Defeat the enemies surrounding the tent)
- 1:03:25 Location (Mount Drena Foothill Cave)
- 1:03:45 Side Quest - The Captured Tent - Task Completed (Defeat the enemies surrounding the tent)
- 1:05:25 Bubbul Gem
- 1:06:00 Exploring Tabantha Tundra (Pikida Stonegrove area)
- 1:08:55 Side Quest - The Captured Tent - Task Started / Completed (Talk to Nat And Meghyn)
- 1:10:30 Side Quest - Who Finds The Haven - Found / Started
- 1:10:50 Reading Hyrule Compendium Entries
- 1:11:10 Outro
- 0:00:00 Intro
- 0:00:25 Placing Markers on the map
- 0:02:45 Side Quest - A Picture For Snowfield Stable - Task Started/Completed (Take a picture of the Bird with outstretched wings
- 0:06:05 Side Quest - A Picture For Snowfield Stable - Task Started/Completed (Talk to Varke and show him the picture)
- 0:10:00 Buying Crystallized Charges & arrows
- 0:13:35 Expanding inventory at Hestus
- 0:14:30 Heart Container
- 0:15:40 Energy Well x2
- 0:17:20 Exploring Tabantha Tundra (Pikida Stonegrove area)
- 0:20:30 Side Quest - Zelda's Golden Horse - Task Started/Completed (Find the Golden Horse)
- 0:22:30 Side Quest - Zelda's Golden Horse - Task Completed (Return to Harlow with the horse)
- 0:24:25 Equipment (Royal Bridle & Royal Sadle)
- 0:25:20 Equipment (Lucky Clover Gazette Fabric)
- 0:26:00 Naming the golden horse
- 0:28:00 Equipment (Traveler's Saddle & Traveler's Bridle)
- 0:29:00 Exploring Tabantha Tundra (Pikida Stonegrove area)
- 0:29:55 Helping Addison
- 0:32:15 Exploring Tabantha Tundra (Pikida Stonegrove area)
- 0:33:10 Korok Seed
- 0:33:55 Memory 10 (Birth of The Demon King)
- 0:39:50 Korok Seed
- 0:40:10 Exploring Tabantha Tundra (Pikida Stonegrove area)
- 0:42:20 Korok Seed
- 0:42:40 Exploring Tabantha Tundra (Pikida Stonegrove area)
- 0:46:20 Korok Seed
- 0:47:20 Exploring Tabantha Tundra (Pikida Stonegrove area)
- 0:50:40 Chest (Saphire)
- 0:51:05 Exploring Tabantha Tundra (Pikida Stonegrove area)
- 0:54:05 Chest (Mighty Zonai Shield)
- 0:54:40 Shrine - Started (Oshozan-U Shrine)
- 0:56:40 Chest (Zonaite Bow)
- 0:58:10 Shrine - Completed (Oshozan-U Shrine)
- 0:59:00 Korok Seed x2
- 1:02:40 Exploring Tabantha Tundra (Pikida Stonegrove area)
- 1:03:40 Korok Seed
- 1:04:10 Exploring Tabantha Tundra (Pikida Stonegrove area)
- 1:05:20 Location (North Lomei Labyrinth)
- 1:05:35 Reading Hyrule Compendium Entries
- 1:06:15 Outro
- 0:00:00 Intro
- 0:00:30 Placing Markers on the map
- 0:02:55 Exploring North Lomei Labyrinth
- 0:04:15 Miniboss (Gloom Spawn & Phantom Ganon)
- 0:05:30 Exploring North Lomei Labyrinth
- 0:07:15 Chest (Mighty Sonaite Spear)
- 0:07:40 Exploring North Lomei Labyrinth
- 0:09:15 Chest (Mighty Zonaite Shield)
- 0:09:40 Exploring North Lomei Labyrinth
- 0:14:05 Chest (Zonaite Bow)
- 0:14:30 Exploring North Lomei Labyrinth
- 0:15:31 Korok Seed
- 0:16:00 Exploring North Lomei Labyrinth
- 0:17:40 Chest (Mighty Zonaite Longsword)
- 0:18:10 Exploring North Lomei Labyrinth
- 0:25:45 Chest (Mighty Zonaite Sword)
- 0:26:30 Exploring North Lomei Labyrinth
- 0:27:15 Chest (Big Battery)
- 0:27:40 Location (North Lomei Chasm)
- 0:28:00 Side Quest - The North Lomei Prophecy - Task Started / Completed (Complete the North Lomei Labyrinth on the surface)
- 0:28:25 Shrine - Started (Mayaotaki Shrine)
- 0:29:05 Chest (Diamond)
- 0:29:20 Shrine - Completed (Mayaotaki Shrine)
- 0:30:10 Exploring North Lomei Labyrinth
- 0:31:30 Exploring Tabantha Tundra (Pikida Stonegrove area)
- 0:32:40 Chest (Large Zonai Charge)
- 0:33:10 Exploring Tabantha Tundra (Pikida Stonegrove area)
- 0:34:25 Chest (Zonaite x5)
- 0:34:45 Exploring Tabantha Tundra (Pikida Stonegrove area)
- 0:35:45 Chest (Flame Emitter)
- 0:36:00 Exploring Tabantha Tundra (Pikida Stonegrove area)
- 0:36:45 Chest (Zonaite x3)
- 0:37:00 Korok Seed
- 0:37:20 Exploring Tabantha Tundra (Pikida Stonegrove area)
- 0:39:00 Korok Seed
- 0:39:30 Exploring Tabantha Tundra (Pikida Stonegrove area)
- 0:41:50 Korok Seed
- 0:42:20 Exploring Tabantha Tundra (Pikida Stonegrove area)
- 0:43:15 Korok Seed
- 0:43:35 Exploring Tabantha Tundra (Pikida Stonegrove area)
- 0:48:20 Helping Addison
- 0:50:20 Exploring Tabantha Tundra (Pikida Stonegrove area)
- 0:55:55 Chest (Dragonbone Boko Bow)
- 0:56:20 Exploring Tabantha Tundra (Pikida Stonegrove area)
- 0:57:20 Korok Seed
- 0:57:55 Exploring Tabantha Tundra (Pikida Stonegrove area)
- 1:01:15 Korok Seed
- 1:02:45 Exploring Tabantha Tundra (Pikida Stonegrove area)
- 1:05:10 Helping Addison
- 1:07:50 Reading Hyrule Compendium Entries
- 1:08:25 Outro
- 0:00:00 Intro
- 0:00:25 Placing Markers on the map
- 0:02:00 Exploring Tabantha Tundra (Pikida Stonegrove area)
- 0:02:30 Handling the Marauders of Hebra
- 0:06:25 Chest (Opal)
- 0:07:00 Exploring Tabantha Tundra (Pikida Stonegrove area)
- 0:09:05 Chest (Amber & Arrow x5 & Hinox Hammer)
- 0:09:40 Korok Seed
- 0:10:00 Exploring Tabantha Tundra (Pikida Stonegrove area)
- 0:12:00 Korok Seed
- 0:12:20 Exploring Tabantha Tundra (Pikida Stonegrove area)
- 0:13:45 Side Quest - Supply-Eyeing Fliers - Task Started / Completed (Shoot down the Aurocudas for Huck)
- 0:16:15 Korok Seed
- 0:16:50 Exploring Tabantha Tundra (Pikida Stonegrove area)
- 0:20:15 Korok Seed
- 0:20:50 Exploring Tabantha Tundra (Pikida Stonegrove area)
- 0:22:50 Miniboss (Silver Lynel)
- 0:27:15 Exploring Tabantha Tundra (Pikida Stonegrove area)
- 0:31:30 Chest (Silver Lizal Reaper)
- 0:32:00 Exploring Tabantha Tundra (Pikida Stonegrove area)
- 0:36:20 Korok Seed x2
- 0:40:25 Miniboss (Hinox)
- 0:41:00 Exploring Tabantha Tundra (Pikida Stonegrove area)
- 0:42:30 Location (Hebra Headspring Cave)
- 0:44:00 Chest (Frostbite Trousers)
- 0:45:20 Bubbul Gem
- 0:46:00 Exploring Tabantha Tundra (Pikida Stonegrove area)
- 0:48:10 Korok Seed
- 0:48:30 Exploring Tabantha Tundra (Pikida Stonegrove area)
- 0:50:30 Korok Seed
- 0:51:30 Chest (Mighty Zonaite Sword & Mighty Construct Bow)
- 0:53:00 Exploring Tabantha Tundra (Pikida Stonegrove area)
- 0:56:15 Location (Kopeeki Drifts Cave)
- 0:57:15 Chest (Feathered Spear)
- 0:58:00 Bubbul Gem
- 0:58:20 Shrine - Started (Nouda Shrine)
- 1:03:15 Chest (Hearty Elixir)
- 1:03:35 Shrine - Completed (Nouda Shrine)
- 1:04:20 Reading Hyrule Compendium Entries
- 1:05:45 Outro
- 0:00:00 Intro
- 0:00:30 Placing Markers on the map
- 0:02:00 Exploring Tabantha Tundra (Pikida Stonegrove area)
- 0:05:40 Korok Seed
- 0:06:10 Exploring Tabantha Tundra (Pikida Stonegrove area)
- 0:07:40 Korok Seed
- 0:08:10 Exploring Tabantha Tundra (Pikida Stonegrove area)
- 0:14:15 Buying Crystallized Charges & more
- 0:19:00 Upgrading inventory at Hestus
- 0:20:25 Energy Well
- 0:22:45 Side Quest - Who Finds The Haven - Task Started / Completed (Find the haven)
- 0:29:00 Exploring Sky area of Tabantha Tundra (Pikida Stonegrove area)
- 0:31:45 Shrine - Started (Tenbez Shrine)
- 0:33:20 Chest (Large Zonai Charge)
- 0:34:50 Shrine - Completed (Tenbez Shrine)
- 0:35:30 Side Quest - The North Lomei Prophecy - Task Continued (Complete the North Lomei Labyrinth in the sky)
- 0:36:45 Chest (Big Battery)
- 0:37:15 Side Quest - The North Lomei Prophecy - Task Continued (Complete the North Lomei Labyrinth in the sky)
- 0:38:00 Chest (Mighty Zonaite Spear)
- 0:39:00 Lomei Terminal
- 0:39:30 Side Quest - The North Lomei Prophecy - Task Continued (Complete the North Lomei Labyrinth in the sky)
- 0:39:50 Lomei Terminal
- 0:40:35 Chest (Mighty Zonaite Longsword)
- 0:41:30 Side Quest - The North Lomei Prophecy - Task Continued (Complete the North Lomei Labyrinth in the sky)
- 0:42:20 Lomei Terminal
- 0:43:25 Chest (Mighty Zonaite Shield)
- 0:44:50 Chest (Mighty Zonaite Sword)
- 0:45:05 Side Quest - The North Lomei Prophecy - Task Continued (Complete the North Lomei Labyrinth in the sky)
- 0:45:20 Lomei Terminal
- 0:46:00 Side Quest - The North Lomei Prophecy - Task Completed (Complete the North Lomei Labyrinth in the sky)
- 0:47:00 Side Quest - The North Lomei Prophecy - Task Started (Complete the North Lomei Labyrinth in the depths)
- 0:48:00 Chest (Zonaite Bow)
- 0:48:20 Korok Seed
- 0:49:00 Going down into the depths
- 0:50:45 Placing markers on the map
- 0:51:45 Light Root - Found (Muihcoro Light Root)
- 0:53:10 Heading directly towards Aduon Light Root
- 0:55:00 Light Root - Found (Aduon Light Root)
- 0:55:30 Heading directly towards U-Nazohso Light Root
- 1:00:40 Light Root - Found (U-Nazohso Light Root)
- 1:01:20 Side Quest - The North Lomei Prophecy - Task Continued (Complete the North Lomei Labyrinth in the depths)
- 1:02:40 Location (North Lomei Depths Labyrinth)
- 1:03:30 Outro
- 0:00 Intro
- 0:25 Side Quest - The North Lomei Prophecy - Task Continued (Complete the North Lomei Labyrinth in the depths)
- 1:00 Miniboss (Flux Construct 3)
- 3:10 Side Quest - The North Lomei Prophecy - Task Completed (Complete the North Lomei Labyrinth in the depths)
- 4:00 Chest (Evil Spirit Greaves)
- 4:30 Exploring the depths of Pikida Stonegrove area (looting chests, bombs, crystallized charges, zonaite & gems)
- 5:15 Light Root - Found (Ikatoayam Light Root)
- 6:10 Placing Markers on the map
- 8:30 Exploring the depths of Pikida Stonegrove area (looting chests, bombs, crystallized charges, zonaite & gems)
- 9:20 Chest (Soldier IV Blade)
- 10:05 Chest (Soldier IV Reaper)
- 11:05 Chest (Zonaite Brow)
- 12:10 Chest (Soldier IV Spear)
- 12:50 Exploring the depths of Pikida Stonegrove area (looting chests, bombs, crystallized charges, zonaite & gems)
- 30:00 Miniboss (Obsidian Frox)
- 31:15 Exploring the depths of Pikida Stonegrove area (looting chests, bombs, crystallized charges, zonaite & gems)
- 41:50 Chest (Arrow x10)
- 42:20 Exploring the depths of Pikida Stonegrove area (looting chests, bombs, crystallized charges, zonaite & gems)
- 55:20 Miniboss (Silver Lynel)
- 57:00 Exploring the depths of Pikida Stonegrove area (looting chests, bombs, crystallized charges, zonaite & gems)
- 58:45 Outro
- 0:00:00 Intro
- 0:00:25 Placing Markers on the map
- 0:03:00 Exploring the depths of Pikida Stonegrove area (looting chests, bombs, crystallized charges, zonaite & gems)
- 0:12:30 Miniboss (Blue-White Frox)
- 0:14:20 Exploring the depths of Pikida Stonegrove area (looting chests, bombs, crystallized charges, zonaite & gems)
- 0:24:35 Chest (Yiga Schematic (Sprinkler System) & Large Crystallized Charge)
- 0:25:10 Exploring the depths of Pikida Stonegrove area (looting chests, bombs, crystallized charges, zonaite & gems)
- 0:29:00 Miniboss (Blue-White Frox)
- 0:30:50 Exploring the depths of Pikida Stonegrove area (looting chests, bombs, crystallized charges, zonaite & gems)
- 1:02:45 Chest (Yiga Schematic (Whirling Basher) & Large Crystallized Charge)
- 1:03:15 Reading Hyrule Compendium Entries
- 1:03:25 Outro
- 0:00:00 Intro
- 0:00:25 Placing Markers on the map
- 0:02:20 Exploring the depths of Pikida Stonegrove area (looting chests, bombs, crystallized charges, zonaite & gems)
- 0:06:15 Shortcut to the surface (Lighthouse)
- 0:06:50 Exploring the depths of Pikida Stonegrove area (looting chests, bombs, crystallized charges, zonaite & gems)
- 0:27:30 Miniboss (Blue-White Frox)
- 0:28:45 Exploring the depths of Pikida Stonegrove area (looting chests, bombs, crystallized charges, zonaite & gems)
- 0:33:40 Chest (Kite Shield)
- 0:34:00 Chest (Swallow Bow)
- 0:35:10 Chest (Sundelion)
- 0:35:35 Exploring the depths of Pikida Stonegrove area (looting chests, bombs, crystallized charges, zonaite & gems)
- 0:42:20 Buying Crystallized Charges
- 0:46:00 Energy Well x3 & Energy Cell
- 0:47:00 Buying Crystallized Charges & more
- 0:49:40 Heart Container
- 0:51:10 Chasing a falling star
- 0:53:10 Chest (Arrow x5)
- 0:53:40 Picking up a few things I missed around Lookout Landing
- 0:54:40 Chest (Opal)
- 0:55:20 Chest (Bomb Flower x3)
- 0:56:00 Making a new Great Eagle Bow in Rito Village
- 0:58:15 Heading for Typhlo Ruins Skyview Tower
- 1:01:20 Skyview Tower - Found (Typhlo Ruins Skyview Tower)
- 1:06:25 Reading Hyrule Compendium Entries
- 1:06:45 Outro
- 0:00:00 Intro
- 0:00:25 Placing Markers on the map
- 0:02:00 Exploring Sky area of Great Hyrule Forest (Typhlo Ruins area)
- 0:04:10 Device Dispenser
- 0:06:55 Exploring Sky area of Great Hyrule Forest (Typhlo Ruins area)
- 0:07:20 Shrine Quest - The North Hyrule Sky Crystal - Task Started (Find and bring the crystal to the shrine)
- 0:08:25 Miniboss (Flux Construct 1)
- 0:09:30 Shrine Quest - The North Hyrule Sky Crystal - Task Continued (Find and bring the crystal to the shrine)
- 0:13:30 Shrine Quest - The North Hyrule Sky Crystal - Task Completed (Find and bring the crystal to the shrine)
- 0:13:50 Shrine - Started (Mayam Shrine)
- 0:14:20 Chest (Magic Rod)
- 0:14:50 Shrine - Completed (Mayam Shrine)
- 0:15:20 Korok Seed
- 0:16:10 Exploring Sky area of Great Hyrule Forest (Typhlo Ruins area)
- 0:24:30 Chest (Old Map)
- 0:25:00 Exploring Sky area of Great Hyrule Forest (Typhlo Ruins area)
- 0:26:20 Location (Bravery Island)
- 0:27:00 Minigame (Dive Ceremony)
- 0:28:55 Armor (Glide Tights)
- 0:29:55 Minigame (Dive Ceremony)
- 0:31:20 Exploring Sky area of Great Hyrule Forest (Typhlo Ruins area)
- 0:32:20 Device Dispenser
- 0:33:30 Shrine - Started (Simosiwak Shrine)
- 0:37:30 Chest (Bright Elixir)
- 0:37:45 Shrine - Completed (Simosiwak Shrine)
- 0:38:40 Korok Seed
- 0:39:30 Exploring Great Hyrule Forest (Typhlo Ruins area)
- 0:43:00 Chest (Opal)
- 0:43:30 Exploring Great Hyrule Forest (Typhlo Ruins area)
- 0:45:00 Location (Drenan Highland Chasm)
- 0:45:30 Exploring Great Hyrule Forest (Typhlo Ruins area)
- 0:46:45 Korok Seed
- 0:47:15 Exploring Great Hyrule Forest (Typhlo Ruins area)
- 0:47:50 Korok Seed
- 0:48:00 Exploring Great Hyrule Forest (Typhlo Ruins area)
- 0:49:40 Korok Seed
- 0:50:00 Exploring Great Hyrule Forest (Typhlo Ruins area)
- 0:52:20 Korok Seed
- 0:54:45 Exploring Great Hyrule Forest (Typhlo Ruins area)
- 1:02:30 Korok Seed
- 1:03:00 Exploring Great Hyrule Forest (Typhlo Ruins area)
- 1:03:35 Reading Hyrule Compendium Entries
- 1:05:30 Outro
- 0:00:00 Intro
- 0:00:25 Placing Markers on the map
- 0:02:35 Side Quest - Investigate Typhlo Ruins - Found
- 0:04:35 Side Quest - The Owl Protected By Dragons - Task Started (Find the owl statue)
- 0:05:30 Side Quest - The Owl Protected By Dragons - Task Completed (Find the owl statue)
- 0:05:45 Chest (Saphire x3)
- 0:06:40 Exploring Great Hyrule Forest (Typhlo Ruins area)
- 0:09:30 Chest (Royal Broadsword)
- 0:10:15 Korok Seed x2
- 0:11:35 Exploring Great Hyrule Forest (Typhlo Ruins area)
- 0:13:50 Chest (Forest Dweller's Shield)
- 0:14:40 Exploring Great Hyrule Forest (Typhlo Ruins area)
- 0:15:10 Helping Addison
- 0:17:00 Korok Seed
- 0:17:35 Exploring Great Hyrule Forest (Typhlo Ruins area)
- 0:18:30 Miniboss (Stone Talus)
- 0:20:10 Exploring Great Hyrule Forest (Typhlo Ruins area)
- 0:25:25 Chest (Arrow x5)
- 0:26:00 Exploring Great Hyrule Forest (Typhlo Ruins area)
- 0:30:20 Chest (Rocket x3)
- 0:31:00 Exploring Great Hyrule Forest (Typhlo Ruins area)
- 0:32:30 Shrine - Started (Kikakin Shrine)
- 0:34:00 Chest (Opal)
- 0:35:10 Chest (Zonaite Bow)
- 0:36:20 Chest (Amber)
- 0:36:50 Chest (Small Key)
- 0:37:20 Chest (Luminous )
- 0:38:00 Shrine - Completed (Kikakin Shrine)
- 0:38:45 Exploring Great Hyrule Forest (Typhlo Ruins area)
- 0:40:15 Korok Seed
- 0:42:25 Chest (Light x3)
- 0:43:30 Korok Seed x2
- 0:45:40 Exploring Great Hyrule Forest (Typhlo Ruins area)
- 0:50:20 Miniboss (Gloom Spawn & Phantom Ganon)
- 0:52:00 Chest (Forest Dweller's Spear)
- 0:52:30 Exploring Great Hyrule Forest (Typhlo Ruins area)
- 0:56:40 Miniboss (Hinox)
- 0:57:20 Exploring Great Hyrule Forest (Typhlo Ruins area)
- 1:00:10 Location (Elma Knolls Chasm)
- 1:01:15 Korok Seed
- 1:02:25 Exploring Great Hyrule Forest (Typhlo Ruins area)
- 1:06:30 Miniboss (Hinox)
- 1:07:25 Korok Seed
- 1:08:00 Reading Hyrule Compendium Entries
- 1:08:35 Outro
- 0:00:00 Intro
- 0:00:30 Placing Markers on the map
- 0:02:30 Exploring Great Hyrule Forest (Typhlo Ruins area)
- 0:03:05 Location (Elma Knolls Well)
- 0:03:30 Exploring Elma Knolls Well
- 0:05:40 Chest (Royal Broadsword)
- 0:06:00 Exploring Elma Knolls Well
- 0:07:20 Chest (Saphire)
- 0:07:50 Exploring Elma Knolls Well
- 0:09:40 Shrine - Started (Tenmaten Shrine)
- 0:10:15 Chest (Large Zonai Charge)
- 0:10:30 Shrine - Completed (Tenmaten Shrine)
- 0:11:50 Buying Crystallized Charges & more
- 0:16:00 Expanding inventory at Hestu
- 0:17:00 Heart Container
- 0:18:15 Energy Well
- 0:19:45 Exploring Great Hyrule Forest (Typhlo Ruins area)
- 0:21:50 Helping Addison
- 0:25:40 Exploring Great Hyrule Forest (Typhlo Ruins area)
- 0:29:45 Korok Seed
- 0:30:10 Exploring Great Hyrule Forest (Typhlo Ruins area)
- 0:35:20 Side Quest - The Treasure Hunters - Task Started / Completed (Get the chest)
- 0:39:20 Exploring Great Hyrule Forest (Typhlo Ruins area)
- 0:41:10 Location (Rauru Settlement Ruins Well)
- 0:42:20 Chest (Royal Broadsword)
- 0:42:45 Exploring Great Hyrule Forest (Typhlo Ruins area)
- 0:43:00 Korok Seed
- 0:43:15 Location (Rauru Hillside Cave)
- 0:43:45 Chest (Royal Shield)
- 0:44:10 Bubbul Gem
- 0:44:35 Exploring Rauru Hillside Cave
- 0:46:40 Chest (Silver Lizal Spear)
- 0:47:00 Exploring Great Hyrule Forest (Typhlo Ruins area)
- 0:52:50 Memory 15 (A Master Sword In Time)
- 0:57:55 Korok Seed
- 0:59:10 Helping Addison
- 1:03:40 Reading Hyrule Compendium Entries
- 1:04:30 Outro
- 0:00:00 Intro
- 0:00:25 Placing Markers on the map
- 0:02:00 Shrine - Started (Sikukuu Shrine)
- 0:04:05 Chest (Mighty Zonaite Longsword)
- 0:05:30 Shrine - Completed (Sikukuu Shrine)
- 0:06:05 Exploring Great Hyrule Forest (Typhlo Ruins area)
- 0:10:45 Chest (Spiked-Iron-Ball Hammer)
- 0:11:00 Exploring Great Hyrule Forest (Typhlo Ruins area)
- 0:11:40 First Rock Octorock Encounter
- 0:13:05 Chest (Cobble Crusher)
- 0:13:30 Exploring Great Hyrule Forest (Typhlo Ruins area)
- 0:23:45 Korok Seed x2
- 0:25:40 Chest (Cart x5)
- 0:26:00 Exploring Great Hyrule Forest (Typhlo Ruins area)
- 0:29:40 First Dragon Encounter
- 0:31:30 Exploring Great Hyrule Forest (Typhlo Ruins area)
- 0:36:30 Miniboss (Black Hinox)
- 0:38:00 Korok Seed
- 0:38:40 Exploring Great Hyrule Forest (Typhlo Ruins area)
- 0:41:00 Helping Addison
- 0:42:50 Exploring Great Hyrule Forest (Typhlo Ruins area)
- 0:47:00 Chest (Royal Claymore)
- 0:47:20 Exploring Great Hyrule Forest (Typhlo Ruins area)
- 0:49:10 Chest (Steering Stick x5)
- 0:49:30 Exploring Great Hyrule Forest (Typhlo Ruins area)
- 0:50:30 Korok Seed x2
- 0:52:45 Exploring Great Hyrule Forest (Typhlo Ruins area)
- 0:53:30 Miniboss (Stone Talus)
- 0:54:30 Exploring Great Hyrule Forest (Typhlo Ruins area)
- 0:57:50 Shrine - Started (Mayak Shrine)
- 1:00:00 Chest (Large Zonai Charge)
- 1:01:45 Shrine - Completed (Mayak Shrine)
- 1:02:35 Reading Hyrule Compendium Entries
- 1:03:50 Outro
- 0:00:00 Intro
- 0:00:25 Placing Markers on the map
- 0:02:25 Exploring Great Hyrule Forest (Typhlo Ruins area)
- 0:08:40 Korok Seed
- 0:09:00 Exploring Great Hyrule Forest (Typhlo Ruins area)
- 0:18:35 Chest (Royal Claymore)
- 0:19:00 Exploring Great Hyrule Forest (Typhlo Ruins area)
- 0:23:40 Location (Deplian Badland Cave)
- 0:24:00 Exploring Deplian Badland Cave
- 0:26:05 Chest (Soldier's-Claymore Stick)
- 0:26:30 Exploring Deplian Badland Cave
- 0:27:30 Chest (Forest Dweller's Shield)
- 0:28:00 Exploring Deplian Badland Cave
- 0:29:00 Shrine - Started (Minetak Shrine)
- 0:29:25 Chest (Big Battery)
- 0:29:40 Shrine - Completed (Minetak Shrine)
- 0:30:40 Exploring Deplian Badland Cave
- 0:32:35 Chest (Forest Dweller's Spear)
- 0:33:00 Exploring Deplian Badland Cave
- 0:33:40 Bubbul Gem
- 0:34:30 Exploring Great Hyrule Forest (Typhlo Ruins area)
- 0:38:00 Chest (Arrow x5)
- 0:38:20 Exploring Great Hyrule Forest (Typhlo Ruins area)
- 0:41:00 Going down into the depths
- 0:41:20 Heading straight towards Nikakik Light Root
- 0:42:15 Light Root - Found (Nikakik Light Root)
- 0:43:20 Heading straight towards Katenim Light Root
- 0:47:05 Light Root - Found (Katenim Light Root)
- 0:48:10 Heading straight towards Netamnet Light Root
- 0:49:40 Light Root - Found (Netamnet Light Root)
- 0:51:10 Heading straight towards Uukukis Light Root
- 0:53:05 Light Root - Found (Uukukis Light Root)
- 0:54:00 Catching some fairys
- 0:58:05 Location (Minshi Woods Chasm)
- 0:58:30 Heading straight towards Eknupup Light Root
- 0:59:00 Location (Minshi Grove)
- 0:59:30 Location (Korok Grove)
- 1:00:15 Light Root - Found (Eknupup Light Root)
- 1:01:00 Reading Hyrule Compendium Entries
- 1:02:05 Outro
- 0:00:00 Intro
- 0:00:25 Placing Markers on the map
- 0:04:05 Exploring the depths of Typhlo Ruins area (looting chests, bombs, crystallized charges, zonaite & gems)
- 0:05:55 Light Root - Found (Ramobnukas Light Root)
- 0:07:10 Exploring the depths of Typhlo Ruins area (looting chests, bombs, crystallized charges, zonaite & gems)
- 0:12:25 Location (Forest Coliseum)
- 0:14:00 Miniboss (Black Hinox)
- 0:15:15 Chest (Korok Mask)
- 0:15:45 Exploring the depths of Typhlo Ruins area (looting chests, bombs, crystallized charges, zonaite & gems)
- 0:28:30 Chest (Large Crystallized Charge)
- 0:28:55 Exploring the depths of Typhlo Ruins area (looting chests, bombs, crystallized charges, zonaite & gems)
- 0:33:00 Light Root - Found (Sijin Light Root)
- 0:33:30 Exploring the depths of Typhlo Ruins area (looting chests, bombs, crystallized charges, zonaite & gems)
- 0:37:15 Miniboss (Gloom Spawn & Phantom Ganon)
- 0:39:40 Exploring the depths of Typhlo Ruins area (looting chests, bombs, crystallized charges, zonaite & gems)
- 1:07:40 Light Root - Found (Rikonasum Light Root)
- 1:08:10 Exploring the depths of Typhlo Ruins area (looting chests, bombs, crystallized charges, zonaite & gems)
- 1:08:45 Entering Korok Forest Through The Depths
- 1:09:10 Location (Korok Forest)
- 1:10:20 Outro
- 0:00:00 Intro
- 0:00:25 Placing Markers on the map
- 0:00:30 Exploring Great Hyrule Forest (Typhlo Ruins area)
- 0:03:00 Miniboss (Gloom Spawn & Phantom Ganon)
- 0:04:30 Saving The Great Deku Tree
- 0:06:50 Doing some light shopping
- 0:09:40 Talking to the Great Deku Tree
- 0:10:05 Memory 01 (The Master Sword's Power)
- 0:12:40 Main Quest - Recovering The Hero's Sword - Found / Started
- 0:13:30 Placing Markers on the map
- 0:14:40 Shrine - Started (Musanokir Shrine)
- 0:17:55 Chest (Large Zonai Charge)
- 0:18:15 Shrine - Completed (Musanokir Shrine)
- 0:18:45 Side Quest - Whirly Swirly Things - Found / Started
- 0:19:40 Heart Container
- 0:20:30 Expanding inventory at Hestu
- 0:21:20 Side Quest - The Secret Room - Task Started / Completed (Give Oaki 4 Blue Nightshades and 2 Giant Brightbloom Seeds)
- 0:23:05 Side Quest - Waltons Treasure Hunt - Task Started / Completed (Find The Spear and the Sword)
- 0:24:25 Side Quest - Waltons Treasure Hunt - Task Started / Completed (Find The Shield)
- 0:27:15 Shrine Quest - None Shall Pass - Task Started / Completed (Find and defeat the Stone Talus holding the crystal)
- 0:31:20 Miniboss (Stone Talus)
- 0:32:00 Shrine Quest - None Shall Pass - Task Started / Completed (Get the crystal to the shrine)
- 0:33:30 Shrine - Started (Sakunbomar Shrine)
- 0:33:55 Chest (Diamond)
- 0:34:10 Shrine - Completed (Sakunbomar Shrine)
- 0:36:20 Shrine Quest - Maca's Special Place - Task Started / Completed (Get to Maca's special place)
- 0:38:00 Shrine - Started (Ninjis Shrine)
- 0:38:25 Chest (Mighty Construct Bow)
- 0:38:45 Shrine - Completed (Ninjis Shrine)
- 0:41:00 Location (Lake Saria)
- 0:42:10 Chest (Forest Dweller's Bow)
- 0:43:00 Exploring Great Hyrule Forest (Typhlo Ruins area)
- 0:45:00 Shrine Quest - A Pretty Stone and Five Golden Apples - Task Started (Find The Golden Apples In The Swamp)
- 0:48:05 Chest (Forest Dweller's Shield)
- 0:50:15 Chest (Giant Brightbloom Seed)
- 0:52:50 Shrine Quest - A Pretty Stone and Five Golden Apples - Task Completed (Find The Golden Apples In The Swamp)
- 0:54:15 Shrine Quest - A Pretty Stone and Five Golden Apples - Task Started / Completed (Give Damia The Apples)
- 0:54:35 Shrine Quest - A Pretty Stone and Five Golden Apples - Task Started / Completed (Get The Crystal To The Shrine)
- 0:55:00 Shrine - Started (Pupunke Shrine)
- 0:55:20 Chest (Mighty Zonaite Sword)
- 0:55:45 Shrine - Completed (Pupunke Shrine)
- 0:56:30 Buying Crystallized Charges
- 1:00:05 Energy Well x2 & Energy Cell
- 1:00:50 Buying Crystallized Charges
- 1:01:45 Heading down into the depths again
- 1:02:35 Reading Hyrule Compendium Entries
- 1:02:40 Outro
- 0:00:00 Intro
- 0:00:25 Placing Markers on the map
- 0:03:40 Miniboss (Obsidian Frox)
- 0:05:10 Exploring the Depths of Typhlo Ruins area (minimal looting, skipping non essential items)
- 0:09:00 Chest (Yiga Schematic (Charged Charger) & Large Crystallized Charge)
- 0:09:30 Exploring the Depths of Typhlo Ruins area (minimal looting, skipping non essential items)
- 0:16:00 Chest (Giant Brightbloom Seed x5)
- 0:16:30 Exploring the Depths of Typhlo Ruins area (minimal looting, skipping non essential items)
- 0:17:15 Miniboss (Flux Construct 2)
- 0:18:15 Exploring the Depths of Typhlo Ruins area (minimal looting, skipping non essential items)
- 0:22:00 Big Cluster of Poes
- 0:22:30 Exploring the Depths of Typhlo Ruins area (minimal looting, skipping non essential items)
- 0:23:45 Chest (Yiga Schematic (Aerial Cannon) & Large Crystallized Charge)
- 0:24:15 Exploring the Depths of Typhlo Ruins area (minimal looting, skipping non essential items)
- 0:27:45 Location (Gleeok Den)
- 0:28:00 Miniboss (King Gleeok)
- 0:30:30 Chest (Cap of Twilight)
- 0:31:00 Exploring the Depths of Typhlo Ruins area (minimal looting, skipping non essential items)
- 0:37:50 Chest (Sundelion)
- 0:38:15 Exploring the Depths of Typhlo Ruins area (minimal looting, skipping non essential items)
- 0:39:45 Miniboss (Stone Talus)
- 0:41:00 Miniboss (Obsidian Frox)
- 0:42:25 Exploring the Depths of Typhlo Ruins area (minimal looting, skipping non essential items)
- 0:44:55 Miniboss (Stalnox)
- 0:46:00 Exploring the Depths of Typhlo Ruins area (minimal looting, skipping non essential items)
- 0:47:50 Shortcut to the surface (Lighthouse)
- 0:48:30 Exploring the Depths of Typhlo Ruins area (minimal looting, skipping non essential items)
- 0:55:10 Location (Drena Canyon Mine)
- 0:55:20 Exploring the Depths of Typhlo Ruins area (minimal looting, skipping non essential items)
- 0:58:05 Chest (Large Crystallized Charge)
- 0:58:25 Exploring the Depths of Typhlo Ruins area (minimal looting, skipping non essential items)
- 1:05:05 Chest (Yiga Schematic (Fishing Trawler) & Large Crystallized Charge)
- 1:05:30 Exploring the Depths of Typhlo Ruins area (minimal looting, skipping non essential items)
- 1:07:20 Outro
- 0:00:00 Intro
- 0:00:25 Exploring the Depths of Typhlo Ruins area (minimal looting, skipping non essential items)
- 0:03:30 Miniboss (Flux Construct 2)
- 0:05:00 Exploring the Depths of Typhlo Ruins area (minimal looting, skipping non essential items)
- 0:09:05 Light Root - Found (Uihcoke Light Root)
- 0:10:20 Exploring the Depths of Typhlo Ruins area (minimal looting, skipping non essential items)
- 0:17:05 Exploring the Depths of Typhlo Ruins area (Showing where the "heat barrier" in Eldin Depths starts)
- 0:28:05 Prepping for Eldin Region
- 0:31:30 Buying Crystallized Charges
- 0:36:00 Energy Well x4 & Energy Cell
- 0:37:10 Prepping for Eldin Region
- 0:42:40 Heading straight towards Eldin Canyon Skyview Tower
- 0:46:00 Skyview Tower (Eldin Canyon Skyview Tower)
- 0:48:55 Chest (Large Zonai Charge)
- 0:49:15 Placing Markers on the map
- 0:50:00 Exploring Eldin (Eldin Canyon area)
- 0:50:30 Chest (Rocket x3)
- 0:51:10 Shrine - Started (Ekochui Shrine)
- 0:52:40 Chest (Mighty Zonaite Shield)
- 0:54:15 Shrine - Completed (Ekochui Shrine)
- 0:55:25 Stable (Woodland Stable)
- 0:55:40 Side Adventure - Serenade To A Great Fairy - Task Started / Completed (Repair the Breezer and bring the Stable Trotters
- 1:04:30 Great Fairy (Tera)
- 1:05:05 Upgrading Equipment at Great Fairy Tera
- 1:14:50 Reading Hyrule Compendium Entries
- 1:15:00 Outro
- 0:00:00 Intro
- 0:00:30 Placing Markers on the map
- 0:02:00 Exploring Eldin (Eldin Canyon area)
- 0:07:50 Chest (Giant Brightbloom Seed x5)
- 0:08:15 Location (Woodland Stable Well)
- 0:09:00 Exploring Eldin (Eldin Canyon area)
- 0:10:45 Side Quest - A Picture For Woodland Stable - Found / Started
- 0:11:30 Exploring Eldin (Eldin Canyon area)
- 0:12:00 Chest (Amber)
- 0:12:20 Exploring Eldin (Eldin Canyon area)
- 0:12:40 Side Adventure - The Hunt For Bubbul Gems - Task Started / Completed (Give Koltin a Bubbul Gem)
- 0:15:20 Armor / Outfit (Bokoblin Mask)
- 0:17:20 Side Adventure - The Search For Koltin - Found / Started
- 0:17:35 Location (Pico Pond Cave)
- 0:18:20 Bubbul Gem
- 0:18:45 Exploring Eldin (Eldin Canyon area)
- 0:23:45 Chest (Arrow x5)
- 0:24:20 Exploring Eldin (Eldin Canyon area)
- 0:25:50 Chest (Royal Broadsword)
- 0:26:15 Exploring Eldin (Eldin Canyon area)
- 0:27:20 Korok Seed
- 0:27:45 Chest (Purple Rupee)
- 0:28:25 Chest (Royal Bow)
- 0:28:45 Exploring Eldin (Eldin Canyon area)
- 0:30:30 Korok Seed
- 0:31:20 Exploring Eldin (Eldin Canyon area)
- 0:33:45 Korok Seed
- 0:34:05 Exploring Eldin (Eldin Canyon area)
- 0:34:40 Chest Dissappeared???
- 0:35:00 Exploring Eldin (Eldin Canyon area)
- 0:37:20 Chest (Opal)
- 0:38:10 Exploring Eldin (Eldin Canyon area)
- 0:39:30 Korok Seed
- 0:40:00 Looting Mighty Tistles & buyin ingredients for the Great Fairy Enhancements
- 0:46:40 Side Adventure - Serenade To Mija - Task Started (Repait the Breezer and Bring The Stable Trotters to the Great Fairy)
- 0:50:30 Side Adventure - Serenade To Mija - Task Started (Repait the Breezer and Bring The Stable Trotters to the Great Fairy)
- 0:52:50 Great Fairy (Mija)
- 0:53:20 Upgrading Gear at Great Fairy Mija
- 1:01:40 Heart Container
- 1:02:30 Shopping
- 1:03:40 Reading Hyrule Compendium Entries
- 1:03:58 Outro
- 0:00:00 Intro
- 0:00:30 Main Quest - Master Sword - Task Started (Pull Master Sword from Flying Light Dragon)
- 0:02:20 Main Quest - Master Sword - Task Completed (Pull Master Sword from Flying Light Dragon)
- 0:03:30 Memory 18 (Zelda's Wish)
- 0:07:40 Getting Dragon Parts from the Light Dragon
- 0:15:25 Placing Markers on the map
- 0:17:15 Exploring Eldin (Eldin Canyon area)
- 0:17:55 Chest (Opal)
- 0:18:25 Exploring Eldin (Eldin Canyon area)
- 0:19:25 Chest (Roayl Claymore)
- 0:20:00 Exploring Eldin (Eldin Canyon area)
- 0:23:10 Helping Addison
- 0:24:55 Exploring Eldin (Eldin Canyon area)
- 0:25:50 Already picked this chest in previous episode
- 0:26:10 Exploring Eldin (Eldin Canyon area)
- 0:27:55 Korok Seed
- 0:28:10 Exploring Eldin (Eldin Canyon area)
- 0:30:30 Chest (Silver Lizal Spear)
- 0:31:00 Exploring Eldin (Eldin Canyon area)
- 0:35:50 Korok Seed
- 0:36:20 Exploring Eldin (Eldin Canyon area)
- 0:37:45 Chest (Silver Lizal Blade)
- 0:38:15 Exploring Eldin (Eldin Canyon area)
- 0:40:15 Miniboss (Igneo Talus)
- 0:41:15 Exploring Eldin (Eldin Canyon area)
- 0:43:20 Korok Seed x2
- 0:46:25 Shrine - Started (Timawak Shrine)
- 0:48:30 Chest (Mighty Zonaite Shield)
- 0:51:15 Shrine - Completed (Timawak Shrine)
- 0:52:00 Exploring Eldin (Eldin Canyon area)
- 0:55:00 Side Quest - Meat For Meat - Task Started / Completed (Speak to Mezer)
- 0:56:10 Korok Seed
- 0:57:05 Chest (Purple Rupee)
- 0:58:25 Side Quest - Meat For Meat - Task Started (Enter the West Restaurant Cave)
- 1:00:05 Side Quest - Meat For Meat - Task Completed (Enter the West Restaurant Cave)
- 1:02:30 Bubbul Gem
- 1:03:00 Side Quest - Meat For Meat - Task Started (Grab the meat and return to Mezer)
- 1:04:45 Side Quest - Meat For Meat - Completed (Grab the meat and return to Mezer)
- 1:06:15 Reading Hyrule Compendium Entries
- 1:06:50 Outro
- 0:00:00 Intro
- 0:00:25 Placing Markers on the Map
- 0:03:15 Side Quest - Cash In On Ripened Flint - Task Started (Give Gomo flint to help him find Ripened flint)
- 0:05:15 Exploring Eldin (Eldin Canyon area)
- 0:06:40 Chest (Ruby)
- 0:07:05 Exploring Eldin (Eldin Canyon area)
- 0:11:05 Korok Seed
- 0:11:25 Exploring Eldin (Eldin Canyon area)
- 0:12:45 Fusing Monster Parts to the Master Sword
- 0:14:00 Chest (Energizing Elixir)
- 0:14:20 Exploring Eldin (Eldin Canyon area)
- 0:15:30 Korok Seed
- 0:18:20 Exploring Eldin (Eldin Canyon area)
- 0:20:40 Chest (Silver Lizal Reaper)
- 0:21:05 Forgot to mark a Korok on the map
- 0:21:25 Exploring Eldin (Eldin Canyon area)
- 0:21:50 Korok Seed
- 0:22:15 Exploring Eldin (Eldin Canyon area)
- 0:24:10 Chest (Battery x3)
- 0:24:30 Exploring Eldin (Eldin Canyon area)
- 0:27:20 Location (Southern Mine)
- 0:28:30 Chest (Rusty Shield)
- 0:29:20 Korok Seed
- 0:29:35 Exploring Eldin (Eldin Canyon area)
- 0:30:10 Location (Southern Mine Cave)
- 0:31:05 Chest (Cobble Crusher)
- 0:31:30 Bubbul Gem
- 0:31:50 Exploring Eldin (Eldin Canyon area)
- 0:37:00 Chest (Arrow x5)
- 0:37:30 Exploring Eldin (Eldin Canyon area)
- 0:39:15 Korok Seed
- 0:39:35 Exploring Eldin (Eldin Canyon area)
- 0:42:00 Chest (Red Rupee & Royal Bow & Rusty Shield)
- 0:42:30 Exploring Eldin (Eldin Canyon area)
- 0:48:10 Chest (Bomb Flower x5)
- 0:48:30 Exploring Eldin (Eldin Canyon area)
- 0:49:30 Korok Seed
- 0:50:05 Exploring Eldin (Eldin Canyon area)
- 0:52:50 Chest (Arrow x10)
- 0:53:20 Exploring Eldin (Eldin Canyon area)
- 0:57:05 Location (Goronbi River Cave)
- 0:57:55 Chest (Ruby)
- 0:58:55 Chest (Rusty Shield)
- 0:59:15 Exploring Goronbi River Cave
- 1:00:25 Chest (Fire-Breath Lizal Blade)
- 1:00:55 Chest (Ember Shirt)
- 1:01:40 Already Completed this quest, see previous episodes
- 1:02:00 Exploring Goronbi River Cave
- 1:03:50 Bubbul Gem
- 1:05:05 Reading Hyrule Compendium Entries
- 1:06:30 Outro
- 0:00:00 Intro
- 0:00:25 Placing Markers on the Map
- 0:02:00 Exploring Eldin (Eldin Canyon area)
- 0:02:25 Korok Seed
- 0:02:40 Exploring Eldin (Eldin Canyon area)
- 0:03:10 Chest (Bright Bloom Seed x5)
- 0:03:30 Exploring Eldin (Eldin Canyon area)
- 0:05:55 Helping Addison
- 0:07:35 Exploring Eldin (Eldin Canyon area)
- 0:13:40 Side Quest - Amber Dealer - Task Started / Completed (Sell Ramella 10 Amber Stones)
- 0:15:15 Location (Goron City)
- 0:15:45 Main Quest - Yunobo of Goron City - Task Started (Reach YunoboCo HQ and talk to Yunobo)
- 0:20:00 Exploring Goron City
- 0:21:30 Armour / Outfit (Flamebreaker Boots, Flamebreaker Armor & Flamebreaker Helm)
- 0:22:20 Exploring Goron City
- 0:24:40 Side Quest - Simmerstone Springs - Found / Started
- 0:25:45 Korok Seed
- 0:26:05 Exploring Goron City
- 0:26:45 Korok Seed
- 0:27:00 Exploring Goron City
- 0:28:45 Korok Seed
- 0:29:00 Exploring Goron City
- 0:37:15 Shrine - Started (Marakuguc Shrine)
- 0:40:20 Chest (Mighty Construct Bow)
- 0:41:40 Shrine - Completed (Marakuguc Shrine)
- 0:43:15 Exploring Goron City
- 0:43:30 Korok Seed
- 0:44:00 Exploring Eldin (Eldin Canyon area)
- 0:47:35 Chest (Royal Shield)
- 0:47:50 Exploring Eldin (Eldin Canyon area)
- 0:49:40 Korok Seed
- 0:50:10 Exploring Eldin (Eldin Canyon area)
- 0:54:45 Korok Seed
- 0:55:10 Side Quest - The Ancient City Gorondia - Task Started / Completed (Get Dugby to YunoboCo HQ)
- 0:56:35 Location (YunoboCo HQ)
- 0:57:40 Exploring Eldin (Eldin Canyon area)
- 1:01:30 Korok Seed
- 1:02:10 Reading Hyrule Compendium Entries
- 1:02:50 Outro
- 0:00:00 Intro
- 0:00:25 Placing Markers on the Map
- 0:03:30 Main Quest - Yunobo of Goron City - Task Started / Completed (Reach YunoboCo HQ and talk to Yunobo)
- 0:04:30 Main Quest - Yunobo of Goron City - Task Started (Defeat the Evil Boss)
- 0:05:45 Main Quest - Yunobo of Goron City - Task Completed (Defeat the Evil Boss)
- 0:09:45 Main Quest - Yunobo of Goron City - Task Started (Reach the top of Death Mountain)
- 0:10:10 Korok Seed
- 0:10:35 Exploring Eldin (Eldin Canyon area)
- 0:11:20 Side Quest - The Search For Koltin - Task Completed (Find Koltin)
- 0:13:25 Shopping at Koltins
- 0:14:00 Armor / Outfit (Moblin Mask)
- 0:15:55 Armor / Outfit (Mystic Robe)
- 0:16:55 Armor / Outfit (Lizalfos Mask)
- 0:17:45 Armor / Outfit (Mystic Trousers)
- 0:18:35 Armor / Outfit (Horriblin Mask)
- 0:19:30 Armor / Outfit (Lynel Mask)
- 0:20:20 Testing the outfits/armors
- 0:21:50 Exploring Eldin (Eldin Canyon area)
- 0:24:45 Korok Seed x2
- 0:29:30 Exploring Eldin (Eldin Canyon area)
- 0:30:15 Getting help from Satori
- 0:30:50 Exploring Eldin (Eldin Canyon area)
- 0:31:50 Korok Seed
- 0:32:35 Exploring Eldin (Eldin Canyon area)
- 0:33:15 Miniboss (Gloom Spawn & Phantom Ganon)
- 0:35:00 Exploring Eldin (Eldin Canyon area)
- 0:38:20 Chest (Arrow x5)
- 0:38:40 Chest (Fire-Breath Lizafols Horn)
- 0:39:00 Exploring Eldin (Eldin Canyon area)
- 0:42:50 Chest (Spiny-Bone Spear)
- 0:43:35 Exploring Eldin (Eldin Canyon area)
- 0:46:30 Location (YunoboCo HQ South Cave)
- 0:47:00 Exploring YunoboCo HQ South Cave
- 0:49:30 Chest (Ember Headdress)
- 0:51:05 Bubbul Gem
- 0:51:30 Exploring Eldin (Eldin Canyon area)
- 0:56:45 Location (YunoboCo HQ East Cave)
- 0:57:30 Exploring YunoboCo HQ East Cave
- 0:58:50 Bubbul Gem
- 0:59:10 Exploring YunoboCo HQ East Cave
- 0:59:45 Chest (Cobble Crusher)
- 1:00:00 Exploring YunoboCo HQ East Cave
- 1:02:45 Shrine - Started (Isisim Shrine)
- 1:07:50 Chest (Magic Rod)
- 1:08:05 Shrine - Completed (Isisim Shrine)
- 1:09:05 Reading Hyrule Compendium Entries
- 1:09:35 Outro
- 0:00 Intro
- 0:25 Placing Markers on the Map
- 1:15 Exploring Eldin (Eldin Canyon area)
- 4:40 Korok Seed x2
- 8:10 Exploring Eldin (Eldin Canyon area)
- 8:50 Location (Isle Of Rabac Gallery)
- 9:15 Exploring Isle Of Rabac Gallery
- 12:15 Chest (Royal Broadsword)
- 12:35 Chest (Cobble Crusher)
- 13:00 Exploring Isle Of Rabac Gallery
- 14:55 Bubbul Gem
- 15:15 Exploring Isle Of Rabac Gallery
- 17:00 Chest (Ruby)
- 17:20 Exploring Isle Of Rabac Gallery
- 18:35 Shrine - Started (Jiotak Shrine)
- 19:10 Chest (Magic Staff)
- 19:30 Shrine - Completed (Jiotak Shrine)
- 20:10 Exploring Isle Of Rabac Gallery
- 23:20 Exploring Eldin (Eldin Canyon area)
- 26:45 Cooking up some meals
- 30:30 Exploring Eldin (Eldin Canyon area)
- 32:30 Chest (Brightbloom Seed x10)
- 33:00 Exploring Eldin (Eldin Canyon area)
- 36:00 Korok Seed x2
- 39:00 Exploring Eldin (Eldin Canyon area)
- 40:55 Miniboss (Igneo Talus)
- 42:50 Chest (Bomb Flower x3)
- 46:10 Location (Death Mountain Foothill Cave)
- 46:55 Exploring Death Mountain Foothill Cave
- 47:40 Chest (Cobble-Crusher Halberd)
- 48:00 Exploring Death Mountain Foothill Cave
- 48:30 Chest (Rusty Shield)
- 48:45 Chest (Ruby)
- 49:00 Exploring Death Mountain Foothill Cave
- 49:50 Bubbul Gem
- 50:10 Exploring Death Mountain Foothill Cave
- 51:30 Exploring Eldin (Eldin Canyon area)
- 56:10 Korok Seed
- 56:35 Exploring Death Mountain Foothill Cave
- 57:35 Outro
- 0:00:00 Intro
- 0:00:25 Placing Markers on the Map
- 0:00:35 Exploring Eldin (Eldin Canyon area)
- 0:01:40 Location (Death Mountain West Tunnel)
- 0:02:20 Side Quest - The Abandoned Laborer - Task Started / Completed (Help Mota get out of the tunnel)
- 0:05:25 Chest (Cobble Crusher)
- 0:05:40 Bubbul Gem
- 0:06:00 Exploring Eldin (Eldin Canyon area)
- 0:07:35 Korok Seed x2
- 0:09:10 Exploring Eldin (Eldin Canyon area)
- 0:12:20 Chest (Royal Claymore, Purple Rupee, Arrow x5)
- 0:13:00 Main Quest - Yunobo of Goron City - Task Continued (Reach the Top of Death Mountain:)
- 0:21:40 Shrine - Started (Sitsum Shrine)
- 0:24:00 Chest (Mighty Construct Bow)
- 0:25:50 Shrine - Completed (Sitsum Shrine)
- 0:27:30 Buying Crystallized Charges
- 0:31:20 Heart Container
- 0:33:30 Main Quest - Yunobo of Goron City - Task Continued (Reach the Top of Death Mountain)
- 0:34:25 Main Quest - Yunobo of Goron City - Task Completed (Reach the Top of Death Mountain)
- 0:34:45 Main Quest - Yunobo of Goron City - Task Started (Moragia Boss Fight)
- 0:38:30 Main Quest - Yunobo of Goron City - Task Completed (Moragia Boss Fight)
- 0:38:50 Location (Death Mountain Chasm)
- 0:39:50 Light Root - Found (Mustis Light Root)
- 0:40:50 Placing Markers on the map
- 0:41:50 Main Quest - Yunobo of Goron City - Task Started (Explore The Depths)
- 0:48:50 Chest (Mighty Construct Bow)
- 0:50:30 Device Dispenser
- 0:51:25 Main Quest - Yunobo of Goron City - Task Continued (Explore The Depths)
- 0:53:15 Chest (Mighty Construct Bow)
- 0:53:35 Main Quest - Yunobo of Goron City - Task Continued (Explore The Depths)
- 0:56:15 Light Root - Found (Cugukaram Light Root)
- 0:56:50 Placing Markers on the map
- 0:59:30 Main Quest - Yunobo of Goron City - Task Continued (Explore The Depths)
- 1:00:30 Location (Abandoned Eldin Mine)
- 1:01:10 Chest (Large Crystallized Charge)
- 1:01:30 Will get back here later
- 1:02:05 Buying Crystallized Charges
- 1:03:35 Outro
- 0:00:00 Intro
- 0:00:25 Main Quest - Yunobo of Goron City - Task Continued (Explore The Depths)
- 0:04:30 Chest (Zonai Charge)
- 0:05:00 Main Quest - Yunobo of Goron City - Task Continued (Explore The Depths)
- 0:08:00 Chest (Zonai Charge)
- 0:08:50 Chest (Mighty Construct Bow)
- 0:09:20 Main Quest - Yunobo of Goron City - Task Continued (Explore The Depths)
- 0:12:25 Chest (Mighty Zonaite Shield)
- 0:13:20 Chest (Mighty Construct Bow)
- 0:14:15 Light Root - Found (Misisi Light Root)
- 0:15:15 Placing Markers on the map
- 0:18:20 Chest (Mighty Zonaite Shield)
- 0:18:45 Main Quest - Yunobo of Goron City - Task Continued (Explore The Depths)
- 0:21:55 Chest (Arrow x5)
- 0:22:10 Main Quest - Yunobo of Goron City - Task Continued (Explore The Depths)
- 0:25:30 Chest (Zonai Charge)
- 0:26:20 Chest (Zonai Charge)
- 0:26:35 Main Quest - Yunobo of Goron City - Task Continued (Explore The Depths)
- 0:31:45 Chest (Large Zonaite)
- 0:32:15 Main Quest - Yunobo of Goron City - Task Continued (Explore The Depths)
- 0:33:20 Chest (Mighty Construct Bow)
- 0:33:45 Main Quest - Yunobo of Goron City - Task Continued (Explore The Depths)
- 0:35:35 Chest (Arrow x5)
- 0:36:00 Main Quest - Yunobo of Goron City - Task Continued (Explore The Depths)
- 0:38:30 Main Quest - Yunobo of Goron City - Task Completed (Explore The Depths)
- 0:39:30 Main Quest - Yunobo of Goron City - Task Started (Open the 5 Padlocks in Fire Temple)
- 0:39:50 Chest (Arrow x10)
- 0:40:10 Main Quest - Yunobo of Goron City - Task Continued (Open the 5 Padlocks in Fire Temple)
- 0:42:20 Placing Markers on the map
- 0:43:10 Main Quest - Yunobo of Goron City - Task Continued (Open the 5 Padlocks in Fire Temple)
- 0:45:55 Chest (Mighty Zonaite Shield)
- 0:46:20 Main Quest - Yunobo of Goron City - Task Continued (Open the 5 Padlocks in Fire Temple)
- 0:48:55 Lock 1
- 0:49:30 Main Quest - Yunobo of Goron City - Task Continued (Open the 5 Padlocks in Fire Temple)
- 0:52:05 Chest (Arrow x10)
- 0:52:30 Main Quest - Yunobo of Goron City - Task Continued (Open the 5 Padlocks in Fire Temple)
- 0:57:10 Lock 2
- 0:57:55 Chest (Zonaite x3)
- 0:58:20 Main Quest - Yunobo of Goron City - Task Continued (Open the 5 Padlocks in Fire Temple)
- 0:59:40 Chest (Arrow x10)
- 1:00:50 Chest (Arrow x10)
- 1:01:20 Main Quest - Yunobo of Goron City - Task Continued (Open the 5 Padlocks in Fire Temple)
- 1:03:20 Outro
- 0:00:00 Intro
- 0:00:25 Placing Markers on the Map
- 0:01:00 Main Quest - Yunobo of Goron City - Task Continued (Open the 5 Padlocks in Fire Temple)
- 0:04:40 Lock 3
- 0:05:45 Chest (Arrow x5)
- 0:07:45 Chest (Ruby)
- 0:08:05 Main Quest - Yunobo of Goron City - Task Continued (Open the 5 Padlocks in Fire Temple)
- 0:09:20 Chest (Diamond)
- 0:15:15 Chest (Mighty Zonaite Shield)
- 0:15:30 Main Quest - Yunobo of Goron City - Task Continued (Open the 5 Padlocks in Fire Temple)
- 0:17:25 Lock 4
- 0:19:50 Main Quest - Yunobo of Goron City - Task Continued (Open the 5 Padlocks in Fire Temple)
- 0:23:00 Chest (Large Zonaite Charge)
- 0:23:30 Main Quest - Yunobo of Goron City - Task Continued (Open the 5 Padlocks in Fire Temple)
- 0:26:30 Chest (Arrow x10)
- 0:26:50 Main Quest - Yunobo of Goron City - Task Continued (Open the 5 Padlocks in Fire Temple)
- 0:30:20 Chest (Mighty Zonaite Longsword)
- 0:30:40 Lock 5
- 0:31:00 Main Quest - Yunobo of Goron City - Task Completed (Open the 5 Padlocks in Fire Temple)
- 0:32:10 Main Quest - Yunobo of Goron City - Task Started (Marbled Gohma Boss Fight)
- 0:37:30 Main Quest - Yunobo of Goron City - Task Completed (Marbled Gohma Boss Fight)
- 0:38:30 Heart Container
- 0:38:50 Plot / Cutscene
- 0:48:00 Main Quest - Yunobo of Goron City - Task Started / Completed (Return to Goron City)
- 0:49:50 Special Ability (Vow of Yunobo)
- 0:50:55 Side Quest - The Hidden Treasure At Lizard Lakes - Found / Started
- 0:52:45 Side Quest - Moon-Gazing Gorons - Found / Started
- 0:54:45 Re-Exploring the Goron City
- 0:55:35 Side Quest - Soul of The Gorons - Task Started / Completed (Give Fugo 3 Diamonds, A Cobble Crusher and Five Flint Pieces
- 0:58:00 Special Weapon (Boulder Breaker)
- 0:59:00 Buying Crystallized Charges
- 1:03:25 Side Quest - Village Attacked by Pirates - Found / Started
- 1:04:55 Energy Well x4 & Energy Cell
- 1:07:00 Reading Hyrule Compendium Entries
- 1:07:15 Outro
- 0:00:00 Intro
- 0:00:25 Placing Markers on the Map
- 0:03:40 Side Quest - A Picture for Woodland Stable - Task Completed (Take a picture of Gorons Soaking in hot springs)
- 0:04:30 Side Quest - The Ancient City Gorondia? - Task Started (Follow Dugby)
- 0:05:55 Side Quest - The Ancient City Gorondia? - Task Completed (Follow Dugby)
- 0:06:30 Side Quest - The Ancient City Gorondia? - Task Started (Help Dugby clear the tracks)
- 0:09:30 Side Quest - The Ancient City Gorondia? - Task Completed (Help Dugby clear the tracks)
- 0:10:10 Exploring Eldin (Eldin Canyon area)
- 0:11:40 Side Quest - Rock Roast or Dust - Task Started (Bring Cooke a rock roast)
- 0:14:25 Side Quest - Rock Roast or Dust - Task Completed (Bring Cooke a rock roast)
- 0:15:30 Side Quest -Cash In On Ripened Flint - Task Continued / Completed (Give Gomo a ripened flint)
- 0:17:10 Exploring Eldin (Eldin Canyon area)
- 0:19:55 Chest (Mighty Zonaite Shield)
- 0:21:00 Chest (Cobble Crusher)
- 0:21:30 Exploring Eldin (Eldin Canyon area)
- 0:27:15 Helping Addison
- 0:29:55 Side Quest - A Picture For Woodland Stable - Task Completed (Give Kish the picture)
- 0:31:30 Exploring Eldin (Eldin Canyon area)
- 0:33:50 Miniboss (Igneo Talus)
- 0:36:10 Miniboss (Boss Bokoblin)
- 0:37:05 Exploring Eldin (Eldin Canyon area)
- 0:38:25 Chest (Mighty Zonaite Longsword)
- 0:38:55 Exploring Eldin (Eldin Canyon area)
- 0:39:25 Location (Lizard's Burrow)
- 0:39:50 Bubbul Gem
- 0:40:20 Chest (Vah Rudania Divine Helm)
- 0:40:45 Side Quest - The Hidden Treasure At Lizard Lakes - Task Completed (Find the treasure)
- 0:41:10 Exploring Eldin (Eldin Canyon area)
- 0:43:00 Korok Seed
- 0:43:45 Korok Seed
- 0:44:35 Korok Seed
- 0:45:00 Exploring Eldin (Eldin Canyon area)
- 0:46:10 Side Adventures - Bring Peace To Eldin - Task Started / Completed (Help Toren and his crew defeat the enemies)
- 0:50:20 Exploring Eldin (Eldin Canyon area)
- 0:51:00 Bubbul Gem
- 0:51:40 Exploring Eldin (Eldin Canyon area)
- 0:54:25 Miniboss (Stalnox)
- 0:55:10 Exploring Eldin (Eldin Canyon area)
- 0:56:50 Chest (Cobble Crusher)
- 0:57:20 Exploring Eldin (Eldin Canyon area)
- 0:59:00 Shrine - Started (Sibajitak Shrine)
- 1:00:55 Chest (Mighty Zonaite Longsword)
- 1:02:30 Shrine - Completed (Sibajitak Shrine)
- 1:03:30 Outro
- 0:00:00 Intro
- 0:00:25 Placing Markers on the Map
- 0:02:45 Exploring Eldin (Eldin Canyon area)
- 0:04:05 Miniboss (Igneo Talus)
- 0:07:15 Exploring Eldin (Eldin Canyon area)
- 0:09:05 Chest (Cobble Crusher)
- 0:09:40 Korok Seed
- 0:10:00 Exploring Eldin (Eldin Canyon area)
- 0:12:55 Chest (Cobble Crusher)
- 0:13:30 Chest (Cobble Crusher)
- 0:14:00 Exploring Eldin (Eldin Canyon area)
- 0:16:05 Korok Seed
- 0:16:25 Chest (Silver Rupee)
- 0:16:45 Exploring Eldin (Eldin Canyon area)
- 0:17:40 Miniboss (Talus)
- 0:18:30 Exploring Eldin (Eldin Canyon area)
- 0:20:35 Helping Addison
- 0:24:45 Shrine - Started (Kimayat Shrine)
- 0:29:25 Chest (Captain IV Reaper)
- 0:29:40 Shrine - Completed (Kimayat Shrine)
- 0:30:15 Exploring Eldin (Eldin Canyon area)
- 0:31:10 Korok Seed
- 0:32:00 Chest (Steering Stick x5)
- 0:32:25 Exploring Eldin (Eldin Canyon area)
- 0:40:20 Location (Death Mountain East Tunnel)
- 0:40:40 Exploring Death Mountain East Tunnel
- 0:41:30 Bubbul Gem
- 0:41:45 Exploring Death Mountain East Tunnel
- 0:42:40 Miniboss (Igneo Talus)
- 0:44:35 Shrine Quest - The Death Caldera Crystal - Task Started (Bring the crystal to the shrine)
- 0:46:45 Shrine Quest - The Death Caldera Crystal - Task Completed (Bring the crystal to the shrine)
- 0:47:30 Shrine - Started (Momosik Shrine)
- 0:48:05 Chest (Big Battery)
- 0:48:20 Shrine - Completed (Momosik Shrine)
- 0:49:00 Exploring Eldin (Eldin Canyon area)
- 0:51:00 Chest (Ancient Blade)
- 0:51:55 Chest (Fire-Breath Lizalfos Horn)
- 0:52:20 Exploring Eldin (Eldin Canyon area)
- 0:57:25 Helping Addison
- 0:58:45 Exploring Eldin (Eldin Canyon area)
- 0:59:15 Korok Seed
- 0:59:35 Exploring Eldin (Eldin Canyon area)
- 1:00:40 Korok Seed
- 1:01:20 Outro
- 0:00 Intro
- 0:25 Placing Markers on the Map
- 2:20 Exploring Eldin (Eldin Canyon area)
- 4:50 Chest (Cobble Crusher)
- 5:10 Exploring Eldin (Eldin Canyon area)
- 8:50 Location (Shadow Hamlet Ruins Well)
- 9:05 Korok Seed
- 10:00 Chest (Steel Lizal Shield)
- 11:15 Chest (Ruby)
- 11:40 Exploring Eldin (Eldin Canyon area)
- 16:45 Chest (Brightbloom Seed x5)
- 19:00 Chest (Bomb Flower x5)
- 19:20 Exploring Eldin (Eldin Canyon area)
- 21:15 Helping Addison
- 23:40 Korok Seed
- 24:10 Exploring Eldin (Eldin Canyon area)
- 26:00 Farming Dragon Parts
- 34:10 Exploring Eldin (Eldin Canyon area)
- 35:30 Korok Seed
- 36:15 Miniboss (Igneo Talus)
- 37:10 Exploring Eldin (Eldin Canyon area)
- 38:25 Chest (Cobble Crusher)
- 39:00 Exploring Eldin (Eldin Canyon area)
- 42:10 Chest (Sage's Will)
- 43:30 Exploring Eldin (Eldin Canyon area)
- 46:20 Korok Seed
- 46:45 Heading towards Koltin to Trade Bubbul Gems
- 52:45 Exploring Eldin (Eldin Canyon area)
- 54:15 Miniboss (White Boss Bokoblin)
- 56:35 Korok Seed
- 57:30 Outro
- 0:00:00 Intro
- 0:00:25 Placing Markers on the Map
- 0:01:40 Exploring Eldin (Eldin Canyon area)
- 0:02:20 Location (Gorko Tunnel)
- 0:02:45 Exploring Gorko Tunnel
- 0:05:00 Chest (Ancient Blade)
- 0:05:15 Exploring Gorko Tunnel
- 0:06:00 Side Quest - Simmerstone Springs - Task Started / Completed (Find Simmerstone Springs)
- 0:08:35 Bubbul Gem
- 0:09:00 Exploring Eldin (Eldin Canyon area)
- 0:11:15 Korok Seed x2
- 0:13:40 Exploring Eldin (Eldin Canyon area)
- 0:15:35 Side Quest - Mine-Cart Land: Open For Business! - Task Started / Completed (Clear the course)
- 0:22:15 Side Quest - Mine-Cart Land: Quickshot Course! - Task Started / Completed (Clear the course)
- 0:25:00 Side Quest - Mine-Cart Land: Death Mountain - Task Started / Completed (Clear the course)
- 0:28:05 Equipment (Goron Fabric)
- 0:29:25 Solem Vow Of Tulin: Sage of Wind
- 0:30:05 Heart Container
- 0:30:40 Buying arrows
- 0:31:55 Buying Crystallized Charges
- 0:35:10 Energy Well x3 & Energy Cell
- 0:36:45 Exploring Eldin (Eldin Canyon area)
- 0:40:10 Chest (Spiked-Iron-Ball Hammer)
- 0:40:30 Exploring Eldin (Eldin Canyon area)
- 0:41:35 Location (East Restaurant Cave)
- 0:42:00 Exploring East Restaurant Cave
- 0:42:50 Chest (Rocket)
- 0:43:15 Bubbul Gem
- 0:44:05 Chest (Ruby)
- 0:44:30 Exploring Eldin (Eldin Canyon area)
- 0:47:40 Miniboss (Igneo Talus)
- 0:50:55 Exploring Eldin (Eldin Canyon area)
- 0:51:15 Korok Seed
- 0:51:50 Exploring Eldin (Eldin Canyon area)
- 0:58:10 Chest (Lizal Boomerang & Arrow x5 & Brigtbloom Seed x5)
- 0:58:50 Exploring Eldin (Eldin Canyon area)
- 1:00:40 Chest (Rusty Shield)
- 1:01:00 Miniboss (Gloom Spawn & Phantom Ganon)
- 1:05:20 Location (Lake Intenoch Cave)
- 1:05:50 Outro
- 0:00 Intro
- 0:25 Placing Markers on the Map
- 2:45 Location (Lake Intenoch Cave)
- 3:05 Exploring Lake Intenoch Cave
- 5:00 Chest (Mighty Construct Bow)
- 5:30 Exploring Lake Intenoch Cave
- 11:00 Chest (Steel Lizal Shield)
- 12:00 Shrine Quest - The Lake Intenoch Cave Crystal - Task Started / Completed (Bring the crystal to the Shrine)
- 16:00 Shrine - Started (Moshapin Shrine)
- 16:50 Chest (Mighty Zonaite Shield)
- 17:10 Shrine - Completed (Moshapin Shrine)
- 18:20 Exploring Eldin (Eldin Canyon area)
- 19:20 Korok Seed
- 20:30 Exploring Eldin (Eldin Canyon area)
- 21:45 Korok Seed
- 22:55 Exploring Eldin (Eldin Canyon area)
- 24:40 Chest (Arrow x5)
- 25:00 Exploring Eldin (Eldin Canyon area)
- 26:40 Chest (Rocket x3)
- 27:00 Exploring Eldin (Eldin Canyon area)
- 28:40 Wierd dudes, we will revisit them later on
- 29:30 Exploring Eldin (Eldin Canyon area)
- 30:10 Chest (Zonaite x3)
- 30:40 Exploring Eldin (Eldin Canyon area)
- 32:10 Korok Seed x2
- 34:15 Exploring Eldin (Eldin Canyon area)
- 35:05 Korok Seed
- 35:30 Exploring Eldin (Eldin Canyon area)
- 35:45 Location (Lake Ferona Cave)
- 36:20 Bubbul Gem
- 38:10 Side Quest - Moon Gazing Gorons - Task Started / Completed (Take a picture of the sun shining in through the cave roof)
- 38:50 Exploring Eldin (Eldin Canyon area)
- 40:35 Korok Seed
- 40:55 Exploring Eldin (Eldin Canyon area)
- 41:50 Helping Addison
- 44:30 Location (Foothill Stable)
- 46:30 Exploring Eldin (Eldin Canyon area)
- 50:20 Side Quest - A Picture For Foothill Stable - Found
- 51:20 Side Quest - For Our Princess - Found
- 53:00 Location (Foothill Stable Well)
- 53:40 Chest (Purple Rupee)
- 54:40 Chest (Royal Shield)
- 55:40 Exploring Eldin (Eldin Canyon area)
- 56:20 Shrine - Started (Kisinona Shrine)
- 57:00 Chest (Mighty Construct Bow)
- 58:10 Shrine - Completed (Kisinona Shrine)
- 59:20 Reading Hyrule Compendium Entries
- 59:35 Outro
- 0:00:00 Intro
- 0:00:25 Placing Markers on the Map
- 0:02:20 Side Quest - A picture for Foothill Stable - Task Started / Completed (Find the spot and take a picture)
- 0:02:50 Side Quest - Moon Gazing Gorons - Task Started / Completed (Talk to Tray)
- 0:04:45 Side Quest - A picture for Foothill Stable - Task Started / Completed (Talk to Ozunda)
- 0:06:20 Exploring Eldin (Eldin Canyon area)
- 0:07:35 Side Quest - Miskos Cave of Chests - Task Started (Befriend the dog outside the cave to unveil the treasure)
- 0:10:00 Location (Cephla Lake Cave)
- 0:10:55 Chest (Ember Trousers)
- 0:11:15 Side Quest - Miskos Cave of Chests - Task Completed (Befriend the dog outside the cave to unveil the treasure)
- 0:12:00 Side Quest - Miskos Treasure: The Fierce Diety - Found / Started
- 0:13:20 Bubbul Gem
- 0:14:20 Side Quest - Miskos Treasure: Twins Manuscript - Found / Started
- 0:15:10 Side Quest - Miskos Treasure: Pirate Manuscript - Found / Started
- 0:16:00 Side Quest - Miskos Treasure: Heroines Manuscript - Found / Started
- 0:16:45 Exploring Eldin (Eldin Canyon area)
- 0:17:10 Korok Seed
- 0:18:00 Exploring Eldin (Eldin Canyon area)
- 0:18:35 Chest (Cobble Crusher)
- 0:19:00 Exploring Eldin (Eldin Canyon area)
- 0:21:30 Chest (Opal)
- 0:22:10 Chest (Arrow x5)
- 0:22:30 Exploring Eldin (Eldin Canyon area)
- 0:25:20 Korok Seed
- 0:26:00 Exploring Eldin (Eldin Canyon area)
- 0:29:50 Side Quest - For Our Princess - Task Started / Completed (Find the cave)
- 0:31:35 Side Quest - For Our Princess - Task Started / Completed (Defeat the enemies)
- 0:34:50 Bubbul Gem
- 0:35:45 Side Quest - For Our Princess - Task Started / Completed (Return to Penn)
- 0:37:50 Exploring Eldin (Eldin Canyon area)
- 0:43:10 Chest (Ruby)
- 0:44:55 Chest (Royal Broadsword)
- 0:46:30 Chest (Royal Bow)
- 0:48:00 Exploring Eldin (Eldin Canyon area)
- 0:48:30 Korok Seed
- 0:49:25 Korok Seed
- 0:49:50 Korok Seed x2
- 0:51:45 Chest (Rocket x3)
- 0:52:15 Exploring Eldin (Eldin Canyon area)
- 0:53:35 Buying Crystallized Charges (the last ones)
- 0:57:15 Energy Well x2 & Energy Cell (finally done!)
- 0:59:00 Expanding inventory at Hestus place
- 1:01:10 Trying out the latest equipment
- 1:02:00 Outro
- 0:00:00 Intro
- 0:00:25 Placing Markers on the Map
- 0:03:10 Exploring Eldin (Eldin Canyon area)
- 0:06:30 Ches (Arrow x5)
- 0:07:00 Korok Seed
- 0:07:30 Exploring Eldin (Eldin Canyon area)
- 0:09:30 Korok Seed
- 0:10:00 Exploring Eldin (Eldin Canyon area)
- 0:14:20 Memory 05 (Mineru's Counsel)
- 0:19:20 Korok Seed
- 0:19:50 Exploring Eldin (Eldin Canyon area)
- 0:22:50 Chest (Time Bomb x3)
- 0:23:30 Chest (Opal)
- 0:23:55 Exploring Eldin (Eldin Canyon area)
- 0:24:40 Korok Seed x2
- 0:26:45 Exploring Eldin (Eldin Canyon area)
- 0:28:15 Korok Seed
- 0:28:45 Exploring Eldin (Eldin Canyon area)
- 0:35:20 Miniboss (Hinox)
- 0:36:10 Exploring Eldin (Eldin Canyon area)
- 0:36:40 Helping Addison
- 0:40:10 Korok Seed
- 0:41:00 Chest (Arrow x5)
- 0:42:00 Exploring Eldin (Eldin Canyon area)
- 0:46:05 Exploring the Sky of Eldin Canyon area
- 0:47:00 Korok Seed
- 0:47:30 Exploring the Sky of Eldin Canyon area
- 0:48:10 Chest (Old Map)
- 0:48:40 Exploring the Sky of Eldin Canyon area
- 0:49:50 Chest (Sage's Will)
- 0:50:30 Exploring the Sky of Eldin Canyon area
- 0:56:20 Shrine - Started (Kadaunar Shrine)
- 0:57:45 Chest (Mighty Construct Bow)
- 1:00:00 Shrine - Completed (Kadaunar Shrine)
- 1:01:20 Outro
- 0:00:00 Intro
- 0:00:25 Placing Markers on the Map
- 0:02:30 Exploring the sky of Eldin Canyon area
- 0:02:50 Device Dispencer
- 0:03:45 Exploring the sky of Eldin Canyon area
- 0:05:45 Chest (Battery x3)
- 0:06:15 Exploring the sky of Eldin Canyon area
- 0:06:30 Korok Seed
- 0:07:10 Exploring the sky of Eldin Canyon area
- 0:14:50 Chest (Amber)
- 0:15:15 Exploring the sky of Eldin Canyon area
- 0:16:20 Chest (Mighty Zonaite Spear)
- 0:16:50 Exploring the sky of Eldin Canyon area
- 0:18:45 Farming Dragon Parts
- 0:22:20 Side Quest - The Corridor Between Two Dragons - Task Started / Completed (Use the sage of fire skill between the two dra
- 0:23:30 Chest (Ruby)
- 0:26:00 Side Quest - Spotting Spot - Task Started (Find Spot on Hyrule Field)
- 0:27:30 Talking to Koltin
- 0:28:30 Side Quest - Spotting Spot - Task Completed (Find Spot on Hyrule Field)
- 0:30:20 Side Quest - Spotting Spot - Task Started / Completed (Talk to Lester)
- 0:33:50 Exploring the depths of Eldin Canyon area
- 0:34:10 Chest (Mighty Zonaite Shield)
- 0:34:40 Exploring the depths of Eldin Canyon area
- 0:35:35 Light Root - Found (Katoij Light Root)
- 0:36:55 Exploring the depths of Eldin Canyon area
- 0:39:20 Chest (Mighty Zonaite Shield)
- 0:39:50 Exploring the depths of Eldin Canyon area
- 0:40:50 Miniboss (Igneo Talus)
- 0:42:30 Exploring the depths of Eldin Canyon area
- 0:51:00 Miniboss (Stone Talus)
- 0:51:55 Exploring the depths of Eldin Canyon area
- 0:54:20 Light Root - Found (Kayam Shrine)
- 0:55:20 Exploring the depths of Eldin Canyon area
- 1:00:00 Location (Eldin Dark Skeleton)
- 1:00:30 Chest (Trousers of The Wild)
- 1:01:20 Exploring the depths of Eldin Canyon area
- 1:02:45 Miniboss (Gloom Spawn & Phantom Ganon)
- 1:04:40 Exploring the depths of Eldin Canyon area
- 1:06:50 Outro
- 0:00:00 Intro
- 0:00:25 Placing Markers on the Map
- 0:01:45 Exploring the depths of Eldin Canyon area
- 0:03:50 Light Root - Found (Katijabis Light Root)
- 0:05:00 Location (Scorching Coliseum)
- 0:09:10 Chest (Zant's Helm)
- 0:09:40 Exploring the depths of Eldin Canyon area
- 0:10:15 Miniboss (Stalnox)
- 0:11:30 Exploring the depths of Eldin Canyon area
- 0:14:40 Chest (Mighty Construct Bow)
- 0:14:55 Chest (Mighty Zonaite Shield)
- 0:15:20 Exploring the depths of Eldin Canyon area
- 0:26:35 Miniboss (Stone Talus)
- 0:27:10 Exploring the depths of Eldin Canyon area
- 0:29:50 Light Root - Found (Tayamik Light Root)
- 0:30:10 Placing Markers on the Map
- 0:31:00 Exploring the depths of Eldin Canyon area
- 0:32:55 Miniboss (Flux Construct 2)
- 0:34:50 Exploring the depths of Eldin Canyon area
- 0:40:20 Chest (Large Crystallized Charge & Yiga Schematic (Assault Cart Schematic))
- 0:41:05 Exploring the depths of Eldin Canyon area
- 0:51:55 Light Root - Found (Sikutamak Light Root)
- 0:52:30 Exploring the depths of Eldin Canyon area
- 0:56:10 Location (Akkala House of Bones)
- 0:56:45 Miniboss (Stalnox)
- 0:58:35 Chest (Biggoron's Sword)
- 0:59:00 Exploring the depths of Eldin Canyon area
- 1:03:20 Chest (Giant Brightbloom Seed x5)
- 1:03:40 Exploring the depths of Eldin Canyon area
- 1:04:35 Reading Hyrule Compendium Entries
- 1:04:45 Outro
- 0:00:00 Intro
- 0:00:25 Placing Markers on the Map
- 0:01:20 Exploring the depths of Eldin Canyon area
- 0:12:50 Light Root - Found (Kisomom Light Root)
- 0:13:30 Placing Markers on the Map
- 0:14:50 Miniboss (Igneo Talus)
- 0:16:55 Exploring the depths of Eldin Canyon area
- 0:21:30 Chest (Mighty Construct Bow)
- 0:21:55 Exploring the depths of Eldin Canyon area
- 0:30:20 Light Root - Found (Nipahsom Light Root)
- 0:31:10 Exploring the depths of Eldin Canyon area
- 0:32:10 Light Root - Found (Gedihcayam Light Root)
- 0:33:00 Exploring the depths of Eldin Canyon area
- 0:34:50 Light Root - Found (Anonisik Light Root)
- 0:35:10 Placing Markers on the Map
- 0:36:15 Exploring the depths of Eldin Canyon area
- 0:38:00 Miniboss (Blue Maned Lynel)
- 0:39:20 Exploring the depths of Eldin Canyon area
- 0:41:15 Miniboss (Obsidian Frox)
- 0:43:30 Exploring the depths of Eldin Canyon area
- 0:45:00 Shortcut to the surface
- 0:46:35 Exploring the depths of Eldin Canyon area
- 0:52:10 Chest (Rusty Shield)
- 0:53:10 Chest (Cobble Crusher)
- 0:53:30 Exploring the depths of Eldin Canyon area
- 0:56:45 Chest (Yiga Schematic (Big Rig Schematic) & Large Crystallized Charge)
- 0:57:10 Exploring the depths of Eldin Canyon area
- 1:08:00 Miniboss (Frox)
- 1:09:15 Exploring the depths of Eldin Canyon area
- 1:11:05 Light Root - Found (Kawamit Light Root)
- 1:12:20 Reading Hyrule Compendium Entries
- 1:13:00 Outro
- 0:00:00 Intro
- 0:00:25 Placing Markers on the Map
- 0:01:30 Exploring the depths of Eldin Canyon area
- 0:02:50 Miniboss (Igneo Talus)
- 0:04:25 Exploring the depths of Eldin Canyon area
- 0:05:10 100th episode special tips and tricks (fast ascend)
- 0:06:00 Exploring the depths of Eldin Canyon area
- 0:10:45 100th episode special tips and tricks (emergency platforms in mid air)
- 0:12:10 Exploring the depths of Eldin Canyon area
- 0:13:20 100th episode special tips and tricks (hover bike)
- 0:14:45 Exploring the depths of Eldin Canyon area
- 0:19:10 Miniboss (Armored Silver Lynel)
- 0:24:00 Exploring the depths of Eldin Canyon area
- 0:24:50 Miniboss (Blue Hinox)
- 0:25:00 Exploring the depths of Eldin Canyon area
- 0:28:30 Chest (Large Crystallized Charge & Yiga Schematic (Rainmaker))
- 0:29:00 Exploring the depths of Eldin Canyon area
- 0:35:10 100th episode special tips and tricks (Dazzle fruit on stal enemies / skeletons)
- 0:42:45 Returning to the surface
- 0:44:20 Location (Exchange Ruins)
- 0:44:35 Skyview Tower (Hyrule Field Skyview Tower)
- 0:47:15 Placing Markers on the Map
- 0:48:00 Exploring South Hyrule Field (Hyrule Field area)
- 0:52:20 Chest (Amber)
- 0:53:00 Chest (Large Zonai Charge)
- 0:54:00 Helping Addison
- 0:54:45 Shrine - Started (Mayachin Shrine)
- 0:56:55 100th episode special tips and tricks (bomb arrows on "shrine switches")
- 0:58:30 Chest (Energizing Elixir)
- 0:59:00 Exploring South Hyrule Field (Hyrule Field area)
- 1:00:00 Chest (Red Rupee)
- 1:01:40 Exploring South Hyrule Field (Hyrule Field area)
- 1:01:50 100th episode special tips and tricks (frozen meat shield)
- 1:02:20 Korok Seed
- 1:02:40 Exploring South Hyrule Field (Hyrule Field area)
- 1:03:25 Reading Hyrule Compendium Entries
- 1:03:35 Outro
- 0:00 Intro
- 0:25 Placing Markers on the Map
- 3:05 Side Quest - Wanted: Hinox! - Task Completed (Talk to Gralens)
- 4:15 Heart Container
- 5:10 Buying arrows & Zonai devices
- 8:55 101th episode special tips and tricks (Wing Shield)
- 9:10 101th episode special tips and tricks (Balloon Shield)
- 10:00 Exploring South Hyrule Field (Hyrule Field area)
- 17:40 Chest (Silver Moblin Sledge & Amber)
- 19:45 Korok Seed
- 20:05 Exploring South Hyrule Field (Hyrule Field area)
- 22:30 Miniboss (Battle Talus)
- 22:50 101th episode special tips and tricks (Muddle Bud on Battle Talus)
- 23:55 Chest (Ruby)
- 24:25 Exploring South Hyrule Field (Hyrule Field area)
- 25:00 Chest (Arrow x5)
- 25:30 Chasing a fallen star
- 27:25 Will return later
- 27:40 Exploring South Hyrule Field (Hyrule Field area)
- 29:30 Korok Seed
- 30:30 101th episode special tips and tricks (Bee Hive Shield)
- 31:20 Location (Whistling Hill Cave)
- 31:50 Bubbul Gem
- 32:10 Exploring Whistling Hill Cave
- 33:15 101th episode special tips and tricks (Dazzle fruit on stal enemies / skeletons)
- 33:45 Exploring Whistling Hill Cave
- 34:25 Chest (Royal Shield)
- 35:05 Chest (Royal Shield)
- 36:00 101th episode special tips and tricks (Quick ascend through small stone)
- 36:30 Chest (Royal Shield)
- 37:25 Chest (Rubber Armor)
- 38:45 Shrine - Started (Teniten Shrine)
- 41:05 Chest (Mighty Zonaite Spear)
- 41:15 Shrine - Completed (Teniten Shrine)
- 42:00 Exploring South Hyrule Field (Hyrule Field area)
- 43:05 Korok Seed x2
- 45:10 Exploring South Hyrule Field (Hyrule Field area)
- 47:20 Korok Seed
- 47:45 Exploring South Hyrule Field (Hyrule Field area)
- 49:30 Korok Seed x2
- 51:50 Will return here later
- 52:00 Exploring South Hyrule Field (Hyrule Field area)
- 53:35 Shrine - Started (Tajikats Shrine)
- 54:15 101th episode special tips and tricks (Traverse through shrines using recall)
- 58:05 Chest (Spiky Shield)
- 58:45 Shrine - Completed (Tajikats Shrine)
- 59:40 Outro
- 0:00:00 Intro
- 0:00:25 Placing Markers on the Map
- 0:02:35 Exploring South Hyrule Field (Hyrule Field area)
- 0:03:10 Side Adventure - Gourmets Gone Missing - Started / Found
- 0:03:50 Stable (Riverside Stable)
- 0:04:15 Feeding the dog
- 0:05:15 Chest (Purple Rupee)
- 0:05:40 Exploring Riverside Stable
- 0:06:15 Side Quest - A Picture for Riverside Stable - Found / Started
- 0:07:10 Exploring Riverside Stable
- 0:11:55 Location (Riverside Stable Well)
- 0:13:35 Chest (Throwing Spear)
- 0:14:40 Exploring South Hyrule Field (Hyrule Field area)
- 0:15:10 Korok Seed x2
- 0:17:15 Exploring South Hyrule Field (Hyrule Field area)
- 0:18:05 Chest (Ancient Blade)
- 0:18:35 Chest (Canon)
- 0:18:55 Exploring South Hyrule Field (Hyrule Field area)
- 0:19:40 Korok Seed
- 0:20:00 Exploring South Hyrule Field (Hyrule Field area)
- 0:21:20 Korok Seed
- 0:21:50 Korok Seed
- 0:22:20 Exploring South Hyrule Field (Hyrule Field area)
- 0:22:45 Side Adventure - Gourmets Gone Missing - Task Completed (Find the Gourmets)
- 0:24:00 Side Adventure - Gourmets Gone Missing - Task Completed (Cook a Meat and Rise Bowl for Argus and the gang)
- 0:27:00 Exploring South Hyrule Field (Hyrule Field area)
- 0:28:20 Help Addison
- 0:29:50 Korok Seed
- 0:30:15 Exploring South Hyrule Field (Hyrule Field area)
- 0:31:15 Chest (Royal Broadsword)
- 0:31:30 Exploring South Hyrule Field (Hyrule Field area)
- 0:34:10 Side Quest - Feathered Fugitives - Task Completed (Find all Cuccos)
- 0:42:00 Exploring South Hyrule Field (Hyrule Field area)
- 0:45:00 Miniboss (Boss Bokoblin)
- 0:47:10 Chest (Spiked-Iron-Ball Sledge)
- 0:47:25 Exploring South Hyrule Field (Hyrule Field area)
- 0:47:45 Location (East Post Ruins)
- 0:48:00 Exploring South Hyrule Field (Hyrule Field area)
- 0:49:00 Chest (Royal Claymore)
- 0:49:30 Exploring South Hyrule Field (Hyrule Field area)
- 0:50:30 Korok Seed
- 0:51:00 Exploring South Hyrule Field (Hyrule Field area)
- 0:53:10 Chest (Ruby)
- 0:53:40 Location (Forest of Time Chasm)
- 0:54:00 Exploring South Hyrule Field (Hyrule Field area)
- 0:54:30 Chest (Saphire)
- 0:55:00 Shrine - Started (Kamizun Shrine)
- 0:57:30 Chest (Spring Shield)
- 0:58:00 Shrine - Completed (Kamizun Shrine)
- 0:58:40 Exploring South Hyrule Field (Hyrule Field area)
- 0:59:30 Chest (Opal)
- 0:59:55 Korok Seed
- 1:00:30 Korok Seed x2
- 1:03:00 Exploring South Hyrule Field (Hyrule Field area)
- 1:04:55 Korok Seed
- 1:05:50 Outro
- 0:00:00 Intro
- 0:00:25 Placing Markers on the Map
- 0:03:00 Exploring South Hyrule Field (Hyrule Field area)
- 0:05:00 Korok Seed
- 0:05:35 Side Quest - Whirly Swirly Things - Task Completed (Take a picture of a whirlpool in water)
- 0:06:00 Exploring South Hyrule Field (Hyrule Field area)
- 0:06:35 Korok Seed
- 0:07:05 Korok Seed x2
- 0:08:45 Exploring South Hyrule Field (Hyrule Field area)
- 0:11:15 Helping Addison
- 0:13:55 Exploring South Hyrule Field (Hyrule Field area)
- 0:16:10 Chest (Royal Claymore)
- 0:17:50 Korok Seed
- 0:18:25 Exploring South Hyrule Field (Hyrule Field area)
- 0:18:45 Chest (Royal Bow)
- 0:19:15 Miniboss (Gloom Spawn & Phantom Ganon)
- 0:20:30 Exploring South Hyrule Field (Hyrule Field area)
- 0:22:30 Chest (Arrow x5)
- 0:22:45 Chest (Royal Broadsword)
- 0:23:05 Exploring South Hyrule Field (Hyrule Field area)
- 0:25:50 Korok Seed
- 0:26:50 Chest (Emblazoned Shield)
- 0:27:20 Exploring South Hyrule Field (Hyrule Field area)
- 0:29:10 Chest (Purple Rupee)
- 0:29:30 Exploring South Hyrule Field (Hyrule Field area)
- 0:29:55 Korok Seed x2 & Location (Great Plateau)
- 0:31:05 Exploring South Hyrule Field (Hyrule Field area)
- 0:32:30 Great Plateau Entrance & Zelda Memorial
- 0:33:15 Exploring South Hyrule Field (Hyrule Field area)
- 0:34:45 Korok Seed
- 0:35:15 Exploring South Hyrule Field (Hyrule Field area)
- 0:38:30 Chest (Bomb Flower x3)
- 0:39:25 Location (Great Plateau North Chasm)
- 0:40:00 Korok Seed x2
- 0:41:40 Exploring South Hyrule Field (Great Plateau area)
- 0:42:55 Location (Shrine of Resurection)
- 0:43:15 Bubbul Gem
- 0:43:35 Exploring Shrine of Resurection
- 0:46:50 Exploring South Hyrule Field (Great Plateau area)
- 0:49:00 Korok Seed
- 0:49:30 Exploring South Hyrule Field (Great Plateau area)
- 0:51:30 Korok Seed
- 0:52:00 Exploring South Hyrule Field (Great Plateau area)
- 0:53:20 Chest (Royal Shield)
- 0:54:35 Location (Temple of Time Ruins)
- 0:54:55 Side Adventure - A Call From The Depths - Started / Found
- 0:55:45 Side Quest - A Picture For Riverside Stable - Task Completed (Take a picture of the goddess statue in the Temple of time
- 0:56:45 Side Quest - A Picture For Riverside Stable - Task Completed (Talk to Ember)
- 0:58:40 Side Quest - Whirly Swirly Things - Task Completed (Talk to Kula)
- 0:59:25 Expand inventory at Hestus
- 1:01:00 Exploring South Hyrule Field (Great Plateau area)
- 1:03:00 Korok Seed
- 1:03:30 Exploring South Hyrule Field (Great Plateau area)
- 1:04:20 Chest (Nostalgic Fabric)
- 1:05:00 Korok Seed
- 1:05:50 Outro
- 0:00:00 Intro
- 0:00:25 Placing Markers on the Map
- 0:03:00 Exploring South Hyrule Field (Great Plateau area)
- 0:04:00 Miniboss (Boss Bokoblin)
- 0:05:20 Exploring South Hyrule Field (Great Plateau area)
- 0:07:20 Collecting a fallen star
- 0:12:00 Location (Great Plateau East Chasm)
- 0:12:20 Side Adventure - A Call From The Depths - Task Started (Throw a Goddess Statue Eye down every chasm on the Great Plateau
- 0:13:00 Korok Seed
- 0:13:40 Exploring South Hyrule Field (Great Plateau area)
- 0:19:20 Armor / Outfit (Yiga Mask)
- 0:21:40 Korok Seed
- 0:22:30 Exploring South Hyrule Field (Great Plateau area)
- 0:25:20 Korok Seed
- 0:26:00 Exploring South Hyrule Field (Great Plateau area)
- 0:27:00 Farming Dragon Parts
- 0:33:00 Korok Seed
- 0:34:15 Exploring South Hyrule Field (Great Plateau area)
- 0:36:30 Side Adventure - A Call From The Depths - Task Continued (Throw a Goddess Statue Eye down every chasm on the Great Plate
- 0:37:10 Exploring South Hyrule Field (Great Plateau area)
- 0:38:40 Korok Seed
- 0:39:20 Korok Seed
- 0:41:40 Exploring South Hyrule Field (Great Plateau area)
- 0:43:50 Korok Seed
- 0:44:10 Exploring South Hyrule Field (Great Plateau area)
- 0:45:10 Miniboss (Battle Talus)
- 0:46:40 Chest (Ruby)
- 0:46:55 Exploring South Hyrule Field (Great Plateau area)
- 0:47:55 Korok Seed
- 0:48:30 Exploring South Hyrule Field (Great Plateau area)
- 0:49:00 Miniboss (Gloom Spawn & Phantom Ganon)
- 0:51:10 Exploring South Hyrule Field (Great Plateau area)
- 0:51:40 Shrine - Started (Riogok Shrine)
- 0:53:10 Chest (Mighty Construct Bow)
- 0:55:45 Shrine - Completed (Riogok Shrine)
- 0:57:15 Exploring South Hyrule Field (Great Plateau area)
- 1:00:15 Chest (Opal)
- 1:00:30 Exploring South Hyrule Field (Great Plateau area)
- 1:05:00 Korok Seed
- 1:05:30 Exploring South Hyrule Field (Great Plateau area)
- 1:07:10 Reading Hyrule Compendium Entries
- 1:07:20 Outro
- 0:00:00 Intro
- 0:00:25 Placing Markers on the Map
- 0:02:30 Exploring South Hyrule Field (Great Plateau area)
- 0:03:15 Chest (Spicy elixir)
- 0:03:55 Chest (Royal Shield)
- 0:04:20 Exploring South Hyrule Field (Great Plateau area)
- 0:07:00 Korok Seed x2 & Chest (Wooden Shield)
- 0:09:05 Exploring South Hyrule Field (Great Plateau area)
- 0:10:30 Korok Seed
- 0:11:00 Exploring South Hyrule Field (Great Plateau area)
- 0:11:30 Chest (Stone Axe)
- 0:12:00 Exploring South Hyrule Field (Great Plateau area)
- 0:12:45 Location (Great Plateau Soth Chasm)
- 0:13:05 Side Adventure - A Call From The Depths - Task Continued (Throw a Goddess Statue Eye down every chasm on the Great Plate
- 0:13:45 Exploring South Hyrule Field (Great Plateau area)
- 0:14:30 Location (River of The Dead Waterfall Cave)
- 0:14:45 Bubbul Gem
- 0:15:00 Shrine - Started (Tadarok Shrine)
- 0:19:20 Chest (Mighty Zonaite Shield)
- 0:20:45 Shrine - Completed (Tadarok Shrine)
- 0:21:15 Exploring South Hyrule Field (Great Plateau area)
- 0:23:20 Chest (Arrow x5)
- 0:23:40 Exploring South Hyrule Field (Great Plateau area)
- 0:27:10 Korok Seed
- 0:27:35 Exploring South Hyrule Field (Great Plateau area)
- 0:28:45 Korok Seed
- 0:29:10 Exploring South Hyrule Field (Great Plateau area)
- 0:33:45 Location (Great Plateau West Chasm)
- 0:34:00 Side Adventure - A Call From The Depths - Task Completed (Throw a Goddess Statue Eye down every chasm on the Great Plate
- 0:34:50 Exploring South Hyrule Field (Great Plateau area)
- 0:37:30 Helping Addison
- 0:39:55 Location (Great Plateau Foothill Cave)
- 0:40:20 Exploring Great Plateau Foothill Cave
- 0:42:30 Bubbul Gem
- 0:42:50 Exploring Great Plateau Foothill Cave
- 0:43:30 Shrine - Started (Kyokugon Shrine)
- 0:45:45 Chest (Hearty Elixir)
- 0:46:10 Shrine - Completed (Kyokugon Shrine)
- 0:47:00 Buying Arrows
- 0:48:10 Heart Container
- 0:49:00 Buying Zonai Devices
- 0:53:00 Exploring the depths of South Hyrule Field (Hyrule Field area)
- 0:53:20 Light Root - Found (Nogukoyk Light Root)
- 0:54:00 Exploring the depths of South Hyrule Field (Hyrule Field area)
- 0:56:20 Light Root - Found (Kogoir Light Root)
- 0:57:00 Exploring the depths of South Hyrule Field (Hyrule Field area)
- 0:59:10 Light Root - Found (Koradat Light Root)
- 1:00:00 Exploring the depths of South Hyrule Field (Hyrule Field area)
- 1:03:00 Side Adventure - A Call From The Depths - Task Started (Take each Goddess Statue eye to the Bargainer Statue Located in
- 1:04:10 Outro
- 0:00:00 Intro
- 0:00:25 Placing Markers on the Map
- 0:03:20 Side Adventure - A Call From The Depths - Task Continued (Take each Goddess Statue eye to the Bargainer Statue Located i
- 0:14:55 Chest (Large Zonaite)
- 0:15:55 Main Quest - A Mystery in the Depths - Task Completed (Find the Temple-Like Building in the Depths)
- 0:19:00 Ability (Autobuild)
- 0:21:00 Main Quest - A Mystery in the Depths - Task Completed (Master Kohga Boss Fight)
- 0:25:30 Chest (Huge Crystallized Charge)
- 0:26:30 Side Adventure - Master Kohga of the Yiga Clan - Found
- 0:26:55 Schema Stone (Fan Plane)
- 0:27:40 Testing Autobuild
- 0:31:30 Chest (Large Zonaite)
- 0:32:00 Exploring the depths of South Hyrule Field (Hyrule Field area)
- 0:33:30 Chest (Large Crystallized Charge)
- 0:34:05 Location (Secret Spring of Revival)
- 0:34:30 Exploring the depths of South Hyrule Field (Hyrule Field area)
- 0:36:55 Chest (Large Crystallized Charge)
- 0:37:15 Exploring the depths of South Hyrule Field (Hyrule Field area)
- 0:39:30 Light Root - Found (Mu-Ustust Light Root)
- 0:41:00 Side Adventure - A Call From The Depths - Task Continued (Take each Goddess Statue eye to the Bargainer Statue Located i
- 0:46:05 Chest (Arrow x10)
- 0:46:30 Side Adventure - A Call From The Depths - Task Continued (Take each Goddess Statue eye to the Bargainer Statue Located i
- 1:01:30 Chest (Miner's Trousers)
- 1:02:00 Side Adventure - A Call From The Depths - Task Continued (Take each Goddess Statue eye to the Bargainer Statue Located i
- 1:07:00 Side Adventure - A Call From The Depths - Task Completed (Take each Goddess Statue eye to the Bargainer Statue Located i
- 1:07:35 Heart Container
- 1:08:45 Costumes/Armor (Gaiters Of The Depths)
- 1:09:30 Exploring the depths of South Hyrule Field (Hyrule Field area)
- 1:10:35 Reading Hyrule Compendium Entries
- 1:10:55 Outro
- 0:00 Intro
- 0:25 Placing Markers on the Map
- 3:20 Exploring the depths of South Hyrule Field (Hyrule Field area)
- 8:00 Chest (Sundelion)
- 8:30 Exploring the depths of South Hyrule Field (Hyrule Field area)
- 11:10 Miniboss (Armored Red Lynel)
- 12:50 Exploring the depths of South Hyrule Field (Hyrule Field area)
- 13:45 Location (Floating Coliseum)
- 14:00 Depths Floating Coliseum Fight
- 29:20 Chest (Majora's Mask)
- 30:00 Exploring the depths of South Hyrule Field (Hyrule Field area)
- 31:00 Schema Stone (Rocket Platform)
- 32:15 Exploring the depths of South Hyrule Field (Hyrule Field area)
- 35:00 Schema Stone (Automated Ally)
- 37:00 Exploring South Hyrule Field (Hyrule Field area)
- 0:00 Intro
- 0:25 Placing Markers on the Map
- 2:50 Korok Seed
- 3:15 Exploring South Hyrule Field (Hyrule Field area)
- 6:45 Miniboss (Thunder Gleeok)
- 8:25 Side Quest - Misko's Treasure Of Awakening 3 - Task Started (Solve the Puzzle)
- 8:50 Location (Coliseum Ruins Cave)
- 9:15 Side Quest - Misko's Treasure Of Awakening 3 - Task Completed (Find the location and solve the puzzle)
- 9:30 Chest (Trousers of Awakening)
- 10:30 Bubbul Gem
- 11:00 Exploring South Hyrule Field (Hyrule Field area)
- 12:50 Prepping For Quick Apple Farming
- 14:45 Korok Seed
- 15:15 Exploring South Hyrule Field (Hyrule Field area)
- 16:20 Minigame (Test of Strength)
- 24:05 Korok Seed x2
- 25:00 Exploring South Hyrule Field (Hyrule Field area)
- 27:00 Korok Seed
- 27:45 Shrine - Started (Tsutsu-Um Shrine)
- 30:25 Chest (Arrow x5)
- 33:45 Shrine - Completed (Tsutsu-Um Shrine)
- 34:25 Stable (Outskirt Stable)
- 0:00:00 Intro
- 0:00:25 Placing Markers on the Map
- 0:02:05 Korok Seed
- 0:02:35 Stable (Mini Stable)
- 0:04:00 Korok Seed
- 0:04:35 Exploring South Hyrule Field (Hyrule Field area)
- 0:06:30 Chest (Portable Pot)
- 0:06:45 Exploring South Hyrule Field (Hyrule Field area)
- 0:09:50 Korok Seed
- 0:10:20 Exploring South Hyrule Field (Hyrule Field area)
- 0:10:55 Device Dispenser
- 0:11:50 Exploring South Hyrule Field (Hyrule Field area)
- 0:12:20 Side Quest - Disaster In Gerudo Canyon - Found
- 0:13:00 Exploring South Hyrule Field (Hyrule Field area)
- 0:18:40 Korok Seed
- 0:19:05 Exploring South Hyrule Field (Hyrule Field area)
- 0:20:00 Korok Seed
- 0:20:20 Exploring South Hyrule Field (Hyrule Field area)
- 0:22:30 Location (Outskirt Hill Well)
- 0:24:00 Korok Seed
- 0:24:20 Exploring South Hyrule Field (Hyrule Field area)
- 0:26:30 Korok Seed
- 0:26:55 Exploring South Hyrule Field (Hyrule Field area)
- 0:27:45 Korok Seed
- 0:28:05 Exploring South Hyrule Field (Hyrule Field area)
- 0:29:00 Helping Addisson
- 0:31:00 Exploring South Hyrule Field (Hyrule Field area)
- 0:31:20 Korok Seed x2
- 0:33:30 Exploring South Hyrule Field (Hyrule Field area)
- 0:34:00 Korok Seed
- 0:34:20 Exploring South Hyrule Field (Hyrule Field area)
- 0:34:40 Location (Mount Daphnes Well)
- 0:36:30 Exploring South Hyrule Field (Hyrule Field area)
- 0:37:20 Korok Seed
- 0:38:00 Miniboss (Battle talus)
- 0:39:10 Exploring South Hyrule Field (Hyrule Field area)
- 0:39:30 Chest (Topaz)
- 0:39:50 Exploring South Hyrule Field (Hyrule Field area)
- 0:40:20 Korok Seed
- 0:40:50 Exploring South Hyrule Field (Hyrule Field area)
- 0:41:10 Korok Seed
- 0:41:30 Exploring South Hyrule Field (Hyrule Field area)
- 0:44:00 Miniboss (Hinox)
- 0:44:55 Exploring South Hyrule Field (Hyrule Field area)
- 0:47:45 Korok Seed
- 0:48:30 Exploring South Hyrule Field (Hyrule Field area)
- 0:49:00 Korok Seed
- 0:49:30 Exploring South Hyrule Field (Hyrule Field area)
- 0:52:20 Side Quest - The Horse Guard's Request - Completed (Show the Horse Guard a mounted Skeleton Stalhorse)
- 0:53:35 Equipment (Knights Saddle & Knights Bridle)
- 0:54:00 Exploring South Hyrule Field (Hyrule Field area)
- 0:55:20 Side Quest - The Horse Guard's Request - Completed (Show the Horse Guard a mounted wild animal)
- 0:56:00 Exploring South Hyrule Field (Hyrule Field area)
- 0:58:05 Korok Seed
- 0:58:35 Exploring South Hyrule Field (Hyrule Field area)
- 1:00:00 Helping Addison
- 1:01:30 Exploring South Hyrule Field (Hyrule Field area)
- 1:02:10 Reading Hyrule Compendium entries
- 1:02:20 Outro
- 0:00:00 Intro
- 0:00:25 Placing Markers on the Map
- 0:03:25 Exploring South Hyrule Field (Hyrule Field area)
- 0:05:25 Chest (Royal Bow)
- 0:05:50 Exploring South Hyrule Field (Hyrule Field area)
- 0:06:45 Korok Seed
- 0:07:15 Exploring South Hyrule Field (Hyrule Field area)
- 0:10:00 Korok Seed
- 0:10:30 Exploring South Hyrule Field (Hyrule Field area)
- 0:12:00 Korok Seed
- 0:13:05 Exploring South Hyrule Field (Hyrule Field area)
- 0:14:35 Shrine - Started (Sonapan Shrine)
- 0:16:00 Chest (Arrow x5)
- 0:17:10 Shrine - Completed (Sonapan Shrine)
- 0:17:45 Quick farming apples
- 0:24:00 Heart Container
- 0:25:00 Shopping
- 0:28:55 Exploring South Hyrule Field (Hyrule Field area)
- 0:29:40 Exploring South Hyrule Field (Hyrule Field area)
- 0:31:45 Location (Satori Mountain Cave)
- 0:32:15 Exploring Satori Mountain Cave
- 0:37:00 Bubbul Gem
- 0:37:30 Exploring Satori Mountain Cave
- 0:41:40 Chest (Royal Shield)
- 0:42:00 Chest (Royal Bow)
- 0:42:30 Exploring Satori Mountain Cave
- 0:43:00 Exploring South Hyrule Field (Hyrule Field area)
- 0:45:00 Making an offering to the Satori
- 0:45:45 Exploring South Hyrule Field (Hyrule Field area)
- 0:46:15 Korok Seed
- 0:46:45 Exploring South Hyrule Field (Hyrule Field area)
- 0:48:00 Korok Seed
- 0:49:30 Exploring South Hyrule Field (Hyrule Field area)
- 0:49:45 Miniboss (Stone talus)
- 0:50:45 Exploring South Hyrule Field (Hyrule Field area)
- 0:52:00 Location (Tamio River Downstream Cave)
- 0:53:30 Chest (Knights-Claymore Spear)
- 0:54:35 Miniboss (Phantom ganon)
- 0:55:45 Exploring Tamio River Downstream Cave
- 0:56:45 Chest (Phantom Armor)
- 0:57:30 Exploring Tamio River Downstream Cave
- 1:01:10 Exploring South Hyrule Field (Hyrule Field area)
- 1:04:20 Reading Hyrule Compendium Entries
- 1:05:00 Outro
- 0:00:00 Intro
- 0:00:25 Placing Markers on the Map
- 0:01:50 Exploring South Hyrule Field (Hyrule Field area)
- 0:03:40 Korok Seed
- 0:04:10 Exploring South Hyrule Field (Hyrule Field area)
- 0:06:10 Korok Seed
- 0:07:05 Exploring South Hyrule Field (Hyrule Field area)
- 0:08:10 Korok Seed
- 0:08:35 Chest (Ancient Blade)
- 0:08:50 Exploring South Hyrule Field (Hyrule Field area)
- 0:11:45 Korok Seed
- 0:12:10 Exploring South Hyrule Field (Hyrule Field area)
- 0:13:40 Side Quest - A PIcture for ... Stable - Task Started / Completed (Take the picture)
- 0:14:00 Exploring South Hyrule Field (Hyrule Field area)
- 0:14:35 Miniboss (Stone talus)
- 0:15:30 Exploring South Hyrule Field (Hyrule Field area)
- 0:16:40 Korok Seed
- 0:17:10 Exploring South Hyrule Field (Hyrule Field area)
- 0:18:30 Korok Seed
- 0:19:00 Exploring South Hyrule Field (Hyrule Field area)
- 0:20:15 Shrine Quest - The Satori Mountain Crystal - Task Started (Defeat the Hinox holding the crystal)
- 0:20:50 Location (Satori Mountain Foothill Cave)
- 0:21:05 Miniboss (Hinox)
- 0:21:30 Shrine Quest - The Satori Mountain Crystal - Task Completed (Defeat the Hinox holding the crystal)
- 0:22:20 Chest (Silver Rupee)
- 0:22:40 Exploring Satori Mountain Foothill Cave
- 0:23:40 Bubbul Gem
- 0:24:00 Shrine Quest - The Satori Mountain Crystal - Task Started/Completed (Bring the crystal to the shrine)
- 0:27:40 Shrine - Started (Usazum Shrine)
- 0:28:00 Chest (Zonaite Spear)
- 0:28:20 Shrine - Completed (Usazum Shrine)
- 0:29:00 Exploring South Hyrule Field (Hyrule Field area)
- 0:30:05 Korok Seed
- 0:31:15 Korok Seed
- 0:31:40 Exploring South Hyrule Field (Hyrule Field area)
- 0:33:30 Side Quest - A PIcture for ... Stable - Task Started / Completed (Show Embry the picture)
- 0:35:00 Equipment (Extravagant Saddle & Extravagant Bridle)
- 0:36:00 Main Quest - A Mystery In the Depths - Task Completed (Return to Josha in Lookout Landing)
- 0:36:45 Equipment (Schema Stone)
- 0:39:50 Side Adventure - Hateno Village Research Lab - Found / Started
- 0:41:30 Talking to Fera about the Well's found so far
- 0:41:50 Shopping
- 0:43:30 Taking a look at the new horse gear
- 0:47:30 Exploring the Sky of South Hyrule Field
- 0:49:00 Farming Dragon Parts
- 0:54:40 Korok Seed
- 0:55:00 Exploring the Sky of South Hyrule Field
- 0:55:40 Chest (Old Map)
- 0:56:10 Exploring the Sky of South Hyrule Field
- 1:00:10 Chest (Sage's Will)
- 1:02:00 Chest (Magic Rod)
- 1:03:00 Reading Hyrule Compendium Entries
- 1:03:55 Outro
- 0:00:00 Intro
- 0:00:30 Exploring the Sky of South Hyrule Field
- 0:01:10 Device Dispenser
- 0:01:40 Exploring the Sky of South Hyrule Field
- 0:04:45 Korok Seed
- 0:05:20 Shrine Quest - The South Hyrule Sky Crystal - Task Started (Get the Crystal to the shrine)
- 0:07:20 Chest (Old Map)
- 0:07:40 Shrine Quest - Crystal - Task Continued / Completed (Get the Crystal to the shrine)
- 0:10:00 Shrine - Started (Jinodok shrine)
- 0:10:20 Chest (Diamond)
- 0:10:35 Shrine - Completed (Jinodok shrine)
- 0:11:10 Exploring the Sky of South Hyrule Field
- 0:12:30 Chest (Old Map)
- 0:13:00 Exploring the Sky of South Hyrule Field
- 0:14:20 Miniboss (Flux construct 2)
- 0:16:40 Chest (Old Map)
- 0:17:00 Exploring the Sky of South Hyrule Field
- 0:20:00 Miniboss (Flux construct 2)
- 0:22:15 Chest (Sage's Will)
- 0:23:00 Heading for the depths
- 0:26:55 Light Root - Found (Nuzimak lightroot)
- 0:27:40 Placing markers on the Map
- 0:30:00 Exploring the Depths of South Hyrule Field
- 0:34:15 Shortcut to the surface
- 0:35:00 Exploring the Depths of South Hyrule Field
- 0:41:00 Chest (Sundelion)
- 0:41:20 Exploring the Depths of South Hyrule Field
- 0:44:20 Miniboss (Frox)
- 0:45:20 Exploring the Depths of South Hyrule Field
- 0:46:45 Location (Grove of time)
- 0:47:00 Chest (Large Crystallized Charge)
- 0:47:20 Exploring the Depths of South Hyrule Field
- 0:49:20 Chest (Sundelion)
- 0:49:40 Exploring the Depths of South Hyrule Field
- 0:58:30 Chest (Giant Brightbloom Seed x5)
- 0:59:00 Exploring the Depths of South Hyrule Field
- 1:01:10 Miniboss (Hinox)
- 1:01:55 Exploring the Depths of South Hyrule Field
- 1:04:00 Miniboss (Armored Red Lynel)
- 1:05:10 Exploring the Depths of South Hyrule Field
- 1:07:40 Outro
- 0:00:00 Intro
- 0:00:30 Exploring the Depths of South Hyrule Field
- 0:04:10 Miniboss (Frox)
- 0:05:30 Exploring the Depths of South Hyrule Field
- 0:08:25 Chest (Rock Salt)
- 0:09:00 Chest (Wooden Shield)
- 0:09:30 Exploring the Depths of South Hyrule Field
- 0:10:50 Miniboss (Battle talus)
- 0:11:45 Exploring the Depths of South Hyrule Field
- 0:13:40 Light Root - Found (Nihcayam lightroot)
- 0:14:05 Exploring the Depths of South Hyrule Field
- 0:16:40 Chest (Brightbloom Seed x5)
- 0:17:00 Exploring the Depths of South Hyrule Field
- 0:17:45 Miniboss (Stone talus)
- 0:18:25 Exploring the Depths of South Hyrule Field
- 0:21:35 Miniboss (Frox)
- 0:22:00 Exploring the Depths of South Hyrule Field
- 0:28:30 Miniboss (Hinox)
- 0:29:10 Exploring the Depths of South Hyrule Field
- 0:34:40 Location (Nabooru canyon mine)
- 0:35:00 Chest (Large Crystallized Charge)
- 0:35:15 Exploring the Depths of South Hyrule Field
- 0:36:40 Location (Dalite grove)
- 0:36:55 Light Root - Found (Muzasu lightroot)
- 0:37:30 Exploring the Depths of South Hyrule Field
- 0:38:40 Light Root - Found (Napanos lightroot)
- 0:39:20 Placing Markers on the Map
- 0:41:00 Exploring the Depths of South Hyrule Field
- 0:42:10 Miniboss (Frox)
- 0:43:05 Exploring the Depths of South Hyrule Field
- 0:48:30 Chest (Yiga Schematic & Large Crystallized Charge)
- 0:49:00 Exploring the Depths of South Hyrule Field
- 0:54:00 Chest (Sword of the Hero)
- 0:54:35 Exploring the Depths of South Hyrule Field
- 0:56:45 Miniboss (Stone talus)
- 0:57:50 Exploring the Depths of South Hyrule Field
- 0:59:15 Location (Blupee Burrow)
- 0:59:40 Chest (Large Crystallized Charge)
- 1:00:50 Outro
- 0:00:00 Intro
- 0:00:30 Exploring the Depths of South Hyrule Field
- 0:09:10 Boss (Marbled Gohma)
- 0:12:10 Chest (Huge Crystallized Charge)
- 0:13:45 Returning to the surface
- 0:16:00 Heading straight for Popla foothills skyview tower
- 0:16:45 Skyview Tower - Found (Popla foothills skyview tower)
- 0:17:30 Location (Popla foothills North Well)
- 0:17:45 Placing Markers on the Map
- 0:18:20 Exploring South Hyrule Field (Hyrule Field area)
- 0:20:30 Location (Popla foothills South Well)
- 0:20:45 Exploring South Hyrule Field (Hyrule Field area)
- 0:22:00 Location (Popla foothills excavation site)
- 0:22:10 Helping Elmerson return to the broken Skyview Tower
- 0:22:50 Chest (Topaz)
- 0:23:15 Exploring South Hyrule Field (Hyrule Field area)
- 0:23:20 Bubbul Gem
- 0:23:45 Exploring South Hyrule Field (Hyrule Field area)
- 0:24:50 Activating Popla foothills skyview tower
- 0:26:25 Placing Markers on the Map
- 0:28:45 Exploring South Hyrule Field (Hyrule Field area)
- 0:30:35 Stable (Highland stable)
- 0:31:25 Side Adventure - An eerie voice - Found / Started
- 0:32:50 Bouying stuff from Beetle
- 0:35:00 Side Quest - A picture for Highland stable - Found / Started
- 0:35:45 Exploring South Hyrule Field (Hyrule Field area)
- 0:38:45 Korok Seed x2
- 0:40:10 Exploring South Hyrule Field (Hyrule Field area)
- 0:42:05 Chest (Purple Rupee)
- 0:42:35 Exploring South Hyrule Field (Hyrule Field area)
- 0:42:50 Shrine - Started (Utsushok shrine)
- 0:48:15 Chest (Sneaky Elixir)
- 0:49:30 Shrine - Completed (Utsushok shrine)
- 0:50:05 Exploring South Hyrule Field (Hyrule Field area)
- 0:51:30 Buying stuff from Eryck
- 0:52:30 Exploring South Hyrule Field (Hyrule Field area)
- 0:52:45 Side Adventure - An eerie voice - Task Started / Completed (Search for the source of the voice together with Penn at nig
- 0:57:20 Exploring South Hyrule Field (Hyrule Field area)
- 0:58:20 Minigame (Horse Race)
- 1:02:10 Outro
- 0:00:00 Intro
- 0:00:30 Placing Markers on the Map
- 0:02:30 Side Adventure - The Flute Players Plan - Task Started / Completed (Give Pyper 10 fireflies)
- 0:04:15 Side Adventure - The Flute Players Plan - Task Started (Talk to Haite during night time)
- 0:08:20 Location (Higlhland Stable Well)
- 0:08:45 Exploring Higlhland Stable Well
- 0:11:10 Chest (Eightfold Longblade)
- 0:11:30 Exploring Higlhland Stable Well
- 0:12:40 Bubbul Gem
- 0:13:15 Exploring Faron (Popla Foothills area)
- 0:14:30 Chest (Ancient Blade)
- 0:14:55 Exploring Higlhland Stable Well
- 0:16:00 Chest (Royal Broadsword)
- 0:16:30 Exploring Higlhland Stable Well
- 0:20:30 Location (Komo Shoreline Cave)
- 0:21:30 Side Adventure - Serenade to Kaysa - Task Started / Completed (Get the stable trotters to Kaysa)
- 0:27:15 Great Fairy (Kaysa)
- 0:27:40 Upgrading gear at the Great Fairy
- 0:45:55 Exploring Faron (Popla Foothills area)
- 0:47:10 Korok Seed
- 0:47:45 Exploring Faron (Popla Foothills area)
- 0:48:50 Location (Bridge of hylia)
- 0:49:05 Miniboss (Flame gleeok)
- 0:51:15 Exploring Faron (Popla Foothills area)
- 0:52:00 Korok Seed
- 0:52:30 Exploring Faron (Popla Foothills area)
- 0:53:00 Korok Seed
- 0:53:30 Exploring Faron (Popla Foothills area)
- 0:55:10 Korok Seed
- 0:55:45 Exploring Faron (Popla Foothills area)
- 0:56:00 Helping Addison
- 0:56:55 Exploring Faron (Popla Foothills area)
- 0:57:50 Korok Seed
- 0:58:10 Exploring Faron (Popla Foothills area)
- 0:58:40 Korok Seed
- 0:59:20 Exploring Faron (Popla Foothills area)
- 1:00:00 Location (Lake hylia whirlpool cave)
- 1:00:30 Bubbul Gem
- 1:00:50 Shrine Quest - The lake hylia crystal - Started / Found
- 1:01:30 Reading Hyrule Compendium Entries
- 1:01:55 Outro
- 0:00:00 Intro
- 0:00:25 Placing Markers on the Map
- 0:01:10 Shrine Quest - The lake hylia crystal - Task Started (Get the crystal to the shrine)
- 0:03:00 Korok Seed
- 0:03:30 Shrine Quest - The lake hylia crystal - Task Continued / Completed (Get the crystal to the shrine)
- 0:06:20 Shrine - Started (En-Oma Shrine)
- 0:06:40 Chest (Mighty Zonaite Sword)
- 0:07:20 Shrine - Completed (En-Oma Shrine)
- 0:08:00 Exploring Faron (Popla Foothills area)
- 0:12:00 Miniboss (Flux Construct 3)
- 0:13:40 Chest (Sage's Will)
- 0:13:55 Exploring Faron (Popla Foothills area)
- 0:15:05 Location (Lake hylia chasm)
- 0:15:25 Exploring Faron (Popla Foothills area)
- 0:16:40 Korok Seed
- 0:16:55 Exploring Faron (Popla Foothills area)
- 0:19:00 Korok Seed
- 0:19:30 Exploring Faron (Popla Foothills area)
- 0:20:20 Korok Seed
- 0:21:00 Memory 13 (A Kings Duty)
- 0:25:30 Exploring Faron (Popla Foothills area)
- 0:26:25 Korok Seed
- 0:27:00 Exploring Faron (Popla Foothills area)
- 0:27:25 Location (Cora lakefront cave)
- 0:28:10 Chest (Eightfold Longblade)
- 0:28:20 Exploring Cora lakefront cave
- 0:31:45 Chest (Boulder Hammer)
- 0:32:00 Bubbul Gem
- 0:32:45 Chest (Bomb Flower & Royal Halberd)
- 0:33:30 Exploring Cora lakefront cave
- 0:34:20 Chest (Shield of The Minds Eye)
- 0:34:45 Exploring Cora lakefront cave
- 0:39:20 Korok Seed
- 0:39:50 Exploring Faron (Popla Foothills area)
- 0:41:15 Miniboss (Boss Bokoblin)
- 0:42:20 Exploring Faron (Popla Foothills area)
- 0:47:30 Korok Seed
- 0:48:10 Exploring Faron (Popla Foothills area)
- 0:50:40 Korok Seed
- 0:51:40 Korok Seed
- 0:52:10 Exploring Faron (Popla Foothills area)
- 0:53:00 Korok Seed
- 0:53:30 Exploring Faron (Popla Foothills area)
- 0:54:30 Location (Faron Woods)
- 0:55:00 Exploring Faron (Popla Foothills area)
- 1:01:05 Heart Container
- 1:01:45 Solemn Vow of Yunobo, Sage of Fire
- 1:02:30 Cooking up some recipes
- 1:05:30 Reading Hyrule Compendium Entries
- 1:06:00 Outro
- 0:00:00 Intro
- 0:00:25 Placing Markers on the Map
- 0:03:30 Exploring Faron (Popla Foothills area)
- 0:04:10 Korok Seed
- 0:05:45 Exploring Faron (Popla Foothills area)
- 0:06:30 Miniboss (Blue-Maned Lynel)
- 0:07:50 Exploring Faron (Popla Foothills area)
- 0:11:00 Chest (Topaz)
- 0:11:30 Exploring Faron (Popla Foothills area)
- 0:14:40 Helping Addison
- 0:15:35 Exploring Faron (Popla Foothills area)
- 0:16:30 Korok Seed
- 0:17:00 Exploring Faron (Popla Foothills area)
- 0:19:00 Side Adventure - Bring Peace to Faron - Task Started / Completed (Help Flaxel and her team to defeat the enemies)
- 0:22:30 Exploring Faron (Popla Foothills area)
- 0:25:00 Korok Seed
- 0:25:30 Exploring Faron (Popla Foothills area)
- 0:29:20 Korok Seed
- 0:29:50 Exploring Faron (Popla Foothills area)
- 0:30:00 Miniboss (Silver-Maned Lynel)
- 0:32:30 Exploring Faron (Popla Foothills area)
- 0:34:20 Chest (Bomb Flower)
- 0:34:40 Exploring Faron (Popla Foothills area)
- 0:37:10 Korok Seed
- 0:37:35 Exploring Faron (Popla Foothills area)
- 0:39:20 Miniboss (Phantom ganon)
- 0:40:30 Exploring Faron (Popla Foothills area)
- 0:42:00 Korok Seed
- 0:43:00 Exploring Faron (Popla Foothills area)
- 0:44:30 Chest (Opal)
- 0:45:00 Korok Seed
- 0:46:00 Chest (Stake)
- 0:46:30 Exploring Faron (Popla Foothills area)
- 0:48:00 Chest (Captain IV Spear)
- 0:48:30 Exploring Faron (Popla Foothills area)
- 0:52:00 Miniboss (Hinox)
- 0:53:00 Exploring Faron (Popla Foothills area)
- 0:55:00 Shrine Quest - Ride the giant horse - Started / Found
- 0:55:50 Exploring Faron (Popla Foothills area)
- 0:56:40 Shrine - Found (Ishokin shrine)
- 0:57:20 Exploring Faron (Popla Foothills area)
- 1:02:20 Chest (Amber & Bomb-Barrel Spear)
- 1:03:00 Exploring Faron (Popla Foothills area)
- 1:04:05 Reading Hyrule Compendium Entries
- 1:04:50 Outro
- 0:00:00 Intro
- 0:00:25 Placing Markers on the Map
- 0:01:30 Exploring Faron (Popla Foothills area)
- 0:02:30 Helping Addison
- 0:04:45 Exploring Faron (Popla Foothills area)
- 0:05:35 Korok Seed
- 0:05:55 Exploring Faron (Popla Foothills area)
- 0:06:15 Korok Seed
- 0:06:40 Exploring Faron (Popla Foothills area)
- 0:07:00 Korok Seed
- 0:08:30 Exploring Faron (Popla Foothills area)
- 0:09:30 Chest (Spring x5)
- 0:09:55 Exploring Faron (Popla Foothills area)
- 0:11:30 Korok Seed
- 0:12:10 Exploring Faron (Popla Foothills area)
- 0:12:35 Miniboss (Stone Talus)
- 0:13:00 Exploring Faron (Popla Foothills area)
- 0:13:30 Korok Seed
- 0:14:10 Exploring Faron (Popla Foothills area)
- 0:15:00 Korok Seed
- 0:15:25 Exploring Faron (Popla Foothills area)
- 0:18:00 Chest (Mighty Zonaite Sword)
- 0:18:30 Exploring Faron (Popla Foothills area)
- 0:20:00 Korok Seed
- 0:22:00 Shrine Quest - Ride the giant horse - Task Started (Find the Giant horse and bring it to Baddek)
- 0:23:00 Side Quest - A Picture for Highland Stable - Task Completed (Take the picture)
- 0:23:30 Shrine Quest - Ride the giant horse - Task Continued (Find the Giant horse and bring it to Baddek)
- 0:28:30 Side Quest - A Picture for Highland Stable - Task Completed (Show Padok the picture)
- 0:29:55 Shrine Quest - Ride the giant horse - Task Continued / Completed (Find the Giant horse and bring it to Baddek)
- 0:34:00 Shrine Quest - Ride the giant horse - Task Started / Completed (Bring the crystal to the shrine)
- 0:35:40 Shrine - Started (Ishokin shrine)
- 0:36:00 Chest (Topaz)
- 0:36:15 Shrine - Completed (Ishokin shrine)
- 0:37:00 Exploring Faron (Popla Foothills area)
- 0:37:55 Chest (Topaz)
- 0:38:15 Exploring Faron (Popla Foothills area)
- 0:41:30 Korok Seed
- 0:43:25 Exploring Faron (Popla Foothills area)
- 0:43:50 Korok Seed
- 0:45:45 Location (Puffer beach Overhead Cave)
- 0:46:00 Exploring Puffer beach Overhead Cave
- 0:48:45 Chest (Phantom Helmet)
- 0:49:30 Bubbul Gem
- 0:49:55 Exploring Faron (Popla Foothills area)
- 0:53:35 Korok Seed
- 0:54:15 Exploring Faron (Popla Foothills area)
- 0:55:05 Korok Seed
- 0:55:30 Exploring Faron (Popla Foothills area)
- 0:56:30 Miniboss (Thunder gleeok)
- 0:59:30 Exploring Faron (Popla Foothills area)
- 1:00:00 Reading Hyrule Compendium Entries
- 1:00:25 Outro
- 0:00:00 Intro
- 0:00:25 Placing Markers on the Map
- 0:03:15 Exploring Faron (Popla Foothills area)
- 0:04:35 Korok Seed
- 0:05:00 Exploring Faron (Popla Foothills area)
- 0:05:30 Chest (Royal Bow)
- 0:06:00 Making an offering to Satori
- 0:06:50 Exploring Faron (Popla Foothills area)
- 0:08:00 Miniboss (Boss Bokoblin)
- 0:10:15 Chest (Savage Lynel Bow)
- 0:10:35 Exploring Faron (Popla Foothills area)
- 0:13:00 Korok Seed
- 0:13:45 Chest (Royal Halberd)
- 0:14:05 Exploring Faron (Popla Foothills area)
- 0:16:00 Chest (Forest Dweller's Spear)
- 0:16:30 Miniboss (Stone talus)
- 0:17:30 Exploring Faron (Popla Foothills area)
- 0:18:50 Korok Seed
- 0:19:20 Exploring Faron (Popla Foothills area)
- 0:19:50 Chest (Steel Lizal Bow)
- 0:20:15 Exploring Faron (Popla Foothills area)
- 0:23:25 Location (Sarjon Woods Cave)
- 0:23:45 Exploring Sarjon Woods Cave
- 0:26:40 Chest (Emblazoned Shield)
- 0:27:00 Exploring Sarjon Woods Cave
- 0:27:40 Bubbul Gem
- 0:28:00 Exploring Sarjon Woods Cave
- 0:28:10 Chest (Rubber Helm)
- 0:28:50 Exploring Faron (Popla Foothills area)
- 0:30:30 Korok Seed
- 0:30:55 Exploring Faron (Popla Foothills area)
- 0:31:10 Location (Corta Lake Cave)
- 0:31:30 Exploring Corta Lake Cave
- 0:32:00 Chest (Strong-Long-Stick Stick)
- 0:33:05 Bubbul Gem
- 0:33:30 Exploring Corta Lake Cave
- 0:34:05 Side Quest - Ousting the Giants - Task Started / Completed (Defeat The Middle Hinox Brother)
- 0:35:00 Exploring Corta Lake Cave
- 0:38:00 Exploring Faron (Popla Foothills area)
- 0:39:30 Miniboss (White-Maned Lynel)
- 0:42:00 Exploring Faron (Popla Foothills area)
- 0:43:10 Korok Seed
- 0:43:50 Korok Seed
- 0:44:10 Exploring Faron (Popla Foothills area)
- 0:46:30 Chest (Rupee)
- 0:46:44 Exploring Faron (Popla Foothills area)
- 0:48:55 Exploring Faron (Popla Foothills area)
- 0:51:25 Korok Seed
- 0:51:45 Exploring Faron (Popla Foothills area)
- 0:52:25 Chest (Royal Halberd)
- 0:52:40 Exploring Faron (Popla Foothills area)
- 0:53:40 Miniboss (Phantom ganon)
- 0:55:00 Exploring Faron (Popla Foothills area)
- 0:57:50 Korok Seed
- 0:58:20 Korok Seed
- 0:58:50 Exploring Faron (Popla Foothills area)
- 1:00:50 Outro
- 0:00 Intro
- 0:25 Placing Markers on the Map
- 3:15 Exploring Faron (Popla Foothills area)
- 4:10 Korok Seed
- 4:40 Exploring Faron (Popla Foothills area)
- 9:25 Location (Calora Lake Cave)
- 9:50 Exploring Calora Lake Cave
- 10:25 Bubbul Gem
- 10:50 Exploring Calora Lake Cave
- 12:00 Side Quest - Ousting the Giants - Task Started / Completed (Defeat The Eldest Hinox Brother)
- 13:15 Chest (Arrow x5)
- 13:30 Exploring Calora Lake Cave
- 17:00 Exploring Faron (Popla Foothills area)
- 21:05 Chest (Royal Broadsword)
- 21:35 Exploring Faron (Popla Foothills area)
- 24:20 Chest (Bomb Flower)
- 24:40 Exploring Faron (Popla Foothills area)
- 26:00 Korok Seed
- 26:20 Exploring Faron (Popla Foothills area)
- 26:50 Location (Floaria Bridge)
- 27:05 Miniboss (Stone talus)
- 28:45 Exploring Faron (Popla Foothills area)
- 30:00 Korok Seed
- 30:30 Exploring Faron (Popla Foothills area)
- 0:00 Intro
- 0:25 Placing Markers on the Map
- 1:00 Exploring Faron (Popla Foothills area)
- 3:25 Korok Seed
- 3:55 Exploring Faron (Popla Foothills area)
- 4:55 Miniboss (Phantom ganon)
- 5:55 Exploring Faron (Popla Foothills area)
- 8:45 Location (Rassla lake cave)
- 8:55 Exploring Rassla lake cave
- 9:20 Bubbul Gem
- 9:50 Chest (Large Zonai Charge)
- 10:15 Exploring Rassla lake cave
- 11:30 Exploring Faron (Popla Foothills area)
- 12:05 Miniboss (Hinox)
- 12:45 Exploring Faron (Popla Foothills area)
- 15:05 Korok Seed
- 15:30 Exploring Faron (Popla Foothills area)
- 17:30 Korok Seed
- 19:30 Exploring Faron (Popla Foothills area)
- 22:20 Korok Seed
- 22:45 Exploring Faron (Popla Foothills area)
- 23:15 Korok Seed
- 23:55 Location (Rodai lakefront Tunnel)
- 24:01 Exploring Rodai lakefront Tunnel
- 26:10 Chest (Gnarled Long Stick)
- 26:30 Exploring Rodai lakefront Tunnel
- 26:45 Bubbul Gem
- 27:10 Exploring Rodai lakefront Tunnel
- 27:40 Side Quest - Ousting the Giants - Task Started / Completed (Defeat The Youngest Hinox Brother)
- 28:20 Exploring Rodai lakefront Tunnel
- 31:30 Side Quest - Ousting the Giants - Task Started / Completed (Talk to Kampo)
- 34:00 Expanding inventory at Hestu's & buying mushrooms
- 36:00 Exploring Faron (Popla Foothills area)
- 37:20 Exploring Faron (Popla Foothills area)
- 39:05 Korok Seed
- 39:30 Location (Mount floria cave)
- 39:55 Exploring Mount floria cave
- 45:10 Chest (Large Zonai Charge)
- 45:40 Exploring Mount floria cave
- 47:20 Chest (Star Fragment)
- 47:50 Exploring Mount floria cave
- 49:00 Bubbul Gem
- 49:30 Exploring Mount floria cave
- 51:50 Chest (Royal Shield)
- 52:20 Exploring Mount floria cave
- 58:15 Reading Hyrule Compendium Entries
- 59:05 Outro
- 0:00:00 Intro
- 0:00:25 Placing Markers on the Map
- 0:02:50 Exploring Faron (Popla Foothills area)
- 0:03:00 Korok Seed
- 0:03:45 Exploring Faron (Popla Foothills area)
- 0:04:45 Korok Seed
- 0:05:15 Exploring Faron (Popla Foothills area)
- 0:07:30 Chest (Shield of the minds eye)
- 0:07:55 Exploring Faron (Popla Foothills area)
- 0:09:20 Korok Seed
- 0:09:45 Exploring Faron (Popla Foothills area)
- 0:11:30 Miniboss (Boss Bokoblin)
- 0:12:45 Exploring Faron (Popla Foothills area)
- 0:15:00 Chest (Mighty Construct Bow)
- 0:15:45 Miniboss (Hinox)
- 0:16:15 Exploring Faron (Popla Foothills area)
- 0:20:45 Chest (Royal Claymore)
- 0:21:15 Exploring Faron (Popla Foothills area)
- 0:21:45 Chest (Topaz)
- 0:22:15 Exploring Faron (Popla Foothills area)
- 0:26:00 Korok Seed
- 0:26:30 Exploring Faron (Popla Foothills area)
- 0:29:00 Korok Seed
- 0:29:35 Exploring Faron (Popla Foothills area)
- 0:33:15 Chest (Opal)
- 0:33:45 Exploring Faron (Popla Foothills area)
- 0:35:00 Chest (Arrow x5)
- 0:35:30 Exploring Faron (Popla Foothills area)
- 0:37:30 Location (Tobio's Hollow Cave)
- 0:38:00 Exploring Tobio's Hollow Cave
- 0:38:50 Shrine Quest - Legend of the soaring Spear - Task Started / Completed (Throw a spear through the ring)
- 0:41:00 Shrine - Started (Utojis shrine)
- 0:41:30 Chest (Large Zonai Charge)
- 0:41:45 Shrine - Completed (Utojis shrine)
- 0:42:15 Exploring Tobio's Hollow Cave
- 0:42:45 Chest (Emblazoned Shield)
- 0:43:10 Chest (Shield of the minds eye)
- 0:44:05 Bubbul Gem
- 0:44:30 Exploring Faron (Popla Foothills area)
- 0:45:35 Chest (Dragonbone Boko Bow)
- 0:45:55 Exploring Faron (Popla Foothills area)
- 0:46:00 Korok Seed
- 0:46:30 Exploring Faron (Popla Foothills area)
- 0:47:00 Helping Addison
- 0:48:00 Shrine - Started (Jiukoum shrine)
- 0:50:30 Chest (Sticky Elixir)
- 0:55:35 Shrine - Completed (Jiukoum shrine)
- 0:57:00 Heart Container/Stamina Vessel
- 0:59:00 Selling meals
- 1:01:55 Outro
- 0:00:00 Intro
- 0:00:25 Placing Markers on the Map
- 0:04:55 Fetching a fallen star
- 0:06:45 Exploring Faron (Popla Foothills area)
- 0:08:25 Korok Seed x2
- 0:10:05 Exploring Faron (Popla Foothills area)
- 0:12:10 Chest (Shield of the minds eye)
- 0:12:30 Exploring Faron (Popla Foothills area)
- 0:13:30 Korok Seed
- 0:14:00 Exploring Faron (Popla Foothills area)
- 0:14:45 Korok Seed x2
- 0:15:55 Exploring Faron (Popla Foothills area)
- 0:16:40 Korok Seed
- 0:17:00 Miniboss (Boss Bokoblin)
- 0:20:25 Chest (Gnarled Thick Stick & Amber & Luminous Stone)
- 0:20:55 Exploring Faron (Popla Foothills area)
- 0:22:50 Chest (Opal)
- 0:23:10 Exploring Faron (Popla Foothills area)
- 0:24:50 Chest (Large Zonai Charge)
- 0:25:10 Exploring Faron (Popla Foothills area)
- 0:28:05 Location (Finra Woods Excavation Site)
- 0:28:20 Exploring Finra Woods Excavation Site
- 0:29:00 Chest (Large Zonai Charge)
- 0:29:30 Bubbul Gem
- 0:30:00 Exploring Faron (Popla Foothills area)
- 0:31:15 Location (Pagos woods excavation site)
- 0:31:40 Exploring Pagos woods excavation site
- 0:32:20 Chest (Large Zonai Charge)
- 0:32:40 Exploring Pagos woods excavation site
- 0:33:10 Bubbul Gem
- 0:33:45 Exploring Faron (Popla Foothills area)
- 0:38:10 Chest (Gnarled Wooden Stick)
- 0:38:30 Exploring Faron (Popla Foothills area)
- 0:40:30 Korok Seed
- 0:40:55 Exploring Faron (Popla Foothills area)
- 0:41:30 Location (Floria river upstream excavation)
- 0:41:50 Exploring Floria river upstream excavation
- 0:43:05 Chest (Topaz)
- 0:43:20 Bubbul Gem
- 0:43:45 Exploring Faron (Popla Foothills area)
- 0:45:45 Chest (Electro Elixir)
- 0:46:00 Exploring Faron (Popla Foothills area)
- 0:46:20 Miniboss (Hinox)
- 0:47:30 Exploring Faron (Popla Foothills area)
- 0:54:35 Korok Seed
- 0:54:55 Exploring Faron (Popla Foothills area)
- 0:55:50 Side Quest - Goddess statue of courage - Started / Found
- 0:59:10 Korok Seed
- 1:01:50 Outro
- 0:00 Intro
- 0:25 Placing Markers on the Map
- 2:10 Building better versions of the hover bike
- 12:00 Korok Seed
- 12:45 Exploring Faron (Popla Foothills area)
- 13:40 Korok Seed
- 14:20 Exploring Faron (Popla Foothills area)
- 15:35 Location (Hills of baumer chasm)
- 15:55 Exploring Faron (Popla Foothills area)
- 16:10 Korok Seed
- 16:45 Exploring Faron (Popla Foothills area)
- 17:15 Location (Hills of baumer well)
- 18:30 Chest (Ruby)
- 18:55 Exploring Faron (Popla Foothills area)
- 19:30 Location (Deya Village Ruins South Well)
- 20:00 Exploring Faron (Popla Foothills area)
- 20:50 Location (Deya Village Ruins East Well)
- 22:00 Chest (Giant Boomerang)
- 22:30 Chest (Royal Bow)
- 22:50 Exploring Deya Village Ruins Well
- 23:45 Chest (Shield of Minds eye)
- 24:05 Exploring Deya Village Ruins Well
- 25:00 Miniboss (Stone talus)
- 26:00 Exploring Deya Village Ruins Well
- 27:25 Chest (Giant Brightbloom Seed)
- 27:45 Location (Deya Village Ruins North Well)
- 28:15 Farming Dragon parts
- 30:30 Exploring Deya Village Ruins Well
- 32:00 Shrine - Started (Susub shrine)
- 32:30 Chest (Magic Staff)
- 32:50 Shrine - Completed (Susub shrine)
- 33:20 Exploring Faron (Popla Foothills area)
- 35:20 Location (Deya Village Ruins Well)
- 36:15 Korok Seed
- 36:45 Exploring Faron (Popla Foothills area)
- 38:00 Miniboss (Boss bokoblin)
- 39:00 Exploring Faron (Popla Foothills area)
- 40:20 Korok Seed
- 41:20 Exploring Faron (Popla Foothills area)
- 41:50 Korok Seed
- 42:35 Korok Seed
- 43:00 Exploring Faron (Popla Foothills area)
- 44:00 Miniboss (Stone talus)
- 45:00 Exploring Faron (Popla Foothills area)
- 45:35 Chest (Phrenic Bow)
- 45:55 Exploring Faron (Popla Foothills area)
- 46:30 Korok Seed
- 46:55 Exploring Faron (Popla Foothills area)
- 50:40 Shrine Quest - Keys born of water - Task Started / Completed (make 3 squares out of water and use as keys)
- 54:45 Shrine - Started (Jochisiu shrine)
- 55:10 Chest (Big Battery)
- 55:25 Shrine - Completed (Jochisiu shrine)
- 56:45 Outro
- 0:00:00 Intro
- 0:00:25 Placing Markers on the Map
- 0:01:00 Fetching a fallen star
- 0:02:20 Korok Seed
- 0:02:45 Exploring Faron (Popla Foothills area)
- 0:06:10 Miniboss (Stalnox)
- 0:07:20 Exploring Faron (Popla Foothills area)
- 0:09:05 Korok Seed
- 0:09:45 Exploring Faron (Popla Foothills area)
- 0:10:30 Chest (Spring x3)
- 0:10:50 Exploring Faron (Popla Foothills area)
- 0:15:30 Korok Seed
- 0:16:15 Exploring Faron (Popla Foothills area)
- 0:18:00 Korok Seed
- 0:19:00 Farming dragon parts
- 0:20:45 Exploring Faron (Popla Foothills area)
- 0:21:55 Korok Seed
- 0:22:15 Location (South Nabi lake Well)
- 0:22:30 Exploring Faron (Popla Foothills area)
- 0:24:20 Memory 06 (The Gerudo Assault)
- 0:28:40 Korok Seed
- 0:29:10 Exploring Faron (Popla Foothills area)
- 0:29:30 Miniboss (Boss Bokoblin)
- 0:30:30 Exploring Faron (Popla Foothills area)
- 0:32:00 Chest (Forest Dweller Sword)
- 0:32:30 Exploring Faron (Popla Foothills area)
- 0:36:50 Chest (Bomb-Barrel Spear & Bomb Flower x5)
- 0:37:20 Exploring Faron (Popla Foothills area)
- 0:38:20 Korok Seed
- 0:39:45 Exploring Faron (Popla Foothills area)
- 0:40:00 Minigame (Grab the plushies)
- 0:43:50 Korok Seed
- 0:44:40 Exploring Faron (Popla Foothills area)
- 0:45:10 Korok Seed
- 0:46:30 Helping Addison
- 0:48:25 Exploring Faron (Popla Foothills area)
- 0:49:10 Miniboss (Hinox)
- 0:50:30 Miniboss (Battle Talus)
- 0:51:35 Chest (Topaz)
- 0:52:00 Exploring Faron (Popla Foothills area)
- 0:55:00 Going down into the depths
- 0:57:45 Light Root - Found (Amo-Ne Lightroot)
- 1:00:25 Outro
- 0:00 Intro
- 0:25 Placing Markers on the Map
- 1:40 Farming Dragon Parts
- 5:00 Miniboss (Flame Glleok)
- 7:30 Exploring Faron (Popla Foothills area)
- 8:45 Side Quest - Goddess Statue of Courage - (Offer the claw to the goddess statue)
- 10:00 Returning to Hebra (Raspro Pass area)
- 14:10 Side Adventure - Bring Peace to Hebra - (Help Flaxel Defeat the enemies)
- 18:00 Exploring Faron (Popla Foothills area)
- 20:00 Returning to the depths
- 21:00 Exploring the depths of the Faron (Popla Foothills area)
- 23:15 Light Root - Found (Nikohsi lightroot)
- 24:30 Exploring the depths of the Faron (Popla Foothills area)
- 25:00 Farmin Dragon Parts
- 28:30 Exploring the depths of the Faron (Popla Foothills area)
- 31:15 Light Root - Found (Kohsustu lightroot)
- 32:00 Exploring the depths of the Faron (Popla Foothills area)
- 33:05 Light Root - Found (U-u-ujoj lightroot)
- 33:45 Exploring the depths of the Faron (Popla Foothills area)
- 36:10 Light Root - Found (Sijotu lightroot)
- 36:45 Exploring the depths of the Faron (Popla Foothills area)
- 37:40 Light Root - Found (Uisihcoj lightroot)
- 38:00 Exploring the depths of the Faron (Popla Foothills area)
- 39:15 Light Root - Found (Busus lightroot)
- 39:40 Placing Markers on the map
- 42:00 Exploring the depths of the Faron (Popla Foothills area)
- 44:00 Chest (Yiga Schematic & Large Crystallized Charge)
- 44:20 Exploring the depths of the Faron (Popla Foothills area)
- 50:00 Miniboss (Stalnox)
- 50:55 Exploring the depths of the Faron (Popla Foothills area)
- 52:40 Light Root - Found (Muokuij lightroot)
- 53:45 Exploring the depths of the Faron (Popla Foothills area)
- 54:20 Outro
- 0:00:00 Intro
- 0:00:25 Placing Markers on the Map
- 0:01:30 Location (Construct factory)
- 0:03:00 Chest (Captain IV Reaper & Mighty Zonaite Shield)
- 0:03:30 Exploring the depths of the Faron (Popla Foothills area)
- 0:08:30 Miniboss (Boss Bokoblin)
- 0:11:10 Location (Right-Arm Depot)
- 0:11:30 Exploring the Right-Arm Depot
- 0:12:50 Chest (Large Zonaite)
- 0:13:10 Exploring the depths of the Faron (Popla Foothills area)
- 0:18:30 Location (Left-Arm Depot)
- 0:20:00 Chest (Steering Stick x5)
- 0:20:20 Exploring the Left-Arm Depot
- 0:23:10 Exploring the depths of the Faron (Popla Foothills area)
- 0:23:50 Location (Wellspring of courage & Bargainer Statue)
- 0:24:30 Costume / Armor (Dark Hood)
- 0:25:45 Exploring the depths of the Faron (Popla Foothills area)
- 0:26:30 Location (Dracozu altar)
- 0:26:45 Chest (Large Crystallized Charge)
- 0:27:00 Exploring the depths of the Faron (Popla Foothills area)
- 0:31:05 Chest (Giant Brightbloom Seed x5)
- 0:31:30 Exploring the depths of the Faron (Popla Foothills area)
- 0:35:10 Location (Left-Leg Depot)
- 0:35:30 Exploring the Left-Leg Depot
- 0:36:00 Device Dispenser
- 0:36:45 Exploring the Left-Leg Depot
- 0:38:30 Chest (Large Zonaite)
- 0:38:55 Exploring the depths of the Faron (Popla Foothills area)
- 0:42:00 Location (Right-Leg Depot)
- 0:42:25 Chest (Zonaite x3)
- 0:42:35 Exploring the Right-Leg Depot
- 0:46:30 Exploring the depths of the Faron (Popla Foothills area)
- 0:51:25 Miniboss (Hinox)
- 0:52:50 Exploring the depths of the Faron (Popla Foothills area)
- 0:54:00 Miniboss (Hinox)
- 0:55:00 Exploring the depths of the Faron (Popla Foothills area)
- 0:56:20 Farming Ore
- 1:01:10 Miniboss (Boss Bokoblin)
- 1:03:00 Exploring the depths of the Faron (Popla Foothills area)
- 1:03:30 Location (Spirit temple)
- 1:04:00 Will return to the Spirit Temple later on
- 1:05:20 Outro
- 0:00:00 Intro
- 0:00:25 Placing Markers on the Map
- 0:02:20 Exploring the depths of the Faron (Popla Foothills area)
- 0:04:45 Mining ore
- 0:07:55 Exploring the depths of the Faron (Popla Foothills area)
- 0:08:40 Miniboss (Hinox)
- 0:09:50 Exploring the depths of the Faron (Popla Foothills area)
- 0:13:10 Miniboss (Hinox)
- 0:14:20 Exploring the depths of the Faron (Popla Foothills area)
- 0:18:30 Location (Floria Canyon Mine)
- 0:19:00 Exploring the depths of the Faron (Popla Foothills area)
- 0:20:55 Chest (Large Crystallized Charge)
- 0:21:15 Exploring the depths of the Faron (Popla Foothills area)
- 0:30:00 Miniboss (Frox)
- 0:32:00 Exploring the depths of the Faron (Popla Foothills area)
- 0:38:40 Miniboss (Hinox)
- 0:39:45 Exploring the depths of the Faron (Popla Foothills area)
- 0:47:50 Miniboss (Armored Silver-maned Lynel)
- 0:49:55 Exploring the depths of the Faron (Popla Foothills area)
- 0:55:20 Chest (Eightfold Blade)
- 0:55:50 Exploring the depths of the Faron (Popla Foothills area)
- 0:56:35 Chest (Emblazoned Shield)
- 0:56:55 Chest (Sundelion)
- 0:57:20 Exploring the depths of the Faron (Popla Foothills area)
- 0:58:10 Miniboss (Stone talus)
- 0:59:00 Exploring the depths of the Faron (Popla Foothills area)
- 1:01:00 Miniboss (Frox)
- 1:03:45 Outro
- 0:00:00 Intro
- 0:00:45 Exploring the depths of the Faron (Popla Foothills area)
- 0:01:30 Miniboss (Armored White-Maned Lynel)
- 0:03:30 Exploring the depths of the Faron (Popla Foothills area)
- 0:07:00 Chest (Yiga Schematic & Large Crystallized Charge)
- 0:07:30 Exploring the depths of the Faron (Popla Foothills area)
- 0:12:20 Miniboss (Flux construct)
- 0:13:30 Exploring the depths of the Faron (Popla Foothills area)
- 0:24:00 Miniboss (Frox)
- 0:25:00 Exploring the depths of the Faron (Popla Foothills area)
- 0:27:00 Chest (Large Crystallized Charge)
- 0:27:30 Exploring the depths of the Faron (Popla Foothills area)
- 0:32:40 Miniboss (Stone talus)
- 0:33:20 Exploring the depths of the Faron (Popla Foothills area)
- 0:34:00 Boss (Colgera)
- 0:36:50 Chest (Huge Crystallized Charge)
- 0:37:30 Building an even bigger hover bike
- 0:38:30 Exploring the depths of the Faron (Popla Foothills area)
- 0:40:20 Miniboss (Frox)
- 0:40:50 Exploring the depths of the Faron (Popla Foothills area)
- 0:42:04 Location (Faloraa Canyon Mine)
- 0:42:35 Chest (Large Crystallized Charge)
- 0:42:55 Exploring the depths of the Faron (Popla Foothills area)
- 0:47:30 Chest (Large Crystallized Charge & Yiga Schematic)
- 0:47:55 Exploring the depths of the Faron (Popla Foothills area)
- 0:52:25 Miniboss (Hinox)
- 0:54:00 Returning to the Surface/Sky
- 0:57:00 Will return here later
- 0:59:50 Entering West Necluda and Lanayru Wetlands (Popla Foothills area) (Sahasra Slope area)
- 1:00:20 Skyview Tower (Sahasra Slope Skyview Tower)
- 1:00:50 Outro
- 0:00 Intro
- 0:25 Placing Markers on the Map
- 0:40 Exploring West Necluda and Lanayru Wetlands (Sahasra Slope area)
- 2:20 Miniboss (Battle talus)
- 3:00 Exploring Sahasra Slope area
- 4:00 Location (Sahasra slope cave)
- 4:15 Exploring Sahasra slope cave
- 5:35 Bubbul Gem
- 5:55 Exploring Sahasra slope cave
- 7:10 Chest (Shield of the Minds Eye)
- 7:30 Exploring Sahasra slope cave
- 10:30 Activating Sahasra Slope Skyview Tower
- 12:20 Farming Dragon Parts
- 16:50 Placing Markers on the Map
- 20:00 Device Dispencer
- 21:30 Korok Seed
- 21:55 Exploring the sky of West Necluda and Lanayru Wetlands (Sahasra Slope area)
- 22:20 Shrine Quest - The West Necluda Sky Crystal - Task Started (Bring the crystal to the shrine)
- 24:20 Chest (Old Map)
- 24:55 Shrine Quest - The West Necluda Sky Crystal - Task Continued (Bring the crystal to the shrine)
- 26:30 Korok Seed
- 27:30 Shrine Quest - The West Necluda Sky Crystal - Task Continued / Completed (Bring the crystal to the shrine)
- 30:30 Shrine - Started (Ukoojisi shrine)
- 31:00 Chest (Mighty Zonaite Shield)
- 31:20 Shrine - Completed (Ukoojisi shrine)
- 32:00 Exploring the Sky of West Necluda and Lanayru Wetlands (Sahasra Slope area)
- 36:00 Location (Zonaite forge island)
- 36:45 Exploring Zonaite forge island
- 37:30 Korok Seed
- 38:30 Korok Seed
- 39:20 Korok Seed
- 39:55 Exploring Zonaite forge island
- 43:05 Korok Seed
- 44:30 Device Dispenser
- 45:00 Exploring Zonaite forge island
- 46:10 Chest (Zonaite Waistguard)
- 47:00 Shrine - Started (Yansamin shrine)
- 52:15 Chest (Large Zonaite)
- 52:25 Shrine - Completed (Yansamin shrine)
- 53:00 Exploring the Sky of West Necluda and Lanayru Wetlands (Sahasra Slope area)
- 55:30 Chest (Old Map)
- 56:50 Reading Hyrule Compendium Entries
- 57:00 Outro
- 0:00:00 Intro
- 0:00:25 Placing Markers on the Map
- 0:03:50 Exploring sky of West Necluda and Lanayru Wetlands (Sahasra Slope area)
- 0:05:50 Shrine Quest -The North Necluda Sky Crystal - Task Started (Find and bring the crystal to the shrine)
- 0:07:15 Chest (Old Map)
- 0:07:50 Shrine Quest -The North Necluda Sky Crystal - Task Continued / Completed (Find and bring the crystal to the shrine)
- 0:10:40 Shrine - Started (Josu Shrine)
- 0:11:05 Chest (Large Zonai Charge)
- 0:11:20 Shrine - Completed (Josu Shrine)
- 0:12:30 Device Dispencer
- 0:12:55 Exploring sky of West Necluda and Lanayru Wetlands (Sahasra Slope area)
- 0:14:35 Chest (Old Map)
- 0:16:00 Korok Seed
- 0:16:45 Exploring sky of West Necluda and Lanayru Wetlands (Sahasra Slope area)
- 0:18:05 Item (Sage's Will)
- 0:18:30 Exploring sky of West Necluda and Lanayru Wetlands (Sahasra Slope area)
- 0:20:15 Chest (Old Map)
- 0:20:30 Exploring sky of West Necluda and Lanayru Wetlands (Sahasra Slope area)
- 0:22:10 Chest (Big Battery)
- 0:22:45 Exploring West Necluda and Lanayru Wetlands (Sahasra Slope area)
- 0:25:15 Helping Addison
- 0:26:40 Korok Seed
- 0:27:15 Exploring West Necluda and Lanayru Wetlands (Sahasra Slope area)
- 0:27:50 Chest (Amber)
- 0:28:15 Exploring West Necluda and Lanayru Wetlands (Sahasra Slope area)
- 0:28:30 Location (Kakariko Village)
- 0:28:45 Exploring Kakariko Village
- 0:29:35 Side Quest - Codgers Quarrel - Found
- 0:30:00 Exploring Kakariko Village
- 0:31:01 Exploring Kakariko Village
- 0:32:00 Side Quest - Out Of The Inn - Found
- 0:32:35 Exploring Kakariko Village
- 0:33:20 Stamina Vessel
- 0:33:45 Exploring Kakariko Village
- 0:34:50 Korok Seed
- 0:35:15 Exploring Kakariko Village
- 0:41:10 Korok Seed
- 0:41:40 Exploring Kakariko Village
- 0:45:00 Side Quest - Message From An Ancient Era - Task Completed (Talk to Wortsworth)
- 0:46:50 Exploring Kakariko Village
- 0:49:30 Side Quest - A trip through history - Found
- 0:50:30 Exploring Kakariko Village
- 0:53:20 Side Quest - Gloom-Borne Illness - Task Started / Completed (Make some Sunny Veggie Porridge for Lasli's Grandmother)
- 0:57:50 Outfit / Armor (Stealth Tights)
- 0:58:05 Equipment (Sheikah Fabric)
- 0:58:15 Outfit / Armor (Stealth Chest Guard & Stealth Mask)
- 0:58:35 Outfit / Armor (Radiant Mask & Radiant Shirt & Radiant Tights)
- 0:59:00 Exploring Kakariko Village
- 1:00:20 Location (Kakariko Village Well)
- 1:00:45 Chest (Eightfold Blade)
- 1:01:00 Exploring Kakariko Village
- 1:04:50 Reading Hyrule Compendium Entries
- 1:05:05 Outro
- 0:00:00 Intro
- 0:00:25 Exploring Kakariko Village
- 0:01:25 Shrine - Started (Makasura shrine)
- 0:03:50 Chest (Fairy Tonic)
- 0:05:50 Shrine - Completed (Makasura shrine)
- 0:06:30 Exploring Kakariko Village
- 0:08:45 Korok Seed
- 0:09:05 Exploring Kakariko Village
- 0:09:20 Chest (Large Zonaite)
- 0:09:40 Exploring Kakariko Village
- 0:10:00 Side Quest - A trip through history - Task Started (Read the notes from the ring ruins stone slabs)
- 0:11:55 Side Quest - Out of the Inn - Task Completed (Find the Inn Keeper)
- 0:12:30 Exploring Kakariko Village
- 0:16:30 Side Quest - Out of the Inn - Task Completed (Return to the Inn and talk to Dai)
- 0:17:10 Exploring Kakariko Village
- 0:20:05 Korok Seed
- 0:20:30 Exploring Kakariko Village
- 0:26:00 Side Quest - A trip through history - Task Continued (Read the notes from the ring ruins stone slabs)
- 0:26:40 Farming Dragon Parts
- 0:28:00 Location (East Hill Chasm)
- 0:29:05 Exploring Kakariko Village
- 0:33:10 Chest (Silver Lizal Blade)
- 0:34:55 Korok Seed x2
- 0:36:30 Exploring Kakariko Village
- 0:37:30 Korok Seed
- 0:38:30 Farming Dragon Parts
- 0:43:55 Exploring Kakariko Village
- 0:46:00 Location (Kakariko village cave)
- 0:46:20 Exploring Kakariko Village Cave
- 0:46:50 Bubbul Gem
- 0:47:20 Exploring Kakariko Village
- 0:50:20 Side Quest - A trip through history - Task Continued (Read the notes from the ring ruins stone slabs)
- 0:53:00 Device Dispencer
- 0:53:50 Location (Cucco hideaway)
- 0:54:10 Exploring Cucco hideaway
- 0:54:50 Chest (Shield of The Minds Eye)
- 0:55:20 Bubbul Gem
- 0:55:40 Exploring Kakariko Village
- 0:57:20 Side Quest - Codgers Quarrel - Task Completed (Help Steen and Olkin to get rid of the monsters)
- 0:58:40 Chest (Giant Brightbloom Seed)
- 0:59:00 Chest (Mighty Zonaite Sword)
- 0:59:20 Side Quest - A trip through history - Task Continued (Read the notes from the ring ruins stone slabs)
- 0:59:25 Exploring Kakariko Village
- 0:59:55 Side Quest - Codgers Quarrel - Task Completed (Talk to Steen and Olkin)
- 1:01:30 Side Quest - A trip through history - Task Completed (Talk to Bugut)
- 1:03:40 Side Quest - Codgers Quarrel - Task Completed (Talk to Trissa)
- 1:04:05 Side Quest - Follow The Cuccos - Task Started / Completed (Give Trissa 10 eggs)
- 1:05:10 Reading Hyrule Compendium Entries
- 1:05:35 Outro
- 0:00:00 Intro
- 0:00:25 Placing Markers on the Map
- 0:01:20 Farming Dragon Parts
- 0:03:50 Korok Seed
- 0:04:20 Farming Dragon Parts
- 0:08:00 Exploring West Necluda and Lanayru Wetlands (Sahasra Slope area)
- 0:10:15 Chest (Savage Lynel Bow)
- 0:10:35 Exploring West Necluda and Lanayru Wetlands (Sahasra Slope area)
- 0:12:25 Korok Seed
- 0:12:50 Exploring West Necluda and Lanayru Wetlands (Sahasra Slope area)
- 0:13:20 Helping Addison
- 0:15:00 Exploring West Necluda and Lanayru Wetlands (Sahasra Slope area)
- 0:15:30 Side Quest - Honey, Bee Mine - Task Started / Completed (Give Beetz 3 pieces of honey)
- 0:17:00 Exploring West Necluda and Lanayru Wetlands (Sahasra Slope area)
- 0:17:20 Korok Seed
- 0:17:45 Exploring West Necluda and Lanayru Wetlands (Sahasra Slope area)
- 0:18:40 Chest (Spring x3)
- 0:18:55 Exploring West Necluda and Lanayru Wetlands (Sahasra Slope area)
- 0:20:25 Korok Seed
- 0:20:45 Exploring West Necluda and Lanayru Wetlands (Sahasra Slope area)
- 0:22:15 Chest (Phrenic Bow)
- 0:22:40 Korok Seed
- 0:23:05 Exploring West Necluda and Lanayru Wetlands (Sahasra Slope area)
- 0:26:10 Korok Seed x2
- 0:27:45 Exploring West Necluda and Lanayru Wetlands (Sahasra Slope area)
- 0:28:35 Korok Seed
- 0:29:05 Location (Dueling peaks Stable)
- 0:32:05 Side Quest - A Picture for Dueling peaks Stable - Found / Started
- 0:33:30 Chest (Eightfold Longblade)
- 0:34:35 Exploring West Necluda and Lanayru Wetlands (Sahasra Slope area)
- 0:37:25 Side Adventure - Princess Zelda Kidnapped? - Found / Stared
- 0:38:30 Location (Dueling Peaks Stable Well)
- 0:38:55 Exploring Dueling Peaks Stable Well
- 0:42:30 Exploring West Necluda and Lanayru Wetlands (Sahasra Slope area)
- 0:43:50 Side Quest - Serenade To Cotera - Task Started (Help the stable trotters get to Cotera)
- 0:45:40 Location (Big Twin Bridge)
- 0:45:55 Side Quest - Serenade To Cotera - Task Continued / Completed (Help the stable trotters get to Cotera)
- 0:53:00 Great Fairy (Cotera)
- 0:53:20 Upgrading equipment at Great Fairy Cotera
- 1:07:00 Outro
- 0:00:00 Intro
- 0:00:25 Placing Markers on the Map
- 0:02:10 Exploring West Necluda and Lanayru Wetlands (Sahasra Slope area)
- 0:02:35 Chest (Arrow)
- 0:02:55 Exploring West Necluda and Lanayru Wetlands (Sahasra Slope area)
- 0:05:20 Shrine - Started (Eshos shrine)
- 0:08:10 Chest (Mighty Zonaite Shield)
- 0:08:25 Shrine - Completed (Eshos shrine)
- 0:09:00 Exploring West Necluda and Lanayru Wetlands (Sahasra Slope area)
- 0:10:40 Grabbing a fallen star
- 0:12:00 Exploring West Necluda and Lanayru Wetlands (Sahasra Slope area)
- 0:13:10 Location (Dueling peaks North Cave)
- 0:13:25 Exploring Dueling peaks North Cave
- 0:45:30 Side Quest - Misko's Treasure: Twins Manuscript - Task Started (Solve the riddle and retrieve the treasure)
- 0:46:20 Armor / Costume (Tingles Shirt)
- 0:46:55 Exploring West Necluda and Lanayru Wetlands (Sahasra Slope area)
- 0:48:45 Korok Seed
- 0:49:20 Korok Seed
- 0:49:55 Exploring West Necluda and Lanayru Wetlands (Sahasra Slope area)
- 0:50:45 Korok Seed
- 0:51:15 Exploring West Necluda and Lanayru Wetlands (Sahasra Slope area)
- 0:53:05 Korok Seed
- 0:53:30 Exploring West Necluda and Lanayru Wetlands (Sahasra Slope area)
- 0:55:40 Chest (Phrenic Bow)
- 0:56:00 Exploring West Necluda and Lanayru Wetlands (Sahasra Slope area)
- 0:57:05 Korok Seed
- 0:57:30 Exploring West Necluda and Lanayru Wetlands (Sahasra Slope area)
- 0:59:30 Korok Seed
- 0:59:55 Exploring West Necluda and Lanayru Wetlands (Sahasra Slope area)
- 1:00:25 Miniboss (Hinox)
- 1:01:25 Exploring West Necluda and Lanayru Wetlands (Sahasra Slope area)
- 1:02:50 Korok Seed
- 1:03:40 Korok Seed
- 1:04:40 Reading Hyrule Compendium Entries
- 1:05:05 Outro
- 0:00:00 Intro
- 0:00:25 Placing Markers on the Map
- 0:03:00 Farming Dragon parts
- 0:06:50 Exploring West Necluda and Lanayru Wetlands (Sahasra Slope area)
- 0:07:45 Location (Byroad to lanayru wetland)
- 0:08:05 Exploring Byroad to lanayru wetland
- 0:13:00 Chest (Phrenic Bow)
- 0:13:30 Exploring Byroad to lanayru wetland
- 0:15:00 Miniboss (Talus)
- 0:15:35 Exploring Byroad to lanayru wetland
- 0:18:00 Chest (Arrow x5)
- 0:18:35 Bubbul Gem
- 0:18:55 Exploring West Necluda and Lanayru Wetlands (Sahasra Slope area)
- 0:20:10 Korok Seed
- 0:20:35 Exploring West Necluda and Lanayru Wetlands (Sahasra Slope area)
- 0:23:55 Location (Riroka Hills Well)
- 0:24:10 Side Quest - The Ultimate Dish? - Task Started / Completed (Give Moza some dubious or rock-hard food)
- 0:27:10 Exploring West Necluda and Lanayru Wetlands (Sahasra Slope area)
- 0:28:25 Chest (Opal)
- 0:29:00 Exploring West Necluda and Lanayru Wetlands (Sahasra Slope area)
- 0:31:20 Chest (Red Rupee)
- 0:31:45 Exploring West Necluda and Lanayru Wetlands (Sahasra Slope area)
- 0:33:20 Korok Seed
- 0:33:50 Exploring West Necluda and Lanayru Wetlands (Sahasra Slope area)
- 0:34:35 Chest (Arrow x5)
- 0:35:00 Exploring West Necluda and Lanayru Wetlands (Sahasra Slope area)
- 0:36:50 Korok Seed
- 0:37:50 Exploring West Necluda and Lanayru Wetlands (Sahasra Slope area)
- 0:38:20 Chest (Large Zonai Charge)
- 0:38:30 Shrine - Started (Morok shrine)
- 0:41:20 Chest (Sneaky Elixir)
- 0:42:10 Shrine - Completed (Morok shrine)
- 0:42:55 Farming Dragon Parts
- 0:48:00 Exploring West Necluda and Lanayru Wetlands (Sahasra Slope area)
- 0:51:00 Chest (Lizal Boomerang)
- 0:51:25 Exploring West Necluda and Lanayru Wetlands (Sahasra Slope area)
- 0:52:25 Korok Seed
- 0:52:45 Miniboss (Gloom Spawn & Phantom Ganon)
- 0:54:30 Exploring West Necluda and Lanayru Wetlands (Sahasra Slope area)
- 0:55:50 Location (Eagus Bridge & Floret Sandbar)
- 0:56:45 Exploring West Necluda and Lanayru Wetlands (Sahasra Slope area)
- 1:01:00 Chest (Dragonbone Boko Shield)
- 1:02:10 Outro
- 0:00:00 Intro
- 0:00:25 Placing Markers on the Map
- 0:02:45 Exploring West Necluda and Lanayru Wetlands (Sahasra Slope area)
- 0:03:10 Korok Seed
- 0:03:35 Exploring West Necluda and Lanayru Wetlands (Sahasra Slope area)
- 0:05:50 Chest (Boomerang)
- 0:06:15 Exploring West Necluda and Lanayru Wetlands (Sahasra Slope area)
- 0:08:45 Korok Seed
- 0:09:05 Exploring West Necluda and Lanayru Wetlands (Sahasra Slope area)
- 0:10:30 Side Quest - A Picture for Wetland Stable - Found
- 0:11:25 Side Adventure - The Missing Farm Tools - Found
- 0:12:09 Exploring West Necluda and Lanayru Wetlands (Sahasra Slope area)
- 0:12:30 Korok Seed
- 0:14:00 Exploring West Necluda and Lanayru Wetlands (Sahasra Slope area)
- 0:17:30 Side Quest - A Picture for Wetland Stable - Task Started / Completed (Take a picture of the ring ruins)
- 0:18:00 Side Quest - A Picture for Wetland Stable - Task Started / Completed (Talk to Lawdon)
- 0:21:35 Side Adventure - The Missing Farm Tools - Task Started / Completed (Help Izra get to Floret Sandbar)
- 0:29:20 Exploring West Necluda and Lanayru Wetlands (Sahasra Slope area)
- 0:32:10 Korok Seed
- 0:32:35 Exploring West Necluda and Lanayru Wetlands (Sahasra Slope area)
- 0:33:40 Korok Seed
- 0:34:00 Exploring West Necluda and Lanayru Wetlands (Sahasra Slope area)
- 0:35:20 Chest (Rock Salt)
- 0:35:35 Exploring West Necluda and Lanayru Wetlands (Sahasra Slope area)
- 0:37:00 Chest (Bomb Flower x3)
- 0:37:20 Exploring West Necluda and Lanayru Wetlands (Sahasra Slope area)
- 0:38:10 Korok Seed
- 0:38:25 Exploring West Necluda and Lanayru Wetlands (Sahasra Slope area)
- 0:40:35 Chest (Arrow)
- 0:40:50 Exploring West Necluda and Lanayru Wetlands (Sahasra Slope area)
- 0:42:00 Miniboss (Phantom ganon)
- 0:43:00 Exploring West Necluda and Lanayru Wetlands (Sahasra Slope area)
- 0:44:30 Chest (Royal Shield)
- 0:44:55 Exploring West Necluda and Lanayru Wetlands (Sahasra Slope area)
- 0:46:30 Chest (Arrow x5)
- 0:46:55 Exploring West Necluda and Lanayru Wetlands (Sahasra Slope area)
- 0:47:05 Shrine - Completed (Ren-Iz Srine)
- 0:49:00 Chest (Mighty Zonaite Shield)
- 0:50:20 Shrine - Completed (Ren-Iz Srine)
- 0:50:55 Exploring West Necluda and Lanayru Wetlands (Sahasra Slope area)
- 0:51:50 Stamina Vessel
- 0:52:30 Cooking & Buying Arrows / Zonai Devices
- 0:56:55 Exploring West Necluda and Lanayru Wetlands (Sahasra Slope area)
- 0:57:30 Korok Seed
- 0:58:15 Exploring West Necluda and Lanayru Wetlands (Sahasra Slope area)
- 0:59:35 Korok Seed
- 1:00:00 Exploring West Necluda and Lanayru Wetlands (Sahasra Slope area)
- 1:01:20 Korok Seed
- 1:01:35 Exploring West Necluda and Lanayru Wetlands (Sahasra Slope area)
- 1:03:25 Chest (Luminous Stone & Arrow x5)
- 1:03:55 Exploring West Necluda and Lanayru Wetlands (Sahasra Slope area)
- 1:04:45 Korok Seed
- 1:05:20 Exploring West Necluda and Lanayru Wetlands (Sahasra Slope area)
- 1:06:30 Trying to light a fire in the rain to reach the Korok Seed (LOL)
- 1:09:15 Korok Seed
- 1:09:30 And of course the rain stopped after all that
- 1:10:20 Outro
- 0:00:00 Intro
- 0:00:25 Placing Markers on the Map
- 0:02:30 Exploring West Necluda and Lanayru Wetlands (Sahasra Slope area)
- 0:02:45 Chest (Bomb Flower)
- 0:03:10 Exploring West Necluda and Lanayru Wetlands (Sahasra Slope area)
- 0:06:50 Korok Seed
- 0:07:10 Exploring West Necluda and Lanayru Wetlands (Sahasra Slope area)
- 0:08:10 Location (Crenel peak cave)
- 0:08:25 Miniboss (Boss Bokoblin)
- 0:09:30 Chest (Bomb Flower)
- 0:09:55 Exploring Crenel peak cave
- 0:11:00 Bubbul Gem
- 0:11:12 Exploring Crenel peak cave
- 0:13:20 Shrine - Started (Jojon shrine)
- 0:19:30 Chest (Magic Rod)
- 0:20:05 Shrine - Completed (Jojon shrine)
- 0:20:30 Exploring Crenel peak cave
- 0:22:00 Exploring West Necluda and Lanayru Wetlands (Sahasra Slope area)
- 0:24:00 Chest (Arrow x5)
- 0:24:20 Chest (Opal)
- 0:25:00 Exploring West Necluda and Lanayru Wetlands (Sahasra Slope area)
- 0:27:30 Korok Seed
- 0:27:50 Exploring West Necluda and Lanayru Wetlands (Sahasra Slope area)
- 0:30:05 Chest (Dragonbone Boko Bow)
- 0:30:20 Exploring West Necluda and Lanayru Wetlands (Sahasra Slope area)
- 0:32:20 Chest (Arrow x5)
- 0:32:50 Exploring West Necluda and Lanayru Wetlands (Sahasra Slope area)
- 0:34:25 Korok Seed
- 0:34:55 Exploring West Necluda and Lanayru Wetlands (Sahasra Slope area)
- 0:38:15 Location (Moor Garrison Ruins Well)
- 0:39:50 Chest (Royal Shield)
- 0:40:30 Exploring West Necluda and Lanayru Wetlands (Sahasra Slope area)
- 0:43:00 Korok Seed
- 0:43:30 Exploring West Necluda and Lanayru Wetlands (Sahasra Slope area)
- 0:46:00 Korok Seed
- 0:46:30 Farming Dragon Parts
- 0:50:30 Exploring West Necluda and Lanayru Wetlands (Sahasra Slope area)
- 0:52:40 Location (Lanayru Wetlands Well)
- 0:54:30 Chest (Rupee)
- 0:54:45 Exploring West Necluda and Lanayru Wetlands (Sahasra Slope area)
- 0:56:40 Korok Seed
- 0:57:00 Exploring West Necluda and Lanayru Wetlands (Sahasra Slope area)
- 0:59:05 Location (Goponga Village Ruins Well)
- 1:00:40 Exploring West Necluda and Lanayru Wetlands (Sahasra Slope area)
- 1:01:10 Chest (Hydrant x3)
- 1:02:00 Outro
- 0:00:00 Intro
- 0:00:25 Placing Markers on the Map
- 0:02:00 Exploring West Necluda and Lanayru Wetlands (Sahasra Slope area)
- 0:03:35 Miniboss (Boss Bokoblin)
- 0:05:35 Chest (Red Rupee & Arrow x5)
- 0:06:15 Location (Zauz Island Well)
- 0:08:20 Miniboss (Stalnox)
- 0:09:20 Exploring West Necluda and Lanayru Wetlands (Sahasra Slope area)
- 0:11:25 Chest (Rocket x3)
- 0:11:55 Exploring West Necluda and Lanayru Wetlands (Sahasra Slope area)
- 0:12:30 Korok Seed x2
- 0:14:15 Exploring West Necluda and Lanayru Wetlands (Sahasra Slope area)
- 0:14:35 Chest (Beam Emitter x3)
- 0:15:00 Exploring West Necluda and Lanayru Wetlands (Sahasra Slope area)
- 0:15:55 Shrine - Started (Jonsau shrine)
- 0:17:00 Chest (Mighty Construct Bow)
- 0:19:00 Shrine - Completed (Jonsau shrine)
- 0:19:35 Exploring West Necluda and Lanayru Wetlands (Sahasra Slope area)
- 0:20:30 Helping Addison
- 0:21:45 Location (Lanayru wetlands chasm)
- 0:22:00 Exploring West Necluda and Lanayru Wetlands (Sahasra Slope area)
- 0:25:05 Chest (Arrow x10)
- 0:25:30 Exploring West Necluda and Lanayru Wetlands (Sahasra Slope area)
- 0:28:10 Chest (Steel Lizal Bow)
- 0:28:30 Exploring West Necluda and Lanayru Wetlands (Sahasra Slope area)
- 0:32:40 Chest (Large Zonai Charge)
- 0:33:00 Exploring West Necluda and Lanayru Wetlands (Sahasra Slope area)
- 0:35:45 Chest (Royal Bow)
- 0:36:00 Exploring West Necluda and Lanayru Wetlands (Sahasra Slope area)
- 0:41:45 Chest (Steel Lizal Shield)
- 0:42:10 Exploring West Necluda and Lanayru Wetlands (Sahasra Slope area)
- 0:44:15 Chest (Royal Broadsword)
- 0:44:35 Exploring West Necluda and Lanayru Wetlands (Sahasra Slope area)
- 0:45:00 Chest (Silver Rupee)
- 0:45:20 Exploring West Necluda and Lanayru Wetlands (Sahasra Slope area)
- 0:47:50 Korok Seed
- 0:48:10 Exploring West Necluda and Lanayru Wetlands (Sahasra Slope area)
- 0:50:40 Chest (Portable Pot x3)
- 0:51:10 Exploring West Necluda and Lanayru Wetlands (Sahasra Slope area)
- 0:52:05 Korok Seed
- 0:52:25 Exploring West Necluda and Lanayru Wetlands (Sahasra Slope area)
- 0:53:45 Miniboss (Blue-Maned Lynel)
- 0:55:30 Exploring West Necluda and Lanayru Wetlands (Sahasra Slope area)
- 0:57:20 Korok Seed
- 0:57:50 Exploring West Necluda and Lanayru Wetlands (Sahasra Slope area)
- 0:59:00 Farming Dragon Parts
- 1:02:10 Korok Seed
- 1:03:20 Reading Hyrule Compendium Entries
- 1:03:35 Outro
- 0:00:00 Intro
- 0:00:25 Placing Markers on the Map
- 0:02:40 Exploring West Necluda and Lanayru Wetlands (Sahasra Slope area)
- 0:03:20 Helping Addison
- 0:04:15 Exploring West Necluda and Lanayru Wetlands (Sahasra Slope area)
- 0:04:50 Miniboss (Silver-Maned Lynel)
- 0:07:50 Korok Seed
- 0:08:15 Exploring West Necluda and Lanayru Wetlands (Sahasra Slope area)
- 0:09:20 Korok Seed
- 0:09:45 Exploring West Necluda and Lanayru Wetlands (Sahasra Slope area)
- 0:14:15 Chest (Gnarled Wooden Stick)
- 0:14:35 Exploring West Necluda and Lanayru Wetlands (Sahasra Slope area)
- 0:16:10 Shrine Quest - Dyeing to find it - Task Started / Completed (Make the shadow of the formation cover the symbol on the wa
- 0:20:50 Shrine - Started (Kurakat shrine)
- 0:21:20 Chest (Magic Scepter)
- 0:22:25 Shrine - Completed (Kurakat shrine)
- 0:23:10 Exploring West Necluda and Lanayru Wetlands (Sahasra Slope area)
- 0:25:00 Upgrading equipment at Great Fairy Cotera
- 0:28:55 Stamina Vessel
- 0:29:55 Selling stuff at the general store
- 0:33:55 Exploring West Necluda and Lanayru Wetlands (Sahasra Slope area)
- 0:35:10 Chest (Frost Emitter)
- 0:39:15 Korok Seed
- 0:39:55 Exploring West Necluda and Lanayru Wetlands (Sahasra Slope area)
- 0:40:50 Korok Seed
- 0:41:35 Exploring West Necluda and Lanayru Wetlands (Sahasra Slope area)
- 0:43:15 Korok Seed
- 0:43:50 Exploring West Necluda and Lanayru Wetlands (Sahasra Slope area)
- 0:44:45 Miniboss (Boss Bokoblin)
- 0:46:55 Miniboss (Blue-Maned Lynel)
- 0:48:50 Exploring West Necluda and Lanayru Wetlands (Sahasra Slope area)
- 0:51:00 Location (Lanayru Road - West Gate)
- 0:51:30 Exploring West Necluda and Lanayru Wetlands (Sahasra Slope area)
- 0:55:30 Korok Seed
- 0:55:55 Exploring West Necluda and Lanayru Wetlands (Sahasra Slope area)
- 0:56:50 Korok Seed
- 0:57:25 Shrine Quest - The lanayru road crystal - Task Started (Find and bring the crystal to the shrine)
- 1:00:15 Location (Lanayru road south cave)
- 1:00:45 Shrine Quest - The lanayru road crystal - Task Continued (Find and bring the crystal to the shrine)
- 1:02:00 Chest (Zora Shield)
- 1:02:45 Bubbul Gem
- 1:03:00 Shrine Quest - The lanayru road crystal - Task Continued (Find and bring the crystal to the shrine)
- 1:03:20 Chest (Mighty Zonaite Shield)
- 1:03:45 Shrine Quest - The lanayru road crystal - Task Continued / Completed (Find and bring the crystal to the shrine)
- 1:05:40 Shrine - Started (O-Ogim Shrine)
- 1:06:00 Chest (Big Battery)
- 1:06:15 Shrine - Completed (O-Ogim Shrine)
- 1:07:30 Reading Hyrule Compendium Entries
- 1:07:45 Outro
- 0:00:00 Intro
- 0:00:25 Placing Markers on the Map
- 0:01:35 Exploring West Necluda and Lanayru Wetlands (Sahasra Slope area)
- 0:02:50 Korok Seed
- 0:04:20 Exploring West Necluda and Lanayru Wetlands (Sahasra Slope area)
- 0:06:15 Location (Lanayru road east cave)
- 0:06:30 Exploring Lanayru road east cave
- 0:08:25 Chest (Steel Lizal Shield)
- 0:08:45 Chest (Knights-Claymore Halberd)
- 0:09:00 Exploring Lanayru road east cave
- 0:12:30 Shrine - Started (Jogou shrine)
- 0:13:00 Chest (Hearty Elixir)
- 0:13:20 Shrine - Completed (Jogou shrine)
- 0:14:00 Exploring Lanayru road east cave
- 0:14:20 Miniboss (Boss Bokoblin)
- 0:16:10 Bubbul Gem
- 0:16:40 Exploring Lanayru road east cave
- 0:17:20 Chest (Royal Bow)
- 0:17:40 Exploring Lanayru road east cave
- 0:19:20 Exploring West Necluda and Lanayru Wetlands (Sahasra Slope area)
- 0:20:35 Miniboss (Boss Bokoblin)
- 0:21:30 Exploring West Necluda and Lanayru Wetlands (Sahasra Slope area)
- 0:24:45 Chest (Topaz Shield)
- 0:25:05 Exploring West Necluda and Lanayru Wetlands (Sahasra Slope area)
- 0:26:00 Miniboss (Stalnox)
- 0:27:00 Exploring West Necluda and Lanayru Wetlands (Sahasra Slope area)
- 0:29:00 Korok Seed
- 0:29:20 Exploring West Necluda and Lanayru Wetlands (Sahasra Slope area)
- 0:31:50 Korok Seed
- 0:32:20 Exploring West Necluda and Lanayru Wetlands (Sahasra Slope area)
- 0:34:10 Korok Seed
- 0:35:20 Location (Robred dropoff cave)
- 0:35:35 Exploring Robred dropoff cave
- 0:42:20 Chest (Barbarian Helm)
- 0:43:35 Bubbul Gem
- 0:44:00 Exploring Robred dropoff cave
- 0:47:40 Exploring West Necluda and Lanayru Wetlands (Sahasra Slope area)
- 0:48:30 Korok Seed
- 0:49:40 Chest (Phrenic Bow)
- 0:49:55 Exploring West Necluda and Lanayru Wetlands (Sahasra Slope area)
- 0:52:20 Chest (Eightfold Longblade)
- 0:52:40 Exploring West Necluda and Lanayru Wetlands (Sahasra Slope area)
- 0:53:10 Korok Seed
- 0:53:30 Exploring West Necluda and Lanayru Wetlands (Sahasra Slope area)
- 0:54:40 Korok Seed
- 0:55:00 Exploring West Necluda and Lanayru Wetlands (Sahasra Slope area)
- 0:58:00 Chest (Shield of The Minds Eye)
- 0:58:30 Exploring West Necluda and Lanayru Wetlands (Sahasra Slope area)
- 0:59:15 Korok Seed
- 0:59:35 Side Adventure - Bring Peace to Necluda - Task Started / Completed (Help Hoz defeat the monsters)
- 1:02:30 Exploring West Necluda and Lanayru Wetlands (Sahasra Slope area)
- 1:03:45 Location (Fort hateno cave)
- 1:04:00 Exploring Fort hateno cave
- 1:04:40 Chest (Shield of The Minds Eye)
- 1:05:05 Chest (Eightfold-Blade Halberd)
- 1:05:50 Bubbul Gem
- 1:06:20 Exploring Fort hateno cave
- 1:07:35 Upgrading equipment at Great Fairy Cotera
- 1:09:20 Outro
- 0:00:00 Intro
- 0:00:25 Placing Markers on the Map
- 0:02:10 Entering the depths
- 0:02:55 Exploring the depths of West Necluda and Lanayru Wetlands (Sahasra Slope area)
- 0:04:25 Light Root - Found (Arusakam lightroot)
- 0:04:45 Exploring the depths of West Necluda and Lanayru Wetlands (Sahasra Slope area)
- 0:05:45 Light Root - Found (Korom lightroot)
- 0:06:15 Exploring the depths of West Necluda and Lanayru Wetlands (Sahasra Slope area)
- 0:07:05 Light Root - Found (Korakut lightroot)
- 0:07:25 Exploring the depths of West Necluda and Lanayru Wetlands (Sahasra Slope area)
- 0:08:30 Light Root - Found (Nojoj lightroot)
- 0:09:00 Location (Crenel canyon mine)
- 0:09:20 Exploring the depths of West Necluda and Lanayru Wetlands (Sahasra Slope area)
- 0:09:40 Light Root - Found (Zi-Ner lightroot)
- 0:10:15 Placing Markers on the Map
- 0:12:40 Exploring the depths of West Necluda and Lanayru Wetlands (Sahasra Slope area)
- 0:20:00 Chest (Sundelion)
- 0:20:20 Exploring the depths of West Necluda and Lanayru Wetlands (Sahasra Slope area)
- 0:21:40 Miniboss (Flux construct)
- 0:23:10 Exploring the depths of West Necluda and Lanayru Wetlands (Sahasra Slope area)
- 0:24:05 Miniboss (Stone talus)
- 0:25:35 Exploring the depths of West Necluda and Lanayru Wetlands (Sahasra Slope area)
- 0:29:40 Chest (Yiga Schematic & Large Crystallized Charge)
- 0:30:00 Exploring the depths of West Necluda and Lanayru Wetlands (Sahasra Slope area)
- 0:32:00 Chest (Trousers of The sky)
- 0:32:40 Exploring the depths of West Necluda and Lanayru Wetlands (Sahasra Slope area)
- 0:36:10 Chest (Arrow x10)
- 0:36:30 Exploring the depths of West Necluda and Lanayru Wetlands (Sahasra Slope area)
- 0:41:40 Chest (Sundelion)
- 0:42:00 Exploring the depths of West Necluda and Lanayru Wetlands (Sahasra Slope area)
- 0:45:00 Miniboss (Frox)
- 0:47:00 Exploring the depths of West Necluda and Lanayru Wetlands (Sahasra Slope area)
- 0:48:50 Miniboss (Armored Silver-Maned Lynel)
- 0:51:30 Exploring the depths of West Necluda and Lanayru Wetlands (Sahasra Slope area)
- 1:01:35 Chest (Sundelion)
- 1:02:00 Exploring the depths of West Necluda and Lanayru Wetlands (Sahasra Slope area)
- 1:08:45 Miniboss (Stone talus)
- 1:10:15 Exploring the depths of West Necluda and Lanayru Wetlands (Sahasra Slope area)
- 1:11:10 Outro
- 0:00:00 Intro
- 0:00:45 Exploring the depths of West Necluda and Lanayru Wetlands (Sahasra Slope area)
- 0:06:50 Miniboss (Hinox)
- 0:07:35 Exploring the depths of West Necluda and Lanayru Wetlands (Sahasra Slope area)
- 0:21:25 Chest (Giant Brightbloom Seed x5)
- 0:21:45 Exploring the depths of West Necluda and Lanayru Wetlands (Sahasra Slope area)
- 0:35:20 Location (Dueling Canyons Mine)
- 0:35:35 Chest (Tunic of The Hero)
- 0:36:25 Exploring the depths of West Necluda and Lanayru Wetlands (Sahasra Slope area)
- 0:42:50 Light Root - Found (Sohse lightroot)
- 0:43:20 Placing Markers on the Map
- 0:45:00 Exploring the depths of West Necluda and Lanayru Wetlands (Sahasra Slope area)
- 0:46:10 Miniboss (Armored White-Maned Lynel)
- 0:47:40 Exploring the depths of West Necluda and Lanayru Wetlands (Sahasra Slope area)
- 0:49:50 Location (Bubinga Grove)
- 0:50:05 Exploring the depths of West Necluda and Lanayru Wetlands (Sahasra Slope area)
- 0:54:05 Chest (Large Crystallized Charge)
- 0:54:45 Exploring the depths of West Necluda and Lanayru Wetlands (Sahasra Slope area)
- 0:56:05 Miniboss (Hinox)
- 0:57:15 Exploring the depths of West Necluda and Lanayru Wetlands (Sahasra Slope area)
- 0:59:10 Location (Secluded Coliseum)
- 1:02:35 Chest (Ravios Hood)
- 1:03:45 Reading Hyrule Compendium Entries
- 1:03:55 Outro
- 0:00:00 Intro
- 0:01:05 Exploring the depths of West Necluda and Lanayru Wetlands (Sahasra Slope area)
- 0:07:08 Chest (Eightfold Blade)
- 0:10:55 Chest (Yiga Schematic & Large Crystallized Charge)
- 0:11:15 Exploring the depths of West Necluda and Lanayru Wetlands (Sahasra Slope area)
- 0:18:15 Location (Abandoned Kakariko Mine)
- 0:18:45 Exploring Abandoned Kakariko Mine
- 0:21:00 Schema Stone (Launch pad)
- 0:22:00 Exploring Abandoned Kakariko Mine
- 0:23:30 Chest (Large Crystallized Charge)
- 0:23:50 Exploring Abandoned Kakariko Mine
- 0:25:10 Chest (Large Crystallized Charge)
- 0:25:30 Exploring the depths of West Necluda and Lanayru Wetlands (Sahasra Slope area)
- 0:28:55 Light Root - Found (Takaruk Light Root)
- 0:29:30 Exploring the depths of West Necluda and Lanayru Wetlands (Sahasra Slope area)
- 0:30:10 Light Root - Found (Migo-O Light Root)
- 0:30:45 Exploring the depths of West Necluda and Lanayru Wetlands (Sahasra Slope area)
- 0:31:15 Light Root - Found (Uogoj Light Root)
- 0:31:35 Placing Markers on the Map
- 0:33:35 Exploring the depths of West Necluda and Lanayru Wetlands (Sahasra Slope area)
- 0:35:00 Miniboss (Frox)
- 0:36:15 Exploring the depths of West Necluda and Lanayru Wetlands (Sahasra Slope area)
- 0:39:55 Miniboss (Flux construct)
- 0:40:55 Exploring the depths of West Necluda and Lanayru Wetlands (Sahasra Slope area)
- 0:44:30 Chest (Giant Brightbloom Seed x5)
- 0:44:50 Exploring the depths of West Necluda and Lanayru Wetlands (Sahasra Slope area)
- 0:46:20 Farming Dragon Parts
- 0:47:55 Exploring the depths of West Necluda and Lanayru Wetlands (Sahasra Slope area)
- 0:50:10 Chest (Yiga Schematic & Large Crystallized Charge)
- 0:50:45 Exploring the depths of West Necluda and Lanayru Wetlands (Sahasra Slope area)
- 0:56:20 Boss (Marbled Gohma)
- 1:00:30 Chest (Huge Crystallized Charge)
- 1:01:10 Reading Hyrule Compendium Entries
- 1:01:20 Outro
- 0:00:00 Intro
- 0:00:50 Exploring the depths of West Necluda and Lanayru Wetlands (Sahasra Slope area)
- 0:03:45 Miniboss (Stalnox)
- 0:04:25 Exploring the depths of West Necluda and Lanayru Wetlands (Sahasra Slope area)
- 0:09:30 Miniboss (Flux construct 2)
- 0:10:30 Exploring the depths of West Necluda and Lanayru Wetlands (Sahasra Slope area)
- 0:18:50 Light Root - Found (Uasnoj lightroot)
- 0:19:30 Exploring the depths of West Necluda and Lanayru Wetlands (Sahasra Slope area)
- 0:20:55 Boss (Marbled Gohma)
- 0:23:30 Chest (Huge Crystallized Charge)
- 0:24:30 Exploring the depths of West Necluda and Lanayru Wetlands (Sahasra Slope area)
- 0:30:30 Light Root - Found (Sekioam lightroot)
- 0:31:30 Returning to the surface
- 0:32:20 Heading towards Upland Zorana Skyview Tower
- 0:33:10 Skyview Tower (Upland Zorana Skyview Tower)
- 0:33:25 Side Quest - Mired in Muck - Task Started / Completed (Clean Bazz with some water/splash fruit)
- 0:35:40 Activating the Upland Zorana Skyview Tower
- 0:38:00 Placing Markers on the Map
- 0:44:30 Exploring Lanayru Great Spring (Upland Zorana area)
- 0:49:20 Location (Bone pond east cave)
- 0:49:25 Exploring Bone pond east cave
- 0:49:45 Chest (Zora Shield)
- 0:49:50 Exploring Bone pond east cave
- 0:50:50 Bubbul Gem
- 0:51:10 Exploring Bone pond east cave
- 0:53:00 Chest (Royal Broadsword)
- 0:53:15 Exploring Bone pond east cave
- 0:54:30 Shrine - Started (Maoikes shrine)
- 0:54:55 Chest (Diamond)
- 0:55:10 Shrine - Completed (Maoikes shrine)
- 0:55:45 Exploring Bone pond east cave
- 0:57:40 Korok Seed
- 0:58:00 Exploring Lanayru Great Spring (Upland Zorana area)
- 1:01:10 Korok Seed
- 1:01:30 Exploring Lanayru Great Spring (Upland Zorana area)
- 1:02:34 Korok Seed
- 1:03:20 Chest (Ruby)
- 1:03:45 Exploring Lanayru Great Spring (Upland Zorana area)
- 1:04:30 Chest (Rupee)
- 1:04:45 Exploring Lanayru Great Spring (Upland Zorana area)
- 1:06:15 Helping Addison
- 1:07:15 Exploring Lanayru Great Spring (Upland Zorana area)
- 1:07:50 Chest (Arrow)
- 1:08:15 Exploring Lanayru Great Spring (Upland Zorana area)
- 1:09:30 Korok Seed
- 1:10:00 Exploring Lanayru Great Spring (Upland Zorana area)
- 1:12:00 Korok Seed
- 1:13:15 Reading Hyrule Compendium entries
- 1:13:35 Outro
- 0:00:00 Intro
- 0:00:35 Exploring Lanayru Great Spring (Upland Zorana area)
- 0:03:00 Korok Seed
- 0:03:30 Chest (Arrow x5)
- 0:03:55 Exploring Lanayru Great Spring (Upland Zorana area)
- 0:06:50 Korok Seed
- 0:07:15 Exploring Lanayru Great Spring (Upland Zorana area)
- 0:08:00 Making an offering to Satori
- 0:08:30 Exploring Lanayru Great Spring (Upland Zorana area)
- 0:15:50 Korok Seed
- 0:16:55 Location (Tabahl Woods Well)
- 0:18:00 Exploring Lanayru Great Spring (Upland Zorana area)
- 0:18:45 Korok Seed
- 0:19:30 Exploring Lanayru Great Spring (Upland Zorana area)
- 0:20:25 Location (Tabahl Woods Cave)
- 0:21:30 Chest (Zora Spear)
- 0:22:10 Bubbul Gem
- 0:22:55 Exploring Tabahl Woods Cave
- 0:24:30 Chest (Zora Sword)
- 0:24:50 Exploring Lanayru Great Spring (Upland Zorana area)
- 0:26:00 Farming Dragon Parts
- 0:29:20 Exploring Lanayru Great Spring (Upland Zorana area)
- 0:31:50 Miniboss (Phantom ganon)
- 0:33:20 Exploring Lanayru Great Spring (Upland Zorana area)
- 0:35:15 Chest (Mighty Zonaite Shield)
- 0:35:35 Exploring Lanayru Great Spring (Upland Zorana area)
- 0:36:55 Chest (Zora Shield)
- 0:37:15 Exploring Lanayru Great Spring (Upland Zorana area)
- 0:38:35 Korok Seed
- 0:39:15 Exploring Lanayru Great Spring (Upland Zorana area)
- 0:40:50 Zora/Sidon monument
- 0:43:10 Korok Seed
- 0:43:55 Exploring Lanayru Great Spring (Upland Zorana area)
- 0:46:00 Korok Seed
- 0:46:40 Exploring Lanayru Great Spring (Upland Zorana area)
- 0:48:00 Chest (Mighty Zonaite Spear)
- 0:48:55 Exploring Lanayru Great Spring (Upland Zorana area)
- 0:50:00 Farming Dragon parts
- 0:53:50 Exploring Lanayru Great Spring (Upland Zorana area)
- 0:55:15 Korok Seed
- 0:55:35 Exploring Lanayru Great Spring (Upland Zorana area)
- 0:56:25 Zora/Sidon monument
- 0:57:30 Exploring Lanayru Great Spring (Upland Zorana area)
- 0:58:10 Location (Luto's Channel)
- 0:58:35 Exploring Luto's Channel
- 0:59:35 Chest (Zora Sword)
- 0:59:50 Exploring Luto's Channel
- 1:00:10 Bubbul Gem
- 1:00:35 Exploring Luto's Channel
- 1:01:15 Chest (Zora Shield)
- 1:01:45 Exploring Luto's Channel
- 1:02:40 Reading Hyrule Compendium Entries
- 1:03:25 Outro
- 0:00:00 Intro
- 0:00:30 Placing Markers on the Map
- 0:01:40 Exploring Lanayru Great Spring (Upland Zorana area)
- 0:05:25 Location (Oren bridge cave)
- 0:05:40 Exploring Oren bridge cave
- 0:07:00 Bubbul Gem
- 0:07:35 Chest (Royal Claymore)
- 0:08:25 Exploring Lanayru Great Spring (Upland Zorana area)
- 0:11:30 Chest (Zora Bow)
- 0:11:45 Exploring Lanayru Great Spring (Upland Zorana area)
- 0:12:40 Korok Seed
- 0:12:55 Exploring Lanayru Great Spring (Upland Zorana area)
- 0:14:25 Chest (Zora Spear)
- 0:14:45 Exploring Lanayru Great Spring (Upland Zorana area)
- 0:15:20 Korok Seed
- 0:17:35 Exploring Lanayru Great Spring (Upland Zorana area)
- 0:19:45 Chest (Zora Spear)
- 0:20:05 Exploring Lanayru Great Spring (Upland Zorana area)
- 0:20:50 Zora/Sidon monument
- 0:21:30 Exploring Lanayru Great Spring (Upland Zorana area)
- 0:22:15 Zora/Sidon monument
- 0:23:10 Farming Dragon Parts
- 0:29:50 Exploring Lanayru Great Spring (Upland Zorana area)
- 0:32:20 Chest (Steel Lizal Bow)
- 0:32:40 Exploring Lanayru Great Spring (Upland Zorana area)
- 0:33:30 Zora/Sidon monument
- 0:34:20 Exploring Lanayru Great Spring (Upland Zorana area)
- 0:37:20 Location (Luto's Crossing)
- 0:37:35 Miniboss (Boss Bokoblin)
- 0:38:10 Exploring Lanayru Great Spring (Upland Zorana area)
- 0:41:50 Zora/Sidon monument
- 0:42:50 Exploring Lanayru Great Spring (Upland Zorana area)
- 0:45:20 Zora/Sidon monument
- 0:46:35 Exploring Lanayru Great Spring (Upland Zorana area)
- 0:47:30 Korok Seed
- 0:47:50 Exploring Lanayru Great Spring (Upland Zorana area)
- 0:52:40 Zora/Sidon monument
- 0:53:15 Exploring Lanayru Great Spring (Upland Zorana area)
- 0:53:30 Helping Addison
- 0:54:50 Exploring Lanayru Great Spring (Upland Zorana area)
- 0:55:10 Korok Seed
- 0:55:45 Korok Seed
- 0:56:00 Exploring Lanayru Great Spring (Upland Zorana area)
- 0:57:00 Location (Cave Cave Under Zora's Domain)
- 0:57:20 Location (Chasm Under Zora's Domain)
- 0:58:39 Exploring Cave Under Zora's Domain
- 0:59:50 Bubbul Gem
- 1:00:15 Exploring Cave Under Zora's Domain
- 1:02:00 Exploring Lanayru Great Spring (Upland Zorana area)
- 1:02:35 Location (Zora's Domain)
- 1:03:20 Reading Hyrule Compendium Entries
- 1:03:35 Outro
- 0:00 Intro
- 0:30 Placing Markers on the Map
- 1:25 Main Quest - The Sludge Covered Statue - Task Started/ Completed (Clean the statue using water)
- 5:00 Main Quest - Sidon of the zora - Found / Started
- 12:50 Main Quest - Restoring th Zora Armor - Task Started / Completed (Give Yona some Ancient Arowanas to help her finish the
- 14:20 Armor (Zora Armor)
- 14:55 Exploring Zora's Domain
- 17:05 Zora / Sidon Monument
- 22:00 Shrine - Started (Mogawak shrine)
- 23:50 Chest (Opal)
- 24:55 Shrine - Completed (Mogawak shrine)
- 25:40 Exploring Zora's Domain
- 26:10 Korok Seed
- 26:35 Exploring Zora's Domain
- 28:50 Korok Seed
- 29:20 Exploring Zora's Domain
- 33:10 Main Quest - Sidon of the zora - Task Started (Climb Polymus Moountain and talk to Sidon)
- 35:30 Location (Ploymus mountain cave)
- 35:44 Exploring Ploymus mountain cave
- 36:25 Bubbul Gem
- 36:34 Exploring Ploymus mountain cave
- 38:50 Chest (Climbers Bandanna)
- 39:20 Main Quest - Sidon of the zora - Task Continued (Climb Polymus Moountain and talk to Sidon)
- 42:10 Zora / Sidon Monument
- 43:00 Main Quest - Sidon of the zora - Task Continued (Climb Polymus Moountain and talk to Sidon)
- 44:00 Location (Prestine Sanctum)
- 44:15 Exploring Prestine Sanctum
- 47:40 Bubbul Gem
- 47:55 Chest (Arrow)
- 48:10 Main Quest - Sidon of the zora - Task Continued (Climb Polymus Moountain and talk to Sidon)
- 48:40 Chest (Topaz)
- 49:00 Main Quest - Sidon of the zora - Task Continued / Completed (Climb Polymus Moountain and talk to Sidon)
- 52:00 Main Quest - Sidon of the zora - Task Started (Find and talk to Jihato)
- 52:50 Exploring Mipha's Court
- 55:00 Shrine - Started (Ihen-A shrine)
- 57:20 Chest (Arrow x5)
- 58:20 Shrine - Completed (Ihen-A shrine)
- 59:15 Outro
- 0:00 Intro
- 0:30 Placing Markers on the Map
- 2:10 Exploring Lanayru Great Spring (Upland Zorana area)
- 2:50 Chest (Giant Brightbloom Seed)
- 3:05 Exploring Lanayru Great Spring (Upland Zorana area)
- 5:45 Korok Seed x2
- 6:05 Exploring Lanayru Great Spring (Upland Zorana area)
- 13:50 Chest (Lynel Boomerang)
- 14:10 Exploring Lanayru Great Spring (Upland Zorana area)
- 15:40 Farming Dragon Parts
- 18:55 Exploring Lanayru Great Spring (Upland Zorana area)
- 22:00 Main Quest - Sidon of the zora - Task Started/ Completed (Find and talk to Jiahto)
- 22:45 Main Quest - The Broken Slate - Task Started/ Completed (Repair the Broken Slate)
- 24:30 Main Quest - Clues to the Sky - Task Started (Find and talk to King Dorophan)
- 24:45 Exploring Lanayru Great Spring (Upland Zorana area)
- 27:40 Chest (Brightbloom Seed)
- 27:55 Exploring Lanayru Great Spring (Upland Zorana area)
- 30:10 Chest (Opal)
- 30:25 Exploring Lanayru Great Spring (Upland Zorana area)
- 34:30 Main Quest - Clues to the Sky - Task Continued / Completed (Find and talk to King Dorophan)
- 37:30 Main Quest - Clues to the Sky - Task Started / Completed (Talk to Sidon)
- 39:30 Main Quest - Clues to the Sky - Task Started (Find the land of the sky fish and solve the puzzle)
- 42:00 Side Quest - Secret Treasure Under The Great Fish - Task Started / Completed (Find the Vah Ruta Divine Helm)
- 42:45 Chest (Zora Helm)
- 43:50 Main Quest - Clues to the Sky - Task Completed (Find the land of the sky fish and solve the puzzle)
- 45:50 Main Quest - Sidon of the zora - Task Completed (Finish Main Quests - The Broken Slate + Restoring the Zora Armor + Clue
- 46:05 Main Quest - Sidon of the zora - Task Started / Completed (Talk to Sidon)
- 47:05 Main Quest - Sidon of the zora - Task Started / Completed (Sludge Like Boss Fight)
- 52:30 Chest (Royal Claymore)
- 53:00 Main Quest - Sidon of the zora - Task Started / Completed (Meet Sidon at East Reservoir Lake)
- 56:20 Location (Ancient Zora Waterworks)
- 56:45 Main Quest - Sidon of the zora - Task Started (Explore the Underwater Cave)
- 57:05 Chest (Zora Sword)
- 57:30 Main Quest - Sidon of the zora - Task Continued (Explore the Underwater Cave)
- 58:50 Reading Hyrule Compendium Entries
- 59:10 Outro
- 0:00:00 Intro
- 0:00:40 Exploring the Ancient Zora Waterworks
- 0:01:10 Chest (Zora Shield)
- 0:01:30 Exploring the Ancient Zora Waterworks
- 0:05:00 Chest (Opal)
- 0:05:20 Exploring the Ancient Zora Waterworks
- 0:09:45 Chest (Large Zonai Charge)
- 0:10:00 Exploring the Ancient Zora Waterworks
- 0:11:00 Chest (Zora Longsword)
- 0:11:15 Exploring the Ancient Zora Waterworks
- 0:13:00 Chest (Zora Shield)
- 0:13:20 Bubbul Gem
- 0:13:40 Exploring the Ancient Zora Waterworks
- 0:14:30 Main Quest - Sidon of the zora - Task Completed (Explore the underwater cave)
- 0:17:15 Main Quest - Sidon of the zora - Task Started (Explore the Wellspring Island)
- 0:17:35 Location (Wellspring Island)
- 0:17:50 Placing Markers on the map
- 0:19:35 Exploring the Wellspring Island
- 0:20:35 Chest (Soldier IV Blade)
- 0:20:55 Exploring the Wellspring Island
- 0:22:20 Korok Seed
- 0:22:40 Exploring the Wellspring Island
- 0:24:30 Chest (Soldier IV Spear)
- 0:25:00 Exploring the Wellspring Island
- 0:27:00 Chest (Big Battery)
- 0:27:15 Exploring the Wellspring Island
- 0:33:00 Chest (Old Map)
- 0:33:20 Exploring the Wellspring Island
- 0:34:30 Chest (Hydrant)
- 0:34:45 Exploring the Wellspring Island
- 0:35:45 Chest (Hover Stone)
- 0:36:25 Shrine - Started (Igoshon shrine)
- 0:37:35 Chest (Large Zonai Charge)
- 0:39:25 Shrine - Completed (Igoshon shrine)
- 0:40:00 Exploring the Wellspring Island
- 0:40:55 Device Dispenser
- 0:41:30 Miniboss (Flux Construct 2)
- 0:42:30 Exploring the Wellspring Island
- 0:42:40 Chest (Soldier IV Spear)
- 0:42:55 Exploring the Wellspring Island
- 0:46:00 Chest (Soldier IV Reaper)
- 0:46:20 Exploring the Wellspring Island
- 0:47:30 Chest (Captain IV Spear)
- 0:47:55 Exploring the Wellspring Island
- 0:48:40 Chest (Large Zonai Charge)
- 0:49:00 Exploring the Wellspring Island
- 0:53:05 Chest (Old Map)
- 0:53:25 Exploring the Wellspring Island
- 0:54:30 Chest (Soldier IV Blade)
- 0:54:55 Exploring the Wellspring Island
- 0:56:30 Chest (Captain IV Reaper)
- 0:57:00 Exploring the Wellspring Island
- 1:00:00 Chest (Opal)
- 1:00:20 Exploring the Wellspring Island
- 1:01:35 Outro
- 0:00:00 Intro
- 0:00:25 Placing Markers on the Map
- 0:01:20 Main Quest - Sidon of the zora - Task Continued (Explore the Wellspring Island)
- 0:04:35 Korok Seed
- 0:05:15 Exploring the Wellspring Island
- 0:06:50 Main Quest - Sidon of the zora - Task Completed (Explore the Wellspring Island)
- 0:07:05 Location (Water temple)
- 0:07:20 Main Quest - Sidon of the zora - Task Started (Explore the Water Temple)
- 0:11:30 Chest (Sapphire)
- 0:11:55 Exploring the Water temple
- 0:13:35 Chest (Large Zonaite)
- 0:13:55 Exploring the Water temple
- 0:15:20 First Water Wheel
- 0:16:10 Exploring the Water temple
- 0:25:10 Second Water Wheel
- 0:26:25 Chest (Zora Shield)
- 0:26:50 Exploring the Water temple
- 0:28:45 Chest (Mighty Zonaite Shield)
- 0:29:05 Exploring the Water temple
- 0:29:20 Chest (Arrow)
- 0:29:40 Exploring the Water temple
- 0:32:00 Chest (Large Zonai Charge)
- 0:32:40 Third Water Wheel
- 0:34:05 Chest (Opal)
- 0:34:35 Exploring the Water temple
- 0:36:20 Fourth Water Wheel
- 0:37:45 Exploring the Water temple
- 0:40:00 Main Quest - Sidon of the zora - Task Completed (Explore the Water Temple)
- 0:41:00 Main Quest - Sidon of the zora - Task Started / Completed (Mucktorok Boss Fight)
- 0:46:15 Heart Container
- 0:46:35 Cutscene
- 0:55:20 Main Quest - Sidon of the zora - Task Started / Completed (Return to Zora's Domain)
- 0:58:40 Special Ability (Vow of Sidon, Sage of Water)
- 0:59:35 Stamina Vessel
- 1:00:20 Side Quest - A token of friendship - Started / Found
- 1:01:15 Reading Hyrule Compendium Entries
- 1:02:20 Outro
- 0:00:00 Intro
- 0:00:25 Placing Markers on the Map
- 0:02:40 Exploring Lanayru Great Spring (Upland Zorana area)
- 0:02:50 Side Quest - Secret Treasure Under The Great Fish - Task Started / Completed (Show Sidon the Vah Ruta Divine Helm)
- 0:04:55 Side Quest - The Never-Ending Lecture - Task Started / Completed (Show Chroma and Khira the Zora Armor Helm)
- 0:08:30 Side Quest - The Moonlight Princess - Task Started / Completed (Take a picture of the Mipha statue in the moonlight at M
- 0:14:00 Farming Dragon Parts
- 0:17:05 Side Quest - The Moonlight Princess - Task Started / Completed (Show Seggin the picture)
- 0:22:10 Side Quest - A Wife Wafted Away - Started / Found
- 0:23:30 Side Quest - True treasure - Started / Found
- 0:24:50 Exploring Lanayru Great Spring (Upland Zorana area)
- 0:26:30 Side Quest - A Crabulous Deal - Task Started / Completed (Give Cleff 10 Bright-eyed-crabs)
- 0:28:45 Side Quest - Glory of the zora - Started / Found
- 0:30:30 Side Quest - The Fort at Ja'Abu Ridge - Found / Started
- 0:31:15 Exploring Lanayru Great Spring (Upland Zorana area)
- 0:31:40 Korok Seed
- 0:31:55 Exploring Lanayru Great Spring (Upland Zorana area)
- 0:33:05 Side Quest - The Blue Stone - Task Started (Fetch a blue stone for Ledo)
- 0:34:30 Location (Reservoir lakefront cavern)
- 0:35:20 Bubbul Gem
- 0:35:50 Side Quest - The Blue Stone - Task Continued / Completed (Fetch a blue stone for Ledo)
- 0:39:35 Korok Seed
- 0:40:00 Exploring Lanayru Great Spring (Upland Zorana area)
- 0:41:40 Side Quest - A token of friendship - Task Started (Find the Zora Greaves, hidden in the Ancient Zora Waterworks)
- 0:45:20 Miniboss (Stone talus)
- 0:46:05 Side Quest - A token of friendship - Task Continued / Completed (Find the Zora Greaves, hidden in the Ancient Zora Water
- 0:46:40 Chest (Zora Greaves)
- 0:49:35 Side Quest - A token of friendship - Task Started / Completed (Talk to Yona)
- 0:51:00 Exploring Lanayru Great Spring (Upland Zorana area)
- 0:51:40 Korok Seed
- 0:53:55 Korok Seed
- 0:54:30 Exploring Lanayru Great Spring (Upland Zorana area)
- 0:55:50 Chest (Mighty Zonaite Spear)
- 0:56:30 Miniboss (Boss Bokoblin)
- 0:57:20 Exploring Lanayru Great Spring (Upland Zorana area)
- 0:59:00 Sidon / Zora Monument
- 1:00:00 Exploring Lanayru Great Spring (Upland Zorana area)
- 1:00:50 Location (Upland zorana foothill cave)
- 1:04:15 Bubbul Gem
- 1:04:40 Chest (Zora Spear)
- 1:04:55 Side Quest - Glory of the zora - Task Started / Completed (Give Dento a Zora Spear, 3 pieces of Diamond and 5 pieces of
- 1:07:50 Special Weapon (Lightscale Trident)
- 1:09:55 Outro
- 0:00:00 Intro
- 0:00:25 Placing Markers on the Map
- 0:03:15 Exploring Lanayru Great Spring (Upland Zorana area)
- 0:05:00 Chest (Zora Shield)
- 0:05:20 Exploring Lanayru Great Spring (Upland Zorana area)
- 0:06:50 Korok Seed
- 0:07:30 Exploring Lanayru Great Spring (Upland Zorana area)
- 0:11:50 Korok Seed
- 0:12:25 Exploring Lanayru Great Spring (Upland Zorana area)
- 0:13:15 Korok Seed
- 0:13:35 Exploring Lanayru Great Spring (Upland Zorana area)
- 0:14:35 Location (Ralis channel)
- 0:14:50 Exploring Ralis Channel
- 0:15:30 Shrine Quest - The Ralis Channel Crystal - Task Started (Place the rock at the shrine)
- 0:17:45 Chest (Arrow x5)
- 0:18:40 Bubbul Gem
- 0:19:40 Shrine Quest - The Ralis Channel Crystal - Task Completed (Find and tget the Crystal to the shrine)
- 0:20:00 Shrine - Started (Joniu shrine)
- 0:20:25 Chest (arge Zonai Charge)
- 0:20:35 Shrine - Compeleted (Joniu shrine)
- 0:20:50 Exploring Ralis Channel
- 0:23:25 Exploring Lanayru Great Spring (Upland Zorana area)
- 0:24:30 Location (Upland Zorana Summit Cave)
- 0:24:50 Exploring Upland Zorana Summit Cave
- 0:26:40 Bubbul Gem
- 0:27:00 Exploring Lanayru Great Spring (Upland Zorana area)
- 0:29:15 Location (Upland zorana byroad)
- 0:29:30 Exploring Upland zorana byroad
- 0:30:05 Chest (Zora Shield)
- 0:30:20 Exploring Upland zorana byroad
- 0:31:10 Chest (Zora Sword)
- 0:31:40 Exploring Upland zorana byroad
- 0:33:05 Chest (Arrow)
- 0:33:25 Exploring Upland zorana byroad
- 0:33:50 Bubbul Gem
- 0:34:10 Exploring Upland zorana byroad
- 0:34:40 Chest (Climbing Boots)
- 0:35:15 Exploring Upland zorana byroad
- 0:36:40 Chest (Zora Shield)
- 0:36:55 Exploring Upland zorana byroad
- 0:41:00 Location (Upland Zorana Mountainside Cave)
- 0:41:30 Chest (Zora Sword)
- 0:42:05 Bubbul Gem
- 0:42:20 Chest (Royal Broadsword)
- 0:42:50 Exploring Lanayru Great Spring (Upland Zorana area)
- 0:46:20 Korok Seed
- 0:46:55 Exploring Lanayru Great Spring (Upland Zorana area)
- 0:47:40 Chest (Wing)
- 0:47:55 Exploring Lanayru Great Spring (Upland Zorana area)
- 0:48:30 Korok Seed
- 0:48:50 Exploring Lanayru Great Spring (Upland Zorana area)
- 0:51:00 Miniboss (Boss Bokoblin)
- 0:52:45 Exploring Lanayru Great Spring (Upland Zorana area)
- 0:58:55 Miniboss (Stone talus)
- 1:00:15 Exploring Lanayru Great Spring (Upland Zorana area)
- 1:01:40 Korok Seed
- 1:02:05 Exploring Lanayru Great Spring (Upland Zorana area)
- 1:02:40 Korok Seed x2
- 1:04:05 Exploring Lanayru Great Spring (Upland Zorana area)
- 1:05:05 Chest (Opal)
- 1:05:25 Exploring Lanayru Great Spring (Upland Zorana area)
- 1:06:20 Outro
- 0:00 Intro
- 0:25 Placing Markers on the Map
- 2:15 Chest (Large Zonai Charge)
- 2:40 Exploring Lanayru Great Spring (Upland Zorana area)
- 3:45 Chest (Arrow)
- 4:00 Exploring Lanayru Great Spring (Upland Zorana area)
- 4:25 Helping Addison
- 7:20 Korok Seed
- 7:40 Exploring Lanayru Great Spring (Upland Zorana area)
- 8:50 Side Adventure - Bring Peace to Akkala - Task Started / Completed (Help Toren defeat the enemies)
- 11:15 Equipment (Monster-Control-Crew Fabric)
- 11:50 Exploring Lanayru Great Spring (Upland Zorana area)
- 13:35 Korok Seed
- 13:50 Exploring Lanayru Great Spring (Upland Zorana area)
- 16:55 Location (South akkala plains chasm)
- 17:10 Exploring Lanayru Great Spring (Upland Zorana area)
- 17:40 Korok Seed
- 18:45 Farming Dragon Parts
- 22:30 Exploring Lanayru Great Spring (Upland Zorana area)
- 27:20 Korok Seed
- 27:50 Exploring Lanayru Great Spring (Upland Zorana area)
- 28:20 Location (Sokkala Bridge)
- 29:05 Chest (Arrow x10)
- 29:20 Exploring Lanayru Great Spring (Upland Zorana area)
- 33:00 Chest (Zora Sword)
- 33:20 Exploring Lanayru Great Spring (Upland Zorana area)
- 35:15 Chest (Zora Longsword)
- 35:50 Exploring Lanayru Great Spring (Upland Zorana area)
- 36:00 Korok Seed
- 36:25 Exploring Lanayru Great Spring (Upland Zorana area)
- 38:00 Miniboss (White-Maned Lynel)
- 39:55 Exploring Lanayru Great Spring (Upland Zorana area)
- 42:25 Location (East Sokkala Bridge)
- 42:45 Korok Seed
- 43:15 Exploring Lanayru Great Spring (Upland Zorana area)
- 44:35 Location (Sokkala Bridge)
- 45:00 Exploring Lanayru Great Spring (Upland Zorana area)
- 46:30 Miniboss (Battle talus)
- 47:30 Chest (Gnarled Wooden Stick)
- 47:55 Exploring Lanayru Great Spring (Upland Zorana area)
- 48:25 Korok Seed
- 49:20 Exploring Lanayru Great Spring (Upland Zorana area)
- 50:45 Shrine - Started (Rasitakiwak shrine)
- 57:20 Chest (Magic Rod)
- 57:40 Shrine - Completed (Rasitakiwak shrine)
- 58:40 Outro
- 0:00:00 Intro
- 0:00:25 Placing Markers on the Map
- 0:03:20 Exploring Lanayru Great Spring (Upland Zorana area)
- 0:09:30 Chest (Zonaite x3)
- 0:09:45 Exploring Lanayru Great Spring (Upland Zorana area)
- 0:10:45 Chest (Hover Stone)
- 0:11:10 Farming Dragon Parts
- 0:16:20 Exploring Lanayru Great Spring (Upland Zorana area)
- 0:17:15 Korok Seed
- 0:17:40 Exploring Lanayru Great Spring (Upland Zorana area)
- 0:18:20 Korok Seed x2
- 0:19:40 Exploring Lanayru Great Spring (Upland Zorana area)
- 0:21:10 Korok Seed
- 0:21:30 Exploring Lanayru Great Spring (Upland Zorana area)
- 0:23:50 Minigame (Take The PLushies Back)
- 0:26:45 Exploring Lanayru Great Spring (Upland Zorana area)
- 0:27:50 Chest (Zora Longsword)
- 0:28:30 Location (Ulria grotto east cave)
- 0:28:45 Exploring Ulria grotto east cave
- 0:30:05 Bubbul Gem
- 0:31:10 Miniboss (Hinox)
- 0:32:00 Chest (Royal Broadsword)
- 0:32:20 Exploring Ulria grotto east cave
- 0:33:10 Chest (Amber)
- 0:33:30 Exploring Lanayru Great Spring (Upland Zorana area)
- 0:33:50 Shrine - Started (Gatanisis shrine)
- 0:35:25 Chest (Bomb Flower x5)
- 0:35:45 Shrine - Completed (Gatanisis shrine)
- 0:37:30 Heart Container
- 0:40:20 Upgrading Gear at Great Fairy Cortera
- 0:49:05 Chest (Zora Sword)
- 0:49:30 Korok Seed
- 0:50:05 Exploring Lanayru Great Spring (Upland Zorana area)
- 0:51:30 Chest (Sapphire)
- 0:51:55 Exploring Lanayru Great Spring (Upland Zorana area)
- 0:54:30 Location (Tingel island Chasm)
- 0:54:45 Exploring Lanayru Great Spring (Upland Zorana area)
- 0:55:45 Korok Seed
- 0:56:35 Exploring Lanayru Great Spring (Upland Zorana area)
- 0:59:00 Chest (Bomb Flower)
- 0:59:15 Exploring Lanayru Great Spring (Upland Zorana area)
- 1:01:20 Korok Seed
- 1:02:00 Exploring Lanayru Great Spring (Upland Zorana area)
- 1:03:00 Outro
- 0:00:00 Intro
- 0:00:25 Placing Markers on the Map
- 0:01:40 Exploring Lanayru Great Spring (Upland Zorana area)
- 0:02:40 Korok Seed
- 0:03:30 Exploring Lanayru Great Spring (Upland Zorana area)
- 0:03:55 Chest (Zora Spear)
- 0:04:15 Exploring Lanayru Great Spring (Upland Zorana area)
- 0:05:35 Korok Seed
- 0:06:05 Exploring Lanayru Great Spring (Upland Zorana area)
- 0:07:30 Helping Addison
- 0:08:45 Exploring Lanayru Great Spring (Upland Zorana area)
- 0:10:00 Korok Seed
- 0:10:20 Exploring Lanayru Great Spring (Upland Zorana area)
- 0:11:20 Chest (Zora Sword)
- 0:11:45 Exploring Lanayru Great Spring (Upland Zorana area)
- 0:14:05 Location (Ulria grotto south cave)
- 0:14:20 Exploring Ulria grotto south cave
- 0:15:50 Bubbul Gem
- 0:16:15 Exploring Ulria grotto south cave
- 0:16:45 Miniboss (Stone Talus)
- 0:17:15 Exploring Ulria grotto south cave
- 0:18:35 Exploring Lanayru Great Spring (Upland Zorana area)
- 0:19:35 Korok Seed
- 0:19:55 Exploring Lanayru Great Spring (Upland Zorana area)
- 0:21:00 Miniboss (Stone talus)
- 0:21:20 Exploring Lanayru Great Spring (Upland Zorana area)
- 0:21:40 Korok Seed
- 0:22:15 Exploring Lanayru Great Spring (Upland Zorana area)
- 0:23:15 Korok Seed
- 0:23:40 Exploring Lanayru Great Spring (Upland Zorana area)
- 0:27:00 Korok Seed
- 0:27:30 Exploring Lanayru Great Spring (Upland Zorana area)
- 0:29:30 Side Quest - The Fort at Ja' Abu Ridge - Task Started / Completed (Defeat the enemies at Ja' Abu Ridge Fort)
- 0:34:30 Chest (Lynel Reaper & Arrow x5 & Amber)
- 0:35:25 Korok Seed
- 0:35:50 Exploring Lanayru Great Spring (Upland Zorana area)
- 0:36:20 Korok Seed
- 0:36:50 Exploring Lanayru Great Spring (Upland Zorana area)
- 0:37:15 Korok Seed
- 0:37:40 Exploring Lanayru Great Spring (Upland Zorana area)
- 0:41:00 Miniboss (Boss Bokoblin)
- 0:42:00 Exploring Lanayru Great Spring (Upland Zorana area)
- 0:45:05 Korok Seed
- 0:45:35 Exploring Lanayru Great Spring (Upland Zorana area)
- 0:47:10 Miniboss (Boss Bokoblin)
- 0:48:30 Exploring Lanayru Great Spring (Upland Zorana area)
- 0:49:15 Korok Seed
- 0:50:05 Exploring Lanayru Great Spring (Upland Zorana area)
- 0:52:20 Korok Seed
- 0:53:25 Exploring Lanayru Great Spring (Upland Zorana area)
- 0:55:25 Miniboss (Hinox)
- 0:56:20 Exploring Lanayru Great Spring (Upland Zorana area)
- 0:57:10 Korok Seed
- 0:57:45 Exploring Lanayru Great Spring (Upland Zorana area)
- 0:59:05 Side Quest - The Fort at Ja' Abu Ridge - Task Started / Completed (Talk to Gaddison)
- 0:59:55 Exploring Lanayru Great Spring (Upland Zorana area)
- 1:01:10 Outro
- 0:00:00 Intro
- 0:00:25 Placing Markers on the Map
- 0:03:55 Exploring Lanayru Great Spring (Upland Zorana area)
- 0:06:00 Korok Seed
- 0:06:30 Exploring Lanayru Great Spring (Upland Zorana area)
- 0:07:45 Helping Addison
- 0:08:40 Exploring Lanayru Great Spring (Upland Zorana area)
- 0:09:10 Korok Seed
- 0:09:50 Exploring Lanayru Great Spring (Upland Zorana area)
- 0:12:30 Chest (Spiked Iron-Ball Hammer & Bomb Flower)
- 0:12:55 Exploring Lanayru Great Spring (Upland Zorana area)
- 0:16:15 Korok Seed
- 0:16:40 Exploring Lanayru Great Spring (Upland Zorana area)
- 0:17:45 Farming Dragon Parts
- 0:21:00 Exploring Lanayru Great Spring (Upland Zorana area)
- 0:21:30 Chest (Zora Shield)
- 0:22:05 Exploring Lanayru Great Spring (Upland Zorana area)
- 0:23:15 Korok Seed x2
- 0:24:30 Exploring Lanayru Great Spring (Upland Zorana area)
- 0:25:10 Korok Seed
- 0:26:00 Exploring Lanayru Great Spring (Upland Zorana area)
- 0:28:20 Korok Seed
- 0:28:50 Exploring Lanayru Great Spring (Upland Zorana area)
- 0:30:00 Helping Addison
- 0:31:00 Exploring Lanayru Great Spring (Upland Zorana area)
- 0:33:35 Korok Seed
- 0:33:55 Exploring Lanayru Great Spring (Upland Zorana area)
- 0:35:00 Korok Seed
- 0:35:40 Exploring Lanayru Great Spring (Upland Zorana area)
- 0:36:00 Location (Horon lagoon cave)
- 0:36:05 Exploring Horon lagoon cave
- 0:37:00 Bubbul Gem
- 0:37:20 Exploring Horon lagoon cave
- 0:38:10 Chest (Rubber Tights)
- 0:38:45 Exploring Lanayru Great Spring (Upland Zorana area)
- 0:40:40 Korok Seed
- 0:41:10 Exploring Lanayru Great Spring (Upland Zorana area)
- 0:42:50 Chest (Ancient Blade)
- 0:43:30 Exploring Lanayru Great Spring (Upland Zorana area)
- 0:44:50 Dragon Tear / Memory (10)
- 0:48:45 Korok Seed
- 0:49:05 Exploring Lanayru Great Spring (Upland Zorana area)
- 0:50:35 Chest (Zora Longsword)
- 0:50:50 Korok Seed
- 0:51:50 Korok Seed
- 0:52:20 Exploring Lanayru Great Spring (Upland Zorana area)
- 0:52:50 Helping Addison
- 0:53:55 Exploring Lanayru Great Spring (Upland Zorana area)
- 0:54:50 Shrine - Started (Apogek shrine)
- 0:56:50 Chest (Mighty Zonaite Spear)
- 0:58:20 Shrine - Completed (Apogek shrine)
- 0:58:55 Exploring Lanayru Great Spring (Upland Zorana area)
- 0:59:25 Korok Seed x2
- 1:01:35 Exploring Lanayru Great Spring (Upland Zorana area)
- 1:02:05 Outro
- 0:00 Intro
- 0:25 Placing Markers on the Map
- 2:00 Exploring Lanayru Great Spring (Upland Zorana area)
- 2:50 Korok Seed
- 3:30 Exploring Lanayru Great Spring (Upland Zorana area)
- 3:45 Location (Tarm point cave)
- 4:00 Side Quest - True Treasure - Task Started (Find and help Sasan get to Finley)
- 6:50 Should be a Bubul Gem here
- 7:30 Side Quest - True Treasure - Task Continued / Completed (Find and help Sasan get to Finley)
- 10:00 Shrine - Started (Yomizuk shrine)
- 10:25 Chest (Diamond)
- 10:40 Shrine - Completed (Yomizuk shrine)
- 11:00 Exploring Tarm point cave
- 12:20 Chest (Royal Shield)
- 12:35 Exploring Tarm point cave
- 13:20 Bubbul Gem (I wonder why it wasn't here before)
- 13:45 Exploring Tarm point cave
- 14:40 Korok Seed
- 15:00 Exploring Lanayru Great Spring (Upland Zorana area)
- 16:00 Exploring the sky of Lanayru Great Spring (Upland Zorana area)
- 16:40 Side Quest - A wife wafted away - Task Started / Compelted (Find and talk to Mei)
- 18:30 Exploring the sky of Lanayru Great Spring (Upland Zorana area)
- 20:00 Chest (Old Map)
- 20:30 Exploring the sky of Lanayru Great Spring (Upland Zorana area)
- 21:20 Korok Seed
- 22:00 Side Quest - A wife wafted away - Task Started / Compelted (Talk to Fronk again)
- 23:40 Buying and selling some stuff at the general store
- 26:20 Exploring the sky of Lanayru Great Spring (Upland Zorana area)
- 27:30 Miniboss (Flux construct)
- 28:35 Exploring the sky of Lanayru Great Spring (Upland Zorana area)
- 29:45 Device Dispenser
- 30:15 Shrine - Started (Jirutagumac shrine)
- 32:40 Chest (Large Zonaite)
- 34:20 Shrine - Completed (Jirutagumac shrine)
- 34:55 Exploring the sky of Lanayru Great Spring (Upland Zorana area)
- 35:35 Chest (Sage's Will)
- 35:55 Exploring the sky of Lanayru Great Spring (Upland Zorana area)
- 38:00 Miniboss (Flame gleeok)
- 42:40 Exploring the sky of Lanayru Great Spring (Upland Zorana area)
- 43:25 Miniboss (Flux construct)
- 44:20 Chest (Sage's Will)
- 44:40 Exploring the sky of Lanayru Great Spring (Upland Zorana area)
- 47:00 Heart Container
- 47:30 Solemn Vow of Sidon, Sage of Water
- 47:55 Exploring Lanayru Great Spring (Upland Zorana area)
- 51:40 Side Quest - The Six Dragons - Task Started / Completed (Use Sidon's power on the six dragon statues)
- 52:20 Chest (Opal x5)
- 52:50 Chest (Brightbloom Seed x10)
- 53:30 Heading down into the depths
- 58:00 Light Root - Found (Niuzimod lightroot)
- 59:10 Outro
- 0:00:00 Intro
- 0:00:25 Placing Markers on the Map
- 0:01:30 Exploring the depths of Lanayru Great Spring (Upland Zorana area)
- 0:03:30 Location (Ancient underground fortress)
- 0:03:50 Exploring the depths of Lanayru Great Spring (Upland Zorana area)
- 0:07:10 Chest (Trousers of Twilight)
- 0:08:10 Heading straight for A-Nehi Light root
- 0:11:40 Location (Ploymus canyon mine)
- 0:11:50 Light Root - Found (A-Nehi lightroot)
- 0:12:15 Heading straight for Kawikatisar Light root
- 0:14:50 Light Root - Found (Kawikatisar lightroot)
- 0:15:30 Heading straight for Agihi-Ihcoj Light root
- 0:16:00 Light Root - Found (Agihi-Ihcoj lightroot)
- 0:16:30 Heading straight for Sisinatag Light root
- 0:17:15 Light Root - Found (Sisinatag lightroot)
- 0:17:50 Heading straight for Kegopa Light root
- 0:19:05 Light Root - Found (Kegopa lightroot)
- 0:19:30 Heading straight for Kuzimoy Light root
- 0:20:55 Light Root - Found (Kuzimoy lightroot)
- 0:22:00 Heading straight for Uinoj Light root
- 0:24:35 Light Root - Found (Uinoj lightroot)
- 0:24:55 Placing Markers on the Map
- 0:26:55 Exploring the depths of Lanayru Great Spring (Upland Zorana area)
- 0:28:40 Location (Abandoned lanayru mine)
- 0:28:55 Light Root - Found (Kawagom lightroot)
- 0:29:15 Exploring the depths of Lanayru Great Spring (Upland Zorana area)
- 0:29:50 Chest (Large Crystallized Charge)
- 0:30:10 Exploring the depths of Lanayru Great Spring (Upland Zorana area)
- 0:31:30 Equipment (Schema Stone)
- 0:32:30 Exploring the depths of Lanayru Great Spring (Upland Zorana area)
- 0:40:25 Location (Ruto canyon mine)
- 0:40:45 Exploring the depths of Lanayru Great Spring (Upland Zorana area)
- 0:42:30 Chest (Large Crystallized Charge)
- 0:42:45 Exploring the depths of Lanayru Great Spring (Upland Zorana area)
- 0:51:45 Chest (Giant Brightbloom Seed x5)
- 0:52:00 Exploring the depths of Lanayru Great Spring (Upland Zorana area)
- 0:53:20 Location (Tabahl Grove)
- 0:54:20 Chest (Stone Sea-Breeze Shield)
- 0:54:55 Exploring the depths of Lanayru Great Spring (Upland Zorana area)
- 0:58:30 Chest (Arrow x10)
- 0:58:50 Exploring the depths of Lanayru Great Spring (Upland Zorana area)
- 1:01:30 Boss (Muctorock)
- 1:04:45 Chest (Huge Crystallized Charge)
- 1:05:40 Reading Hyrule Compendium Entries
- 1:06:00 Outro
- 0:00:00 Intro
- 0:00:25 Placing Markers on the Map
- 0:04:20 Exploring the depths of Lanayru Great Spring (Upland Zorana area)
- 0:07:50 Chest (Arrow)
- 0:08:10 Exploring the depths of Lanayru Great Spring (Upland Zorana area)
- 0:11:40 Chest (Giant Brightbloom Seed x5)
- 0:12:00 Exploring the depths of Lanayru Great Spring (Upland Zorana area)
- 0:14:00 Miniboss (Boss Bokoblin)
- 0:15:30 Exploring the depths of Lanayru Great Spring (Upland Zorana area)
- 0:17:30 Miniboss (Battle talus)
- 0:18:35 Exploring the depths of Lanayru Great Spring (Upland Zorana area)
- 0:24:00 Miniboss (Flux construct)
- 0:24:45 Exploring the depths of Lanayru Great Spring (Upland Zorana area)
- 0:27:50 Chest (Arrow x10)
- 0:28:10 Exploring the depths of Lanayru Great Spring (Upland Zorana area)
- 0:30:20 Location (Plymous Canyon Mine)
- 0:30:35 Chest (Large Crystallized Charge)
- 0:30:55 Exploring the depths of Lanayru Great Spring (Upland Zorana area)
- 0:37:50 Chest (Sundelion)
- 0:38:10 Exploring the depths of Lanayru Great Spring (Upland Zorana area)
- 0:41:20 Miniboss (Frox)
- 0:43:15 Exploring the depths of Lanayru Great Spring (Upland Zorana area)
- 0:48:00 Chest (Sundelion)
- 0:48:15 Exploring the depths of Lanayru Great Spring (Upland Zorana area)
- 0:56:30 Chest (Yiga Schematic & LArge Crystallized Charge)
- 0:56:55 Exploring the depths of Lanayru Great Spring (Upland Zorana area)
- 0:58:25 Miniboss (Stone talus)
- 0:59:45 Exploring the depths of Lanayru Great Spring (Upland Zorana area)
- 1:01:20 Shortcut to the surface
- 1:02:45 Exploring the depths of Lanayru Great Spring (Upland Zorana area)
- 1:08:20 Chest (Yiga Schematic & Large Crystallized Charge)
- 1:08:50 Exploring the depths of Lanayru Great Spring (Upland Zorana area)
- 1:12:30 Outro
- 0:00:00 Intro
- 0:00:40 Exploring the depths of Lanayru Great Spring (Upland Zorana area)
- 0:08:15 Chest (Sundelion)
- 0:08:30 Exploring the depths of Lanayru Great Spring (Upland Zorana area)
- 0:23:00 Miniboss (Phantom ganon)
- 0:23:40 Chest (Cap of The Wind)
- 0:25:00 Heading Up to the surface
- 0:26:00 Heading straight towards Mount Lanayru Skyview Tower
- 0:27:40 Skyview Tower - Found (Mount Lanayru Skyview Tower)
- 0:29:15 Placing Markers on the Map
- 0:33:00 Exploring the sky of Mount Lanayru (Mount Lanayru area)
- 0:36:00 Shrine Quest - The High Spring and the Light Rings - Task Started / Completed (Interact with the terminal in the sky rig
- 0:38:15 Shrine - Started (Zakusu shrine)
- 0:43:30 Chest (Soldier IV Spear)
- 0:43:45 Shrine - Completed (Zakusu shrine)
- 0:45:10 Exploring the sky of Mount Lanayru (Mount Lanayru area)
- 0:49:45 Korok Seed
- 0:50:10 Exploring the sky of Mount Lanayru (Mount Lanayru area)
- 0:50:45 Device Dispenser
- 0:51:15 Exploring the sky of Mount Lanayru (Mount Lanayru area)
- 0:51:50 Shrine Quest - The south lanayru sky crystal - Found / Started
- 0:52:10 Exploring the sky of Mount Lanayru (Mount Lanayru area)
- 0:54:00 Chest (Old Map)
- 0:54:30 Exploring the sky of Mount Lanayru (Mount Lanayru area)
- 0:56:10 Korok Seed
- 0:56:45 Exploring the sky of Mount Lanayru (Mount Lanayru area)
- 0:58:30 Chest (Old Map)
- 0:59:55 Exploring the sky of Mount Lanayru (Mount Lanayru area)
- 1:00:10 Shrine Quest - The south lanayru sky crystal - Task Started / Completed (Find and bring the Crystal to Zakusu Shrine)
- 1:02:15 Shrine - Started (Mayanas shrine)
- 1:05:50 Chest (Mighty Zonaite Shield)
- 1:06:35 Shrine - Completed (Mayanas shrine)
- 1:07:40 Outro
- 0:00:00 Intro
- 0:00:40 Exploring the sky of Mount Lanayru (Mount Lanayru area)
- 0:04:30 Dive Cermony
- 0:07:25 Armor / Costume (Glide Mask)
- 0:08:30 Dive Cermony
- 0:09:30 Exploring the sky of Mount Lanayru (Mount Lanayru area)
- 0:10:20 Device Dispenser
- 0:11:00 Shrine - Started (Sihajog shrine)
- 0:11:20 Chest (Diamond)
- 0:11:35 Shrine - Completed (Sihajog shrine)
- 0:11:55 Exploring the sky of Mount Lanayru (Mount Lanayru area)
- 0:12:40 Korok Seed
- 0:12:55 Exploring the sky of Mount Lanayru (Mount Lanayru area)
- 0:13:45 Korok Seed
- 0:14:10 Exploring Mount Lanayru (Mount Lanayru area)
- 0:17:15 Korok seed
- 0:18:30 Miniboss (Frost talus)
- 0:20:30 Exploring Mount Lanayru (Mount Lanayru area)
- 0:21:00 Helping Addison
- 0:22:30 Exploring Mount Lanayru (Mount Lanayru area)
- 0:23:30 Chest (Royal Shield)
- 0:24:00 Chest (Royal Shield)
- 0:24:30 Exploring Mount Lanayru (Mount Lanayru area)
- 0:25:40 Miniboss (Boss Bokoblin)
- 0:27:55 Exploring Mount Lanayru (Mount Lanayru area)
- 0:28:35 Korok Seed
- 0:28:55 Exploring Mount Lanayru (Mount Lanayru area)
- 0:30:30 Side Quest - The High Spring and The Light Rings - Task Started / Completed (Talk to Nazbi)
- 0:32:10 Side Quest - Goddess Statue of Wisdom - Task Started / Completed (Offer a Naydra Claw to the Goddess Statue of Wisdom)
- 0:33:15 Exploring Mount Lanayru (Mount Lanayru area)
- 0:36:10 Chest (Wooden Shield)
- 0:36:30 Miniboss (Phantom ganon)
- 0:38:15 Exploring Mount Lanayru (Mount Lanayru area)
- 0:41:30 Korok Seed x2
- 0:43:00 Farming Dragon Parts
- 0:45:00 Exploring Mount Lanayru (Mount Lanayru area)
- 0:48:20 Korok Seed
- 0:48:40 Farming Dragon Parts
- 0:53:30 Exploring Mount Lanayru (Mount Lanayru area)
- 0:56:35 Korok Seed
- 0:57:00 Exploring Mount Lanayru (Mount Lanayru area)
- 0:57:25 Miniboss (Phantom ganon)
- 0:58:20 Exploring Mount Lanayru (Mount Lanayru area)
- 1:02:05 Chest (Dragonbone Boko Shield)
- 1:02:25 Exploring Mount Lanayru (Mount Lanayru area)
- 1:03:20 Korok Seed
- 1:04:25 Outro
- 0:00 Intro
- 0:25 Placing Markers on the Map
- 5:40 Exploring Mount Lanayru (Mount Lanayru area)
- 7:10 Fetching a fallen star
- 9:00 Farming dragon parts
- 13:00 Upgrading gear at Great Fairy Cotera
- 15:45 Exploring the sky of Mount Lanayru (Mount Lanayru area)
- 19:10 Korok Seed
- 19:35 Exploring Mount Lanayru (Mount Lanayru area)
- 23:30 Chest (Steel Lizal Bow)
- 23:45 Exploring Mount Lanayru (Mount Lanayru area)
- 26:15 Miniboss (Stone talus)
- 26:55 Exploring Mount Lanayru (Mount Lanayru area)
- 27:30 Helping Addison
- 30:45 Farming Dragon Parts
- 34:45 Exploring Mount Lanayru (Mount Lanayru area)
- 38:20 Chest (Dragonbone Boko Bow)
- 38:40 Exploring Mount Lanayru (Mount Lanayru area)
- 40:45 Helping Addison
- 42:45 Exploring Mount Lanayru (Mount Lanayru area)
- 43:40 Korok Seed
- 43:55 Exploring Mount Lanayru (Mount Lanayru area)
- 44:35 Korok Seed x2
- 45:50 Location (Hateno Village)
- 46:25 Exploring Mount Lanayru (Mount Lanayru area)
- 46:45 Korok Seed
- 47:15 Exploring Mount Lanayru (Mount Lanayru area)
- 48:40 Miniboss (Phantom ganon)
- 49:55 Exploring Mount Lanayru (Mount Lanayru area)
- 0:00:00 Intro
- 0:00:25 Farming Dragon Parts
- 0:04:30 Korok Seed x2
- 0:06:00 Exploring Hateno Village
- 0:06:25 Korok Seed
- 0:06:45 Exploring Hateno Village
- 0:07:30 Korok Seed
- 0:07:50 Exploring Hateno Village
- 0:08:05 Location (Hateno Village Wells)
- 0:08:25 Exploring Hateno Village Wells
- 0:10:10 Chest (Shield of The Mind's Eye)
- 0:10:30 Exploring Hateno Village Wells
- 0:12:40 Chest (Phrenic Bow)
- 0:12:55 Exploring Hateno Village Wells
- 0:16:20 Location (Hateno Village West Well)
- 0:16:40 Exploring Hateno Village Wells
- 0:18:20 Exploring Hateno Village
- 0:20:10 Side Adventure - Team Cece or Team Reede? - Found / Started
- 0:24:20 Side Adventure - Cece's Secret - Found / Started
- 0:25:30 Exploring Hateno Village
- 0:26:50 Side Quest - Manny's Beloved - Task Started / Completed (Talk to Ivee)
- 0:28:15 Side Adventure - Reede's Secret - Found / Started
- 0:29:10 Side Quest - Manny's Beloved - Task Started / Completed (Talk to Manny and give him 10 frogs)
- 0:31:00 Side Adventure - Team Cece or Team Reede? - Task Started (Give a Hylian Mushroom to 10 Hateno Village residents)
- 0:31:30 Exploring Hateno Village
- 0:32:45 Equipment (Cece Fabric)
- 0:33:25 Dyeing the shiekah outfit
- 0:34:45 Changing the Glider fabric
- 0:35:45 Exploring Hateno Village
- 0:38:00 Side Adventure - Team Cece or Team Reede? - Task Continued (Give a Hylian Mushroom to 10 Hateno Village residents)
- 0:38:25 Exploring Hateno Village
- 0:43:10 Korok Seed
- 0:43:35 Exploring Hateno Village
- 0:44:55 Side Quest - Teach Me A Lesson 1 - Found / Started
- 0:46:00 Farming Dragon Parts
- 0:48:45 Side Quest - Teach Me A Lesson 1 - Task Started / Completed (Tak a picture of a screen depicting the calamity and show i
- 0:54:50 Side Quest - Teach Me A Lesson 2 - Task Started / Completed (Cook a dish containing Goron Spice, Hyllian Rice and Monste
- 0:59:15 Exploring Hateno Village
- 1:01:30 Korok Seed
- 1:01:55 Exploring Hateno Village
- 1:04:00 Side Adventure - A Letter to Koyin - Task Started / Completd (Fetch and show the message in a bottle Koyin)
- 1:06:15 Side Adventure - Team Cece or Team Reede? - Task Continued (Give a Hylian Mushroom to 10 Hateno Village residents)
- 1:06:50 Side Adventure - Team Cece or Team Reede? - Task Continued (Give a Hylian Mushroom to 10 Hateno Village residents)
- 1:07:15 Side Quest - Dantz Prize Cows - Task Started / Completd (Give Dantz 3 acorns)
- 1:08:30 Chest (Arrow)
- 1:10:15 Side Adventure - A letter to koyin - Task Started / Completed (Talk to Koyin again)
- 1:11:30 Exploring Hateno Village
- 1:12:55 Outro
- 0:00:00 Intro
- 0:02:30 Chest (Royal Bow)
- 0:04:50 Shrine - Started (Zanmik shrine)
- 0:08:30 Chest (Mighty Zonaite Longsword)
- 0:09:45 Shrine - Completed (Zanmik shrine)
- 0:10:30 Location (Hateno Village East Well)
- 0:13:35 Side Adventure - Team Cece or Team Reede? - Task Continued (Give a Hylian Mushroom to 10 Hateno Village residents)
- 0:15:35 Heart Container
- 0:18:10 Chest (Rupee)
- 0:19:15 Location (Hateno Village North Well)
- 0:19:40 Side Adventure - Reede's Secret - Task Started / Completed (Enter Reede's Shed and find out his secret)
- 0:21:25 Side Adventure - Reede's Secret - Task Started / Completed (Talk to Clavia)
- 0:22:40 Side Quest - Photographing a Chuchu - Found / Started
- 0:25:40 Side Adventure - Cece's Secret - Task Started / Completed (Follow Cece at night)
- 0:28:20 Side Adventure - Cece's Secret - Task Started / Completed (Talk to Sophie)
- 0:30:15 Side Adventure - Team Cece or Team Reede? - Task Continued (Give a Hylian Mushroom to 10 Hateno Village residents)
- 0:31:40 Farming Dragon Parts
- 0:36:45 Korok Seed
- 0:37:30 Farming Dragon Parts
- 0:39:45 Side Adventure - Team Cece or Team Reede? - Task Continued (Give a Hylian Mushroom to 10 Hateno Village residents)
- 0:40:40 Location (Hateno Ancient Tech Lab)
- 0:40:55 Side Adventure - Hateno Village Research Lab - Task Completed (Go to Hateno Research Lab)
- 0:41:10 Side Adventure - Hateno Village Research Lab - Task Started / Completed (Get the sensor from Robbie)
- 0:41:25 Side Adventure - Hateno Village Research Lab - Task Started (Test the sensor)
- 0:42:45 Location (Retsam forest cave)
- 0:43:05 Shrine - Started (Mayahisik shrine)
- 0:43:45 Chest (Magic Scepter)
- 0:43:50 Shrine - Completed (Mayahisik shrine)
- 0:44:50 Bubbul Gem
- 0:46:10 Side Adventure - Hateno Village Research Lab - Task Started / Completed (Talk to Robbie again)
- 0:47:10 Side Adventure - Presenting: Sensor +! - Task Started / Completed (Have at least 5 monsters stored in your compendium an
- 0:49:05 Side Adventure - Presenting: Hero's Path Mode - Task Started / Completed (Visit at least 15 shrines and talk to Robbie)
- 0:50:20 Side Adventure - Presenting: The Travel Medallion - Found / Started
- 0:51:45 Side Adventure - Filling Out The Compendium - Found / Started
- 0:55:45 Korok Seed
- 0:56:45 Exploring Hateno Village
- 1:00:35 Side Quest - Uma's Garden - Task / Started (Plant something in the garden)
- 1:01:55 Side Adventure - Team Cece or Team Reede? - Task Continued (Give a Hylian Mushroom to 10 Hateno Village residents)
- 1:02:40 Outro
- 0:00:00 Intro
- 0:00:25 Placing Markers on the Map
- 0:02:10 Exploring Hateno Village
- 0:03:50 Side Adventure - Team Cece or Team Reede? - Task Continued (Talk to Cece)
- 0:04:20 Side Adventure - The Mayoral Election - Task Started / Completed (Talk to Sophie to get the election started)
- 0:08:30 Costume / Outfit (Cece Hat)
- 0:10:05 Exploring Hateno Village
- 0:10:45 Side Quest - Photographing a Chuchu - Task Started / Completed (Take a photo of a Chuchu and show it to Ayge)
- 0:14:00 Equipment (Chuchu, Cucco & Horse Fabric)
- 0:15:45 Exploring Hateno Village
- 0:16:15 Side Quest - Homegrown in Hateno - Task Started / Completed (Defend the plants through the night)
- 0:19:15 Exploring Hateno Village
- 0:20:30 Korok Seed x2
- 0:21:55 Exploring Mount Lanayru (Mount Lanayru area)
- 0:22:25 Side Quest - A bottled cry for help - Started / Found
- 0:23:00 Exploring Mount Lanayru (Mount Lanayru area)
- 0:23:30 Korok Seed
- 0:23:55 Exploring Mount Lanayru (Mount Lanayru area)
- 0:25:20 Korok Seed
- 0:25:45 Location (Walnot mountain cave)
- 0:26:05 Exploring Walnot mountain cave
- 0:27:30 Chest (Amber)
- 0:27:55 Exploring Walnot mountain cave
- 0:29:30 Bubbul Gem
- 0:30:00 Chest (Rock Salt)
- 0:30:30 Chest (Giant Boomerang)
- 0:31:00 Exploring Walnot mountain cave
- 0:32:00 Miniboss (Boss Bokoblin)
- 0:33:00 Exploring Walnot mountain cave
- 0:34:20 Chest (Royal Bow)
- 0:34:40 Chest (Royal Claymore)
- 0:35:25 Chest (Barbarian Leg Wraps)
- 0:36:20 Exploring Walnot mountain cave
- 0:37:20 Shrine - Started (Jikais shrine)
- 0:39:25 Chest (Magic Staff)
- 0:40:30 Shrine - Completed (Jikais shrine)
- 0:40:43 Exploring Mount Lanayru (Mount Lanayru area)
- 0:42:40 Chest (Arrow)
- 0:42:55 Exploring Mount Lanayru (Mount Lanayru area)
- 0:43:40 Korok Seed
- 0:44:00 Exploring Mount Lanayru (Mount Lanayru area)
- 0:44:50 Korok Seed
- 0:45:20 Exploring Mount Lanayru (Mount Lanayru area)
- 0:50:00 Chest (Blue-Maned Lynel Reaper)
- 0:50:30 Exploring Mount Lanayru (Mount Lanayru area)
- 0:51:15 Korok Seed
- 0:51:40 Exploring Mount Lanayru (Mount Lanayru area)
- 0:52:30 Korok Seed
- 0:53:05 Exploring Mount Lanayru (Mount Lanayru area)
- 0:54:30 Korok Seed
- 0:54:50 Exploring Mount Lanayru (Mount Lanayru area)
- 0:55:55 Miniboss (Boss Bokoblin)
- 0:57:45 Exploring Mount Lanayru (Mount Lanayru area)
- 1:00:30 Outro
- 0:00:00 Intro
- 0:00:25 Placing Markers on the Map
- 0:02:50 Exploring Mount Lanayru (Mount Lanayru area)
- 0:03:00 Korok Seed
- 0:03:25 Exploring Mount Lanayru (Mount Lanayru area)
- 0:04:30 Taming "Ganons Horse"
- 0:15:15 Dyeing more outfits
- 0:20:00 Exploring Mount Lanayru (Mount Lanayru area)
- 0:21:50 Korok Seed
- 0:22:20 Exploring Mount Lanayru (Mount Lanayru area)
- 0:23:30 Location (Deepback bay cave)
- 0:23:45 Exploring Deepback bay cave
- 0:25:40 Chest (Shield of Mind's Eye)
- 0:26:00 Exploring Deepback bay cave
- 0:27:00 Bubbul Gem
- 0:27:15 Shrine - Started (Anedamimik shrine)
- 0:28:25 Chest (Large Zonai Charge)
- 0:29:15 Shrine - Completed (Anedamimik shrine)
- 0:29:50 Exploring Mount Lanayru (Mount Lanayru area)
- 0:31:10 Korok Seed
- 0:31:35 Exploring Mount Lanayru (Mount Lanayru area)
- 0:33:10 Chest (Arrow)
- 0:33:30 Exploring Mount Lanayru (Mount Lanayru area)
- 0:33:45 Chest (Zonaite x3)
- 0:34:05 Exploring Mount Lanayru (Mount Lanayru area)
- 0:35:25 Helping Addison
- 0:37:45 Exploring Mount Lanayru (Mount Lanayru area)
- 0:38:10 Korok Seed
- 0:38:35 Exploring Mount Lanayru (Mount Lanayru area)
- 0:40:00 Location (Mapla point cave)
- 0:40:20 Side Quest - A Bottled Cry For Help - Task Started / Completed (Find and talk to Chumin in Maple Point Cave)
- 0:41:45 Exploring Mapla point cave
- 0:42:00 Chest (Purple Rupee)
- 0:42:35 Bubbul Gem
- 0:42:55 Exploring Mount Lanayru (Mount Lanayru area)
- 0:46:00 Korok Seed
- 0:46:30 Exploring Mount Lanayru (Mount Lanayru area)
- 0:47:50 Korok Seed
- 0:48:25 Exploring Mount Lanayru (Mount Lanayru area)
- 0:49:00 Chest (Large Zonai Charge)
- 0:49:20 Exploring Mount Lanayru (Mount Lanayru area)
- 0:50:25 Korok Seed
- 0:51:00 Korok Seed
- 0:51:55 Farming Dragon Parts
- 0:53:50 Korok Seed
- 0:54:20 Exploring Mount Lanayru (Mount Lanayru area)
- 0:56:00 Chest (Eightfold Longblade)
- 0:56:40 Chest (Phrenic Bow)
- 0:57:00 Exploring Mount Lanayru (Mount Lanayru area)
- 0:57:45 Miniboss (Hinox)
- 0:58:50 Exploring Mount Lanayru (Mount Lanayru area)
- 1:00:15 Korok Seed
- 1:01:00 Korok Seed
- 1:01:50 Exploring Mount Lanayru (Mount Lanayru area)
- 1:02:30 Making an offering to Satori
- 1:03:55 Outro
- 0:00:00 Intro
- 0:00:25 Placing Markers on the Map
- 0:02:45 Exploring Mount Lanayru (Mount Lanayru area)
- 0:04:30 Chest (Arrow)
- 0:04:50 Fetching a fallen star
- 0:07:25 Equipment (Aerocuda Fabric)
- 0:08:55 Exploring Mount Lanayru (Mount Lanayru area)
- 0:12:30 Chest (Silver Boko Reaper)
- 0:13:00 Exploring Mount Lanayru (Mount Lanayru area)
- 0:17:00 Miniboss (Boss Bokoblin)
- 0:17:30 Chest (Amber & Opal % Gnarled Wooden Stick)
- 0:18:55 Korok Seed
- 0:19:20 Chest (Luminous Stone)
- 0:19:45 Exploring Mount Lanayru (Mount Lanayru area)
- 0:21:00 Farmin Dragon Parts
- 0:27:00 Exploring Mount Lanayru (Mount Lanayru area)
- 0:29:10 Korok Seed
- 0:29:35 Exploring Mount Lanayru (Mount Lanayru area)
- 0:30:10 Korok Seed x2
- 0:32:10 Location (Oakles Navel Cave)
- 0:32:30 Exploring Oakles Navel Cave
- 0:33:00 Chest (Shield of Minds Eye)
- 0:33:50 Shrine Quest - The Oakles Navel Cave Crystal - Task Started (Bring the crystal to the shrine)
- 0:35:05 Chest (Eightfold Blade)
- 0:35:20 Shrine Quest - The Oakles Navel Cave Crystal - Task Continued / Completed (Bring the crystal to the shrine)
- 0:36:50 Shrine - Started (Tokiy shrine)
- 0:37:10 Chest (Large Zonai Charge)
- 0:37:25 Shrine - Completed (Tokiy shrine)
- 0:37:55 Exploring Oakles Navel Cave
- 0:38:35 Bubbul Gem
- 0:38:55 Exploring Mount Lanayru (Mount Lanayru area)
- 0:39:50 Korok Seed
- 0:40:30 Exploring Mount Lanayru (Mount Lanayru area)
- 0:41:10 Korok Seed
- 0:41:30 Exploring Mount Lanayru (Mount Lanayru area)
- 0:42:00 Chest (Phrenic Bow)
- 0:42:20 Exploring Mount Lanayru (Mount Lanayru area)
- 0:44:35 Chest (Savage Lynel Bow)
- 0:44:55 Exploring Mount Lanayru (Mount Lanayru area)
- 0:51:15 Korok Seed
- 0:51:45 Exploring Mount Lanayru (Mount Lanayru area)
- 0:52:50 Dyeing More Clothes
- 0:55:00 Heart Container
- 0:55:50 Side Quest - Uma's Garden - Task Completed (Come back and visit once the plants are fully grown)
- 0:57:45 Farming Dragon Parts
- 1:00:25 Heading Down into the depths
- 1:00:40 Light Root - Found (Usakaz Light Root)
- 1:01:10 Placing Markers on the Map
- 1:01:50 Outro
- 0:00:00 Intro
- 0:01:15 Heading Straight towards Siakij light root
- 0:02:00 Light Root - Found (Siakij lightroot)
- 0:02:30 Heading Straight towards Kimimadena light root
- 0:03:10 Light Root - Found (Kimimadena lightroot)
- 0:03:45 Heading Straight towards Kisihayam light root
- 0:04:00 Location (Retsam Grove)
- 0:04:15 Light Root - Found (Kisihayam lightroot)
- 0:04:50 Heading Straight towards Kimnaz light root
- 0:05:10 Light Root - Found (Kimnaz lightroot)
- 0:05:40 Placing Markers on the Map
- 0:08:10 Location (Abandoned Hateno Mine)
- 0:08:25 Exploring Abandoned Hateno Mine
- 0:09:00 Equipment (Schema Stone)
- 0:09:55 Exploring Abandoned Hateno Mine
- 0:11:40 Chest (Large Crystallized Charge)
- 0:12:00 Exploring Abandoned Hateno Mine
- 0:15:45 Chest (Large Crystallized Charge)
- 0:16:00 Exploring Abandoned Hateno Mine
- 0:16:50 Exploring the depths of Mount Lanayru (Mount Lanayru area)
- 0:17:45 Location (Ebon Canyon Mine)
- 0:18:35 Chest (Zonai Charge)
- 0:18:55 Exploring the depths of Mount Lanayru (Mount Lanayru area)
- 0:27:10 Chest (Phrenic Bow)
- 0:27:50 Chest (Arrow)
- 0:28:20 Chest (Eightfold Blade)
- 0:28:45 Exploring the depths of Mount Lanayru (Mount Lanayru area)
- 0:32:05 Chest (Cap of The Sky)
- 0:32:30 Exploring the depths of Mount Lanayru (Mount Lanayru area)
- 0:35:20 Location (Walnot Canyon Mine)
- 0:35:35 Chest (Large Crystallized Charge)
- 0:35:55 Exploring the depths of Mount Lanayru (Mount Lanayru area)
- 0:46:45 Chest (Sundelion)
- 0:47:00 Exploring the depths of Mount Lanayru (Mount Lanayru area)
- 0:53:50 Location (Lanayru Canyon Mine)
- 0:54:10 Chest (Large Crystallized Charge)
- 0:54:30 Exploring the depths of Mount Lanayru (Mount Lanayru area)
- 0:56:00 Location (Wellspring of wisdom)
- 0:56:15 Exploring the depths of Mount Lanayru (Mount Lanayru area)
- 0:57:25 Costume / Armor (Dark Hood)
- 0:59:00 Exploring the depths of Mount Lanayru (Mount Lanayru area)
- 1:00:30 Outro
- 0:00:00 Intro
- 0:00:30 Placing Markers on the Map
- 0:02:20 Exploring the depths of Mount Lanayru (Mount Lanayru area)
- 0:07:00 Miniboss (Stone talus)
- 0:08:05 Exploring the depths of Mount Lanayru (Mount Lanayru area)
- 0:14:10 Miniboss (Flux construct)
- 0:15:05 Exploring the depths of Mount Lanayru (Mount Lanayru area)
- 0:17:30 Location (Modorna Canyon Mine)
- 0:17:45 Chest (Large Crystallized Charge)
- 0:18:00 Exploring the depths of Mount Lanayru (Mount Lanayru area)
- 0:22:50 Location (Ginner Grove)
- 0:23:25 Chest (Large Crystallized Charge)
- 0:24:10 Location (Middla Grove)
- 0:24:25 Chest (Large Crystallized Charge)
- 0:25:00 Exploring the depths of Mount Lanayru (Mount Lanayru area)
- 0:29:10 Chest (Large Crystallized Charge & Yiga Schematic)
- 0:29:40 Exploring the depths of Mount Lanayru (Mount Lanayru area)
- 0:30:55 Location (Canyon of Awekning Mine)
- 0:31:10 Chest (Large Crystallized Charge)
- 0:31:40 Exploring the depths of Mount Lanayru (Mount Lanayru area)
- 0:37:55 Miniboss (Stone talus)
- 0:38:30 Exploring the depths of Mount Lanayru (Mount Lanayru area)
- 0:46:00 Miniboss (Frost talus)
- 0:47:25 Exploring the depths of Mount Lanayru (Mount Lanayru area)
- 0:48:45 Going back to the surface
- 0:49:30 Dyeing more clothes
- 0:51:40 Checking in on Uma and her crops
- 0:53:00 Heading towards Rabella wetlands skyview tower
- 0:53:30 Farming Dragon Parts
- 0:55:20 Heading straight towards Rabella wetlands skyview tower
- 0:56:05 Skyview Tower - Found (Rabella wetlands skyview tower)
- 1:00:15 Chest (Old Map)
- 1:02:10 Outro
- 0:00:00 Intro
- 0:00:30 Placing Markers on the Map
- 0:03:30 Exploring East Necluda (Rabella Wetlands area)
- 0:04:20 Korok Seed
- 0:05:10 Exploring East Necluda (Rabella Wetlands area)
- 0:07:10 Chest (Giant Boomerang)
- 0:07:25 Exploring East Necluda (Rabella Wetlands area)
- 0:14:20 Chest (Cannon x3)
- 0:14:40 Exploring East Necluda (Rabella Wetlands area)
- 0:16:40 Helping Addison
- 0:17:30 Exploring East Necluda (Rabella Wetlands area)
- 0:18:05 Korok Seed
- 0:18:30 Exploring East Necluda (Rabella Wetlands area)
- 0:18:50 Miniboss (Hinox)
- 0:19:45 Exploring East Necluda (Rabella Wetlands area)
- 0:21:55 Korok Seed
- 0:22:20 Exploring East Necluda (Rabella Wetlands area)
- 0:23:10 Korok Seed
- 0:23:40 Exploring East Necluda (Rabella Wetlands area)
- 0:24:35 Korok Seed
- 0:24:55 Exploring East Necluda (Rabella Wetlands area)
- 0:28:00 Chest (Bomb Flower x3)
- 0:28:45 Exploring East Necluda (Rabella Wetlands area)
- 0:33:00 Farming Dragon Parts
- 0:34:55 Exploring East Necluda (Rabella Wetlands area)
- 0:39:30 Korok Seed
- 0:39:50 Chest (Shield of The Minds Eye)
- 0:40:05 Exploring East Necluda (Rabella Wetlands area)
- 0:42:40 Korok Seed
- 0:43:15 Exploring East Necluda (Rabella Wetlands area)
- 0:44:05 Korok Seed
- 0:44:25 Exploring East Necluda (Rabella Wetlands area)
- 0:46:35 Chest (Savage Lynel Bow)
- 0:46:50 Exploring East Necluda (Rabella Wetlands area)
- 0:47:35 Korok Seed
- 0:47:55 Exploring East Necluda (Rabella Wetlands area)
- 0:49:00 Korok Seed
- 0:49:35 Miniboss (Boss Bokoblin)
- 0:51:45 Exploring East Necluda (Rabella Wetlands area)
- 0:53:15 Chest (Shield of The Minds Eye)
- 0:53:40 Korok Seed
- 0:54:10 Exploring East Necluda (Rabella Wetlands area)
- 0:55:45 Korok Seed
- 0:56:35 Exploring East Necluda (Rabella Wetlands area)
- 0:57:00 Chest (Dragonbone Boko Bow)
- 0:57:20 Exploring East Necluda (Rabella Wetlands area)
- 1:01:30 Helping Addison
- 1:02:45 Outro
- 0:00:00 Intro
- 0:00:25 Placing Markers on the Map
- 0:02:00 Exploring East Necluda (Rabella Wetlands area)
- 0:02:30 Chest (Phrenic Bow)
- 0:02:50 Exploring East Necluda (Rabella Wetlands area)
- 0:04:10 Location (Meda mountain chasm)
- 0:04:30 Exploring East Necluda (Rabella Wetlands area)
- 0:05:35 Korok Seed
- 0:06:10 Farming Dragon Parts
- 0:08:30 Exploring East Necluda (Rabella Wetlands area)
- 0:12:00 Chest (Ancient Blade)
- 0:12:45 Korok Seed
- 0:13:15 Exploring East Necluda (Rabella Wetlands area)
- 0:17:50 Chest (Steel Lizal Shield)
- 0:18:10 Exploring East Necluda (Rabella Wetlands area)
- 0:19:10 Korok Seed
- 0:20:00 Exploring East Necluda (Rabella Wetlands area)
- 0:20:40 Miniboss (Stalnox)
- 0:22:00 Exploring East Necluda (Rabella Wetlands area)
- 0:24:30 Korok Seed
- 0:24:50 Exploring East Necluda (Rabella Wetlands area)
- 0:29:00 Korok Seed x2 & Korok Seed
- 0:31:45 Exploring East Necluda (Rabella Wetlands area)
- 0:33:05 Side Adventure - Ruffian-Infested Village - Found / Started
- 0:34:20 Shrine - Started (Sifumim Shrine)
- 0:39:10 Chest (Captain IV Reaper)
- 0:39:25 Shrine - Completed (Sifumim Shrine)
- 0:40:10 Location (Lerelin Village)
- 0:40:45 Building an big laser turret
- 0:42:10 Side Adventure - Ruffian-Infested Village - Task Started (Defeat all the enemies in Lurelin Village)
- 0:50:00 Location (Lurelin Village Well)
- 0:50:20 Side Adventure - Ruffian-Infested Village - Task Continued / Completed (Defeat all the enemies in Lurelin Village)
- 0:52:55 Side Adventure - Lurelin Village Restoration Project - Task Started / Completed (Gather 15 tree logs and 20 bundles of h
- 1:04:15 Outro
- 0:00:00 Intro
- 0:00:25 Placing Markers on the Map
- 0:01:00 Side Adventure - Lurelin Restoration Project - Task Continued / Completed (Restore all of the village buildings)
- 0:24:00 Exploring East Necluda (Rabella Wetlands area)
- 0:25:10 Chest (Fisherman's Shield)
- 0:25:45 Exploring East Necluda (Rabella Wetlands area)
- 0:26:50 Side Quest - Rattled Ralera - Task Started / Completed (Cook a Tough Seafood Curry for Ralera)
- 0:29:00 Side Quest - Rattled Ralera - Task Started / Completed (Blow some cool air on Ralera)
- 0:29:45 Equipment (Lurelin Village Fabric)
- 0:30:00 Exploring East Necluda (Rabella Wetlands area)
- 0:31:40 Side Quest - Dad's Blue Shirt - Task Started (Find and deliver the blue shirt)
- 0:32:25 Chest (Blue Rupee)
- 0:32:45 Chest (Blue Rupee)
- 0:33:50 Chest (Island Lobster Shirt)
- 0:34:30 Side Quest - Dad's Blue Shirt - Task Completed (Find and deliver the blue shirt)
- 0:36:30 Exploring East Necluda (Rabella Wetlands area)
- 0:38:20 Korok Seed
- 0:38:45 Exploring East Necluda (Rabella Wetlands area)
- 0:39:00 Building the skeleton for a weaponized off road vehicle
- 0:45:40 Korok Seed
- 0:46:15 Exploring East Necluda (Rabella Wetlands area)
- 0:47:50 Building the rest of the weaponized off road vehicle
- 0:55:30 Miniboss (Boss Bokoblin)
- 0:57:10 Chest (Star Fragment)
- 0:57:35 Korok Seed
- 0:57:55 Exploring East Necluda (Rabella Wetlands area)
- 1:00:45 Memory / Dragon Tear
- 1:04:00 Reading Gyrule Compendium Entries
- 1:04:40 Outro
- 0:00:00 Intro
- 0:00:25 Placing Markers on the Map
- 0:01:25 Exploring East Necluda (Rabella Wetlands area)
- 0:02:00 Helping Addison
- 0:02:55 Exploring East Necluda (Rabella Wetlands area)
- 0:04:30 Korok Seed
- 0:04:50 Exploring East Necluda (Rabella Wetlands area)
- 0:07:20 Korok Seed x2
- 0:08:45 Exploring East Necluda (Rabella Wetlands area)
- 0:10:50 Miniboss (Battle talus)
- 0:12:25 Chest (Topaz)
- 0:12:45 Exploring East Necluda (Rabella Wetlands area)
- 0:14:15 Location (Mount dunsel cave)
- 0:14:35 Exploring Mount dunsel cave
- 0:15:20 Chest (Royal Bow)
- 0:15:40 Exploring Mount dunsel cave
- 0:16:40 Chest (Emblazoned Shield)
- 0:17:30 Chest (Eightfold Longblade)
- 0:18:00 Bubbul Gem
- 0:18:25 Exploring Mount dunsel cave
- 0:19:50 Chest (Shield of Minds Eye)
- 0:20:20 Chest (Emblazoned Shield)
- 0:20:50 Shrine - Started (Bamitok shrine)
- 0:21:15 Chest (Big Battery)
- 0:21:30 Shrine - Completed (Bamitok shrine)
- 0:22:05 Exploring East Necluda (Rabella Wetlands area)
- 0:23:30 Buying Zonai Devices
- 0:28:30 Side Quest - Village Attacked By Pirates - Task Started / Completed (Talk to Garini)
- 0:30:30 Selling stuff and cooking up some meals
- 0:37:35 Exploring Mount dunsel cave
- 0:38:15 Chest (Sapphire)
- 0:38:35 Exploring Mount dunsel cave
- 0:41:15 Miniboss (Stone talus)
- 0:42:00 Upgrading the weaponized off road vehicle
- 0:56:30 Exploring East Necluda (Rabella Wetlands area)
- 0:57:30 Miniboss (Boss Bokoblin)
- 0:58:30 Exploring East Necluda (Rabella Wetlands area)
- 1:03:05 Chest (Emblazoned Shield & Shield of Minds Eye)
- 1:03:55 Exploring East Necluda (Rabella Wetlands area)
- 1:05:00 Chest (Silver Boko Reaper)
- 1:05:30 Exploring East Necluda (Rabella Wetlands area)
- 1:09:00 Chest (Royal Claymore)
- 1:09:25 Exploring East Necluda (Rabella Wetlands area)
- 1:10:20 Korok Seed
- 1:11:10 Exploring East Necluda (Rabella Wetlands area)
- 1:11:45 Outro
- 0:00 Intro
- 0:25 Placing Markers on the Map
- 2:10 Exploring East Necluda (Rabella Wetlands area)
- 8:10 Chest (Royal Halberd)
- 8:30 Exploring East Necluda (Rabella Wetlands area)
- 9:05 Korok Seed
- 9:30 Exploring East Necluda (Rabella Wetlands area)
- 10:20 Korok Seed
- 10:50 Exploring East Necluda (Rabella Wetlands area)
- 11:30 Location (Cape cales cliffbase cave)
- 11:50 Side Quest - Misko's Treasure: Pirate Manuscript - Task Started / Completed (Solve the riddle and retrieve the treasure)
- 15:25 Chest (Tingles Tights)
- 15:45 Exploring Cape cales cliffbase cave
- 16:20 Chest (Savage Lynel Bow)
- 16:35 Exploring Cape cales cliffbase cave
- 17:15 Chest (Royal Broadsword)
- 17:40 Bubbul Gem
- 18:05 Exploring Cape cales cliffbase cave
- 19:35 Korok Seed x2
- 0:00:00 Intro
- 0:00:25 Placing Markers on the Map
- 0:02:00 Exploring East Necluda (Rabella Wetlands area)
- 0:03:45 Side Quest - A way to Trade - Task Started / Completed (Help Garini get his boat back)
- 0:12:30 Exploring East Necluda (Rabella Wetlands area)
- 0:14:50 Korok Seed
- 0:15:30 Exploring East Necluda (Rabella Wetlands area)
- 0:16:00 Location (Atun valley cave)
- 0:16:25 Chest (Bomb Flower)
- 0:16:45 Exploring Atun valley cave
- 0:18:00 Chest (Bomb-Barrel Spear & Knight's-Broadsword Halberd)
- 0:18:25 Exploring Atun valley cave
- 0:19:00 Bubbul Gem
- 0:19:30 Exploring Atun valley cave
- 0:20:15 Exploring East Necluda (Rabella Wetlands area)
- 0:22:00 Chest (Topaz)
- 0:22:15 Exploring East Necluda (Rabella Wetlands area)
- 0:23:40 Korok Seed
- 0:24:00 Exploring East Necluda (Rabella Wetlands area)
- 0:24:40 Helping Addison
- 0:25:45 Exploring East Necluda (Rabella Wetlands area)
- 0:26:20 Chest (Zonaite x3)
- 0:27:30 Miniboss (Boss Bokoblin)
- 0:29:20 Exploring East Necluda (Rabella Wetlands area)
- 0:31:10 Korok Seed
- 0:31:40 Exploring East Necluda (Rabella Wetlands area)
- 0:32:00 Korok Seed x2
- 0:33:00 Exploring East Necluda (Rabella Wetlands area)
- 0:37:20 Chest (Cannon x3)
- 0:37:40 Exploring East Necluda (Rabella Wetlands area)
- 0:39:40 Korok Seed
- 0:40:05 Exploring East Necluda (Rabella Wetlands area)
- 0:43:35 Korok Seed
- 0:44:05 Exploring East Necluda (Rabella Wetlands area)
- 0:44:30 Side Quest - A Picture for Dueling Peaks Stable - Task Started (Take a picture of Hyrule's finest sunset and show it to
- 0:45:00 Exploring East Necluda (Rabella Wetlands area)
- 0:46:05 Chest (Opal)
- 0:46:35 Exploring East Necluda (Rabella Wetlands area)
- 0:48:20 Korok Seed x2
- 0:49:45 Exploring East Necluda (Rabella Wetlands area)
- 0:51:50 Side Quest - A Picture for Dueling Peaks Stable - Task Continued / Completed (Take a picture of Hyrule's finest sunset a
- 0:53:50 Upgrading Gear at Great Fairy Cotera
- 1:01:05 Outro
- 0:00:00 Intro
- 0:00:25 Placing Markers on the Map
- 0:02:00 Exploring the Sky of East Necluda (Rabella Wetlands area)
- 0:03:00 Korok Seed
- 0:03:25 Exploring the Sky of East Necluda (Rabella Wetlands area)
- 0:05:10 Shrine Quest - The Necluda Sky Crystal - Task Started (Find and bring the crystal to the shrine)
- 0:06:15 Device Dispenser
- 0:06:50 Shrine Quest - The Necluda Sky Crystal - Task Continued (Find and bring the crystal to the shrine)
- 0:08:25 Miniboss (Flux construct 3)
- 0:09:30 Shrine Quest - The Necluda Sky Crystal - Task Continued (Find and bring the crystal to the shrine)
- 0:11:35 Korok Seed
- 0:12:00 Shrine Quest - The Necluda Sky Crystal - Task Continued / Completed (Find and bring the crystal to the shrine)
- 0:12:10 Shrine - Started (Kumamayn Shrine)
- 0:12:50 Chest (Zonaite Bow)
- 0:13:05 Shrine - Completed (Kumamayn Shrine)
- 0:14:00 Exploring the Sky of East Necluda (Rabella Wetlands area)
- 0:15:05 Miniboss (Flux Construct 3)
- 0:15:50 Chest (Sage's Will)
- 0:16:20 Exploring the Sky of East Necluda (Rabella Wetlands area)
- 0:19:15 Miniboss (King Gleeok)
- 0:22:25 Chest (Sage's Will)
- 0:23:50 Exploring the Sky of East Necluda (Rabella Wetlands area)
- 0:24:40 Equipment (Gleeok Fabric)
- 0:27:00 Farming Dragon Parts
- 0:29:00 Exploring the Depths of East Necluda (Rabella Wetlands area)
- 0:29:50 Light Root - Found (Yikot lightroot)
- 0:30:20 Heading straight towards Mimufis lightroot
- 0:31:35 Light Root - Found (Mimufis lightroot)
- 0:32:00 Heading straight towards Kotimab lightroot
- 0:32:30 Light Root - Found (Kotimab lightroot)
- 0:33:00 Heading to surface
- 0:33:40 Heart Container
- 0:36:00 Heading down into depths again
- 0:36:15 Location (Lone island coliseum)
- 0:36:45 Light Root - Found (Ni-Iraram Lightroot)
- 0:37:30 Exploring the Depths of East Necluda (Rabella Wetlands area)
- 0:38:00 Shortcut to surface
- 0:38:45 Exploring the Depths of East Necluda (Rabella Wetlands area)
- 0:43:00 Building an upgraded automated ally to help me with the Coliseum
- 0:45:40 Chest (Midna's Helm)
- 0:46:20 Exploring the Depths of East Necluda (Rabella Wetlands area)
- 0:47:20 Placing Markers on the Map
- 0:48:20 Exploring the Depths of East Necluda (Rabella Wetlands area)
- 0:49:25 Chest (Large Crystallized Charge)
- 0:49:40 Exploring the Depths of East Necluda (Rabella Wetlands area)
- 0:51:35 Location (Hickaly Grove)
- 0:51:50 Chest (Crystallized Charge)
- 0:52:10 Exploring the Depths of East Necluda (Rabella Wetlands area)
- 0:56:00 Location (Rozudo Canyon Mine)
- 0:56:15 Chest (Large Crystallized Charge)
- 0:56:30 Exploring the Depths of East Necluda (Rabella Wetlands area)
- 1:01:50 Miniboss (Frost talus)
- 1:02:55 Exploring the Depths of East Necluda (Rabella Wetlands area)
- 1:05:05 Reading Hyrule Compendium Entries
- 1:05:15 Outro
- 0:00:00 Intro
- 0:00:25 Placing Markers on the Map
- 0:04:10 Exploring the Depths of East Necluda (Rabella Wetlands area)
- 0:06:45 Location (Meda canyon mine)
- 0:07:00 Chest (Large Crystallized Charge)
- 0:07:20 Exploring the Depths of East Necluda (Rabella Wetlands area)
- 0:12:55 Miniboss (Stalnox)
- 0:14:05 Exploring the Depths of East Necluda (Rabella Wetlands area)
- 0:20:25 Chest (Yiga Schematic & Zonai Charge)
- 0:20:50 Exploring the Depths of East Necluda (Rabella Wetlands area)
- 0:23:10 Location (Taran Canyon Mine)
- 0:23:30 Chest (Large Crystallized Charge)
- 0:23:40 Exploring the Depths of East Necluda (Rabella Wetlands area)
- 0:33:40 Chest (Giant Brightbloom Seed x5)
- 0:34:00 Exploring the Depths of East Necluda (Rabella Wetlands area)
- 0:39:20 Miniboss (Frox)
- 0:41:20 Exploring the Depths of East Necluda (Rabella Wetlands area)
- 0:44:20 Chest (Eightfold Blade)
- 0:46:30 Chest (Shield of the minds eye & Arrow x10)
- 0:47:05 Exploring the Depths of East Necluda (Rabella Wetlands area)
- 0:48:40 Chest (Sundelion)
- 0:49:00 Exploring the Depths of East Necluda (Rabella Wetlands area)
- 0:52:40 Location (Ancient observation deck)
- 0:53:45 Location (Tuft Canyon Mine)
- 0:54:00 Chest (Cap of the Hero)
- 0:54:30 Exploring the Depths of East Necluda (Rabella Wetlands area)
- 0:59:40 Chest (Large Crystallized Charge)
- 0:59:55 Exploring the Depths of East Necluda (Rabella Wetlands area)
- 1:00:40 Reading Hyrule Compendium Entries
- 1:00:50 Outro
- 0:00:00 Intro
- 0:00:25 Exploring the Depths of East Necluda (Rabella Wetlands area)
- 0:02:20 Location (Abandoned Lurelin Mine)
- 0:02:40 Exploring Abandoned Lurelin Mine
- 0:05:10 Chest (Large Crystallized Charge)
- 0:05:25 Exploring Abandoned Lurelin Mine
- 0:09:20 Equipment (Schema Stone)
- 0:10:25 Chest (Large Crystallized Charge)
- 0:10:40 Exploring Abandoned Lurelin Mine
- 0:12:30 Exploring the Depths of East Necluda (Rabella Wetlands area)
- 0:14:25 Miniboss (Flux construct)
- 0:15:10 Exploring the Depths of East Necluda (Rabella Wetlands area)
- 0:17:00 Chest (Trousers of the Wind)
- 0:17:40 Exploring the Depths of East Necluda (Rabella Wetlands area)
- 0:20:00 Location (Dunsel Canyon Mine)
- 0:20:55 Chest (Large Crystallized Charge)
- 0:21:15 Exploring the Depths of East Necluda (Rabella Wetlands area)
- 0:25:30 Shortcut to the surface
- 0:26:00 Exploring the Depths of East Necluda (Rabella Wetlands area)
- 0:28:45 Chest (Sundelion)
- 0:29:00 Exploring the Depths of East Necluda (Rabella Wetlands area)
- 0:31:55 Miniboss (Battle talus)
- 0:32:25 Exploring the Depths of East Necluda (Rabella Wetlands area)
- 0:39:00 Returning to the surface
- 0:39:45 Equipment (Stalnox Fabric)
- 0:41:40 Gathering crops from Hateno
- 0:43:00 Heading towards Gerudo Canyon Skyview Tower
- 0:46:40 Skyview Tower - Found (Gerudo Canyon Skyview Tower)
- 0:47:00 Activating Gerudo Canyon Skyview Tower
- 0:50:55 Placing Markers on the map
- 0:51:50 Exploring the sky of Gerudo Desert (Gerudo Canyon area)
- 0:54:45 Korok Seed
- 0:55:55 Exploring the sky of Gerudo Desert (Gerudo Canyon area)
- 0:58:30 Chest (Sage's Will)
- 0:59:00 Chest (Old Map)
- 0:59:30 Exploring the sky of Gerudo Desert (Gerudo Canyon area)
- 1:03:30 Outro
- 0:00 Intro
- 0:25 Exploring the sky of Gerudo Desert (Gerudo Canyon area)
- 1:15 Device Dispenser
- 1:55 Exploring the sky of Gerudo Desert (Gerudo Canyon area)
- 2:30 Shrine - Started (Rakashog shrine)
- 6:30 Chest (Large Zonai Charge)
- 7:25 Shrine - Completed (Rakashog shrine)
- 7:55 Exploring the sky of Gerudo Desert (Gerudo Canyon area)
- 9:45 Location (South lomei castle top floor)
- 10:10 Will return here later
- 10:30 Shrine - Started (Siyamotsus shrine)
- 11:05 Chest (Mighty Construct Bow)
- 12:00 Shrine - Completed (Siyamotsus shrine)
- 13:25 Chest (Big Battery)
- 13:45 Exploring the sky of Gerudo Desert (Gerudo Canyon area)
- 14:10 Korok Seed
- 14:35 Exploring the sky of Gerudo Desert (Gerudo Canyon area)
- 19:40 Miniboss (King gleeok)
- 21:30 Exploring the sky of Gerudo Desert (Gerudo Canyon area)
- 24:05 Chest (Sage's Will)
- 24:25 Placing Markers on the Map
- 27:35 Exploring Gerudo Desert (Gerudo Canyon area)
- 28:30 Side Quest - Disaster in Gerudo Canyon - Task Started (Find Quince's 3 friends)
- 28:40 Exploring Gerudo Desert (Gerudo Canyon area)
- 30:10 Chest (Steering Stick)
- 30:35 Exploring Gerudo Desert (Gerudo Canyon area)
- 34:35 Location (Mount Nabooru South Cave)
- 35:30 Bubbul Gem
- 35:55 Exploring Gerudo Desert (Gerudo Canyon area)
- 37:20 Location (Stalry plateau cave)
- 38:00 Bubbul Gem
- 38:15 Side Quest - Disaster in Gerudo Canyon - Task Continued (Find Quince's 3 friends)
- 38:50 Chest (Royal Shield)
- 39:35 Helping Addison
- 41:55 Exploring Gerudo Desert (Gerudo Canyon area)
- 43:15 Korok Seed x2
- 44:10 Exploring Gerudo Desert (Gerudo Canyon area)
- 44:35 Location (Spectacle rock cave)
- 45:05 Bubbul Gem
- 45:20 Exploring Gerudo Desert (Gerudo Canyon area)
- 47:30 Side Quest - Disaster in Gerudo Canyon - Task Continued (Find Quince's 3 friends)
- 48:10 Shrine Quest - The Gerudo Canyon Crystal - Task Started (Get the crystal to the shrine)
- 50:20 Korok Seed x2
- 51:30 Shrine Quest - The Gerudo Canyon Crystal - Task Continued / Completed (Get the crystal to the shrine)
- 53:10 Shrine - Started (Rakakudaj shrine)
- 53:30 Chest (Mighty Zonaite Longsword)
- 53:50 Shrine - Completed (Rakakudaj shrine)
- 54:10 Exploring Gerudo Desert (Gerudo Canyon area)
- 55:15 Outro
- 0:00:00 Intro
- 0:00:25 Placing Markers on the Map
- 0:01:40 Exploring Gerudo Desert (Gerudo Canyon area)
- 0:02:50 Location (Mount Nabooru Cave)
- 0:03:10 Exploring Mount Nabooru Cave
- 0:04:30 Chest (Royal Halberd)
- 0:05:00 Bubbul Gem
- 0:05:20 Exploring Mount Nabooru Cave
- 0:06:30 Catching a fallen star
- 0:09:45 Farming Dragon parts
- 0:12:30 Exploring Gerudo Desert (Gerudo Canyon area)
- 0:14:10 Chest (Arrow)
- 0:14:25 Exploring Gerudo Desert (Gerudo Canyon area)
- 0:19:15 Korok Seed
- 0:19:45 Exploring Gerudo Desert (Gerudo Canyon area)
- 0:20:55 Location (Mount Nabooru Well)
- 0:21:20 Exploring Mount Nabooru Well
- 0:23:30 Exploring Gerudo Desert (Gerudo Canyon area)
- 0:28:00 Korok Seed
- 0:28:40 Chest (Arrow)
- 0:29:00 Exploring Gerudo Desert (Gerudo Canyon area)
- 0:29:50 Helping Addison
- 0:31:25 Exploring Gerudo Desert (Gerudo Canyon area)
- 0:32:30 Catching a fallen star
- 0:34:20 Exploring Gerudo Desert (Gerudo Canyon area)
- 0:35:25 Korok Seed
- 0:37:30 Miniboss (Blue-Maned Lynel)
- 0:39:10 Exploring Gerudo Desert (Gerudo Canyon area)
- 0:43:00 Helping Addison
- 0:45:20 Exploring Gerudo Desert (Gerudo Canyon area)
- 0:46:40 Side Quest - Disaster in Gerudo Canyon - Task Continued / Completed (Find Quince's 3 friends)
- 0:49:00 Side Quest - Disaster in Gerudo Canyon - Task Started / Completed (Talk to Quince)
- 0:49:55 Exploring Gerudo Desert (Gerudo Canyon area)
- 0:51:00 Farming Dragon Parts
- 0:52:50 Location (Koukot plateau cave)
- 0:53:05 Bubbul Gem
- 0:53:30 Exploring Koukot plateau cave
- 0:56:00 Exploring Gerudo Desert (Gerudo Canyon area)
- 0:56:50 Korok Seed
- 0:57:05 Exploring Gerudo Desert (Gerudo Canyon area)
- 0:57:20 Chest (Arrow)
- 0:57:40 Exploring Gerudo Desert (Gerudo Canyon area)
- 0:59:10 Korok Seed
- 0:59:30 Exploring Gerudo Desert (Gerudo Canyon area)
- 1:00:50 Korok Seed
- 1:01:10 Exploring Gerudo Desert (Gerudo Canyon area)
- 1:02:40 Reading Hyrule Compendium Entries
- 1:02:55 Outro
- 0:00:00 Intro
- 0:00:25 Placing Markers on the Map
- 0:03:20 Exploring Gerudo Desert (Gerudo Canyon area)
- 0:03:30 Chest (Purple Rupee)
- 0:03:50 Exploring Gerudo Desert (Gerudo Canyon area)
- 0:05:00 Chest (Topaz)
- 0:05:20 Exploring Gerudo Desert (Gerudo Canyon area)
- 0:07:20 Location (Taafei Hill Cave)
- 0:07:35 Exploring Taafei Hill Cave
- 0:08:00 Bubbul Gem
- 0:08:25 Miniboss (Stone talus)
- 0:09:15 Exploring Gerudo Desert (Gerudo Canyon area)
- 0:11:50 Korok Seed
- 0:12:10 Exploring Gerudo Desert (Gerudo Canyon area)
- 0:13:20 Will get back here later
- 0:13:40 Exploring Gerudo Desert (Gerudo Canyon area)
- 0:18:25 Korok Seed x2
- 0:20:50 Exploring Gerudo Desert (Gerudo Canyon area)
- 0:22:00 Helping Addison (Rupee)
- 0:23:30 Exploring Gerudo Desert (Gerudo Canyon area)
- 0:23:50 Making an offering to Satori
- 0:24:10 Exploring Gerudo Desert (Gerudo Canyon area)
- 0:25:45 Korok Seed
- 0:26:00 Exploring Gerudo Desert (Gerudo Canyon area)
- 0:29:50 Korok Seed
- 0:30:10 Exploring Gerudo Desert (Gerudo Canyon area)
- 0:31:00 Korok Seed
- 0:31:20 Exploring Gerudo Desert (Gerudo Canyon area)
- 0:34:00 Location (Spectacle rock cave)
- 0:34:20 Exploring Spectacle rock cave
- 0:34:30 Bubbul Gem
- 0:34:50 Exploring Spectacle rock cave
- 0:35:20 Chest (Gerudo Shield)
- 0:35:40 Exploring Spectacle rock cave
- 0:36:40 Farming Dragon parts & fetching a fallen star
- 0:39:51 Exploring Gerudo Desert (Gerudo Canyon area)
- 0:42:30 Miniboss (Stone talus)
- 0:44:00 Exploring Gerudo Desert (Gerudo Canyon area)
- 0:45:30 Miniboss (Flame gleeok)
- 0:48:50 Exploring Gerudo Desert (Gerudo Canyon area)
- 0:52:20 Korok Seed
- 0:52:40 Exploring Gerudo Desert (Gerudo Canyon area)
- 0:52:50 Shrine - Started (Turakamik shrine)
- 0:54:50 Chest (Mighty Zonaite Shield)
- 0:55:50 Shrine - Completed (Turakamik shrine)
- 0:56:25 Exploring Gerudo Desert (Gerudo Canyon area)
- 0:56:45 Location (Gerudo Canyon Stable)
- 0:57:00 Helping Adisson
- 0:57:50 Exploring Gerudo Desert (Gerudo Canyon area)
- 0:59:00 Chest (Giant Brightbloom Seeds x5)
- 0:59:15 Exploring Gerudo Desert (Gerudo Canyon area)
- 0:59:50 Side Quest - Piaffe, Packed Away - Task Started / Completed (Destroy all the crates in the stable)
- 1:03:20 Outro
- 0:00 Intro
- 0:25 Placing Markers on the Map
- 2:20 Side Adventure - The Blocked Well - Task Started (Defeat the enemies in the well)
- 5:40 Chest (Gerudo Bow)
- 6:00 Side Adventure - The Blocked Well - Task Continued / Completed (Defeat the enemies in the well)
- 8:05 Exploring Gerudo Desert (Gerudo Canyon area)
- 10:10 Side Quest - A Picture for the closed stable - Task Started / Completed (Take a picture of Spectacle rock from the sky)
- 15:45 Side Quest - A Picture for the closed stable 2 - Found / Started
- 16:45 Exploring Gerudo Desert (Gerudo Canyon area)
- 18:10 Korok Seed
- 19:00 Exploring Gerudo Desert (Gerudo Canyon area)
- 20:25 Side Quest - Gleeok Guts - Task Started / Completed (Give Malena some Gleeok Guts)
- 21:40 Exploring Gerudo Desert (Gerudo Canyon area)
- 23:30 Korok Seed
- 23:55 Exploring Gerudo Desert (Gerudo Canyon area)
- 27:25 Farming Dragon Parts
- 29:30 Exploring Gerudo Desert (Gerudo Canyon area)
- 32:05 Korok Seed
- 32:55 Exploring Gerudo Desert (Gerudo Canyon area)
- 34:40 Location (Gerudo canyon mine)
- 34:55 Exploring Gerudo canyon mine
- 36:30 Chest (Gerudo Scimitar)
- 36:40 Chest (Bomb Flower)
- 36:55 Exploring Gerudo canyon mine
- 39:10 Chest (Gerudo Shield)
- 39:25 Exploring Gerudo canyon mine
- 39:55 Chest (Gerudo Shield)
- 40:15 Bubbul Gem
- 40:45 Exploring Gerudo canyon mine
- 43:20 Exploring Gerudo Desert (Gerudo Canyon area)
- 44:00 Korok Seed
- 44:50 Exploring Gerudo Desert (Gerudo Canyon area)
- 48:45 Chest (Gerudo Bow)
- 49:00 Exploring Gerudo Desert (Gerudo Canyon area)
- 49:40 Side Quest - Whirly Swirly Things - Task Started / Completed (Take a picture of a sand vortex)
- 49:50 Location (East gerudo ruins cave)
- 50:20 Exploring East gerudo ruins cave
- 53:00 Chest (Radiant Shield)
- 53:25 Exploring East gerudo ruins cave
- 54:00 Chest (Topaz)
- 54:20 Exploring East gerudo ruins cave
- 56:10 Bubbul Gem
- 57:00 Side Quest - Whirly Swirly Things - Task Started / Completed (Talk to Kula again)
- 58:50 Reading Hyrule Compendium Entries
- 59:40 Outro
- 0:00:00 Intro
- 0:00:25 Placing Markers on the Map
- 0:01:30 Exploring Gerudo Desert (Gerudo Canyon area)
- 0:04:50 Korok Seed x2
- 0:07:25 Exploring Gerudo Desert (Gerudo Canyon area)
- 0:08:10 Shrine - Started (Mayatat Shrine)
- 0:10:45 Chest (Arrow x10)
- 0:11:40 Shrine - Completed (Mayatat Shrine)
- 0:12:15 Exploring Gerudo Desert (Gerudo Canyon area)
- 0:13:35 Chest (Gerudo Bow)
- 0:14:15 Chest (Bomb Flower x5)
- 0:16:00 Exploring Gerudo Desert (Gerudo Canyon area)
- 0:18:50 Costume/Armor (Desert Voe Headband)
- 0:19:55 Exploring Gerudo Desert (Gerudo Canyon area)
- 0:20:35 Side Quest - Decorate With Passion - Task Started / Completed (Show Boraa a weapon fused with a ruby)
- 0:22:30 Exploring Gerudo Desert (Gerudo Canyon area)
- 0:30:45 Korok Seed
- 0:31:25 Location (Kara Kara Bazaar Well)
- 0:31:45 Location (Oasis Source)
- 0:32:00 Exploring Oasis Source
- 0:35:00 Bubbul Gem
- 0:35:20 Exploring Oasis Source
- 0:35:50 Chest (Radiant Shield)
- 0:36:10 Exploring Oasis Source
- 0:37:00 Exploring Gerudo Desert (Gerudo Canyon area)
- 0:44:20 Korok Seed
- 0:45:00 Exploring Gerudo Desert (Gerudo Canyon area)
- 0:45:45 Location (Gerudo Town)
- 0:46:10 Exploring Gerudo Town
- 0:57:20 Shrine - Started (Soryotanog Shrine)
- 0:58:10 Chest (Small Key)
- 1:00:30 Chest (Arrow x10)
- 1:04:25 Shrine - Completed (Soryotanog Shrine)
- 1:05:20 Chest (Gerudo Shield)
- 1:05:40 Exploring Gerudo Town
- 1:06:00 Korok Seed
- 1:06:30 Exploring Gerudo Town
- 1:08:05 Korok Seed
- 1:08:50 Exploring Gerudo Town
- 1:09:10 Location (Gerudo Shelter)
- 1:10:30 Main Quest - Riju of Gerudo Town - Found / Started
- 1:11:10 Reading Hyrule Compendium Entries
- 1:12:45 Outro
- 0:00:00 Intro
- 0:00:25 Placing Markers on the Map
- 0:02:00 Side Quest - The Missing Owner - Found / Started
- 0:03:55 Armor / Outfit (Ruby Circlet)
- 0:04:10 Armor / Outfit (Saphire Circlet)
- 0:04:20 Armor / Outfit (Amber Earrings)
- 0:04:35 Exploring Gerudo Town
- 0:07:50 Side Quest - The Heroines Secret - Found / Started
- 0:09:25 Exploring Gerudo Town
- 0:10:30 Heart Container
- 0:11:00 Exploring Gerudo Town
- 0:24:50 Chest (Purple Rupee)
- 0:25:10 Exploring Gerudo Town
- 0:28:05 Korok Seed
- 0:28:30 Exploring Gerudo Town
- 0:30:40 Location (Gerudo secret shop)
- 0:31:20 Armor / Outfit (Desert Voe Spaulder)
- 0:31:40 Armor / Outfit (Desert Voe Trousers)
- 0:31:55 Armor / Outfit (Snow Boots)
- 0:32:25 Armor / Outfit (Sand Boots)
- 0:32:40 Selling stuff
- 0:36:00 Exploring Gerudo Town
- 0:36:40 Location (Valley of Silent Statues)
- 0:41:30 Chest (Gerudo Shield)
- 0:41:40 Chest (Topaz)
- 0:42:00 Main Quest - Riju of Gerudo Town - Task Continued (Meet Riju)
- 0:42:40 Bubbul Gem
- 0:43:00 Main Quest - Riju of Gerudo Town - Task Continued (Meet Riju)
- 0:44:00 Chest (Arrow x10)
- 0:44:15 Main Quest - Riju of Gerudo Town - Task Continued / Completed (Meet Riju)
- 0:54:50 Chest (Royal Bow)
- 0:55:30 Main Quest - Riju of Gerudo Town - Task Started / Completed (Defend Kara Kara Bazar)
- 1:02:20 Main Quest - Riju of Gerudo Town - Task Started / Completed (Meet Riju in Gerudo Town)
- 1:03:55 Reading Hyrule Compendium Entries
- 1:04:25 Outro
- 0:00 Intro
- 0:30 Main Quest - Riju of Gerudo Town - Task Started (Destroy the Gibdo Hives)
- 4:10 Chest (Silver Rupee & Electric Lizalfos Horn & Topaz)
- 4:40 Main Quest - Riju of Gerudo Town - Task Continued / Completed (Destroy the Gibdo Hives)
- 14:50 Main Quest - Riju of Gerudo Town - Task Started / Completed (Solve the Mural Riddle)
- 30:30 Location (Lightning Temple)
- 31:00 Main Quest - Riju of Gerudo Town - Task Started / Completed (Queen Gibdo Boss Fight)
- 34:00 Main Quest - Riju of Gerudo Town - Task Started (Navigate through the Lightning Temple)
- 35:25 Placing Markers on the Map
- 36:10 Chest (Flame Emitter)
- 36:30 Main Quest - Riju of Gerudo Town - Task Continued (Navigate through the Lightning Temple)
- 41:20 Chest (Large Zonai Charge)
- 41:40 Main Quest - Riju of Gerudo Town - Task Continued (Navigate through the Lightning Temple)
- 42:40 Chest (Topaz)
- 42:55 Main Quest - Riju of Gerudo Town - Task Continued (Navigate through the Lightning Temple)
- 48:30 Chest (Mighty Zonaite Shield)
- 48:50 Main Quest - Riju of Gerudo Town - Task Continued (Navigate through the Lightning Temple)
- 53:05 Chest (Mighty Construct Bow)
- 53:25 Main Quest - Riju of Gerudo Town - Task Continued (Navigate through the Lightning Temple)
- 57:50 Reading Hyrule Compendium Entries
- 58:40 Outro
- 0:00 Intro
- 0:30 Main Quest - Riju of Gerudo Town - Task Continued (Navigate through the Lightning Temple)
- 25:30 Chest (Diamond)
- 25:50 Main Quest - Riju of Gerudo Town - Task Continued / Completed (Navigate through the Lightning Temple)
- 27:30 Main Quest - Riju of Gerudo Town - Task Started / Completed (Queen Gibdo Boss Fight - Again)
- 32:15 Heart Container
- 33:00 Cutscene
- 42:00 Main Quest - Riju of Gerudo Town - Task Started / Completed (Return to Gerudo Town)
- 43:20 Ability (Vow of Riju, Sage of Lightning)
- 44:00 Exploring Gerudo Town
- 54:00 Reading Hyrule Compendium Entries
- 54:55 Outro
- 0:00 Intro
- 0:25 Placing Markers on the Map
- 3:05 Armor / Otfit (Diamond Circlet & Topaz Earrings & Opal Earrings)
- 4:25 Exploring Gerudo Town
- 11:25 Side Quest - To the ruins - Found / Started
- 12:05 Exploring Gerudo Town
- 17:45 Side Quest - The Heroines Secret - Task Started / Completed (Photograph the 4 stelae texts hidden in the Gerudo Hideout
- 26:25 Side Quest - The Mysterious Eighth - Task Started (Bring the 7 stelae to Rotana)
- 27:40 Side Quest - The Mysterious Eighth - Task Continued (Bring the 7 stelae to Rotana)
- 29:20 Side Quest - The Mysterious Eighth - Task Continued (Bring the 7 stelae to Rotana)
- 32:00 Side Quest - Dalias Game - Task Started (Find the hidden doll)
- 33:55 Side Quest - The Mysterious Eighth - Task Continued (Bring the 7 stelae to Rotana)
- 38:05 Side Quest - Lost in the dunes - Task Started (Find Ponthos)
- 41:20 Side Quest - The Mysterious Eighth - Task Continued (Bring the 7 stelae to Rotana)
- 44:10 Chest (Arrow)
- 45:20 Korok Seed
- 46:35 Side Quest - The Mysterious Eighth - Task Continued (Bring the 7 stelae to Rotana)
- 47:20 Chest (Large Zonai Charge)
- 47:45 Side Quest - The Mysterious Eighth - Task Continued (Bring the 7 stelae to Rotana)
- 49:00 Chest (Large Zonai Charge)
- 49:30 Side Quest - The Mysterious Eighth - Task Continued / Completed (Bring the 7 stelae to Rotana)
- 52:45 Side Quest - The Mysterious Eighth - Task Continued / Completed (Bring the big boulder to the North Gerudo Ruins)
- 56:00 Location (Gerudo sanctuary)
- 56:40 Outro
- 0:00:00 Intro
- 0:00:25 Placing Markers on the Map
- 0:01:50 Side Quest - The Mysterious Eighth - Task Started / Completed (Investigate the underground of North Gerudo Ruins)
- 0:08:40 Chest (Gold Rupee)
- 0:08:55 Exploring the rest of North Gerudo Ruins
- 0:14:20 Korok Seed
- 0:14:45 Exploring the rest of North Gerudo Ruins
- 0:18:15 Bubbul Gem
- 0:18:40 Chest (Giant Brightbloom Seed)
- 0:19:10 Side Quest - The Mysterious Eighth - Task Started (Return to Rotana and tell her what you found)
- 0:20:10 Ability (Solemn Vow of Riju, Sage of Lightning)
- 0:20:20 Side Quest - The Mysterious Eighth - Task Continued / Completed (Return to Rotana and tell her what you found)
- 0:22:00 Side Quest - Treasure of The Gerudo Desert - Found / Started
- 0:22:50 Exploring Gerudo Desert (Gerudo Canyon area)
- 0:23:50 Korok Seed
- 0:24:30 Side Quest - The Iceless Icehouse - Task Started / Completed (Make some ice for the ice house)
- 0:26:55 Exploring Gerudo Desert (Gerudo Canyon area)
- 0:28:45 Korok Seed
- 0:29:15 Exploring Gerudo Desert (Gerudo Canyon area)
- 0:31:40 Location (Desert rift)
- 0:31:55 Exploring Gerudo Desert (Gerudo Canyon area)
- 0:35:00 Chest (Royal Broadsword)
- 0:35:15 Exploring Gerudo Desert (Gerudo Canyon area)
- 0:36:15 Korok Seed
- 0:36:30 Exploring Gerudo Desert (Gerudo Canyon area)
- 0:37:00 Helping Addison
- 0:38:00 Exploring Gerudo Desert (Gerudo Canyon area)
- 0:40:50 Korok Seed x2
- 0:42:15 Exploring Gerudo Desert (Gerudo Canyon area)
- 0:42:35 Location (Ancient Prison Ruins)
- 0:42:50 Exploring Ancient Prison Ruins
- 0:45:40 Chest (Topaz)
- 0:46:00 Exploring Ancient Prison Ruins
- 0:47:40 Chest (Purple Rupee)
- 0:48:10 Bubbul Gem
- 0:48:30 Exploring Ancient Prison Ruins
- 0:49:00 Chest (Gerudo Scimitar)
- 0:49:20 Exploring Ancient Prison Ruins
- 0:49:30 Shrine - Started (Chichim shrine)
- 0:50:05 Chest (Mighty Zonaite Spear)
- 0:50:25 Shrine - Completed (Chichim shrine)
- 0:51:00 Exploring Ancient Prison Ruins
- 0:52:00 Exploring Gerudo Desert (Gerudo Canyon area)
- 0:52:30 Location (Quicksand Lake Cave)
- 0:52:45 Exploring Quicksand Lake Cave
- 0:55:55 Bubbul Gem
- 0:56:15 Exploring Quicksand Lake Cave
- 0:57:35 Chest (Gerudo Spear)
- 0:57:50 Chest (Royal Shield)
- 0:58:05 Exploring Quicksand Lake Cave
- 1:01:20 Outro
- 0:00 Intro
- 0:25 Placing Markers on the Map
- 1:35 Exploring Gerudo Desert (Gerudo Canyon area)
- 5:30 Farming Dragon parts
- 8:00 Exploring Gerudo Desert (Gerudo Canyon area)
- 11:00 Miniboss (Molduga)
- 13:00 Exploring Gerudo Desert (Gerudo Canyon area)
- 13:40 Minigame (Desert Race)
- 16:40 Equipment (Gerudo Fabric)
- 18:00 Shrine - Started (Karahatag shrine)
- 20:15 Chest (Mighty Construct Bow)
- 20:50 Shrine - Completed (Karahatag shrine)
- 21:05 Heading to Hateno Village
- 23:20 Heart Container
- 24:00 Harvesting in Hateno Village
- 24:45 Exploring Gerudo Desert (Gerudo Canyon area)
- 27:00 Location (Central Gerudo Cave)
- 27:20 Exploring Central Gerudo Cave
- 28:40 Chest (Flame Emitter)
- 28:49 Exploring Central Gerudo Cave
- 29:35 Bubbul Gem
- 29:55 Exploring Central Gerudo Cave
- 31:30 Exploring Gerudo Desert (Gerudo Canyon area)
- 33:00 Korok Seed x2
- 34:15 Exploring Gerudo Desert (Gerudo Canyon area)
- 34:50 Shrine - Started (Irasak shrine)
- 35:15 Chest (Large Zonai Charge)
- 35:25 Shrine - Completed (Irasak shrine)
- 35:55 Exploring Gerudo Desert (Gerudo Canyon area)
- 36:35 Chest (Radiant Shield)
- 36:50 Exploring Gerudo Desert (Gerudo Canyon area)
- 38:00 Chest (Topaz)
- 38:20 Exploring Gerudo Desert (Gerudo Canyon area)
- 39:00 Chest (Mirror)
- 39:20 Exploring Gerudo Desert (Gerudo Canyon area)
- 41:00 Chest (Arrow)
- 41:20 Exploring Gerudo Desert (Gerudo Canyon area)
- 42:20 Location (Gerudo great skeleton)
- 42:35 Exploring Gerudo great skeleton
- 43:35 Chest (Topaz)
- 43:55 Bubbul Gem
- 44:20 Exploring Gerudo great skeleton
- 45:00 Korok Seed
- 45:30 Exploring Gerudo great skeleton
- 48:35 Exploring Gerudo Desert (Gerudo Canyon area)
- 50:00 Korok Seed x2
- 52:25 Shrine - Started (Miryotanog shrine)
- 56:50 Chest (Captain IV Blade)
- 57:05 Shrine - Completed (Miryotanog shrine)
- 57:50 Reading Hyrule Compendium Entries
- 58:20 Outro
- 0:00:00 Intro
- 0:00:25 Placing Markers on the Map
- 0:02:25 Exploring Gerudo Desert (Gerudo Canyon area)
- 0:04:40 Miniboss (Molduga)
- 0:06:00 Side Quest - The Missing Owner - Task Started / Completed (Find and rescue the missing owner)
- 0:07:00 Exploring Gerudo Desert (Gerudo Canyon area)
- 0:07:15 Chest (Gerudo Claymore & Gerudo Spear)
- 0:07:45 Exploring Gerudo Desert (Gerudo Canyon area)
- 0:10:25 Chest(Bomb Flower & Gerudo Scimitar)
- 0:11:00 Exploring Gerudo Desert (Gerudo Canyon area)
- 0:11:35 Miniboss (Molduga)
- 0:12:45 Chest (Royal Claymore)
- 0:13:10 Korok Seed
- 0:13:30 Exploring Gerudo Desert (Gerudo Canyon area)
- 0:14:45 Side Quest - The Missing Owner - Task Started / Completed (Talk to Cara in Gerudo Town)
- 0:15:30 Side Quest - The Pride of The Gerudo - Found / Started
- 0:16:30 Exploring Gerudo Desert (Gerudo Canyon area)
- 0:22:50 Chest (Large Zonaite)
- 0:23:10 Exploring Gerudo Desert (Gerudo Canyon area)
- 0:24:05 Korok Seed
- 0:24:30 Exploring Gerudo Desert (Gerudo Canyon area)
- 0:25:35 Korok Seed
- 0:25:55 Exploring Gerudo Desert (Gerudo Canyon area)
- 0:27:25 Chest (Radiant Shield)
- 0:27:45 Exploring Gerudo Desert (Gerudo Canyon area)
- 0:31:00 Korok Seed
- 0:31:40 Chest (Radiant Shield)
- 0:32:20 Location (West gerudo underground ruins)
- 0:32:35 Exploring West gerudo underground ruins
- 0:36:20 Chest (Gerudo Spear)
- 0:36:40 Exploring West gerudo underground ruins
- 0:39:20 Bubbul Gem
- 0:39:35 Exploring West gerudo underground ruins
- 0:40:25 Chest (Vah Naboris Divine Helm)
- 0:41:30 Exploring Gerudo Desert (Gerudo Canyon area)
- 0:42:40 Korok Seed
- 0:43:00 Exploring Gerudo Desert (Gerudo Canyon area)
- 0:43:30 Korok Seed
- 0:44:20 Exploring Gerudo Desert (Gerudo Canyon area)
- 0:45:15 Korok Seed
- 0:46:20 Exploring Gerudo Desert (Gerudo Canyon area)
- 0:46:45 Chest (Frost Emitter)
- 0:50:40 Shrine - Started (Kudanisar shrine)
- 0:57:45 Chest (Arrow x10)
- 0:59:15 Chest (Hasty Elixir)
- 1:01:05 Shrine - Completed (Kudanisar shrine)
- 1:01:30 Exploring Gerudo Desert (Gerudo Canyon area)
- 1:02:15 Korok Seed x2
- 1:05:50 Outro
- 0:00:00 Intro
- 0:00:25 Placing Markers on the Map
- 0:02:40 Side Quest - Pride of The Gerudo - Task Continued / Completed (Give Isha 10 flint, one diamond, a Gerudo Scimitar and a
- 0:07:30 Exploring Gerudo Desert (Gerudo Canyon area)
- 0:08:45 Side Quest - To the Ruins! - Task Started / Completed (Take Pokki to the Ruins)
- 0:12:45 Exploring Gerudo Desert (Gerudo Canyon area)
- 0:15:25 Chest (Gerudo Claymore)
- 0:15:55 Chest (Opal)
- 0:16:10 Exploring Gerudo Desert (Gerudo Canyon area)
- 0:17:15 Chest (Spiked-Iron-Ball Hammer)
- 0:17:35 Exploring Gerudo Desert (Gerudo Canyon area)
- 0:19:50 Korok Seed
- 0:20:40 Shrine - Started (Siwakama shrine)
- 0:23:10 Chest (Bomb Flower)
- 0:24:15 Shrine - Completed (Siwakama shrine)
- 0:25:00 Side Quest - Wanted: Molduga - Task Started (Defeat the Molduga and report back to Gralens)
- 0:25:20 Miniboss (Molduga)
- 0:26:40 Chest (Royal Halberd)
- 0:26:50 Chest (Gerudo Claymore)
- 0:28:25 Side Quest - Wanted: Molduga - Task Continued / Completed (Defeat the Molduga and report back to Gralens)
- 0:29:25 Heart Container
- 0:29:55 Cooking up some recipies
- 0:32:00 Korok Seed x2
- 0:33:30 Korok Seed
- 0:34:30 Location (Ancient Altar Ruins)
- 0:35:00 Chest (Phantom Greaves)
- 0:35:50 Chest (Topaz)
- 0:36:20 Bubbul Gem
- 0:36:45 Exploring Ancient Altar Ruins
- 0:37:30 Chest (Gerudo Bow)
- 0:37:45 Exploring Ancient Altar Ruins
- 0:38:20 Chest (Gerudo Bow)
- 0:38:45 Exploring Ancient Altar Ruins
- 0:42:15 Chest (Gerudo Scimitar)
- 0:42:35 Exploring Ancient Altar Ruins
- 0:46:10 Exploring Gerudo Desert (Gerudo Canyon area)
- 0:49:30 Helping Addison
- 0:51:00 Location (South gerudo Cave)
- 0:51:20 Exploring South gerudo Cave
- 0:54:35 Chest (Knight's-Claymore Spear)
- 0:54:50 Chest (Soldier's-Claymore Spear)
- 0:55:10 Exploring South gerudo Cave
- 0:55:55 Bubbul Gem
- 0:56:40 Exploring Gerudo Desert (Gerudo Canyon area)
- 0:58:55 Korok Seed
- 0:59:10 Exploring Gerudo Desert (Gerudo Canyon area)
- 0:59:50 Korok Seed
- 1:00:20 Exploring Gerudo Desert (Gerudo Canyon area)
- 1:01:10 Korok Seed
- 1:01:50 Farming Dragon parts
- 1:04:25 Outro
- 0:00:00 Intro
- 0:00:25 Placing Markers on the Map
- 0:02:20 Exploring Gerudo Desert (Gerudo Canyon area)
- 0:02:40 Shrine - Started (Kitawak shrine)
- 0:03:35 Chest (Arrow x10)
- 0:05:00 Shrine - Completed (Kitawak shrine)
- 0:05:40 Exploring Gerudo Desert (Gerudo Canyon area)
- 0:09:25 Side Quest - Cold-Endurance Contest - Task Started / Completed (Beat Rahdo at the cold-endurance contest)
- 0:19:30 Side Quest - Heat-Endurance Contest - Task Started / Completed (Beat Rahdo at the heat-endurance contest)
- 0:28:55 Exploring Gerudo Desert (Gerudo Canyon area)
- 0:29:50 Korok Seed
- 0:30:30 Korok Seed
- 0:31:10 Korok Seed
- 0:31:50 Exploring Gerudo Desert (Gerudo Canyon area)
- 0:33:10 Chest (Rocket x3)
- 0:33:40 Exploring Gerudo Desert (Gerudo Canyon area)
- 0:34:20 Side Quest - The Great Tumbleweed Purge - Task Started / Completed (Remove all tumbleweed)
- 0:37:00 Exploring Gerudo Desert (Gerudo Canyon area)
- 0:38:10 Korok Seed
- 0:38:25 Exploring Gerudo Desert (Gerudo Canyon area)
- 0:39:00 Helping Addison
- 0:41:30 Exploring Gerudo Desert (Gerudo Canyon area)
- 0:43:00 Korok Seed
- 0:44:00 Farming Dragon Parts
- 0:47:20 Equipment (Lynel Fabric)
- 0:50:00 Upgrading gear at Great Fairy Cotera
- 1:09:20 Exploring Gerudo Desert (Gerudo Canyon area)
- 1:11:40 Korok Seed
- 1:12:15 Exploring Gerudo Desert (Gerudo Canyon area)
- 1:19:50 Outro
- 0:00:00 Intro
- 0:00:25 Placing Markers on the Map
- 0:01:55 Exploring Gerudo Desert (Gerudo Canyon area)
- 0:05:45 Side Quest - The South Lomei Prophecy - Task Started (Find the terminal in the surface labyrinth)
- 0:08:30 Chest (Mighty Zonaite Sword)
- 0:12:25 Chest (Mighty Zonaite Longsword)
- 0:17:10 Location (South lomei chasm)
- 0:17:25 Side Quest - The South Lomei Prophecy - Task Continued / Completed (Find and activate the terminal in the surface labyri
- 0:17:51 Shrine - Started (Motsusis shrine)
- 0:18:00 Chest (Large Zonai Charge)
- 0:18:20 Shrine - Completed (Motsusis shrine)
- 0:19:00 Exploring Gerudo Desert (Gerudo Canyon area)
- 0:21:15 Chest (Big Battery)
- 0:23:30 Korok Seed
- 0:24:00 Side Quest - The South Lomei Prophecy - Task Started (Find and activate the 4 terminals of the sky labyrinth)
- 0:26:05 Chest (Mighty Zonaite Spear)
- 0:27:25 Chest (Mighty Zonaite Shield)
- 0:28:35 Chest (Mighty Zonaite Sword)
- 0:31:00 Chest (Zonaite Bow)
- 0:33:05 Chest (Mighty Zonaite Longsword)
- 0:33:25 Side Quest - The South Lomei Prophecy - Task Continued / Completed (Find and activate the 4 terminals of the sky labyrin
- 0:36:35 Placing Markers on the map
- 0:38:00 Location (South lomei depths labyrinth)
- 0:38:20 Side Quest - The South Lomei Prophecy - Task Started (Find and defeat the Flux Construct inside the labyrinth of the dep
- 0:39:05 Chest (Sodier IV Reaper)
- 0:40:15 Chest (Zonaite Bow)
- 0:41:20 Chest (Sodier IV Blade)
- 0:42:10 Chest (Sodier IV Spear)
- 0:42:40 Miniboss (Flux construct)
- 0:43:00 Side Quest - The South Lomei Prophecy - Task Continued / Completed (Find and defeat the Flux Construct inside the labyri
- 0:45:20 Chest (Evil Spirit Mask)
- 0:46:30 Light Root - Found (Sisustom lightroot)
- 0:47:00 Placing markers on the map
- 0:48:45 Light Root - Found (Amakawis lightroot)
- 0:50:35 Light Root - Found (Mihcihc lightroot)
- 0:52:05 Light Root - Found (Gataharak lightroot)
- 0:53:00 Location (Gerudo underground cemetery)
- 0:53:15 Light Root - Found (Kasari lightroot)
- 0:54:00 Location (Desert coliseum)
- 0:54:15 Location (Gerudo Dark Skeleton)
- 0:54:50 Light Root - Found (Gonatoyrim lightroot)
- 0:56:50 Light Root - Found (Gonatoyros lightroot)
- 0:58:05 Light Root - Found (Rasinaduk lightroot)
- 0:59:50 Light Root - Found (Tatayam lightroot)
- 1:00:20 Location (Abandoned kara kara mine)
- 1:01:10 Light Root - Found (Kimakarut lightroot)
- 1:02:20 Light Root - Found (Jadukakar lightroot)
- 1:04:15 Light Root - Found (Kawatik lightroot)
- 1:05:20 Outro
- 0:00:00 Intro
- 0:00:25 Placing Markers on the Map
- 0:03:05 Exploring the depths of Gerudo Desert (Gerudo Canyon area)
- 0:07:15 Location (Granajh canyon mine)
- 0:07:30 Chest (Large Crystallized Charge)
- 0:07:45 Exploring the depths of Gerudo Desert (Gerudo Canyon area)
- 0:11:05 Boss (Colgera)
- 0:13:55 Exploring the depths of Gerudo Desert (Gerudo Canyon area)
- 0:14:50 Location (Daval canyon mine)
- 0:15:05 Chest (Large Crystallized Charge)
- 0:15:20 Exploring the depths of Gerudo Desert (Gerudo Canyon area)
- 0:21:20 Chest (Sundelion)
- 0:21:35 Exploring the depths of Gerudo Desert (Gerudo Canyon area)
- 0:39:00 Farming Dragon Parts
- 0:41:00 Exploring the depths of Gerudo Desert (Gerudo Canyon area)
- 0:47:45 Chest (Yiga Schematic)
- 0:47:55 Chest (Large Crystallized Charge)
- 0:48:15 Exploring the depths of Gerudo Desert (Gerudo Canyon area)
- 0:50:10 Miniboss (Frox)
- 0:51:25 Exploring the depths of Gerudo Desert (Gerudo Canyon area)
- 1:02:10 Chest (Yiga Schematic)
- 1:02:25 Chest (Large Crystallized Charge)
- 1:02:40 Exploring the depths of Gerudo Desert (Gerudo Canyon area)
- 1:05:45 Reading Hyrule Compendium Entries
- 1:05:55 Outro
- 0:00 Intro
- 0:25 Placing Markers on the Map
- 2:35 Exploring the depths of Gerudo Desert (Gerudo Canyon area)
- 5:45 Miniboss (Stalnox)
- 6:45 Exploring the depths of Gerudo Desert (Gerudo Canyon area)
- 13:30 Chest (Sundelion)
- 13:50 Exploring the depths of Gerudo Desert (Gerudo Canyon area)
- 18:40 Miniboss (Blue Hinox)
- 19:55 Exploring the depths of Gerudo Desert (Gerudo Canyon area)
- 24:05 Chest (Large Crystallized Charge)
- 24:25 Exploring the depths of Gerudo Desert (Gerudo Canyon area)
- 28:00 Desert Coliseum Fight
- 32:00 Chest (Sheik's Mask)
- 32:45 Exploring the depths of Gerudo Desert (Gerudo Canyon area)
- 36:20 Miniboss (Gloom Hands & Phantom Ganon)
- 37:45 Exploring the depths of Gerudo Desert (Gerudo Canyon area)
- 40:00 Shortcut to the surface
- 41:00 Exploring the depths of Gerudo Desert (Gerudo Canyon area)
- 43:40 Chest (Tunic of The Wild)
- 44:25 Exploring the depths of Gerudo Desert (Gerudo Canyon area)
- 47:15 Miniboss (Frox)
- 48:25 Exploring the depths of Gerudo Desert (Gerudo Canyon area)
- 56:05 Reading Hyrule Compendium Entries
- 56:35 Outro
- 0:00 Intro
- 0:25 Placing Markers on the Map
- 3:00 Exploring the depths of Gerudo Desert (Gerudo Canyon area)
- 4:00 Miniboss (Flux Construct 2)
- 5:15 Exploring the depths of Gerudo Desert (Gerudo Canyon area)
- 6:10 Chest (Large Crystallized Charge)
- 6:30 Exploring the depths of Gerudo Desert (Gerudo Canyon area)
- 8:50 Location (Abandoned Gerudo Mine)
- 9:35 Side Adventure - Master Kohga of The Yiga Clan - Task Started / Completed (Find Master Kohga in the Abandoned Gerudo Min
- 10:45 Miniboss (Master Kohga)
- 14:00 Chest (Huge Crystallized Charge)
- 14:15 Equipment (Schema Stone)
- 15:00 Exploring the depths of Gerudo Desert (Gerudo Canyon area)
- 19:55 Side Adventure - Master Kohga of The Yiga Clan - Task Started / Completed (Find Master Kohga in the Abandoned Lanayru Mi
- 22:55 Miniboss (Master Kohga)
- 25:45 Chest (Huge Crystallized Charge)
- 26:35 Side Adventure - Master Kohga of The Yiga Clan - Task Started / Completed (Find Master Kohga in the Abandoned Hebra Mine
- 26:55 Miniboss (Master Kohga)
- 33:35 Chest (Huge Crystallized Charge & Diamond)
- 34:15 Exploring the depths of Gerudo Desert (Gerudo Canyon area)
- 36:00 Chest (Giant Brightbloom Seed x5)
- 36:20 Exploring the depths of Gerudo Desert (Gerudo Canyon area)
- 38:35 Miniboss (Frox)
- 39:25 Exploring the depths of Gerudo Desert (Gerudo Canyon area)
- 51:50 Chest (Gerudo Shield)
- 52:15 Chest (Giant Brightbloom Seed x5 & Gerudo Bow)
- 52:30 Exploring the depths of Gerudo Desert (Gerudo Canyon area)
- 58:20 Chest (Yiga Schematic & Large Crystallized Charge)
- 59:50 Outro
- 0:00:00 Intro
- 0:00:25 Placing Markers on the Map
- 0:05:50 Exploring the depths of Gerudo Desert (Gerudo Canyon area)
- 0:08:30 Chest (Gerudo Scimitar)
- 0:09:25 Chest (Gerudo Shield & Arrow x10)
- 0:10:00 Exploring the depths of Gerudo Desert (Gerudo Canyon area)
- 0:17:25 Chest (Arrow x10)
- 0:17:45 Exploring the depths of Gerudo Desert (Gerudo Canyon area)
- 0:20:30 Miniboss (Stone Talus)
- 0:21:30 Exploring the depths of Gerudo Desert (Gerudo Canyon area)
- 0:24:15 Chest (Miner's Mask)
- 0:25:00 Equipment (Schema Stone)
- 0:26:15 Chest (Large Crystallized Charge)
- 0:26:50 Exploring the depths of Gerudo Desert (Gerudo Canyon area)
- 0:30:00 Chest (Sundelion)
- 0:30:30 Exploring the depths of Gerudo Desert (Gerudo Canyon area)
- 0:32:30 Miniboss (Lynel)
- 0:33:30 Exploring the depths of Gerudo Desert (Gerudo Canyon area)
- 0:37:20 Miniboss (Frox)
- 0:38:30 Exploring the depths of Gerudo Desert (Gerudo Canyon area)
- 0:43:45 Chest (Arrow x10)
- 0:44:00 Exploring the depths of Gerudo Desert (Gerudo Canyon area)
- 0:47:00 Chest (Sundelion)
- 0:47:20 Exploring the depths of Gerudo Desert (Gerudo Canyon area)
- 0:48:15 Miniboss (Hinox)
- 0:49:10 Exploring the depths of Gerudo Desert (Gerudo Canyon area)
- 0:51:00 Chest (Giant Brightbloom Seed x5)
- 0:51:20 Exploring the depths of Gerudo Desert (Gerudo Canyon area)
- 0:52:30 Miniboss (Frox)
- 0:53:40 Exploring the depths of Gerudo Desert (Gerudo Canyon area)
- 0:57:40 Chest (Gerudo Shield & Arrow x10 & Gerudo Shield)
- 0:58:30 Exploring the depths of Gerudo Desert (Gerudo Canyon area)
- 1:05:00 Outro
- 0:00 Intro
- 0:25 Placing Markers on the Map
- 1:45 Exploring the depths of Gerudo Desert (Gerudo Canyon area)
- 2:30 Miniboss (Frox)
- 3:30 Exploring the depths of Gerudo Desert (Gerudo Canyon area)
- 5:10 Chest (Sundelion)
- 5:30 Exploring the depths of Gerudo Desert (Gerudo Canyon area)
- 8:25 Chest (Yiga Schematic & Large Crystallized Charge)
- 8:50 Exploring the depths of Gerudo Desert (Gerudo Canyon area)
- 12:20 Miniboss (Frox)
- 13:55 Exploring the depths of Gerudo Desert (Gerudo Canyon area)
- 15:20 Chest (Sundelion)
- 15:50 Exploring the depths of Gerudo Desert (Gerudo Canyon area)
- 19:40 Chest (Giant Brightbloom Seed x5)
- 20:00 Exploring the depths of Gerudo Desert (Gerudo Canyon area)
- 24:00 Miniboss (Frox)
- 26:00 Returning to previous parts of the depths for some cleanup
- 26:40 Boss (Queen Gibdo)
- 32:15 Chest (Huge Crystallized Charge)
- 33:00 Returning to previous parts of the depths for some cleanup
- 34:00 Boss (Muctorok)
- 38:35 Chest (Huge Crystallized Charge)
- 39:00 Returning to the surface
- 39:30 Side Adventure - The Long Dragon - Task Started / Completed (Use Riju's powers to unveil the long dragons secret)
- 41:35 Chest (Topaz x3)
- 42:50 Side Adventure - Investigate Typhlo Ruins - Task Started / Completed (Enter the secret chamber and talk to Kazul)
- 43:05 Chest (Dusk Claymore)
- 46:30 Buying stuff from the bargainer statue
- 52:00 Heading straight towards Ulri Mountain Skyview Tower
- 53:20 Skyview Tower - Found (Ulri Mountain Skyview Tower)
- 56:25 Reading Hyrule Compendium Entries
- 56:50 Outro
- 0:00 Intro
- 0:25 Placing Markers on the Map
- 2:25 Exploring Akkala (Ulri Mountain area)
- 3:30 Helping Addison
- 5:00 Exploring Akkala (Ulri Mountain area)
- 7:30 Chest (Opal & Arrow x5)
- 8:10 Exploring Akkala (Ulri Mountain area)
- 9:40 Location (Tarrey town)
- 10:00 Korok Seed
- 10:15 Exploring Tarrey Town
- 14:40 Chest (Purple Rupee)
- 17:30 Korok Seed
- 17:55 Exploring Tarrey Town
- 22:20 Shrine Quest - Rock for sale - Task Started / Completed (Buy and take the crystal to the shrine)
- 26:00 Shrine - Started (Jochi-Ihga Shrine)
- 26:20 Chest (Diamond)
- 26:35 Shrine - Completed (Jochi-Ihga Shrine)
- 27:10 Exploring Akkala (Ulri Mountain area)
- 28:00 Chest (Opal)
- 28:20 Exploring Akkala (Ulri Mountain area)
- 29:05 Chest (Arrow x5)
- 29:25 Exploring Akkala (Ulri Mountain area)
- 30:20 Side Adventure - Mattison's Independence - Task Started (Help Mattison spend some time with her dad)
- 40:20 Location (Tarrey town tunnel)
- 40:30 Exploring Tarrey town tunnel
- 40:45 Bubbul Gem
- 41:10 Side Adventure - Mattison's Independence - Task Continued (Help Mattison spend some time with her dad)
- 45:20 Farming Dragon Parts
- 50:30 Side Adventure - Mattison's Independence - Task Continued / Completed (Help Mattison spend some time with her dad)
- 56:40 Side Quest - A Monstrous Collection 1 - Found / Started
- 58:20 Outro
- 0:00:00 Intro
- 0:00:30 Farming Dragon Parts
- 0:05:40 Side Quest - A Monstrous Collection 1 - Task Started / Completed (Take a picture of a Bokoblin and show it to Kilton/Hud
- 0:11:40 Side Quest - Home on arrange - Started / Found
- 0:13:15 Exploring Akkala (Ulri Mountain area)
- 0:14:20 Korok Seed
- 0:15:00 Korok Seed
- 0:16:00 Korok Seed
- 0:16:50 Side Quest - Home on arrange - Task Started / Completed (Build Link's house)
- 0:39:30 Exploring Akkala (Ulri Mountain area)
- 0:40:50 Side Quest - Secrets within - Task Started / Completed (Put a zonai charge in the device dispenser)
- 0:42:25 Exploring Akkala (Ulri Mountain area)
- 0:43:10 Location (Construction site cave)
- 0:43:25 Exploring Akkala (Ulri Mountain area)
- 0:45:10 Location (Construction site Well)
- 0:45:25 Exploring Akkala (Construction site Well)
- 0:46:50 Bubbul Gem
- 0:47:20 Exploring Akkala (Ulri Mountain area)
- 0:48:05 Korok Seed
- 0:48:40 Exploring Akkala (Ulri Mountain area)
- 0:51:35 Side Quest - Master the Vehicle Prototype - Task Started / Completed (Mount a steering stick to the device and complete
- 0:55:25 Exploring Akkala (Ulri Mountain area)
- 0:56:25 200 Episode special - building my own version of The Scorpion hover craft (cudos to @chesepuf)
- 1:05:25 Korok Seed
- 1:06:05 Exploring Akkala (Ulri Mountain area)
- 1:07:25 Farming Dragon parts
- 1:12:05 Reading Hyrule Compendium Entries
- 1:12:35 Outro
- 0:00 Intro
- 0:25 Placing Markers on the Map
- 2:15 Exploring Akkala (Ulri Mountain area)
- 2:45 Side Adventure - A monstrous Collection 2 & 3 - Task Started / Completed (Take a picture of a Horriblin & Battle Talus a
- 15:30 Equipment (Monster Bridle)
- 15:50 Side Adventure - A monstrous Collection 4 & 5 - Task Started (Take a picture of a Frox & King Gleeok and show it to Kolt
- 29:05 Equipment (Monster Saddle)
- 30:00 Side Adventure - A monstrous Collection 4 & 5 - Task Continued / Completed (Take a picture of a Frox & King Gleeok and s
- 35:00 Chest (Diamond)
- 35:15 Making my own addition to the Monstrous collection
- 37:30 Exploring Akkala (Ulri Mountain area)
- 38:00 Side Quest - The Tarrey Town Race Is On! - Task Started / Completed (Build a vehicle and finish the race within 2 minute
- 41:30 Minigame (Tarrey Town Race)
- 46:45 Exploring Akkala (Ulri Mountain area)
- 47:10 Korok Seed x2
- 49:15 Chest (Purple Rupee)
- 49:45 Exploring Akkala (Ulri Mountain area)
- 50:25 Chest (Arrow x10)
- 51:00 Shrine - Started (Gemimik Shrine)
- 52:05 Chest (Mighty Zonaite Shield)
- 54:10 Shrine - Completed (Gemimik Shrine)
- 55:00 Reading Hyrule Compendium Entries
- 55:45 Outro
- 0:00 Intro
- 0:25 Placing Markers on the Map
- 2:15 Exploring Akkala (Ulri Mountain area)
- 2:30 Korok Seed
- 2:50 Exploring Akkala (Ulri Mountain area)
- 4:00 The Ruby rod... lol
- 5:15 Chest (Steel Lizal Bow)
- 5:40 Exploring Akkala (Ulri Mountain area)
- 6:00 Miniboss (Hinox)
- 8:40 Korok Seed
- 9:00 Exploring Akkala (Ulri Mountain area)
- 14:10 Korok Seed
- 14:25 Exploring Akkala (Ulri Mountain area)
- 14:45 Miniboss (Battle talus)
- 15:20 Exploring Akkala (Ulri Mountain area)
- 15:45 Chest (Sapphire)
- 15:55 Exploring Akkala (Ulri Mountain area)
- 17:35 Korok Seed
- 18:00 Location (Akkala citadel ruins cave)
- 18:15 Exploring Akkala citadel ruins cave
- 20:30 Chest (Guard's-Sword Stick)
- 20:55 Chest (Soldier's-Broadsword Halberd)
- 21:20 Bubbul Gem
- 21:35 Exploring Akkala citadel ruins cave
- 22:00 Exploring Akkala (Ulri Mountain area)
- 23:30 Farming Dragon Parts
- 28:00 Exploring Akkala (Ulri Mountain area)
- 33:45 Miniboss (Thunder gleeok)
- 35:25 Exploring Akkala (Ulri Mountain area)
- 36:40 Korok Seed
- 37:10 Exploring Akkala (Ulri Mountain area)
- 37:25 Chest (Royal Shield)
- 37:40 Exploring Akkala (Ulri Mountain area)
- 39:20 Miniboss (Phantom ganon)
- 40:20 Exploring Akkala (Ulri Mountain area)
- 40:55 Chest (Royal Guard's Spear)
- 41:10 Exploring Akkala (Ulri Mountain area)
- 41:45 Location (Akkala citadel ruins)
- 41:55 Chest (Fierce Deity Armor)
- 42:45 Bubbul Gem
- 43:05 Exploring Akkala (Ulri Mountain area)
- 45:30 Korok Seed
- 45:50 Exploring Akkala (Ulri Mountain area)
- 46:00 Shrine - Started (Domizuin shrine)
- 47:20 Chest (Zonai Charge)
- 48:35 Chest (Zonaite Shield)
- 49:15 Chest (Arrow)
- 50:50 Shrine - Completed (Domizuin shrine)
- 51:20 Exploring Akkala (Ulri Mountain area)
- 52:20 Stable (South akkala stable)
- 52:30 Helping Addison
- 54:55 Exploring Akkala (Ulri Mountain area)
- 56:10 Chest (Bomb-Barrel Spear)
- 57:00 Side Quest - One-Hit Wonder - Task Started / Completed (Destroy the ore deposit in one hit)
- 58:10 Reading Hyrule Compendium entries
- 58:25 Outro
- 0:00 Intro
- 0:25 Placing Markers on the Map
- 3:05 Exploring Akkala (Ulri Mountain area)
- 4:40 Side Quest - A picture for south akkala stable - Task Started / Completed (Take a picture of the Unity Bell in Tarrey To
- 10:00 Exploring Akkala (Ulri Mountain area)
- 12:50 Side Adventure - The All CLucking Cucco - Task Started / Completed (Investigate the Cucco and report back to Penn)
- 19:50 Side Adventure - Potential Princess Sightings - Task Started / Completed (Complete all 12 Side Adventures from Penn at S
- 20:05 Exploring Akkala (Ulri Mountain area)
- 20:35 Korok Seed
- 20:50 Exploring Akkala (Ulri Mountain area)
- 22:30 Side Adventure - Potential Princess Sightings - Task Started / Completed (Return to Lucky Clover Gazette and report back
- 23:20 Costume / Armor (Froggy Hood)
- 24:20 Exploring the Lucky Clover Gazette
- 29:20 Exploring Akkala (Ulri Mountain area)
- 31:40 Shrine - Started (Mayachideg shrine)
- 37:30 Chest (Captain IV Spear)
- 37:45 Shrine - Completed (Mayachideg shrine)
- 38:40 Korok Seed x2
- 40:10 Exploring Akkala (Ulri Mountain area)
- 41:00 Korok Seed
- 41:20 Exploring Akkala (Ulri Mountain area)
- 44:15 Chest (Zonaite Bow)
- 44:30 Exploring Akkala (Ulri Mountain area)
- 46:35 Miniboss (Boss Bokoblin)
- 47:50 Exploring Akkala (Ulri Mountain area)
- 49:45 Chest (Royal Shield)
- 50:00 Exploring Akkala (Ulri Mountain area)
- 50:55 Chest (Royal Claymore)
- 51:20 Exploring Akkala (Ulri Mountain area)
- 53:20 Shrine - Started (Sinatanika shrine)
- 55:40 Chest (Sneaky Elixir)
- 55:55 Shrine - Completed (Sinatanika shrine)
- 57:30 Outro
- 0:00:00 Intro
- 0:00:25 Placing Markers on the Map
- 0:01:30 Korok Seed
- 0:02:45 Farming Dragon Parts
- 0:04:50 Location (East akkala plains chasm)
- 0:05:10 Exploring Akkala (Ulri Mountain area)
- 0:05:45 Miniboss (Battle talus)
- 0:07:15 Chest (Saphire)
- 0:07:30 Exploring Akkala (Ulri Mountain area)
- 0:09:10 Helping Addison
- 0:10:55 Exploring Akkala (Ulri Mountain area)
- 0:11:45 Chest (Royal Bow)
- 0:12:05 Exploring Akkala (Ulri Mountain area)
- 0:15:50 Korok Seed
- 0:16:10 Exploring Akkala (Ulri Mountain area)
- 0:16:40 Miniboss (Phantom ganon)
- 0:17:35 Exploring Akkala (Ulri Mountain area)
- 0:20:15 Location (Spring of Power)
- 0:20:40 Side Quest - Goddess Statue of Power - Task Started / Completed (Offer the statue a Dinrals Claw)
- 0:22:50 Side Quest - The mother goddess statue - Task Started / Completed (Return to the Mother Goddess statue)
- 0:23:30 Weapon (White Sword of the Sky)
- 0:24:45 Exploring Akkala (Ulri Mountain area)
- 0:25:30 Korok Seed
- 0:25:50 Exploring Akkala (Ulri Mountain area)
- 0:27:00 Miniboss (Red-Maned Lynel)
- 0:27:50 Exploring Akkala (Ulri Mountain area)
- 0:28:40 Korok Seed
- 0:29:00 Exploring Akkala (Ulri Mountain area)
- 0:30:30 Chest (Rock Salt)
- 0:30:50 Exploring Akkala (Ulri Mountain area)
- 0:31:15 Chest (Royal Shield)
- 0:31:40 Exploring Akkala (Ulri Mountain area)
- 0:33:20 Korok Seed
- 0:33:40 Exploring Akkala (Ulri Mountain area)
- 0:34:40 Location (Skull lake chasm)
- 0:34:55 Exploring Akkala (Ulri Mountain area)
- 0:35:25 Location (Skull lake cave)
- 0:35:40 Exploring Akkala (Skull lake cave)
- 0:37:35 Miniboss (Stalnox)
- 0:38:30 Exploring Akkala (Skull lake cave)
- 0:39:20 Bubbul Gem
- 0:39:35 Exploring Akkala (Skull lake cave)
- 0:40:20 Chest (Fierce Deity mask)
- 0:41:30 Exploring Akkala (Ulri Mountain area)
- 0:41:55 Shrine - Started (Kamatukis shrine)
- 0:43:40 Chest (Mighty Zonaite Longsword)
- 0:45:00 Shrine - Completed (Kamatukis shrine)
- 0:45:35 Exploring Akkala (Ulri Mountain area)
- 0:47:40 Chest (Fierce Deity Sword)
- 0:48:00 Side Quest - Misko's Treasure: The Fierce Deity - Task Started / Completed (Return to Cephla cave with the complete Fier
- 0:49:35 Returning to Hateno Village
- 0:49:50 Heart Container
- 0:50:30 Dyeing the Gerudo Armor
- 0:53:00 Exploring Akkala (Ulri Mountain area)
- 0:54:20 Korok Seed
- 0:54:40 Exploring Akkala (Ulri Mountain area)
- 0:55:40 Fetching a fallen star
- 0:56:30 Exploring Akkala (Ulri Mountain area)
- 0:56:50 Korok Seed
- 0:57:20 Exploring Akkala (Ulri Mountain area)
- 0:58:00 Korok Seed
- 0:58:30 Exploring Akkala (Ulri Mountain area)
- 1:00:40 Reading Hyrule Compendium Entries
- 1:01:35 Outro
- 0:00 Intro
- 0:25 Placing Markers on the Map
- 2:50 Exploring Akkala (Ulri Mountain area)
- 4:10 Chest (Ruby)
- 4:25 Exploring Akkala (Ulri Mountain area)
- 5:40 Helping Addison
- 6:40 Exploring Akkala (Ulri Mountain area)
- 7:05 Korok Seed x2
- 8:30 Exploring Akkala (Ulri Mountain area)
- 9:10 Catching the Royal White Steed
- 10:40 Korok Seed
- 11:10 Exploring Akkala (Ulri Mountain area)
- 13:30 Korok Seed
- 14:00 Exploring Akkala (Ulri Mountain area)
- 14:50 Miniboss (Boss Bokoblin)
- 16:30 Exploring Akkala (Ulri Mountain area)
- 17:45 Location (East Akkal Stable)
- 20:10 Farming Dragon Parts
- 22:20 Exploring Akkala (Ulri Mountain area)
- 26:20 Korok Seed
- 27:20 Exploring Akkala (Ulri Mountain area)
- 28:05 Chest (Arrow x10)
- 28:30 Exploring Akkala (Ulri Mountain area)
- 29:20 Miniboss (Stone talus)
- 29:30 Side Quest - Wanted: Stone Talus - Task Started / Completed (Defeat the stone talus and report back to Gralens)
- 31:30 Side Quest - Unknown Sky Giant - Task Continued / Completed (Defeat the Flux Construct and report back to Gralens)
- 32:30 Side Quest - Unknown Three-Headed Monster - Task Continued / Completed (Defeat the Gleeok and report back to Gralens)
- 33:30 Side Quest - Unknown Huge Silhouet - Task Continued / Completed (Defeat the Frox and report back to Gralens)
- 36:00 Exploring Akkala (Ulri Mountain area)
- 36:45 Korok Seed
- 37:15 Exploring Akkala (Ulri Mountain area)
- 38:30 Helping Addison
- 39:20 Exploring Akkala (Ulri Mountain area)
- 39:40 Korok Seed x2
- 40:45 Exploring Akkala (Ulri Mountain area)
- 41:10 Side Quest - Strongest in the world - Task Started / Completed (Show Chabi a sword fused with a lynel horn)
- 43:20 Side Quest - The gathering pirates - Started / Found
- 43:50 Exploring Akkala (Ulri Mountain area)
- 44:10 Chest (Royal Shield)
- 45:30 Location (East Akkal Stable Well)
- 46:00 Exploring Akkala (Ulri Mountain area)
- 48:40 Side Quest - A Picture for East Akkala Stable - Task Starte / Completed (Take a picture of the lake resembling an octoro
- 54:55 Outro
- 0:00:00 Intro
- 0:00:25 Placing Markers on the Map
- 0:02:30 Exploring Akkala (Ulri Mountain area)
- 0:02:45 Side Quest - Eldin's Colossal Fossil - Found / Started
- 0:04:20 Shrine - Started (Jochi-Iu Shrine)
- 0:05:20 Chest (Energy Cell & Large Zonaite)
- 0:08:20 Shrine - Completed (Jochi-Iu Shrine)
- 0:08:55 Side Quest - Eldin's Colossal Fossil - Task Started / Completed (Meet up with Loone at Eldin's fossil and help her resto
- 0:11:45 Side Quest - Hebra's Colossal Fossil - Task Started / Completed (Meet up with Loone at Hebra's fossil and help her resto
- 0:15:00 Side Quest - Gerudo's Colossal Fossil - Found / Started
- 0:15:25 Finding a Grizzlemaw bear for a new glider fabric
- 0:19:35 Side Quest - Gerudo's Colossal Fossil - Task Started / Completed (Meet up with Loone at Gerudo's fossil and help her res
- 0:24:00 Returning to Hateno
- 0:25:10 Equipment (Grizzlemaw-Bear Fabric)
- 0:25:50 Farming pumpkins in Hateno
- 0:26:15 Returning to Akkala
- 0:26:45 Exploring Akkala (Ulri Mountain area)
- 0:28:00 Korok Seed
- 0:28:30 Exploring Akkala (Ulri Mountain area)
- 0:30:45 Korok Seed
- 0:31:15 Exploring Akkala (Ulri Mountain area)
- 0:31:45 Visiting Malanya - The Horse God
- 0:38:30 Exploring Akkala (Ulri Mountain area)
- 0:39:00 Korok Seed x2
- 0:39:55 Exploring Akkala (Ulri Mountain area)
- 0:44:25 Chest (Spiked-Iron-Ball Hammer)
- 0:44:45 Exploring Akkala (Ulri Mountain area)
- 0:45:55 Korok Seed
- 0:46:10 Exploring Akkala (Ulri Mountain area)
- 0:47:45 Korok Seed
- 0:48:10 Exploring Akkala (Ulri Mountain area)
- 0:48:15 Chest (Royal Bow)
- 0:48:35 Exploring Akkala (Ulri Mountain area)
- 0:51:50 Farming Dragon Parts
- 0:54:30 Exploring Akkala (Ulri Mountain area)
- 0:55:25 Helping Addison
- 0:57:20 Exploring Akkala (Ulri Mountain area)
- 0:58:05 Korok Seed
- 0:58:30 Exploring Akkala (Ulri Mountain area)
- 1:00:00 Armor (Yiga Armor)
- 1:00:45 Side Adventure - Presenting: The Travel Medallion - Task Started / Completed (Go to Robbie's old lab in Akkala to retrie
- 1:01:00 Equipment (Travel Medallion Prototype)
- 1:02:30 Reading Hyrule Compendium Entries
- 1:02:55 Outro
- 0:00 Intro
- 0:25 Placing Markers on the Map
- 2:30 Side Adventure - Presenting: The Travel Medalion - Task Started / Completed (Return to Robbie)
- 3:25 Equipment (Travel Medallion)
- 4:05 Side Adventure - Presenting: The Travel Medalion - Task Started / Completed (Return to Robbie after activating at least
- 4:35 Side Adventure - Presenting: The Travel Medalion - Task Started (Return to Robbie after activating 15 skyview towers)
- 4:55 Exploring Akkala (Ulri Mountain area)
- 7:45 Korok Seed
- 8:10 Exploring Akkala (Ulri Mountain area)
- 10:05 Korok Seed
- 10:35 Exploring Akkala (Ulri Mountain area)
- 13:45 Korok Seed
- 14:15 Exploring Akkala (Ulri Mountain area)
- 16:55 Korok Seed
- 17:15 Exploring Akkala (Ulri Mountain area)
- 18:30 Korok Seed x2
- 19:55 Exploring Akkala (Ulri Mountain area)
- 20:20 Chest (Arrow x10)
- 20:45 Exploring Akkala (Ulri Mountain area)
- 22:45 Side Quest - The Gathering Pirates - Task Started / Completed (Defeat the enemies on the pirate ships)
- 27:50 Chest (Steel Lizal Bow)
- 28:05 Exploring Akkala (Ulri Mountain area)
- 29:30 Chest (Blue Hinox Hammer)
- 29:45 Exploring Akkala (Ulri Mountain area)
- 31:00 Side Quest - The Gathering Pirates - Task Started / Completed (Talk to Aya)
- 32:05 Exploring Akkala (Ulri Mountain area)
- 33:00 Miniboss (Stone Talus)
- 33:50 Exploring Akkala (Ulri Mountain area)
- 35:20 Chest (Bomb FLower x10)
- 35:50 Shrine - Started (Rasiwak shrine)
- 37:10 Chest (Magic Scepter)
- 39:05 Shrine - Completed (Rasiwak shrine)
- 39:40 Exploring Akkala (Ulri Mountain area)
- 40:05 Location (North akkala beach cave)
- 40:25 Exploring North akkala beach cave
- 43:20 Chest (Royal Shield)
- 43:28 Exploring North akkala beach cave
- 44:00 Miniboss (Hinox)
- 44:45 Exploring North akkala beach cave
- 45:10 Bubbul Gem
- 45:35 Exploring North akkala beach cave
- 46:05 Chest (Big Battery)
- 46:20 Miniboss (Phantom ganon)
- 47:30 Location (Lomei labyrinth Chasm)
- 47:45 Exploring Lomei labyrinth
- 50:00 Chest (Zonai Charge)
- 50:25 Chest (Zonai Charge)
- 50:50 Exploring Lomei labyrinth
- 52:30 Outro
- 0:00 Intro
- 0:25 Placing Markers on the Map
- 1:30 Exploring Lomei labyrinth island
- 3:30 Chest (Large Zonai Charge)
- 3:50 Chest (Zonai Charge)
- 4:15 Exploring Lomei labyrinth island
- 6:10 Chest (Mighty Zonaite Spear)
- 6:25 Exploring Lomei labyrinth island
- 7:15 Chest (Mighty Zonaite Shield)
- 7:35 Exploring Lomei labyrinth island
- 9:30 Side Quest - The Lomei Ladyrinth Island Prophecy - Task Started (Navigate through the Labyrinth)
- 10:30 Farming Dragon Parts
- 13:15 Shrine - Started (Igashuk shrine)
- 13:35 Chest (Large Zonai Charge)
- 13:55 Shrine - Completed (Igashuk shrine)
- 14:30 Exploring Lomei labyrinth island
- 15:40 Chest (Zonaite Bow)
- 15:55 Exploring Lomei labyrinth island
- 16:30 Korok Seed
- 18:00 Visiting the Break-a-Part Shop
- 20:00 Upgrading gear at Great Fairy Cotera
- 29:00 Exploring Lomei sky labyrinth
- 31:25 Shrine - Started (Mogisari shrine)
- 33:10 Chest (Mighty Zonaite Shield)
- 34:50 Shrine - Completed (Mogisari shrine)
- 35:30 Side Quest - The Lomei Ladyrinth Island Prophecy - Task Continued (Navigate through the Labyrinth)
- 36:30 Chest (Mighty Zonaite Shield)
- 36:45 Side Quest - The Lomei Ladyrinth Island Prophecy - Task Continued (Navigate through the Labyrinth)
- 39:00 Chest (Zonaite Bow)
- 39:20 Side Quest - The Lomei Ladyrinth Island Prophecy - Task Continued (Navigate through the Labyrinth)
- 40:00 Chest (Big Battery)
- 40:20 Side Quest - The Lomei Ladyrinth Island Prophecy - Task Continued (Navigate through the Labyrinth)
- 42:30 Chest (Soldier IV Reaper)
- 42:50 Side Quest - The Lomei Ladyrinth Island Prophecy - Task Continued (Navigate through the Labyrinth)
- 46:20 Chest (Soldier IV Spear)
- 47:00 Chest (Soldier IV Blade)
- 47:20 Side Quest - The Lomei Ladyrinth Island Prophecy - Task Continued (Navigate through the Labyrinth)
- 50:00 Korok Seed
- 50:30 Side Quest - The Lomei Ladyrinth Island Prophecy - Task Continued (Navigate through the Labyrinth)
- 50:40 Location (Lomei depths labyrinth)
- 51:00 Miniboss (Flux construct 2)
- 52:20 Side Quest - The Lomei Ladyrinth Island Prophecy - Task Continued / Completed (Navigate through the Labyrinth)
- 53:20 Chest (Evil Spirit Armor)
- 54:05 Outro
- 0:00 Intro
- 0:35 Exploring Lomei depths Labyrinth
- 1:00 Light Root - Found (Kuhsagi Lightroot)
- 1:30 Placing Markers on the Map
- 2:20 Exploring Lomei depths Labyrinth
- 2:45 Chest (Zonaite Bow)
- 2:55 Exploring Lomei depths Labyrinth
- 3:25 Chest (Soldier IV Spear)
- 3:45 Exploring Lomei depths Labyrinth
- 4:10 Chest (Soldier IV Blade)
- 4:25 Exploring Lomei depths Labyrinth
- 4:40 Chest (Large Zonaite)
- 4:55 Exploring Lomei depths Labyrinth
- 6:10 Chest (Soldier IV Reaper)
- 6:30 Exploring Lomei depths Labyrinth
- 7:55 Placing Markers on the Map
- 10:05 Exploring the Sky of Akkala (Ulri Mountain area)
- 12:10 Miniboss (Flux Construct 3)
- 13:20 Chest (Old Map)
- 13:35 Exploring the Sky of Akkala (Ulri Mountain area)
- 15:20 Chest (Old Map)
- 15:40 Exploring the Sky of Akkala (Ulri Mountain area)
- 17:40 Korok Seed
- 18:20 Exploring the Sky of Akkala (Ulri Mountain area)
- 19:15 Device Dispencer
- 20:30 Location (Sky mine)
- 20:45 Shrine Quest - The sky mine crystal - Task Started (Get the crystal to the shrine)
- 24:35 Chest (Zonaite Shin Guards)
- 25:15 Shrine Quest - The sky mine crystal - Task Continued / Completed (Get the crystal to the shrine)
- 27:15 Shrine - Started (Gikaku shrine)
- 27:30 Chest (Ruby)
- 27:40 Shrine - Completed (Gikaku shrine)
- 28:10 Exploring the Sky of Akkala (Ulri Mountain area)
- 36:00 Chest (Sage's Will)
- 36:30 Exploring the Sky of Akkala (Ulri Mountain area)
- 37:30 Korok Seed
- 38:50 Shrine Quest - The Sokkala Sky Crystal - Task Started / Completed (Get the crystal to the shrine)
- 41:00 Shrine - Started (Natak shrine)
- 41:20 Chest (Enduring Elixir)
- 41:30 Shrine - Completed (Natak shrine)
- 41:50 Exploring the Sky of Akkala (Ulri Mountain area)
- 43:00 Farming Dragon Parts
- 45:30 Exploring the Sky of Akkala (Ulri Mountain area)
- 47:20 Miniboss (Flux Construct 2)
- 48:10 Chest (Old Map)
- 48:30 Exploring the Sky of Akkala (Ulri Mountain area)
- 50:00 Heart Container
- 51:40 Exploring the Depths of Akkala (Ulri Mountain area)
- 53:30 Location (Rist mine)
- 53:55 Exploring the Depths of Akkala (Ulri Mountain area)
- 55:15 Light Root - Found (Kimimeg lightroot)
- 56:05 Outro
- 0:00:00 Intro
- 0:00:25 Placing Markers on the Map
- 0:01:00 Exploring the Depths of Akkala (Ulri Mountain area)
- 0:02:20 Chest (Tunic of Twilight)
- 0:03:10 Exploring the Depths of Akkala (Ulri Mountain area)
- 0:06:45 Miniboss (Hinox)
- 0:07:15 Exploring the Depths of Akkala (Ulri Mountain area)
- 0:09:20 Location (Abandoned Tarrey Mine)
- 0:11:00 Equipment (Schema Stone)
- 0:11:20 Exploring the Depths of Akkala (Ulri Mountain area)
- 0:12:00 Chest (Large Crystallized Charge)
- 0:12:30 Exploring the Depths of Akkala (Ulri Mountain area)
- 0:14:10 Miniboss (Frox)
- 0:15:30 Exploring the Depths of Akkala (Ulri Mountain area)
- 0:16:25 Light Root - Found (Akinatanis lightroot)
- 0:16:55 Placing Markers on The Map
- 0:17:55 Exploring the Depths of Akkala (Ulri Mountain area)
- 0:19:00 Chest (Yiga Schematic & Large Crystallized Charge)
- 0:19:30 Exploring the Depths of Akkala (Ulri Mountain area)
- 0:21:10 Location (Ulri Canyon Mine)
- 0:21:20 Chest (Large Crystallized Charge)
- 0:21:45 Exploring the Depths of Akkala (Ulri Mountain area)
- 0:24:50 Miniboss (Armored Blue-Maned Lynel)
- 0:26:05 Exploring the Depths of Akkala (Ulri Mountain area)
- 0:27:45 Boss (Muctorok)
- 0:31:45 Chest (Huge Crystallized Charge)
- 0:31:55 Exploring the Depths of Akkala (Ulri Mountain area)
- 0:34:25 Location (Spring of power)
- 0:35:05 Armor (Tunic of Memories)
- 0:35:50 Exploring the Depths of Akkala (Ulri Mountain area)
- 0:36:30 Farming Dragon Parts
- 0:37:30 Exploring the Depths of Akkala (Ulri Mountain area)
- 0:39:15 Miniboss (Flux construct)
- 0:40:20 Exploring the Depths of Akkala (Ulri Mountain area)
- 0:40:45 Location (Rok Groove)
- 0:40:55 Chest (Large Crystallized Charge)
- 0:41:10 Exploring the Depths of Akkala (Ulri Mountain area)
- 0:42:35 Light Root - Found (Ui-Ihcoj lightroot)
- 0:42:55 Exploring the Depths of Akkala (Ulri Mountain area)
- 0:43:30 Miniboss (Armored Silver-Maned Lynel)
- 0:44:55 Exploring the Depths of Akkala (Ulri Mountain area)
- 0:46:35 Light Root - Found (Kawisar lightroot)
- 0:46:55 Exploring the Depths of Akkala (Ulri Mountain area)
- 0:48:40 Miniboss (Stone talus)
- 0:49:20 Exploring the Depths of Akkala (Ulri Mountain area)
- 0:51:00 Shortcut to the surface
- 0:51:50 Exploring the Depths of Akkala (Ulri Mountain area)
- 0:53:20 Chest (Yiga Schematic & Large Crystallized Charge)
- 0:53:50 Exploring the Depths of Akkala (Ulri Mountain area)
- 0:56:45 Farming Materials for future armor upgrades
- 1:03:30 Heading towards the last Skyview tower (Gerudo Highlands)
- 1:04:30 Outro
- 0:00 Intro
- 0:30 Heading Straight for Gerudo Highlands Skyview Tower
- 1:10 Placing Markers on the Map
- 1:40 Heading Straight for Gerudo Highlands Skyview Tower
- 2:35 Skyview Tower - Found (Gerudo Highlands Skyview Tower)
- 3:00 Exploring Gerudo Highlands area
- 4:15 Location (Meadela's Mantle Cave)
- 4:30 Exploring Meadela's Mantle Cave
- 7:30 Chest (Gerudo Bow)
- 7:55 Exploring Meadela's Mantle Cave
- 8:50 Bubbul Gem
- 9:45 Chest (Topaz)
- 10:15 Exploring Meadela's Mantle Cave
- 11:00 Activating Gerudo Highlands Skyview Tower (last skyview tower!!!)
- 13:15 Exploring the sky of Gerudo Highlands area
- 16:40 PLacing Markers on the Map
- 19:30 Exploring the sky of Gerudo Highlands area
- 22:25 Korok Seed
- 22:55 Exploring the sky of Gerudo Highlands area
- 23:05 Chest (Old Map)
- 23:30 Exploring the sky of Gerudo Highlands area
- 24:20 Location (Starview Island)
- 24:45 Device Dispenser
- 25:45 Exploring Starview Island
- 28:40 Chest (Sage's Will)
- 28:55 Exploring the sky of Gerudo Highlands area
- 30:00 Shrine - Started (Mayasiar Shrine)
- 30:40 Chest (Star-Fragment Staff)
- 31:00 Shrine - Completed (Mayasiar Shrine)
- 32:45 Exploring Starview Island
- 34:45 Farming Dragon Parts & other Materials
- 44:10 Dragon Tear / Memory 07 (A Show of Fealty)
- 48:45 Main Quest - The dragons tears - Task Completed (Visit all 11 geoglyphs)
- 49:20 Korok Seed
- 49:45 Exploring Gerudo Highlands area
- 51:15 Chest (Radiant Shield)
- 51:30 Exploring Gerudo Highlands area
- 52:00 Chest (Arrow x5)
- 52:20 Exploring Gerudo Highlands area
- 52:45 Korok Seed
- 53:30 Exploring Gerudo Highlands area
- 55:35 Korok Seed
- 55:55 Exploring Gerudo Highlands area
- 57:00 Outro
- 0:00:00 Intro
- 0:00:25 Placing Markers on the Map
- 0:01:50 Exploring Gerudo Highlands area
- 0:08:00 Korok Seed
- 0:08:20 Exploring Gerudo Highlands area
- 0:09:30 Location (Brida Lookout Chasm)
- 0:10:00 Exploring Gerudo Highlands area
- 0:15:00 Chest (Gerudo Bow)
- 0:15:20 Exploring Gerudo Highlands area
- 0:18:25 Korok Seed
- 0:18:50 Exploring Gerudo Highlands area
- 0:21:15 Korok Seed
- 0:21:35 Exploring Gerudo Highlands area
- 0:24:00 Farming Dragon Parts and other materials
- 0:31:40 Chest (Royal Bow)
- 0:31:55 Exploring Gerudo Highlands area
- 0:35:10 Chest (Topaz)
- 0:35:30 Exploring Gerudo Highlands area
- 0:38:15 Korok Seed
- 0:38:30 Exploring Gerudo Highlands area
- 0:39:25 Korok Seed
- 0:40:00 Exploring Gerudo Highlands area
- 0:44:30 Korok Seed
- 0:44:50 Exploring Gerudo Highlands area
- 0:45:20 Korok Seed
- 0:46:00 Exploring Gerudo Highlands area
- 0:46:30 Miniboss (Battle talus)
- 0:47:40 Exploring Gerudo Highlands area
- 0:52:30 Chest (Opal)
- 0:53:00 Exploring Gerudo Highlands area
- 0:53:50 Korok Seed
- 0:54:15 Exploring Gerudo Highlands area
- 0:57:00 Location (Yiga clan hideout)
- 0:57:15 Side Adventure - Infiltrating the Yiga Clan - Task Started (Get the complete Yiga Clan Outfit and enter through the main
- 0:58:55 Exploring Yiga clan hideout
- 1:00:00 Chest (Eightfold Blade)
- 1:00:20 Exploring Yiga clan hideout
- 1:01:20 Outro
- 0:00:00 Intro
- 0:00:25 Placing Markers on the Map
- 0:02:15 Exploring Yiga clan hideout
- 0:05:25 Chest (Sneaky Elixir)
- 0:06:00 Exploring Yiga clan hideout
- 0:07:45 Chest (Eightfold Longblade)
- 0:08:10 Exploring Yiga clan hideout
- 0:09:20 Yiga training
- 0:10:45 Equipment (Yiga Fabric)
- 0:11:00 Yiga training
- 0:13:50 Equipment (Earthwake Manual)
- 0:14:15 Yiga training
- 0:15:25 Armor (Lightning Helm)
- 0:16:30 Exploring Gerudo Highlands area
- 0:19:10 Location (Yiga clan hideout chasm)
- 0:20:25 Shrine - Started (Rotsumamu shrine)
- 0:22:30 Chest (Large Zonaite)
- 0:23:10 Shrine - Completed (Rotsumamu shrine)
- 0:24:30 Changing Glider fabric and farming crops in Hateno Village
- 0:27:00 Side Adventure - Presenting: The Travel Medalion! - Task Started / Completed (Visit all 15 skyview towers and return to
- 0:28:30 Heart Container
- 0:29:45 Exploring Gerudo Highlands area
- 0:32:10 Chest (Gerudo Shield)
- 0:32:25 Exploring Gerudo Highlands area
- 0:33:00 Korok Seed
- 0:33:25 Exploring Gerudo Highlands area
- 0:36:40 Korok Seed
- 0:37:15 Exploring Gerudo Highlands area
- 0:39:20 Korok Seed x2
- 0:41:30 Exploring Gerudo Highlands area
- 0:42:45 Korok Seed
- 0:43:15 Exploring Gerudo Highlands area
- 0:44:10 Korok Seed
- 0:44:30 Exploring Gerudo Highlands area
- 0:45:20 Korok Seed
- 0:45:45 Exploring Gerudo Highlands area
- 0:47:20 Korok Seed
- 0:47:40 Exploring Gerudo Highlands area
- 0:49:20 Chest (Zonaite x3)
- 0:49:45 Exploring Gerudo Highlands area
- 0:50:20 Miniboss (Frost talus)
- 0:51:45 Exploring Gerudo Highlands area
- 0:53:15 Korok Seed
- 0:53:45 Exploring Gerudo Highlands area
- 0:54:45 Korok Seed
- 0:56:00 Exploring Gerudo Highlands area
- 0:57:10 Chest (Gerudo Scimitar)
- 0:57:30 Exploring Gerudo Highlands area
- 0:58:50 Korok Seed
- 0:59:20 Exploring Gerudo Highlands area
- 1:01:00 Korok Seed
- 1:02:05 Exploring Gerudo Highlands area
- 1:04:20 Korok Seed
- 1:04:40 Fetching a fallen star
- 1:08:00 Farming dragon parts
- 1:09:30 Exploring Gerudo Highlands area
- 1:12:25 Outro
- 0:00:00 Intro
- 0:00:25 Placing Markers on the Map
- 0:02:10 Exploring Gerudo Highlands area
- 0:03:40 Korok Seed
- 0:04:10 Exploring Gerudo Highlands area
- 0:05:10 Korok Seed
- 0:05:35 Exploring Gerudo Highlands area
- 0:07:35 Chest (Bomb Flower x5)
- 0:07:50 Exploring Gerudo Highlands area
- 0:10:30 Korok Seed
- 0:11:10 Exploring Gerudo Highlands area
- 0:12:30 Korok Seed
- 0:12:45 Exploring Gerudo Highlands area
- 0:21:30 Korok Seed
- 0:21:55 Exploring Gerudo Highlands area
- 0:26:15 Miniboss (Phantom ganon)
- 0:27:10 Exploring Gerudo Highlands area
- 0:31:10 Location (Yiga blademaster station)
- 0:31:45 Side Adventure - The Yiga Clan Exam - Task Started (Offer bananas at all 5 Yiga Frogs and report back to the Blademaster
- 0:50:00 Miniboss (Blue-Maned Lynel)
- 0:53:00 Miniboss (Flame Gleeok)
- 0:56:30 Side Adventure - The Yiga Clan Exam - Task Continued / Completed (Offer bananas at all 5 Yiga Frogs and report back to t
- 0:57:20 Chest (Ruby)
- 0:57:30 Chest (Eightfold Longblade)
- 0:57:50 Bubbul Gem
- 0:58:35 Shrine - Started (Suariwak shrine)
- 0:59:00 Chest (Big Battery)
- 0:59:15 Shrine - Completed (Suariwak shrine)
- 1:01:00 Fetching a fallen star
- 1:03:15 Visiting the pick apart shop
- 1:05:30 Farming Dragon Parts
- 1:07:30 Exploring Gerudo Highlands area
- 1:08:10 Chest (Eightfold Longblade)
- 1:08:30 Exploring Gerudo Highlands area
- 1:09:20 Outro
- 0:00 Intro
- 0:25 Placing Markers on the Map
- 1:10 Exploring Gerudo Highlands area
- 4:50 Chest (Frost Emitter)
- 5:05 Exploring Gerudo Highlands area
- 8:45 Miniboss (Boss Bokoblin)
- 10:50 Exploring Gerudo Highlands area
- 11:25 Korok Seed
- 11:45 Exploring Gerudo Highlands area
- 12:15 Chest (Gerudo Scimitar)
- 12:40 Exploring Gerudo Highlands area
- 15:00 Farming Dragon Parts and fetching stars
- 24:50 Exploring Gerudo Highlands area
- 26:30 Korok Seed
- 27:05 Exploring Gerudo Highlands area
- 27:30 Korok Seed
- 27:45 Exploring Gerudo Highlands area
- 29:00 Chest (Arrow)
- 29:20 Exploring Gerudo Highlands area
- 31:20 Korok Seed
- 31:35 Exploring Gerudo Highlands area
- 33:00 Miniboss (Boss Bokoblin)
- 34:30 Exploring Gerudo Highlands area
- 35:10 Korok Seed
- 35:45 Korok Seed
- 36:55 Korok Seed
- 37:10 Exploring Gerudo Highlands area
- 37:40 Chest (Gerudo Scimitar)
- 37:55 Exploring Gerudo Highlands area
- 39:05 Location (Mysararhi's Shelf Cave)
- 39:40 Chest (Large Zonaite)
- 40:00 Bubbul Gem
- 40:30 Exploring Gerudo Highlands area
- 41:35 Korok Seed
- 41:55 Exploring Gerudo Highlands area
- 43:00 Location (Gerudo summit chasm)
- 43:15 Exploring Gerudo Highlands area
- 44:45 Miniboss (Frost gleeok)
- 46:10 Korok Seed
- 46:45 Side Quest - A Picture for the closed stable 2 - Task Started / Completed (Take a picture of the huge sword at the Gerud
- 51:50 Exploring Gerudo Highlands area
- 58:00 Outro
- 0:00:00 Intro
- 0:00:25 Placing Markers on the Map
- 0:02:10 Exploring Gerudo Highlands area
- 0:02:40 Fetching a fallen star
- 0:05:50 Helping Addison
- 0:06:20 Miniboss (Hinox)
- 0:06:55 Exploring Gerudo Highlands area
- 0:08:00 Miniboss (Frost talus)
- 0:08:45 Exploring Gerudo Highlands area
- 0:09:50 Chest (Frost Emitter)
- 0:10:10 Exploring Gerudo Highlands area
- 0:14:05 Shrine - Started (Mayamats shrine)
- 0:15:05 Chest (Large Zonai Charge)
- 0:16:40 Shrine - Completed (Mayamats shrine)
- 0:17:05 Exploring Gerudo Highlands area
- 0:18:40 Korok Seed
- 0:19:50 Exploring Gerudo Highlands area
- 0:22:45 Chest (Royal Halberd)
- 0:23:00 Exploring Gerudo Highlands area
- 0:24:10 Korok Seed
- 0:24:30 Exploring Gerudo Highlands area
- 0:25:30 Korok Seed
- 0:25:45 Exploring Gerudo Highlands area
- 0:27:20 Korok Seed x2
- 0:28:45 Exploring Gerudo Highlands area
- 0:30:00 Chest (Gerudo Spear)
- 0:31:00 Chest (Bomb Flower & Gerudo Spear)
- 0:31:30 Exploring Gerudo Highlands area
- 0:32:00 Miniboss (Silver-Maned Lynel)
- 0:33:00 Exploring Gerudo Highlands area
- 0:34:20 Chest (Gerudo Spear)
- 0:34:40 Exploring Gerudo Highlands area
- 0:35:00 Korok Seed
- 0:35:20 Exploring Gerudo Highlands area
- 0:39:30 Shrine - Started (Otutsum shrine)
- 0:39:50 Chest (Topaz)
- 0:40:00 Shrine - Completed (Otutsum shrine)
- 0:40:35 Exploring Gerudo Highlands area
- 0:42:00 Korok Seed
- 0:42:50 Chest (Gerudo Shield & Radiant Shield)
- 0:43:30 Exploring Gerudo Highlands area
- 0:44:05 Chest (Mirror)
- 0:44:20 Exploring Gerudo Highlands area
- 0:44:40 Location (Statue of the eighth heroine cave)
- 0:45:00 Exploring Statue of the eighth heroine cave
- 0:47:00 Chest (Tingles Hood)
- 0:47:35 Bubbul Gem (last one!!!)
- 0:48:15 Exploring Gerudo Highlands area
- 0:49:25 Korok Seed
- 0:49:55 Exploring Gerudo Highlands area
- 0:52:20 Korok Seed
- 0:54:25 Exploring Gerudo Highlands area
- 0:56:00 Farming stars and dragon parts
- 0:58:00 Equipment (Koltins Fabric)
- 1:00:30 Outro
- 0:00:00 Intro
- 0:00:25 Placing Markers on the Map
- 0:02:10 Farming Materials
- 0:05:50 Exploring Gerudo Highlands area
- 0:12:20 Chest (Arrow)
- 0:12:40 Exploring Gerudo Highlands area
- 0:16:40 Chest (Radiant Shield & Gerudo Shield)
- 0:17:30 Exploring Gerudo Highlands area
- 0:18:35 Korok Seed
- 0:19:15 Exploring Gerudo Highlands area
- 0:22:45 Shrine - Started (Gasas shrine)
- 0:24:25 Chest (Large Zonai Charge & Small Key)
- 0:26:05 Shrine - Completed (Gasas shrine)
- 0:26:45 Exploring Gerudo Highlands area
- 0:29:20 Korok Seed
- 0:30:15 Exploring Gerudo Highlands area
- 0:32:40 Chest (Royal Claymore)
- 0:33:10 Exploring Gerudo Highlands area
- 0:34:30 Korok Seed x2
- 0:35:50 Exploring Gerudo Highlands area
- 0:37:00 Miniboss (Red-maned Lynel)
- 0:39:00 Chest (Royal Claymore)
- 0:39:20 Exploring Gerudo Highlands area
- 0:40:00 Helping Addison
- 0:41:10 Korok Seed
- 0:41:50 Shrine - Started (Turakawak shrine)
- 0:42:45 Chest (Magic Rod)
- 0:43:40 Shrine - Completed (Turakawak shrine)
- 0:44:20 Exploring Gerudo Highlands area
- 0:46:10 Helping Addison (for the last time!!!)
- 0:47:10 Equipment (Addison Fabric)
- 0:47:40 Exploring Gerudo Highlands area
- 0:48:15 Finding Penn's spot
- 0:49:30 Placing Markers on the Map
- 0:51:20 Upgrading gear at Great Fairy Cotera
- 1:02:00 Outro
- 0:00:00 Intro
- 0:00:25 Going straight for Umamustor lightroot
- 0:01:00 Light Root - Found (Umamustor lightroot)
- 0:01:55 Going straight for Kawiraus lightroot
- 0:04:00 Light Root - Found (Kawiraus lightroot)
- 0:04:35 Going straight for Kawakarut lightroot
- 0:06:35 Light Root - Found (Kawakarut lightroot)
- 0:07:00 Going straight for Mustuto lightroot
- 0:09:00 Light Root - Found (Mustuto lightroot)
- 0:09:20 Going straight for Stamayam lightroot
- 0:10:35 Light Root - Found (Stamayam lightroot) - LAST LIGHTROOT!!!
- 0:11:30 Equipment (Dispelling Darkness Medal)
- 0:12:05 Placing Markers on the Map
- 0:14:55 Exploring the Depths of Gerudo Highlands area
- 0:16:50 Chest (Gerudo Shield)
- 0:17:30 Chest (Arrow x10)
- 0:17:40 Exploring the Depths of Gerudo Highlands area
- 0:23:05 Chest (Giant Brightbloom Seed x5)
- 0:23:20 Exploring the Depths of Gerudo Highlands area
- 0:23:40 Miniboss (Stone talus)
- 0:24:05 Exploring the Depths of Gerudo Highlands area
- 0:28:15 Shortcut to the surface
- 0:28:45 Miniboss (Frox)
- 0:30:10 Exploring the Depths of Gerudo Highlands area
- 0:33:00 Chest (Arrow x10)
- 0:33:20 Exploring the Depths of Gerudo Highlands area
- 0:33:45 Chest (Yiga Schematic & Large Crystallized Charge)
- 0:34:15 Exploring the Depths of Gerudo Highlands area
- 0:36:00 Miniboss (Flux construct)
- 0:36:50 Exploring the Depths of Gerudo Highlands area
- 0:41:10 Boss (Marbled Gohma)
- 0:44:40 Exploring the Depths of Gerudo Highlands area
- 0:45:45 Chest (Giant Brightbloom Seed x5)
- 0:46:00 Exploring the Depths of Gerudo Highlands area
- 0:46:50 Shortcut to the surface
- 0:47:25 Boss (Queen Gibdo)
- 0:49:50 Chest (Huge Crystallized Charge)
- 0:50:20 Exploring the Depths of Gerudo Highlands area
- 0:50:55 Miniboss (Battle talus)
- 0:51:30 Exploring the Depths of Gerudo Highlands area
- 0:55:45 Chest (Yiga Schematic & Large Crystallized Charge)
- 0:56:10 Exploring the Depths of Gerudo Highlands area
- 0:58:20 Chest (Sundelion)
- 0:58:35 Exploring the Depths of Gerudo Highlands area
- 1:00:20 Chest (Sundelion)
- 1:00:55 Exploring the Depths of Gerudo Highlands area
- 1:02:00 Boss (Queen Gibdo)
- 1:04:15 Chest (Huge Crystallized Charge)
- 1:04:50 Outro
- 0:00:00 Intro
- 0:00:25 Placing Markers on the Map
- 0:03:00 Exploring the Depths of Gerudo Highlands area
- 0:04:00 Chest (Arrow)
- 0:04:15 Exploring the Depths of Gerudo Highlands area
- 0:05:00 Miniboss (Hinox)
- 0:05:55 Exploring the Depths of Gerudo Highlands area
- 0:07:10 Miniboss (Flux construct 3)
- 0:08:35 Exploring the Depths of Gerudo Highlands area
- 0:09:30 Location (Gerudo canyon mine)
- 0:09:40 Chest (Trousers of Time)
- 0:10:20 Exploring the Depths of Gerudo Highlands area
- 0:15:50 Chest (Yiga Schematic & Large Crystallized)
- 0:16:20 Exploring the Depths of Gerudo Highlands area
- 0:17:15 Miniboss (Frox)
- 0:18:35 Exploring the Depths of Gerudo Highlands area
- 0:20:05 Location (Agaat canyon mine)
- 0:20:15 Chest (Sundelion)
- 0:20:30 Exploring the Depths of Gerudo Highlands area
- 0:23:25 Chest (Large Crystallized Charge)
- 0:23:45 Exploring the Depths of Gerudo Highlands area
- 0:24:00 Miniboss (Frost talus)
- 0:24:45 Exploring the Depths of Gerudo Highlands area
- 0:26:45 Farming materials for armor upgrades
- 0:43:20 Heart Container
- 0:43:40 Side Quest - Where are the Wells - Task Completed (Find and tell Fera all the Well Locations)
- 0:44:40 Equipment (Alls Well)
- 0:46:00 Returning to Prissen and Domidak after finishing all their treasure quests
- 0:47:50 Equipment (Eldin-Ostrich Fabric)
- 0:48:30 Farming, selling and buyin materials for armor/horse upgrades
- 0:56:45 Side Adventure - Filling out the Compendium - Task Completed (Buy compendium pictures from rob)
- 0:58:15 Memory 17 (Tears of the Dragon)
- 0:58:30 Main Quest - The Dragons Tears - Task Completed (Find the last Dragon Tear)
- 1:04:50 Reading Hyrule Compendium entries
- 1:09:45 Outro
- 0:00:00 Intro
- 0:00:25 Placing Markers on the Map
- 0:04:00 Farming Dragon parts, stars and other materials
- 0:11:30 Upgrading one horse to max stats
- 0:34:45 Side Quest - Lurelin Resort Project - Task Started / Completed (Talk to Tali in Tarrey Town)
- 0:40:15 Side Quest - Lurelin Resort Project - Task Started / Completed (Talk to Rozel in Lurelin Village)
- 0:42:00 Minigame (Lurelin Water Rally)
- 0:49:00 Selling stuff to make money for armor upgrades
- 0:52:00 Farming Dragon Parts
- 0:53:30 Buying Hyrule Compendium Photos from Robbie
- 0:55:00 Farming/buying materials for armor upgrades
- 1:04:20 Side Adventure - Legend of the Great Sky Island - Task Started / Completed (Light the three fires and return to the stew
- 1:09:30 Equipment (Zonai Fabric)
- 1:10:50 Reading Hyrule Compendium Entries
- 1:15:05 Outro
- 0:00:00 Intro
- 0:00:25 Placing Markers on the Map
- 0:01:20 Side Adventure- Messages from an Ancient Era - Task Started (Find all Stone Tablets and photograph them)
- 0:16:30 Miniboss (Frost Gleeok)
- 0:19:00 Side Adventure - Messages from an Ancient Era - Task Continued (Find all Stone Tablets and photograph them)
- 0:22:25 Miniboss (Frox)
- 0:24:00 Side Adventure - Messages from an Ancient Era - Task Continued (Find all Stone Tablets and photograph them)
- 0:30:00 Buying materials for armor upgrades
- 0:33:00 Side Adventure - Messages from an Ancient Era - Task Continued (Find all Stone Tablets and photograph them)
- 0:40:20 Miniboss (King gleeok)
- 0:42:50 Side Adventure - Messages from an Ancient Era - Task Continued / Completed (Find all Stone Tablets and photograph them)
- 0:46:00 Side Adventure - Messages from an Ancient Era - Task Started / Completed (Show Wortsworth all the stone tablet pictures)
- 1:03:00 Equipment (Zonai Survey Team Fabric)
- 1:04:30 Changing Glider Fabric and farming carrots in Hateno Village
- 1:06:10 Buying compendium photos from Robbie
- 1:09:00 Farming Stealthfin Trouts
- 1:14:35 Upgrading gear at Great Fairy Cotera
- 1:22:10 Reading Hyrule Compendium Entries
- 1:26:25 Outro
- 0:00:00 Intro
- 0:00:25 Placing Markers on the Map
- 0:01:10 Farming Hearty Bass
- 0:03:00 Farming stars fragments
- 0:09:30 2 Star Fragments in one go
- 0:12:00 Farming Fire and Ice Lizalfos Tails
- 0:30:00 Farming Molduga Parts, Gibdo Parts and Electric Lizalfos Tails
- 0:49:00 Farming Lynel Parts
- 0:56:30 Upgrading gear at Great Fairy Cotera
- 1:04:10 Main Quest - Regional Phenomena - Task Started / Completed (Return to Purah in Lookout Landing)
- 1:06:30 Main Quest - Crisis at Hyrule Castle - Task Started (Explore Hyrule Castle)
- 1:09:10 Outro
- 0:00:00 Intro
- 0:00:25 Placing Markers on the Map
- 0:03:50 Main Quest - Crisis at Hyrule Castle - Task Continued (Explore Hyrule Castle)
- 0:05:35 Chest (Royal Halberd)
- 0:05:50 Exploring Hyrule Castle
- 0:07:25 Chest (Royal Claymore)
- 0:07:40 Korok Seed
- 0:07:55 Exploring Hyrule Castle
- 0:08:55 Korok Seed
- 0:09:25 Exploring Hyrule Castle
- 0:10:40 Chest (Arrow x5 & Royal Claymore)
- 0:11:00 Exploring Hyrule Castle
- 0:11:45 Shrine - Started (Serutabomac shrine)
- 0:13:35 Chest (Magic Rod)
- 0:14:20 Shrine - Completed (Serutabomac shrine)
- 0:14:45 Exploring Hyrule Castle
- 0:15:40 Chest (Royal Guard Boots)
- 0:15:55 Exploring Hyrule Castle
- 0:17:20 Chest (Shard of Dinraals Spike)
- 0:17:35 Exploring Hyrule Castle
- 0:21:10 Chest (Gold Rupee)
- 0:21:30 Exploring Hyrule Castle
- 0:24:35 Chest (Royal Claymore)
- 0:24:50 Exploring Hyrule Castle
- 0:25:10 Chest (Royal Bow)
- 0:25:25 Exploring Hyrule Castle
- 0:26:40 Chest (Royal Shield)
- 0:26:55 Exploring Hyrule Castle
- 0:28:15 Chest (Royal Bow)
- 0:28:35 Exploring Hyrule Castle
- 0:30:50 Chest (Royal Guard's Sword)
- 0:31:10 Korok Seed
- 0:31:30 Exploring Hyrule Castle
- 0:32:30 Korok Seed
- 0:32:55 Exploring Hyrule Castle
- 0:34:20 Chest (Royal Guard Cap)
- 0:34:40 Exploring Hyrule Castle
- 0:36:50 Korok Seed
- 0:37:15 Exploring Hyrule Castle
- 0:40:00 Chest (Royal Guard's Claymore)
- 0:40:15 Exploring Hyrule Castle
- 0:42:45 Chest (Royal Bow & Royal Bow & Royal Shield)
- 0:43:35 Exploring Hyrule Castle
- 0:44:50 Chest (Royal Halberd)
- 0:45:20 Korok Seed
- 0:45:40 Exploring Hyrule Castle
- 0:46:30 Chest (Red Rupee)
- 0:46:45 Exploring Hyrule Castle
- 0:48:20 Korok Seed
- 0:48:40 Exploring Hyrule Castle
- 0:49:10 Chest (Royal Guard's Spear & Sapphire)
- 0:49:30 Korok Seed
- 0:50:10 Chest (Gold Rupee)
- 0:50:25 Main Quest - Crisis at Hyrule Castle - Task Continued / Completed (Explore Hyrule Castle)
- 0:53:00 Boss (Phantom Ganon)
- 0:53:30 Main Quest - Crisis at Hyrule Castle - Task Started / Compled (Phantom Boss Fight)
- 0:58:20 Heart Container
- 0:59:00 Main Quest - Crisis at Hyrule Castle - Task Started (Return to Purah in Lookout Landing)
- 1:00:20 Side Quest - A New Champion's Tunic - Task Started / Completed (Find the Champions Tunic in Hyrule Castle)
- 1:00:40 Chest (Champions Leathers)
- 1:02:10 Outro
- 0:00:00 Intro
- 0:00:25 Placing Markers on the Map
- 0:01:40 Fetching a fallen star
- 0:03:30 Talking to Josha and buying bombs
- 0:04:30 Talking to the Sages at Lookout Lanindg
- 0:05:45 Main Quest - Crisis at Hyrule Castle - Task Started / Completed (Return to Purah in Lookout Landing)
- 0:09:00 Main Quest - Find the fifth sage - Found / Started
- 0:10:30 Main Quest - Find the fifth sage - Task Started / Completed (Talk to Paya and Tauro)
- 0:13:00 Main Quest - Secret of the Ring Ruins - Task Started / Completed (Find a way to read the stone slab in the previously "f
- 0:19:40 Main Quest - Secret of the Ring Ruins - Task Started / Completed (Go to Popla Foothills Skyview Tower)
- 0:23:20 Main Quest - Secret of the Ring Ruins - Task Started / Completed (Talk to Tauro in Zonai Ruins)
- 0:25:00 Main Quest - Secret of the Ring Ruins - Task Started (Solve the Serpent Riddle)
- 0:25:15 Chest (Charged Shirt)
- 0:25:45 Main Quest - Secret of the Ring Ruins - Task Continued (Solve the Serpent Riddle)
- 0:27:50 Chest (Charged Trousers)
- 0:28:30 Main Quest - Secret of the Ring Ruins - Task Continued (Solve the Serpent Riddle)
- 0:30:10 Chest (Charged Headdress)
- 0:30:40 Main Quest - Secret of the Ring Ruins - Task Continued / Completed (Solve the Serpent Riddle)
- 0:36:30 Placing Markers on the Map
- 0:38:55 Upgrading gear at Great Fairy Cotera
- 0:47:30 Main Quest - Secret of the Ring Ruins - Task Started (Reach End of Thunderhead Isles)
- 0:53:00 Chest (Mighty Zonaite Spear)
- 0:53:30 Main Quest - Secret of the Ring Ruins - Task Continued (Reach End of Thunderhead Isles)
- 0:57:40 Chest (Topaz)
- 0:58:00 Main Quest - Secret of the Ring Ruins - Task Continued (Reach End of Thunderhead Isles)
- 1:00:05 Outro
- 0:00 Intro
- 0:30 Main Quest - Secret of the Ring Ruins - Task Continued (Reach End of Thunderhead Isles)
- 5:25 Chest (Old Map)
- 8:00 Korok Seed
- 8:30 Main Quest - Secret of the Ring Ruins - Task Continued (Reach End of Thunderhead Isles)
- 13:50 Miniboss (Flux Construct 3)
- 14:30 Main Quest - Secret of the Ring Ruins - Task Continued (Reach End of Thunderhead Isles)
- 14:40 Chest (Old Map)
- 16:30 Shrine - Started (Joku-usin Shrine)
- 20:40 Chest (Electro Elixir)
- 20:50 Shrine - Completed (Joku-usin Shrine)
- 21:20 Main Quest - Secret of the Ring Ruins - Task Continued (Reach End of Thunderhead Isles)
- 22:05 Device Dispenser
- 23:50 Chest (Mighty Zonaite Shield & Mighty Zonaite Shield)
- 24:20 Chest (Big Battery)
- 24:30 Chest (Mighty Zonaite Shield)
- 25:45 Chest (Shock Emitter)
- 26:30 Chest (Mighty Zonaite Spear & Sage's Will)
- 26:55 Main Quest - Secret of the Ring Ruins - Task Continued (Reach End of Thunderhead Isles)
- 28:05 Chest (Zonaite Bow)
- 28:25 Main Quest - Secret of the Ring Ruins - Task Continued (Reach End of Thunderhead Isles)
- 30:00 Chest (Mighty Zonaite Shield)
- 30:15 Main Quest - Secret of the Ring Ruins - Task Continued (Reach End of Thunderhead Isles)
- 34:25 Chest (Shock Emitter)
- 34:45 Main Quest - Secret of the Ring Ruins - Task Completed (Reach End of Thunderhead Isles)
- 35:00 Location (Dragonhead Island)
- 35:35 Korok Seed
- 38:05 Chest (Sage's Will)
- 38:30 Main Quest - Secret of the Ring Ruins - Task Continued (Reach End of Dragonhead Island)
- 40:50 Shrine - Started (Joku-U Shrine)
- 41:45 Chest (Diamond)
- 41:55 Shrine - Completed (Joku-U Shrine)
- 43:00 Main Quest - Secret of the Ring Ruins - Task Continued (Reach End of Dragonhead Island)
- 45:00 Goddess Statue & Heart Container
- 46:00 Main Quest - Secret of the Ring Ruins - Task Completed (Reach End of Dragonhead Island)
- 47:30 Main Quest - Guidance From Ages Past - Task Started (Follow the light)
- 48:15 Device Dispenser
- 51:20 Location (Tobios Hollow Chasm)
- 51:35 Main Quest - Guidance From Ages Past - Task Continued / Completed (Follow the light)
- 55:55 Outro
- 0:00:00 Intro
- 0:00:25 Placing Markers on the Map
- 0:01:40 Main Quest - Guidance From Ages Past - Task Started/completed (Go to Right-Arm Depot)
- 0:08:30 Main Quest - Guidance From Ages Past - Task Started/completed (Go to Left-Arm Depot)
- 0:14:30 Main Quest - Guidance From Ages Past - Task Started (Go to Right-Leg Depot)
- 0:16:00 Testing out the light weight rail for improved flight
- 0:19:30 Main Quest - Guidance From Ages Past - Task Continued/completed (Go to Right-Leg Depot)
- 0:23:30 Main Quest - Guidance From Ages Past - Task Started/completed (Go to Left-Leg Depot)
- 0:30:30 Main Quest - Guidance From Ages Past - Task Started (Ride Mineru’s Construct to Spirit Temple)
- 0:43:50 Miniboss (Hinox)
- 0:49:30 Location (Spirit temple)
- 0:51:00 Main Quest - Guidance From Ages Past - Task Continued/completed (Seized Construct Boss Fight)
- 0:51:20 Boss (Seized Construct)
- 0:56:15 Heart Container
- 1:10:00 Ability (Vow of Mineru, Sage of Spirit)
- 1:10:30 Reading Character Profiles
- 1:12:10 Outro
- 0:00:00 Intro
- 0:00:25 Placing Markers on the Map
- 0:00:50 Side Quest - Ancient Blades Below - Task Started / Completed (Buy an ancient blade from the mining construct)
- 0:02:10 Exploring more of the Spirit Temple
- 0:07:00 Buying weapons at the Bargainer Statue
- 0:12:00 Getting the "Korok Seed Completion Bonus" from Hestu (Hestu's Gift)
- 0:15:20 Side Quest - The Shrine Explorer - Task Started / Completed (Return to the temple of time after finding all shrines and
- 0:17:20 Chest (Ancient Hero's Aspect)
- 0:19:50 Upgrading gear at Great Fairy Cotera's
- 0:23:30 Grinding for Materials to upgrade the last armor sets
- 0:29:45 Trying out a couple of new hover bike builds with the light weight rails from the depths depos
- 0:44:00 Grinding for Materials to upgrade the last armor sets
- 1:12:45 Outro
- 0:00:00 Intro
- 0:00:25 Placing Markers on the Map
- 0:07:10 Grinding for Materials to upgrade the last armor sets
- 1:08:40 Upgrading Gear at Great Fairy Coteras
- 1:16:00 Outro
- 0:00:00 Intro
- 0:00:25 Placing Markers on the Map
- 0:08:10 Grinding for Materials to upgrade the last armor sets
- 1:05:30 Upgrading Gear at Great Fairy Coteras
- 1:09:40 Outro
- 0:00:00 Intro
- 0:00:25 Placing Markers on the Map
- 0:03:30 Grinding for Materials to upgrade the last armor sets
- 0:37:10 Upgrading Gear at Great Fairy Coteras
- 0:40:30 Grinding for Materials to upgrade the last armor sets
- 1:19:00 Upgrading Gear at Great Fairy Coteras
- 1:24:50 Outro
- 0:00:00 Intro
- 0:00:25 Placing Markers on the Map
- 0:01:00 Grinding for Materials to upgrade the last armor sets
- 0:31:10 Upgrading Gear at Great Fairy Coteras
- 0:34:00 Replacing markers on the map
- 0:36:35 Grinding for Materials to upgrade the last armor sets
- 1:09:50 Upgrading Gear at Great Fairy Coteras
- 1:13:50 Outro
- 0:00:00 Intro
- 0:00:25 Placing Markers on the Map
- 0:01:00 Grinding for Materials to upgrade the last armor sets
- 0:12:20 Upgrading Gear at Great Fairy Coteras
- 0:22:15 Grinding for Materials to upgrade the last armor sets
- 0:40:30 Upgrading Gear at Great Fairy Coteras
- 0:45:00 Grinding for Materials to upgrade the last armor sets
- 0:55:30 Upgrading Gear at Great Fairy Coteras
- 0:59:00 Grinding for Materials to upgrade the last armor sets
- 1:05:30 Upgrading the last Armor sets at Great Fairy Coteras
- 1:09:20 Returning to Lookout Landing
- 1:10:35 Outro
- 0:00:00 Intro
- 0:00:25 Placing Markers on the Map
- 0:01:05 Main Quest - Find The Fifth Sage - Task Completed (Return to Purah in Lookout Landing)
- 0:02:20 Main Quest - Destroy Ganondorf - Started / Found
- 0:05:00 Prepping for the final fight
- 0:11:20 Main Quest - Destroy Ganondorf - Task Started (Head down into the depths to find Ganondorf)
- 0:12:20 Chest (Royal Bow)
- 0:13:00 Chest (Royal Shield)
- 0:14:30 Chest (Royal Bow)
- 0:15:00 Main Quest - Destroy Ganondorf - Task Continued (Head down into the depths to find Ganondorf)
- 0:16:10 Miniboss (Silver-Maned Lynel)
- 0:17:45 Main Quest - Destroy Ganondorf - Task Continued (Head down into the depths to find Ganondorf)
- 0:21:40 Chest (Royal Guards Bow)
- 0:22:00 Chest (Royal Bow)
- 0:22:20 Chest (Royal Shield)
- 0:22:35 Main Quest - Destroy Ganondorf - Task Continued (Head down into the depths to find Ganondorf)
- 0:27:30 Miniboss (Phantom ganon)
- 0:28:00 Main Quest - Destroy Ganondorf - Task Continued (Head down into the depths to find Ganondorf)
- 0:30:50 Item (Bomb Flower)
- 0:31:10 Main Quest - Destroy Ganondorf - Task Continued / Completed (Head down into the depths to find Ganondorf)
- 0:41:00 Main Quest - Destroy Ganondorf - Task Started / Completed (Stop The Demon King's Army)
- 0:46:45 Cutscene
- 0:49:30 Main Quest - Destroy Ganondorf - Task Started / Completed (Fight Ganondorf)
- 0:56:00 Cutscene
- 1:00:30 Main Quest - Destroy Ganondorf - Task Started / Completed (Destroy Ganondorf)
- 1:05:30 Cutscene
- 1:15:30 Credits
- 1:25:15 Ending
- 1:31:40 Finishing the Hyrule compendium
- 1:39:00 Visiting the last locations on the world map
- 1:40:40 Location (Lake Ferona Cave)
- 1:42:40 Location (Lost Woods)
- 1:44:00 Location (Gleeok Bridge)
- 1:45:25 Location (Gatepost Town Ruins)
- 1:47:30 Location (Horwell Bridge)
- 1:49:30 Location (Boné Pond East Cave)
- 1:53:30 Outro... I guess this is it... both a joy and a pain to see this grand adventure come to an end... thank you all so much
Secrets
Hidden things in this game, each with a short clip. Click one and it plays in the player above.


Collectibles
In this walkthrough from the playlist you are watching
Every pick-up in this playlist, with its episode and moment. Click one and the video above jumps to that episode, a few seconds before it.
In this walkthrough
Lookout Landing 2 pick-ups
Sky 11 pick-ups
Depths 83 pick-ups
- Gadohsi Lightroot ep 17
- Sinonoyk Lightroot ep 18
- Oyimay Lightroot ep 18
- Stakijat Lightroot ep 20
- Netinet Lightroot ep 20
- Nabahi-Ikat Lightroot ep 30
- Kawakanis Lightroot ep 30
- Yisuyayam Lightroot ep 32
- Sasag Lightroot ep 61
- Ikatoayam Lightroot ep 69
- Ramobnukas Lightroot ep 77
- Sijin Lightroot ep 77
- Rikonasum Lightroot ep 77
- Uihcoke Lightroot ep 80
- Katoij Lightroot ep 97
- Kayam Shrine ep 97
- Katijabis Lightroot ep 98
- Tayamik Lightroot ep 98
- Sikutamak Lightroot ep 98
- Kisomom Lightroot ep 99
- Nipahsom Lightroot ep 99
- Gedihcayam Lightroot ep 99
- Anonisik Lightroot ep 99
- Kawamit Lightroot ep 99
- Nogukoyk Lightroot ep 105
- Kogoir Lightroot ep 105
- Koradat Lightroot ep 105
- Mu-Ustust Lightroot ep 106
- Nihcayam lightroot ep 113
- Muzasu lightroot ep 113
- Napanos lightroot ep 113
- Nikohsi lightroot ep 126
- Kohsustu lightroot ep 126
- U-u-ujoj lightroot ep 126
- Sijotu lightroot ep 126
- Uisihcoj lightroot ep 126
- Busus lightroot ep 126
- Muokuij lightroot ep 126
- Arusakam lightroot ep 141
- Korom lightroot ep 141
- Korakut lightroot ep 141
- Nojoj lightroot ep 141
- Zi-Ner lightroot ep 141
- Sohse lightroot ep 142
- Takaruk Lightroot ep 143
- Migo-O Lightroot ep 143
- Uogoj Lightroot ep 143
- Uasnoj lightroot ep 144
- Sekioam lightroot ep 144
- A-Nehi lightroot ep 158
- Kawikatisar lightroot ep 158
- Agihi-Ihcoj lightroot ep 158
- Sisinatag lightroot ep 158
- Kegopa lightroot ep 158
- Kuzimoy lightroot ep 158
- Uinoj lightroot ep 158
- Kawagom lightroot ep 158
- Yikot lightroot ep 176
- Mimufis lightroot ep 176
- Kotimab lightroot ep 176
- Ni-Iraram Lightroot ep 176
- Kuhsagi Lightroot ep 209
- Kimimeg lightroot ep 209
- Akinatanis lightroot ep 210
- Ui-Ihcoj lightroot ep 210
- Kawisar lightroot ep 210
- Pikida Stonegrove Skyview Tower ep 63
- Typhlo Ruins Skyview Tower ep 71
- Eldin Canyon Skyview Tower ep 80
- Hyrule Field Skyview Tower ep 100
- Popla Foothills Skyview Tower ep 114
- Sahasra Slope Skyview Tower ep 129
- Upland Zorana Skyview Tower ep 144
- Mount Lanayru Skyview Tower ep 160
- Rabella Wetlands Skyview Tower ep 169
- Gerudo Canyon Skyview Tower ep 178
- Ulri Mountain Skyview Tower ep 198
- Gerudo Highlands Skyview Tower ep 211
Lanayru Wetlands 3 pick-ups
Hyrule Field 6 pick-ups
Hyrule Ridge 7 pick-ups
Tabantha Frontier 2 pick-ups
Hebra Mountains 13 pick-ups
Tabantha Tundra 1 pick-up
Great Hyrule Forest & Surroundings 7 pick-ups
Eldin Canyon 9 pick-ups
Faron Grasslands 4 pick-ups
West Necluda 1 pick-up
East Necluda 1 pick-up
Lanayru Great Spring 2 pick-ups
Mount Lanayru 6 pick-ups
Gerudo Desert 16 pick-ups
- Sisustom lightroot ep 193
- Amakawis lightroot ep 193
- Mihcihc lightroot ep 193
- Gataharak lightroot ep 193
- Kasari lightroot ep 193
- Gonatoyrim lightroot ep 193
- Gonatoyros lightroot ep 193
- Rasinaduk lightroot ep 193
- Tatayam lightroot ep 193
- Kimakarut lightroot ep 193
- Jadukakar lightroot ep 193
- Kawatik lightroot ep 193
Deep Akkala 1 pick-up
Gerudo Highlands 6 pick-ups
Other 1 pick-up
From collectibles guides
Game Guides Channel · Korok Seeds
Hebra Mountains 48 pick-ups
- Korok Seed 1 Game Guides Channel
- Korok Seed 2 Game Guides Channel
- Korok Seed 3 Game Guides Channel
- Korok Seed 4 Game Guides Channel
- Korok Seed 5 Game Guides Channel
- Korok Seed 6 Game Guides Channel
- Korok Seed 7 Game Guides Channel
- Korok Seed 8 Game Guides Channel
- Korok Seed 9 Game Guides Channel
- Korok Seed 10 Game Guides Channel
- Korok Seed 11 Game Guides Channel
- Korok Seed 12 Game Guides Channel
- Korok Seed 13 Game Guides Channel
- Korok Seed 14 Game Guides Channel
- Korok Seed 15 Game Guides Channel
- Korok Seed 16 Game Guides Channel
- Korok Seed 17 Game Guides Channel
- Korok Seed 18 Game Guides Channel
- Korok Seed 19 Game Guides Channel
- Korok Seed 20 Game Guides Channel
- Korok Seed 21 Game Guides Channel
- Korok Seed 22 Game Guides Channel
- Korok Seed 23 Game Guides Channel
- Korok Seed 24 Game Guides Channel
- Korok Seed 25 Game Guides Channel
- Korok Seed 26 Game Guides Channel
- Korok Seed 27 Game Guides Channel
- Korok Seed 28 Game Guides Channel
- Korok Seed 29 Game Guides Channel
- Korok Seed 30 Game Guides Channel
- Korok Seed 31 Game Guides Channel
- Korok Seed 32 Game Guides Channel
- Korok Seed 33 Game Guides Channel
- Korok Seed 34 Game Guides Channel
- Korok Seed 35 Game Guides Channel
- Korok Seed 36 Game Guides Channel
- Korok Seed 37 Game Guides Channel
- Korok Seed 38 Game Guides Channel
- Korok Seed 39 Game Guides Channel
- Korok Seed 40 Game Guides Channel
- Korok Seed 41 Game Guides Channel
- Korok Seed 42 Game Guides Channel
- Korok Seed 43 Game Guides Channel
- Korok Seed 44 Game Guides Channel
- Korok Seed 45 Game Guides Channel
- Korok Seed 46 Game Guides Channel
- Korok Seed 47 Game Guides Channel
- Korok Seed 48 Game Guides Channel
Tabantha Tundra 32 pick-ups
- Korok Seed 49 Game Guides Channel
- Korok Seed 50 Game Guides Channel
- Korok Seed 51 Game Guides Channel
- Korok Seed 52 Game Guides Channel
- Korok Seed 53 Game Guides Channel
- Korok Seed 54 Game Guides Channel
- Korok Seed 55 Game Guides Channel
- Korok Seed 56 Game Guides Channel
- Korok Seed 57 Game Guides Channel
- Korok Seed 58 Game Guides Channel
- Korok Seed 59 Game Guides Channel
- Korok Seed 60 Game Guides Channel
- Korok Seed 61 Game Guides Channel
- Korok Seed 62 Game Guides Channel
- Korok Seed 63 Game Guides Channel
- Korok Seed 64 Game Guides Channel
- Korok Seed 65 Game Guides Channel
- Korok Seed 66 Game Guides Channel
- Korok Seed 67 Game Guides Channel
- Korok Seed 68 Game Guides Channel
- Korok Seed 69 Game Guides Channel
- Korok Seed 70 Game Guides Channel
- Korok Seed 71 Game Guides Channel
- Korok Seed 72 Game Guides Channel
- Korok Seed 73 Game Guides Channel
- Korok Seed 74 Game Guides Channel
- Korok Seed 75 Game Guides Channel
- Korok Seed 76 Game Guides Channel
- Korok Seed 77 Game Guides Channel
- Korok Seed 78 Game Guides Channel
- Korok Seed 79 Game Guides Channel
- Korok Seed 80 Game Guides Channel
Tabantha Frontier 46 pick-ups
- Korok Seed 81 Game Guides Channel
- Korok Seed 82 Game Guides Channel
- Korok Seed 83 Game Guides Channel
- Korok Seed 84 Game Guides Channel
- Korok Seed 85 Game Guides Channel
- Korok Seed 86 Game Guides Channel
- Korok Seed 87 Game Guides Channel
- Korok Seed 88 Game Guides Channel
- Korok Seed 89 Game Guides Channel
- Korok Seed 90 Game Guides Channel
- Korok Seed 91 Game Guides Channel
- Korok Seed 92 Game Guides Channel
- Korok Seed 93 Game Guides Channel
- Korok Seed 94 Game Guides Channel
- Korok Seed 95 Game Guides Channel
- Korok Seed 96 Game Guides Channel
- Korok Seed 97 Game Guides Channel
- Korok Seed 98 Game Guides Channel
- Korok Seed 99 Game Guides Channel
- Korok Seed 100 Game Guides Channel
- Korok Seed 101 Game Guides Channel
- Korok Seed 102 Game Guides Channel
- Korok Seed 103 Game Guides Channel
- Korok Seed 104 Game Guides Channel
- Korok Seed 105 Game Guides Channel
- Korok Seed 106 Game Guides Channel
- Korok Seed 107 Game Guides Channel
- Korok Seed 108 Game Guides Channel
- Korok Seed 109 Game Guides Channel
- Korok Seed 110 Game Guides Channel
- Korok Seed 111 Game Guides Channel
- Korok Seed 112 Game Guides Channel
- Korok Seed 113 Game Guides Channel
- Korok Seed 114 Game Guides Channel
- Korok Seed 115 Game Guides Channel
- Korok Seed 116 Game Guides Channel
- Korok Seed 117 Game Guides Channel
- Korok Seed 118 Game Guides Channel
- Korok Seed 119 Game Guides Channel
- Korok Seed 120 Game Guides Channel
- Korok Seed 121 Game Guides Channel
- Korok Seed 122 Game Guides Channel
- Korok Seed 123 Game Guides Channel
- Korok Seed 124 Game Guides Channel
- Korok Seed 125 Game Guides Channel
- Korok Seed 126 Game Guides Channel
Gerudo Highlands 70 pick-ups
- Korok Seed 127 Game Guides Channel
- Korok Seed 128 Game Guides Channel
- Korok Seed 129 Game Guides Channel
- Korok Seed 130 Game Guides Channel
- Korok Seed 131 Game Guides Channel
- Korok Seed 132 Game Guides Channel
- Korok Seed 133 Game Guides Channel
- Korok Seed 134 Game Guides Channel
- Korok Seed 135 Game Guides Channel
- Korok Seed 136 Game Guides Channel
- Korok Seed 137 Game Guides Channel
- Korok Seed 138 Game Guides Channel
- Korok Seed 139 Game Guides Channel
- Korok Seed 140 Game Guides Channel
- Korok Seed 141 Game Guides Channel
- Korok Seed 142 Game Guides Channel
- Korok Seed 143 Game Guides Channel
- Korok Seed 144 Game Guides Channel
- Korok Seed 145 Game Guides Channel
- Korok Seed 146 Game Guides Channel
- Korok Seed 147 Game Guides Channel
- Korok Seed 148 Game Guides Channel
- Korok Seed 149 Game Guides Channel
- Korok Seed 150 Game Guides Channel
- Korok Seed 151 Game Guides Channel
- Korok Seed 152 Game Guides Channel
- Korok Seed 153 Game Guides Channel
- Korok Seed 154 Game Guides Channel
- Korok Seed 155 Game Guides Channel
- Korok Seed 156 Game Guides Channel
- Korok Seed 157 Game Guides Channel
- Korok Seed 158 Game Guides Channel
- Korok Seed 159 Game Guides Channel
- Korok Seed 160 Game Guides Channel
- Korok Seed 161 Game Guides Channel
- Korok Seed 162 Game Guides Channel
- Korok Seed 163 Game Guides Channel
- Korok Seed 164 Game Guides Channel
- Korok Seed 165 Game Guides Channel
- Korok Seed 166 Game Guides Channel
- Korok Seed 167 Game Guides Channel
- Korok Seed 168 Game Guides Channel
- Korok Seed 169 Game Guides Channel
- Korok Seed 170 Game Guides Channel
- Korok Seed 171 Game Guides Channel
- Korok Seed 172 Game Guides Channel
- Korok Seed 173 Game Guides Channel
- Korok Seed 174 Game Guides Channel
- Korok Seed 175 Game Guides Channel
- Korok Seed 176 Game Guides Channel
- Korok Seed 177 Game Guides Channel
- Korok Seed 178 Game Guides Channel
- Korok Seed 179 Game Guides Channel
- Korok Seed 180 Game Guides Channel
- Korok Seed 181 Game Guides Channel
- Korok Seed 182 Game Guides Channel
- Korok Seed 183 Game Guides Channel
- Korok Seed 184 Game Guides Channel
- Korok Seed 185 Game Guides Channel
- Korok Seed 186 Game Guides Channel
- Korok Seed 187 Game Guides Channel
- Korok Seed 188 Game Guides Channel
- Korok Seed 189 Game Guides Channel
- Korok Seed 190 Game Guides Channel
- Korok Seed 191 Game Guides Channel
- Korok Seed 192 Game Guides Channel
- Korok Seed 193 Game Guides Channel
- Korok Seed 194 Game Guides Channel
- Korok Seed 195 Game Guides Channel
- Korok Seed 196 Game Guides Channel
Gerudo Desert 36 pick-ups
- Korok Seed 197 Game Guides Channel
- Korok Seed 198 Game Guides Channel
- Korok Seed 199 Game Guides Channel
- Korok Seed 200 Game Guides Channel
- Korok Seed 201 Game Guides Channel
- Korok Seed 202 Game Guides Channel
- Korok Seed 203 Game Guides Channel
- Korok Seed 204 Game Guides Channel
- Korok Seed 205 Game Guides Channel
- Korok Seed 206 Game Guides Channel
- Korok Seed 207 Game Guides Channel
- Korok Seed 208 Game Guides Channel
- Korok Seed 209 Game Guides Channel
- Korok Seed 210 Game Guides Channel
- Korok Seed 211 Game Guides Channel
- Korok Seed 212 Game Guides Channel
- Korok Seed 213 Game Guides Channel
- Korok Seed 214 Game Guides Channel
- Korok Seed 215 Game Guides Channel
- Korok Seed 216 Game Guides Channel
- Korok Seed 217 Game Guides Channel
- Korok Seed 218 Game Guides Channel
- Korok Seed 219 Game Guides Channel
- Korok Seed 220 Game Guides Channel
- Korok Seed 221 Game Guides Channel
- Korok Seed 222 Game Guides Channel
- Korok Seed 223 Game Guides Channel
- Korok Seed 224 Game Guides Channel
- Korok Seed 225 Game Guides Channel
- Korok Seed 226 Game Guides Channel
- Korok Seed 227 Game Guides Channel
- Korok Seed 228 Game Guides Channel
- Korok Seed 229 Game Guides Channel
- Korok Seed 230 Game Guides Channel
- Korok Seed 231 Game Guides Channel
- Korok Seed 232 Game Guides Channel
Hyrule Ridge 58 pick-ups
- Korok Seed 233 Game Guides Channel
- Korok Seed 234 Game Guides Channel
- Korok Seed 235 Game Guides Channel
- Korok Seed 236 Game Guides Channel
- Korok Seed 237 Game Guides Channel
- Korok Seed 238 Game Guides Channel
- Korok Seed 239 Game Guides Channel
- Korok Seed 240 Game Guides Channel
- Korok Seed 241 Game Guides Channel
- Korok Seed 242 Game Guides Channel
- Korok Seed 243 Game Guides Channel
- Korok Seed 244 Game Guides Channel
- Korok Seed 245 Game Guides Channel
- Korok Seed 246 Game Guides Channel
- Korok Seed 247 Game Guides Channel
- Korok Seed 248 Game Guides Channel
- Korok Seed 249 Game Guides Channel
- Korok Seed 250 Game Guides Channel
- Korok Seed 251 Game Guides Channel
- Korok Seed 252 Game Guides Channel
- Korok Seed 253 Game Guides Channel
- Korok Seed 254 Game Guides Channel
- Korok Seed 255 Game Guides Channel
- Korok Seed 256 Game Guides Channel
- Korok Seed 257 Game Guides Channel
- Korok Seed 258 Game Guides Channel
- Korok Seed 259 Game Guides Channel
- Korok Seed 260 Game Guides Channel
- Korok Seed 261 Game Guides Channel
- Korok Seed 262 Game Guides Channel
- Korok Seed 263 Game Guides Channel
- Korok Seed 264 Game Guides Channel
- Korok Seed 265 Game Guides Channel
- Korok Seed 266 Game Guides Channel
- Korok Seed 267 Game Guides Channel
- Korok Seed 268 Game Guides Channel
- Korok Seed 269 Game Guides Channel
- Korok Seed 270 Game Guides Channel
- Korok Seed 271 Game Guides Channel
- Korok Seed 272 Game Guides Channel
- Korok Seed 273 Game Guides Channel
- Korok Seed 274 Game Guides Channel
- Korok Seed 275 Game Guides Channel
- Korok Seed 276 Game Guides Channel
- Korok Seed 277 Game Guides Channel
- Korok Seed 278 Game Guides Channel
- Korok Seed 279 Game Guides Channel
- Korok Seed 280 Game Guides Channel
- Korok Seed 281 Game Guides Channel
- Korok Seed 282 Game Guides Channel
- Korok Seed 283 Game Guides Channel
- Korok Seed 284 Game Guides Channel
- Korok Seed 285 Game Guides Channel
- Korok Seed 286 Game Guides Channel
- Korok Seed 287 Game Guides Channel
- Korok Seed 288 Game Guides Channel
- Korok Seed 289 Game Guides Channel
- Korok Seed 290 Game Guides Channel
Lookout Landing 66 pick-ups
- Korok Seed 291 Game Guides Channel
- Korok Seed 292 Game Guides Channel
- Korok Seed 293 Game Guides Channel
- Korok Seed 294 Game Guides Channel
- Korok Seed 295 Game Guides Channel
- Korok Seed 296 Game Guides Channel
- Korok Seed 297 Game Guides Channel
- Korok Seed 298 Game Guides Channel
- Korok Seed 299 Game Guides Channel
- Korok Seed 300 Game Guides Channel
- Korok Seed 301 Game Guides Channel
- Korok Seed 302 Game Guides Channel
- Korok Seed 303 Game Guides Channel
- Korok Seed 304 Game Guides Channel
- Korok Seed 305 Game Guides Channel
- Korok Seed 306 Game Guides Channel
- Korok Seed 307 Game Guides Channel
- Korok Seed 308 Game Guides Channel
- Korok Seed 309 Game Guides Channel
- Korok Seed 310 Game Guides Channel
- Korok Seed 311 Game Guides Channel
- Korok Seed 312 Game Guides Channel
- Korok Seed 313 Game Guides Channel
- Korok Seed 314 Game Guides Channel
- Korok Seed 315 Game Guides Channel
- Korok Seed 316 Game Guides Channel
- Korok Seed 317 Game Guides Channel
- Korok Seed 318 Game Guides Channel
- Korok Seed 319 Game Guides Channel
- Korok Seed 320 Game Guides Channel
- Korok Seed 321 Game Guides Channel
- Korok Seed 322 Game Guides Channel
- Korok Seed 323 Game Guides Channel
- Korok Seed 324 Game Guides Channel
- Korok Seed 325 Game Guides Channel
- Korok Seed 326 Game Guides Channel
- Korok Seed 327 Game Guides Channel
- Korok Seed 328 Game Guides Channel
- Korok Seed 329 Game Guides Channel
- Korok Seed 330 Game Guides Channel
- Korok Seed 331 Game Guides Channel
- Korok Seed 332 Game Guides Channel
- Korok Seed 333 Game Guides Channel
- Korok Seed 334 Game Guides Channel
- Korok Seed 335 Game Guides Channel
- Korok Seed 336 Game Guides Channel
- Korok Seed 337 Game Guides Channel
- Korok Seed 338 Game Guides Channel
- Korok Seed 339 Game Guides Channel
- Korok Seed 340 Game Guides Channel
- Korok Seed 341 Game Guides Channel
- Korok Seed 342 Game Guides Channel
- Korok Seed 343 Game Guides Channel
- Korok Seed 344 Game Guides Channel
- Korok Seed 345 Game Guides Channel
- Korok Seed 346 Game Guides Channel
- Korok Seed 347 Game Guides Channel
- Korok Seed 348 Game Guides Channel
- Korok Seed 349 Game Guides Channel
- Korok Seed 350 Game Guides Channel
- Korok Seed 351 Game Guides Channel
- Korok Seed 352 Game Guides Channel
- Korok Seed 353 Game Guides Channel
- Korok Seed 354 Game Guides Channel
- Korok Seed 355 Game Guides Channel
- Korok Seed 356 Game Guides Channel
Great Hyrule Forest & Surroundings 36 pick-ups
- Korok Seed 357 Game Guides Channel
- Korok Seed 358 Game Guides Channel
- Korok Seed 359 Game Guides Channel
- Korok Seed 360 Game Guides Channel
- Korok Seed 361 Game Guides Channel
- Korok Seed 362 Game Guides Channel
- Korok Seed 363 Game Guides Channel
- Korok Seed 364 Game Guides Channel
- Korok Seed 365 Game Guides Channel
- Korok Seed 366 Game Guides Channel
- Korok Seed 367 Game Guides Channel
- Korok Seed 368 Game Guides Channel
- Korok Seed 369 Game Guides Channel
- Korok Seed 370 Game Guides Channel
- Korok Seed 371 Game Guides Channel
- Korok Seed 372 Game Guides Channel
- Korok Seed 373 Game Guides Channel
- Korok Seed 374 Game Guides Channel
- Korok Seed 375 Game Guides Channel
- Korok Seed 376 Game Guides Channel
- Korok Seed 377 Game Guides Channel
- Korok Seed 378 Game Guides Channel
- Korok Seed 379 Game Guides Channel
- Korok Seed 380 Game Guides Channel
- Korok Seed 381 Game Guides Channel
- Korok Seed 382 Game Guides Channel
- Korok Seed 383 Game Guides Channel
- Korok Seed 384 Game Guides Channel
- Korok Seed 385 Game Guides Channel
- Korok Seed 386 Game Guides Channel
- Korok Seed 387 Game Guides Channel
- Korok Seed 388 Game Guides Channel
- Korok Seed 389 Game Guides Channel
- Korok Seed 390 Game Guides Channel
- Korok Seed 391 Game Guides Channel
- Korok Seed 392 Game Guides Channel
Eldin Mountains 30 pick-ups
- Korok Seed 393 Game Guides Channel
- Korok Seed 394 Game Guides Channel
- Korok Seed 395 Game Guides Channel
- Korok Seed 396 Game Guides Channel
- Korok Seed 397 Game Guides Channel
- Korok Seed 398 Game Guides Channel
- Korok Seed 399 Game Guides Channel
- Korok Seed 400 Game Guides Channel
- Korok Seed 401 Game Guides Channel
- Korok Seed 402 Game Guides Channel
- Korok Seed 403 Game Guides Channel
- Korok Seed 404 Game Guides Channel
- Korok Seed 405 Game Guides Channel
- Korok Seed 406 Game Guides Channel
- Korok Seed 407 Game Guides Channel
- Korok Seed 408 Game Guides Channel
- Korok Seed 409 Game Guides Channel
- Korok Seed 410 Game Guides Channel
- Korok Seed 411 Game Guides Channel
- Korok Seed 412 Game Guides Channel
- Korok Seed 413 Game Guides Channel
- Korok Seed 414 Game Guides Channel
- Korok Seed 415 Game Guides Channel
- Korok Seed 416 Game Guides Channel
- Korok Seed 417 Game Guides Channel
- Korok Seed 418 Game Guides Channel
- Korok Seed 419 Game Guides Channel
- Korok Seed 420 Game Guides Channel
- Korok Seed 421 Game Guides Channel
- Korok Seed 422 Game Guides Channel
Death Mountain 14 pick-ups
- Korok Seed 423 Game Guides Channel
- Korok Seed 424 Game Guides Channel
- Korok Seed 425 Game Guides Channel
- Korok Seed 426 Game Guides Channel
- Korok Seed 427 Game Guides Channel
- Korok Seed 428 Game Guides Channel
- Korok Seed 429 Game Guides Channel
- Korok Seed 430 Game Guides Channel
- Korok Seed 431 Game Guides Channel
- Korok Seed 432 Game Guides Channel
- Korok Seed 433 Game Guides Channel
- Korok Seed 434 Game Guides Channel
- Korok Seed 435 Game Guides Channel
- Korok Seed 436 Game Guides Channel
Deep Akkala 34 pick-ups
- Korok Seed 437 Game Guides Channel
- Korok Seed 438 Game Guides Channel
- Korok Seed 439 Game Guides Channel
- Korok Seed 440 Game Guides Channel
- Korok Seed 441 Game Guides Channel
- Korok Seed 442 Game Guides Channel
- Korok Seed 443 Game Guides Channel
- Korok Seed 444 Game Guides Channel
- Korok Seed 445 Game Guides Channel
- Korok Seed 446 Game Guides Channel
- Korok Seed 447 Game Guides Channel
- Korok Seed 448 Game Guides Channel
- Korok Seed 449 Game Guides Channel
- Korok Seed 450 Game Guides Channel
- Korok Seed 451 Game Guides Channel
- Korok Seed 452 Game Guides Channel
- Korok Seed 453 Game Guides Channel
- Korok Seed 454 Game Guides Channel
- Korok Seed 455 Game Guides Channel
- Korok Seed 456 Game Guides Channel
- Korok Seed 457 Game Guides Channel
- Korok Seed 458 Game Guides Channel
- Korok Seed 459 Game Guides Channel
- Korok Seed 460 Game Guides Channel
- Korok Seed 461 Game Guides Channel
- Korok Seed 462 Game Guides Channel
- Korok Seed 463 Game Guides Channel
- Korok Seed 464 Game Guides Channel
- Korok Seed 465 Game Guides Channel
- Korok Seed 466 Game Guides Channel
- Korok Seed 467 Game Guides Channel
- Korok Seed 468 Game Guides Channel
- Korok Seed 469 Game Guides Channel
- Korok Seed 470 Game Guides Channel
Akkala Highlands 34 pick-ups
- Korok Seed 471 Game Guides Channel
- Korok Seed 472 Game Guides Channel
- Korok Seed 473 Game Guides Channel
- Korok Seed 474 Game Guides Channel
- Korok Seed 475 Game Guides Channel
- Korok Seed 476 Game Guides Channel
- Korok Seed 477 Game Guides Channel
- Korok Seed 478 Game Guides Channel
- Korok Seed 479 Game Guides Channel
- Korok Seed 480 Game Guides Channel
- Korok Seed 481 Game Guides Channel
- Korok Seed 482 Game Guides Channel
- Korok Seed 483 Game Guides Channel
- Korok Seed 484 Game Guides Channel
- Korok Seed 485 Game Guides Channel
- Korok Seed 486 Game Guides Channel
- Korok Seed 487 Game Guides Channel
- Korok Seed 488 Game Guides Channel
- Korok Seed 489 Game Guides Channel
- Korok Seed 490 Game Guides Channel
- Korok Seed 491 Game Guides Channel
- Korok Seed 492 Game Guides Channel
- Korok Seed 493 Game Guides Channel
- Korok Seed 494 Game Guides Channel
- Korok Seed 495 Game Guides Channel
- Korok Seed 496 Game Guides Channel
- Korok Seed 497 Game Guides Channel
- Korok Seed 498 Game Guides Channel
- Korok Seed 499 Game Guides Channel
- Korok Seed 500 Game Guides Channel
- Korok Seed 501 Game Guides Channel
- Korok Seed 502 Game Guides Channel
- Korok Seed 503 Game Guides Channel
- Korok Seed 504 Game Guides Channel
Lanayru Great Spring 43 pick-ups
- Korok Seed 505 Game Guides Channel
- Korok Seed 506 Game Guides Channel
- Korok Seed 507 Game Guides Channel
- Korok Seed 508 Game Guides Channel
- Korok Seed 509 Game Guides Channel
- Korok Seed 510 Game Guides Channel
- Korok Seed 511 Game Guides Channel
- Korok Seed 512 Game Guides Channel
- Korok Seed 513 Game Guides Channel
- Korok Seed 514 Game Guides Channel
- Korok Seed 515 Game Guides Channel
- Korok Seed 516 Game Guides Channel
- Korok Seed 517 Game Guides Channel
- Korok Seed 518 Game Guides Channel
- Korok Seed 519 Game Guides Channel
- Korok Seed 520 Game Guides Channel
- Korok Seed 521 Game Guides Channel
- Korok Seed 522 Game Guides Channel
- Korok Seed 523 Game Guides Channel
- Korok Seed 524 Game Guides Channel
- Korok Seed 525 Game Guides Channel
- Korok Seed 526 Game Guides Channel
- Korok Seed 527 Game Guides Channel
- Korok Seed 528 Game Guides Channel
- Korok Seed 529 Game Guides Channel
- Korok Seed 530 Game Guides Channel
- Korok Seed 531 Game Guides Channel
- Korok Seed 532 Game Guides Channel
- Korok Seed 533 Game Guides Channel
- Korok Seed 534 Game Guides Channel
- Korok Seed 535 Game Guides Channel
- Korok Seed 536 Game Guides Channel
- Korok Seed 537 Game Guides Channel
- Korok Seed 538 Game Guides Channel
- Korok Seed 539 Game Guides Channel
- Korok Seed 540 Game Guides Channel
- Korok Seed 541 Game Guides Channel
- Korok Seed 542 Game Guides Channel
- Korok Seed 543 Game Guides Channel
- Korok Seed 544 Game Guides Channel
- Korok Seed 545 Game Guides Channel
- Korok Seed 546 Game Guides Channel
- Korok Seed 547 Game Guides Channel
Eldin Canyon 19 pick-ups
- Korok Seed 548 Game Guides Channel
- Korok Seed 549 Game Guides Channel
- Korok Seed 550 Game Guides Channel
- Korok Seed 551 Game Guides Channel
- Korok Seed 552 Game Guides Channel
- Korok Seed 553 Game Guides Channel
- Korok Seed 554 Game Guides Channel
- Korok Seed 555 Game Guides Channel
- Korok Seed 556 Game Guides Channel
- Korok Seed 557 Game Guides Channel
- Korok Seed 558 Game Guides Channel
- Korok Seed 559 Game Guides Channel
- Korok Seed 560 Game Guides Channel
- Korok Seed 561 Game Guides Channel
- Korok Seed 562 Game Guides Channel
- Korok Seed 563 Game Guides Channel
- Korok Seed 564 Game Guides Channel
- Korok Seed 565 Game Guides Channel
- Korok Seed 566 Game Guides Channel
Lanayru Wetlands 58 pick-ups
- Korok Seed 567 Game Guides Channel
- Korok Seed 568 Game Guides Channel
- Korok Seed 569 Game Guides Channel
- Korok Seed 570 Game Guides Channel
- Korok Seed 571 Game Guides Channel
- Korok Seed 572 Game Guides Channel
- Korok Seed 573 Game Guides Channel
- Korok Seed 574 Game Guides Channel
- Korok Seed 575 Game Guides Channel
- Korok Seed 576 Game Guides Channel
- Korok Seed 577 Game Guides Channel
- Korok Seed 578 Game Guides Channel
- Korok Seed 579 Game Guides Channel
- Korok Seed 580 Game Guides Channel
- Korok Seed 581 Game Guides Channel
- Korok Seed 582 Game Guides Channel
- Korok Seed 583 Game Guides Channel
- Korok Seed 584 Game Guides Channel
- Korok Seed 585 Game Guides Channel
- Korok Seed 586 Game Guides Channel
- Korok Seed 587 Game Guides Channel
- Korok Seed 588 Game Guides Channel
- Korok Seed 589 Game Guides Channel
- Korok Seed 590 Game Guides Channel
- Korok Seed 591 Game Guides Channel
- Korok Seed 592 Game Guides Channel
- Korok Seed 593 Game Guides Channel
- Korok Seed 594 Game Guides Channel
- Korok Seed 595 Game Guides Channel
- Korok Seed 596 Game Guides Channel
- Korok Seed 597 Game Guides Channel
- Korok Seed 598 Game Guides Channel
- Korok Seed 599 Game Guides Channel
- Korok Seed 600 Game Guides Channel
- Korok Seed 601 Game Guides Channel
- Korok Seed 602 Game Guides Channel
- Korok Seed 603 Game Guides Channel
- Korok Seed 604 Game Guides Channel
- Korok Seed 605 Game Guides Channel
- Korok Seed 606 Game Guides Channel
- Korok Seed 607 Game Guides Channel
- Korok Seed 608 Game Guides Channel
- Korok Seed 609 Game Guides Channel
- Korok Seed 610 Game Guides Channel
- Korok Seed 611 Game Guides Channel
- Korok Seed 612 Game Guides Channel
- Korok Seed 613 Game Guides Channel
- Korok Seed 614 Game Guides Channel
- Korok Seed 615 Game Guides Channel
- Korok Seed 616 Game Guides Channel
- Korok Seed 617 Game Guides Channel
- Korok Seed 618 Game Guides Channel
- Korok Seed 619 Game Guides Channel
- Korok Seed 620 Game Guides Channel
- Korok Seed 621 Game Guides Channel
- Korok Seed 622 Game Guides Channel
- Korok Seed 623 Game Guides Channel
- Korok Seed 624 Game Guides Channel
Mount Lanayru 59 pick-ups
- Korok Seed 625 Game Guides Channel
- Korok Seed 626 Game Guides Channel
- Korok Seed 627 Game Guides Channel
- Korok Seed 628 Game Guides Channel
- Korok Seed 629 Game Guides Channel
- Korok Seed 630 Game Guides Channel
- Korok Seed 631 Game Guides Channel
- Korok Seed 632 Game Guides Channel
- Korok Seed 633 Game Guides Channel
- Korok Seed 634 Game Guides Channel
- Korok Seed 635 Game Guides Channel
- Korok Seed 636 Game Guides Channel
- Korok Seed 637 Game Guides Channel
- Korok Seed 638 Game Guides Channel
- Korok Seed 639 Game Guides Channel
- Korok Seed 640 Game Guides Channel
- Korok Seed 641 Game Guides Channel
- Korok Seed 642 Game Guides Channel
- Korok Seed 643 Game Guides Channel
- Korok Seed 644 Game Guides Channel
- Korok Seed 645 Game Guides Channel
- Korok Seed 646 Game Guides Channel
- Korok Seed 647 Game Guides Channel
- Korok Seed 648 Game Guides Channel
- Korok Seed 649 Game Guides Channel
- Korok Seed 650 Game Guides Channel
- Korok Seed 651 Game Guides Channel
- Korok Seed 652 Game Guides Channel
- Korok Seed 653 Game Guides Channel
- Korok Seed 654 Game Guides Channel
- Korok Seed 655 Game Guides Channel
- Korok Seed 656 Game Guides Channel
- Korok Seed 657 Game Guides Channel
- Korok Seed 658 Game Guides Channel
- Korok Seed 659 Game Guides Channel
- Korok Seed 660 Game Guides Channel
- Korok Seed 661 Game Guides Channel
- Korok Seed 662 Game Guides Channel
- Korok Seed 663 Game Guides Channel
- Korok Seed 664 Game Guides Channel
- Korok Seed 665 Game Guides Channel
- Korok Seed 666 Game Guides Channel
- Korok Seed 667 Game Guides Channel
- Korok Seed 668 Game Guides Channel
- Korok Seed 669 Game Guides Channel
- Korok Seed 670 Game Guides Channel
- Korok Seed 671 Game Guides Channel
- Korok Seed 672 Game Guides Channel
- Korok Seed 673 Game Guides Channel
- Korok Seed 674 Game Guides Channel
- Korok Seed 675 Game Guides Channel
- Korok Seed 676 Game Guides Channel
- Korok Seed 677 Game Guides Channel
- Korok Seed 678 Game Guides Channel
- Korok Seed 679 Game Guides Channel
- Korok Seed 680 Game Guides Channel
- Korok Seed 681 Game Guides Channel
- Korok Seed 682 Game Guides Channel
- Korok Seed 683 Game Guides Channel
West Necluda 54 pick-ups
- Korok Seed 684 Game Guides Channel
- Korok Seed 685 Game Guides Channel
- Korok Seed 686 Game Guides Channel
- Korok Seed 687 Game Guides Channel
- Korok Seed 688 Game Guides Channel
- Korok Seed 689 Game Guides Channel
- Korok Seed 690 Game Guides Channel
- Korok Seed 691 Game Guides Channel
- Korok Seed 692 Game Guides Channel
- Korok Seed 693 Game Guides Channel
- Korok Seed 694 Game Guides Channel
- Korok Seed 695 Game Guides Channel
- Korok Seed 696 Game Guides Channel
- Korok Seed 697 Game Guides Channel
- Korok Seed 698 Game Guides Channel
- Korok Seed 699 Game Guides Channel
- Korok Seed 700 Game Guides Channel
- Korok Seed 701 Game Guides Channel
- Korok Seed 702 Game Guides Channel
- Korok Seed 703 Game Guides Channel
- Korok Seed 704 Game Guides Channel
- Korok Seed 705 Game Guides Channel
- Korok Seed 706 Game Guides Channel
- Korok Seed 707 Game Guides Channel
- Korok Seed 708 Game Guides Channel
- Korok Seed 709 Game Guides Channel
- Korok Seed 710 Game Guides Channel
- Korok Seed 711 Game Guides Channel
- Korok Seed 712 Game Guides Channel
- Korok Seed 713 Game Guides Channel
- Korok Seed 714 Game Guides Channel
- Korok Seed 715 Game Guides Channel
- Korok Seed 716 Game Guides Channel
- Korok Seed 717 Game Guides Channel
- Korok Seed 718 Game Guides Channel
- Korok Seed 719 Game Guides Channel
- Korok Seed 720 Game Guides Channel
- Korok Seed 721 Game Guides Channel
- Korok Seed 722 Game Guides Channel
- Korok Seed 723 Game Guides Channel
- Korok Seed 724 Game Guides Channel
- Korok Seed 725 Game Guides Channel
- Korok Seed 726 Game Guides Channel
- Korok Seed 728 Game Guides Channel
- Korok Seed 729 Game Guides Channel
- Korok Seed 730 Game Guides Channel
- Korok Seed 731 Game Guides Channel
- Korok Seed 732 Game Guides Channel
- Korok Seed 733 Game Guides Channel
- Korok Seed 734 Game Guides Channel
- Korok Seed 735 Game Guides Channel
- Korok Seed 727 Game Guides Channel
- Korok Seed 736 Game Guides Channel
- Korok Seed 737 Game Guides Channel
East Necluda 68 pick-ups
- Korok Seed 738 Game Guides Channel
- Korok Seed 739 Game Guides Channel
- Korok Seed 740 Game Guides Channel
- Korok Seed 741 Game Guides Channel
- Korok Seed 742 Game Guides Channel
- Korok Seed 743 Game Guides Channel
- Korok Seed 744 Game Guides Channel
- Korok Seed 745 Game Guides Channel
- Korok Seed 746 Game Guides Channel
- Korok Seed 747 Game Guides Channel
- Korok Seed 748 Game Guides Channel
- Korok Seed 749 Game Guides Channel
- Korok Seed 750 Game Guides Channel
- Korok Seed 751 Game Guides Channel
- Korok Seed 752 Game Guides Channel
- Korok Seed 753 Game Guides Channel
- Korok Seed 754 Game Guides Channel
- Korok Seed 755 Game Guides Channel
- Korok Seed 756 Game Guides Channel
- Korok Seed 757 Game Guides Channel
- Korok Seed 758 Game Guides Channel
- Korok Seed 759 Game Guides Channel
- Korok Seed 760 Game Guides Channel
- Korok Seed 761 Game Guides Channel
- Korok Seed 762 Game Guides Channel
- Korok Seed 763 Game Guides Channel
- Korok Seed 764 Game Guides Channel
- Korok Seed 765 Game Guides Channel
- Korok Seed 766 Game Guides Channel
- Korok Seed 767 Game Guides Channel
- Korok Seed 768 Game Guides Channel
- Korok Seed 769 Game Guides Channel
- Korok Seed 770 Game Guides Channel
- Korok Seed 771 Game Guides Channel
- Korok Seed 772 Game Guides Channel
- Korok Seed 773 Game Guides Channel
- Korok Seed 774 Game Guides Channel
- Korok Seed 775 Game Guides Channel
- Korok Seed 776 Game Guides Channel
- Korok Seed 777 Game Guides Channel
- Korok Seed 778 Game Guides Channel
- Korok Seed 779 Game Guides Channel
- Korok Seed 780 Game Guides Channel
- Korok Seed 781 Game Guides Channel
- Korok Seed 782 Game Guides Channel
- Korok Seed 783 Game Guides Channel
- Korok Seed 784 Game Guides Channel
- Korok Seed 785 Game Guides Channel
- Korok Seed 786 Game Guides Channel
- Korok Seed 787 Game Guides Channel
- Korok Seed 788 Game Guides Channel
- Korok Seed 789 Game Guides Channel
- Korok Seed 790 Game Guides Channel
- Korok Seed 791 Game Guides Channel
- Korok Seed 792 Game Guides Channel
- Korok Seed 793 Game Guides Channel
- Korok Seed 794 Game Guides Channel
- Korok Seed 795 Game Guides Channel
- Korok Seed 796 Game Guides Channel
- Korok Seed 797 Game Guides Channel
- Korok Seed 798 Game Guides Channel
- Korok Seed 799 Game Guides Channel
- Korok Seed 800 Game Guides Channel
- Korok Seed 801 Game Guides Channel
- Korok Seed 802 Game Guides Channel
- Korok Seed 803 Game Guides Channel
- Korok Seed 804 Game Guides Channel
- Korok Seed 805 Game Guides Channel
Hyrule Field 65 pick-ups
- Korok Seed 806 Game Guides Channel
- Korok Seed 807 Game Guides Channel
- Korok Seed 808 Game Guides Channel
- Korok Seed 809 Game Guides Channel
- Korok Seed 810 Game Guides Channel
- Korok Seed 811 Game Guides Channel
- Korok Seed 812 Game Guides Channel
- Korok Seed 813 Game Guides Channel
- Korok Seed 814 Game Guides Channel
- Korok Seed 815 Game Guides Channel
- Korok Seed 816 Game Guides Channel
- Korok Seed 817 Game Guides Channel
- Korok Seed 818 Game Guides Channel
- Korok Seed 819 Game Guides Channel
- Korok Seed 820 Game Guides Channel
- Korok Seed 821 Game Guides Channel
- Korok Seed 822 Game Guides Channel
- Korok Seed 823 Game Guides Channel
- Korok Seed 824 Game Guides Channel
- Korok Seed 825 Game Guides Channel
- Korok Seed 826 Game Guides Channel
- Korok Seed 827 Game Guides Channel
- Korok Seed 828 Game Guides Channel
- Korok Seed 829 Game Guides Channel
- Korok Seed 830 Game Guides Channel
- Korok Seed 831 Game Guides Channel
- Korok Seed 832 Game Guides Channel
- Korok Seed 833 Game Guides Channel
- Korok Seed 834 Game Guides Channel
- Korok Seed 835 Game Guides Channel
- Korok Seed 836 Game Guides Channel
- Korok Seed 837 Game Guides Channel
- Korok Seed 838 Game Guides Channel
- Korok Seed 839 Game Guides Channel
- Korok Seed 840 Game Guides Channel
- Korok Seed 841 Game Guides Channel
- Korok Seed 842 Game Guides Channel
- Korok Seed 843 Game Guides Channel
- Korok Seed 844 Game Guides Channel
- Korok Seed 845 Game Guides Channel
- Korok Seed 846 Game Guides Channel
- Korok Seed 847 Game Guides Channel
- Korok Seed 848 Game Guides Channel
- Korok Seed 849 Game Guides Channel
- Korok Seed 850 Game Guides Channel
- Korok Seed 851 Game Guides Channel
- Korok Seed 852 Game Guides Channel
- Korok Seed 853 Game Guides Channel
- Korok Seed 854 Game Guides Channel
- Korok Seed 855 Game Guides Channel
- Korok Seed 856 Game Guides Channel
- Korok Seed 857 Game Guides Channel
- Korok Seed 858 Game Guides Channel
- Korok Seed 859 Game Guides Channel
- Korok Seed 860 Game Guides Channel
- Korok Seed 861 Game Guides Channel
- Korok Seed 862 Game Guides Channel
- Korok Seed 863 Game Guides Channel
- Korok Seed 864 Game Guides Channel
- Korok Seed 865 Game Guides Channel
- Korok Seed 866 Game Guides Channel
- Korok Seed 867 Game Guides Channel
- Korok Seed 868 Game Guides Channel
- Korok Seed 869 Game Guides Channel
- Korok Seed 870 Game Guides Channel
Faron Grasslands 69 pick-ups
- Korok Seed 871 Game Guides Channel
- Korok Seed 872 Game Guides Channel
- Korok Seed 873 Game Guides Channel
- Korok Seed 874 Game Guides Channel
- Korok Seed 875 Game Guides Channel
- Korok Seed 876 Game Guides Channel
- Korok Seed 877 Game Guides Channel
- Korok Seed 878 Game Guides Channel
- Korok Seed 879 Game Guides Channel
- Korok Seed 880 Game Guides Channel
- Korok Seed 881 Game Guides Channel
- Korok Seed 882 Game Guides Channel
- Korok Seed 883 Game Guides Channel
- Korok Seed 884 Game Guides Channel
- Korok Seed 885 Game Guides Channel
- Korok Seed 886 Game Guides Channel
- Korok Seed 887 Game Guides Channel
- Korok Seed 888 Game Guides Channel
- Korok Seed 889 Game Guides Channel
- Korok Seed 890 Game Guides Channel
- Korok Seed 891 Game Guides Channel
- Korok Seed 892 Game Guides Channel
- Korok Seed 893 Game Guides Channel
- Korok Seed 894 Game Guides Channel
- Korok Seed 895 Game Guides Channel
- Korok Seed 896 Game Guides Channel
- Korok Seed 897 Game Guides Channel
- Korok Seed 898 Game Guides Channel
- Korok Seed 899 Game Guides Channel
- Korok Seed 900 Game Guides Channel
- Korok Seed 901 Game Guides Channel
- Korok Seed 902 Game Guides Channel
- Korok Seed 903 Game Guides Channel
- Korok Seed 904 Game Guides Channel
- Korok Seed 905 Game Guides Channel
- Korok Seed 906 Game Guides Channel
- Korok Seed 907 Game Guides Channel
- Korok Seed 908 Game Guides Channel
- Korok Seed 909 Game Guides Channel
- Korok Seed 910 Game Guides Channel
- Korok Seed 911 Game Guides Channel
- Korok Seed 912 Game Guides Channel
- Korok Seed 913 Game Guides Channel
- Korok Seed 914 Game Guides Channel
- Korok Seed 915 Game Guides Channel
- Korok Seed 916 Game Guides Channel
- Korok Seed 917 Game Guides Channel
- Korok Seed 918 Game Guides Channel
- Korok Seed 919 Game Guides Channel
- Korok Seed 920 Game Guides Channel
- Korok Seed 921 Game Guides Channel
- Korok Seed 922 Game Guides Channel
- Korok Seed 923 Game Guides Channel
- Korok Seed 924 Game Guides Channel
- Korok Seed 925 Game Guides Channel
- Korok Seed 926 Game Guides Channel
- Korok Seed 927 Game Guides Channel
- Korok Seed 928 Game Guides Channel
- Korok Seed 929 Game Guides Channel
- Korok Seed 930 Game Guides Channel
- Korok Seed 931 Game Guides Channel
- Korok Seed 932 Game Guides Channel
- Korok Seed 933 Game Guides Channel
- Korok Seed 934 Game Guides Channel
- Korok Seed 935 Game Guides Channel
- Korok Seed 936 Game Guides Channel
- Korok Seed 937 Game Guides Channel
- Korok Seed 938 Game Guides Channel
- Korok Seed 939 Game Guides Channel
Sky 61 pick-ups
- Korok Seed 940 Game Guides Channel
- Korok Seed 941 Game Guides Channel
- Korok Seed 942 Game Guides Channel
- Korok Seed 943 Game Guides Channel
- Korok Seed 944 Game Guides Channel
- Korok Seed 945 Game Guides Channel
- Korok Seed 946 Game Guides Channel
- Korok Seed 947 Game Guides Channel
- Korok Seed 948 Game Guides Channel
- Korok Seed 949 Game Guides Channel
- Korok Seed 950 Game Guides Channel
- Korok Seed 951 Game Guides Channel
- Korok Seed 952 Game Guides Channel
- Korok Seed 953 Game Guides Channel
- Korok Seed 954 Game Guides Channel
- Korok Seed 955 Game Guides Channel
- Korok Seed 956 Game Guides Channel
- Korok Seed 957 Game Guides Channel
- Korok Seed 958 Game Guides Channel
- Korok Seed 959 Game Guides Channel
- Korok Seed 960 Game Guides Channel
- Korok Seed 961 Game Guides Channel
- Korok Seed 962 Game Guides Channel
- Korok Seed 963 Game Guides Channel
- Korok Seed 964 Game Guides Channel
- Korok Seed 965 Game Guides Channel
- Korok Seed 966 Game Guides Channel
- Korok Seed 967 Game Guides Channel
- Korok Seed 968 Game Guides Channel
- Korok Seed 969 Game Guides Channel
- Korok Seed 970 Game Guides Channel
- Korok Seed 971 Game Guides Channel
- Korok Seed 972 Game Guides Channel
- Korok Seed 973 Game Guides Channel
- Korok Seed 974 Game Guides Channel
- Korok Seed 975 Game Guides Channel
- Korok Seed 976 Game Guides Channel
- Korok Seed 977 Game Guides Channel
- Korok Seed 978 Game Guides Channel
- Korok Seed 979 Game Guides Channel
- Korok Seed 980 Game Guides Channel
- Korok Seed 981 Game Guides Channel
- Korok Seed 982 Game Guides Channel
- Korok Seed 983 Game Guides Channel
- Korok Seed 984 Game Guides Channel
- Korok Seed 985 Game Guides Channel
- Korok Seed 986 Game Guides Channel
- Korok Seed 987 Game Guides Channel
- Korok Seed 988 Game Guides Channel
- Korok Seed 989 Game Guides Channel
- Korok Seed 990 Game Guides Channel
- Korok Seed 991 Game Guides Channel
- Korok Seed 992 Game Guides Channel
- Korok Seed 993 Game Guides Channel
- Korok Seed 994 Game Guides Channel
- Korok Seed 995 Game Guides Channel
- Korok Seed 996 Game Guides Channel
- Korok Seed 997 Game Guides Channel
- Korok Seed 998 Game Guides Channel
- Korok Seed 999 Game Guides Channel
- Korok Seed 1000 Game Guides Channel
100% Guides · Bubbul Gems, Caves
Sky 10 pick-ups
Hyrule Field 24 pick-ups
- Bubbul Gem: Royal Hidden Passage 100% Guides
- Bubbul Gem: Ancient Tree Stump Cave 100% Guides
- Bubbul Gem: Sage Temple Cave 100% Guides
- Bubbul Gem: Satori Mountain Cave 100% Guides
- Bubbul Gem: Satori Mountain Foothill Cave 100% Guides
- Bubbul Gem: Tamio River Downstream Cave 100% Guides
- Bubbul Gem: River Of The Dead Waterfall Cave 100% Guides
- Bubbul Gem: Shrine Of Resurrection 100% Guides
- Bubbul Gem: Great Plateau Foothill Cave 100% Guides
- Bubbul Gem: Coliseum Ruins Cave 100% Guides
- Bubbul Gem: Whistling Hill Cave 100% Guides
- Bubbul Gem: Popla Foothills Excavation Site 100% Guides
- Royal Hidden Passage 100% Guides
- Ancient Tree Stump Cave 100% Guides
- Sage Temple Cave 100% Guides
- Satori Mountain Cave 100% Guides
- Satori Mountain Foothill Cave 100% Guides
- Tamio River Downstream Cave 100% Guides
- River Of The Dead Waterfall Cave 100% Guides
- Shrine Of Resurrection 100% Guides
- Great Plateau Foothill Cave 100% Guides
- Coliseum Ruins Cave 100% Guides
- Whistling Hill Cave 100% Guides
- Popla Foothills Excavation Site 100% Guides
Lookout Landing 8 pick-ups
Lanayru Wetlands 22 pick-ups
- Bubbul Gem: Crenel Peak Cave 100% Guides
- Bubbul Gem: Dueling Peaks North Cave 100% Guides
- Bubbul Gem: Atun Valley Cave 100% Guides
- Bubbul Gem: Mount Dunsel Cave 100% Guides
- Bubbul Gem: Cape Cales Cliffbase Cave 100% Guides
- Bubbul Gem: Lanayru Road East Cave 100% Guides
- Bubbul Gem: Lanayru Road South Cave 100% Guides
- Bubbul Gem: Robred Dropoff Cave 100% Guides
- Bubbul Gem: Fort Hateno Cave 100% Guides
- Bubbul Gem: Sahasra Slope Cave 100% Guides
- Bubbul Gem: Byroad To Lanayru Wetlands 100% Guides
- Crenel Peak Cave 100% Guides
- Dueling Peaks North Cave 100% Guides
- Atun Valley Cave 100% Guides
- Mount Dunsel Cave 100% Guides
- Cape Cales Cliffbase Cave 100% Guides
- Lanayru Road East Cave 100% Guides
- Lanayru Road South Cave 100% Guides
- Robred Dropoff Cave 100% Guides
- Fort Hateno Cave 100% Guides
- Sahasra Slope Cave 100% Guides
- Byroad To Lanayru Wetlands 100% Guides
Hyrule Ridge 14 pick-ups
- Bubbul Gem: North Hyrule Plain Cave 100% Guides
- Bubbul Gem: Thundra Plateau Cave 100% Guides
- Bubbul Gem: Tanagar Canyon East Cave 100% Guides
- Bubbul Gem: Lindor's Brow Cave 100% Guides
- Bubbul Gem: Brightcap Cave 100% Guides
- Bubbul Gem: Gisa Crater Cave 100% Guides
- Bubbul Gem: Ancient Columns Cave 100% Guides
Great Hyrule Forest & Surroundings 4 pick-ups
Tabantha Tundra 6 pick-ups
Hebra Mountains 22 pick-ups
- Bubbul Gem: Pikida Stonegrove Northwest Cave 100% Guides
- Bubbul Gem: Hebra Mountains Northwest Cave 100% Guides
- Bubbul Gem: Hebra Great Skeleton 100% Guides
- Bubbul Gem: Icefall Foothills Cave 100% Guides
- Bubbul Gem: North Biron Snowshelf Cave 100% Guides
- Bubbul Gem: Lake Kilsie Cave 100% Guides
- Bubbul Gem: Sturnida Springs Cave 100% Guides
- Bubbul Gem: East Biron Snowshelf Cave 100% Guides
- Bubbul Gem: Rospro Pass Cave 100% Guides
- Bubbul Gem: Hebra South Summit Cave 100% Guides
- Bubbul Gem: Talonto Peak Cave 100% Guides
- Pikida Stonegrove Northwest Cave 100% Guides
- Hebra Mountains Northwest Cave 100% Guides
- Hebra Great Skeleton 100% Guides
- Icefall Foothills Cave 100% Guides
- North Biron Snowshelf Cave 100% Guides
- Lake Kilsie Cave 100% Guides
- Sturnida Springs Cave 100% Guides
- East Biron Snowshelf Cave 100% Guides
- Rospro Pass Cave 100% Guides
- Hebra South Summit Cave 100% Guides
- Talonto Peak Cave 100% Guides
Tabantha Frontier 6 pick-ups
Gerudo Highlands 10 pick-ups
Gerudo Desert 36 pick-ups
- Bubbul Gem: West Gerudo Underground Ruins 100% Guides
- Bubbul Gem: Gerudo Great Skeleton 100% Guides
- Bubbul Gem: Central Gerudo Cave 100% Guides
- Bubbul Gem: South Gerudo Cave 100% Guides
- Bubbul Gem: Ancient Altar Ruins 100% Guides
- Bubbul Gem: Ancient Prison Ruins 100% Guides
- Bubbul Gem: Quicksand Lake Cave 100% Guides
- Bubbul Gem: Gerudo Sanctuary 100% Guides
- Bubbul Gem: Valley Of Silent Statues 100% Guides
- Bubbul Gem: Oasis Source 100% Guides
- Bubbul Gem: East Gerudo Ruins 100% Guides
- Bubbul Gem: Gerudo Canyon Mine 100% Guides
- Bubbul Gem: Spectacle Rock Cave 100% Guides
- Bubbul Gem: Taafei Hill Cave 100% Guides
- Bubbul Gem: Koukot Plateau cave 100% Guides
- Bubbul Gem: Mount Nabooru Cave 100% Guides
- Bubbul Gem: Mount Nabooru South Cave 100% Guides
- Bubbul Gem: Stalry Plateau Cave 100% Guides
- West Gerudo Underground Ruins 100% Guides
- Gerudo Great Skeleton 100% Guides
- Central Gerudo Cave 100% Guides
- South Gerudo Cave 100% Guides
- Ancient Altar Ruins 100% Guides
- Ancient Prison Ruins 100% Guides
- Quicksand Lake Cave 100% Guides
- Gerudo Sanctuary 100% Guides
- Valley Of Silent Statues 100% Guides
- Oasis Source 100% Guides
- East Gerudo Ruins 100% Guides
- Gerudo Canyon Mine 100% Guides
- Spectacle Rock Cave 100% Guides
- Taafei Hill Cave 100% Guides
- Koukot Plateau cave 100% Guides
- Mount Nabooru Cave 100% Guides
- Mount Nabooru South Cave 100% Guides
- Stalry Plateau Cave 100% Guides
Faron Grasslands 28 pick-ups
- Bubbul Gem: Cora Lakefront Cave 100% Guides
- Bubbul Gem: Puffer Beach Overhead Cave 100% Guides
- Bubbul Gem: Como Shoreline Cave 100% Guides
- Bubbul Gem: Pagos Woods Excavation Site 100% Guides
- Bubbul Gem: Floria River Upstream Excavation 100% Guides
- Bubbul Gem: Finra Woods Excavation Site 100% Guides
- Bubbul Gem: Lake Hylia Whirlpool Cave 100% Guides
- Bubbul Gem: Tobio's Hollow Cave 100% Guides
- Bubbul Gem: Mount Floria Cave 100% Guides
- Bubbul Gem: Sarjon Woods Cave 100% Guides
- Bubbul Gem: Corta Lake Cave 100% Guides
- Bubbul Gem: Calora Lake Cave 100% Guides
- Bubbul Gem: Rodai Lakefront Tunnel 100% Guides
- Bubbul Gem: Rassla Lake Cave 100% Guides
- Cora Lakefront Cave 100% Guides
- Puffer Beach Overhead Cave 100% Guides
- Como Shoreline Cave 100% Guides
- Pagos Woods Excavation Site 100% Guides
- Floria River Upstream Excavation 100% Guides
- Finra Woods Excavation Site 100% Guides
- Lake Hylia Whirlpool Cave 100% Guides
- Tobio's Hollow Cave 100% Guides
- Mount Floria Cave 100% Guides
- Sarjon Woods Cave 100% Guides
- Corta Lake Cave 100% Guides
- Calora Lake Cave 100% Guides
- Rodai Lakefront Tunnel 100% Guides
- Rassla Lake Cave 100% Guides
West Necluda 8 pick-ups
Mount Lanayru 8 pick-ups
East Necluda 2 pick-ups
Lanayru Great Spring 36 pick-ups
- Bubbul Gem: Bone Pond East Cave 100% Guides
- Bubbul Gem: Tabahl Woods Cave 100% Guides
- Bubbul Gem: Oren Bridge Cave 100% Guides
- Bubbul Gem: Luto's Channel 100% Guides
- Bubbul Gem: Horon Lagoon Cave 100% Guides
- Bubbul Gem: Tarm Point Cave 100% Guides
- Bubbul Gem: Ulria Grotto East Cave 100% Guides
- Bubbul Gem: Ulria Grotto South Cave 100% Guides
- Bubbul Gem: Reservoir Lakefront Cavern 100% Guides
- Bubbul Gem: Pristine Sanctum 100% Guides
- Bubbul Gem: Ploymus Mountain Cave 100% Guides
- Bubbul Gem: Ancient Zora Waterworks 100% Guides
- Bubbul Gem: Cave Under Zora's Domain 100% Guides
- Bubbul Gem: Ralis Channel 100% Guides
- Bubbul Gem: Upland Zorana Summit Cave 100% Guides
- Bubbul Gem: Upland Zorana Byroad 100% Guides
- Bubbul Gem: Upland Zorana Mountainside Cave 100% Guides
- Bubbul Gem: Upland Zorana Foothill Cave 100% Guides
- Bone Pond East Cave 100% Guides
- Tabahl Woods Cave 100% Guides
- Oren Bridge Cave 100% Guides
- Luto's Channel 100% Guides
- Horon Lagoon Cave 100% Guides
- Tarm Point Cave 100% Guides
- Ulria Grotto East Cave 100% Guides
- Ulria Grotto South Cave 100% Guides
- Reservoir Lakefront Cavern 100% Guides
- Pristine Sanctum 100% Guides
- Ploymus Mountain Cave 100% Guides
- Ancient Zora Waterworks 100% Guides
- Cave Under Zora's Domain 100% Guides
- Ralis Channel 100% Guides
- Upland Zorana Summit Cave 100% Guides
- Upland Zorana Byroad 100% Guides
- Upland Zorana Mountainside Cave 100% Guides
- Upland Zorana Foothill Cave 100% Guides
Deep Akkala 12 pick-ups
Eldin Canyon 36 pick-ups
- Bubbul Gem: Cephla Lake Cave 100% Guides
- Bubbul Gem: Lake Ferona Cave 100% Guides
- Bubbul Gem: Pico Pond Cave 100% Guides
- Bubbul Gem: Foorhill Monster Den 100% Guides
- Bubbul Gem: Lake Intenoch Cave 100% Guides
- Bubbul Gem: Gorko Tunnel 100% Guides
- Bubbul Gem: Southern Mine 100% Guides
- Bubbul Gem: East Restaurant Cave 100% Guides
- Bubbul Gem: West Restaurant Cave 100% Guides
- Bubbul Gem: Goronbi River Cave 100% Guides
- Bubbul Gem: YunoboCo HQ South Cave 100% Guides
- Bubbul Gem: YunoboCo HQ East Cave 100% Guides
- Bubbul Gem: Isle Of Rabac Gallery 100% Guides
- Bubbul Gem: Death Mountain Foothill Cave 100% Guides
- Bubbul Gem: Death Mountain West Tunnel 100% Guides
- Bubbul Gem: Lizard's Burrow 100% Guides
- Bubbul Gem: Lake Darman Monster Den 100% Guides
- Bubbul Gem: Death Mountain East Tunnel 100% Guides
- Cephla Lake Cave 100% Guides
- Lake Ferona Cave 100% Guides
- Pico Pond Cave 100% Guides
- Foorhill Monster Den 100% Guides
- Lake Intenoch Cave 100% Guides
- Gorko Tunnel 100% Guides
- Southern Mine 100% Guides
- East Restaurant Cave 100% Guides
- West Restaurant Cave 100% Guides
- Goronbi River Cave 100% Guides
- YunoboCo HQ South Cave 100% Guides
- YunoboCo HQ East Cave 100% Guides
- Isle Of Rabac Gallery 100% Guides
- Death Mountain Foothill Cave 100% Guides
- Death Mountain West Tunnel 100% Guides
- Lizard's Burrow 100% Guides
- Lake Darman Monster Den 100% Guides
- Death Mountain East Tunnel 100% Guides
Eldin Mountains 2 pick-ups
Game Guides Channel · Wells
Hebra Mountains 1 pick-up
Tabantha Frontier 2 pick-ups
Tabantha Tundra 1 pick-up
Hyrule Ridge 3 pick-ups
Great Hyrule Forest & Surroundings 2 pick-ups
Hyrule Field 8 pick-ups
- Maritta Exchange Well Game Guides Channel
- Carok Bridge Well Game Guides Channel
- Riverside Stable Well Game Guides Channel
- Popla Foothills South Well Game Guides Channel
- Aquame Lake Well Game Guides Channel
- Mount Daphnes Well Game Guides Channel
- Outskirt Stable Well Game Guides Channel
- Outskirt Hill Well Game Guides Channel
Sky 1 pick-up
Lookout Landing 5 pick-ups
Lanayru Wetlands 8 pick-ups
- Wetland Stable South Well Game Guides Channel
- Wetland Stable Well Game Guides Channel
- Dueling Peaks Stable Well Game Guides Channel
- Rikoka Hills Well Game Guides Channel
- Goponga Village Ruins Well Game Guides Channel
- Lanayru Wetlands Well Game Guides Channel
- Zauz Island Well Game Guides Channel
- Moor Garrison Ruins Well Game Guides Channel
Faron Grasslands 8 pick-ups
- South Nabi Lake Well Game Guides Channel
- Hills of Baumer Well Game Guides Channel
- Deya Village Ruins South Well Game Guides Channel
- Deya Village Ruins Well Game Guides Channel
- Deya Village Ruins North Well Game Guides Channel
- Deya Village Ruins East Well Game Guides Channel
- Highland Stable Well Game Guides Channel
- Haran Lakefront Well Game Guides Channel
Depths 1 pick-up
Gerudo Desert 3 pick-ups
West Necluda 2 pick-ups
East Necluda 6 pick-ups
Eldin Canyon 3 pick-ups
Lanayru Great Spring 1 pick-up
Deep Akkala 3 pick-ups
BeardBear · Armor pieces
BeardBear 108 pick-ups
- Armor piece 72 BeardBear
- Armor piece 71 BeardBear
- Armor piece 73 BeardBear
- Armor piece 68 BeardBear
- Armor piece 13 BeardBear
- Armor piece 14 BeardBear
- Armor piece 15 BeardBear
- Armor piece 22 BeardBear
- Armor piece 23 BeardBear
- Armor piece 24 BeardBear
- Armor piece 63 BeardBear
- Armor piece 107 BeardBear
- Armor piece 108 BeardBear
- Armor piece 106 BeardBear
- Armor piece 82 BeardBear
- Armor piece 35 BeardBear
- Armor piece 83 BeardBear
- Armor piece 36 BeardBear
- Armor piece 81 BeardBear
- Armor piece 34 BeardBear
- Armor piece 11 BeardBear
- Armor piece 10 BeardBear
- Armor piece 12 BeardBear
- Armor piece 7 BeardBear
- Armor piece 8 BeardBear
- Armor piece 9 BeardBear
- Armor piece 95 BeardBear
- Armor piece 94 BeardBear
- Armor piece 93 BeardBear
- Armor piece 3 BeardBear
- Armor piece 2 BeardBear
- Armor piece 1 BeardBear
- Armor piece 96 BeardBear
- Armor piece 105 BeardBear
- Armor piece 104 BeardBear
- Armor piece 103 BeardBear
- Armor piece 91 BeardBear
- Armor piece 90 BeardBear
- Armor piece 92 BeardBear
- Armor piece 20 BeardBear
- Armor piece 21 BeardBear
- Armor piece 19 BeardBear
- Armor piece 79 BeardBear
- Armor piece 77 BeardBear
- Armor piece 78 BeardBear
- Armor piece 66 BeardBear
- Armor piece 80 BeardBear
- Armor piece 75 BeardBear
- Armor piece 76 BeardBear
- Armor piece 74 BeardBear
- Armor piece 46 BeardBear
- Armor piece 47 BeardBear
- Armor piece 48 BeardBear
- Armor piece 55 BeardBear
- Armor piece 56 BeardBear
- Armor piece 57 BeardBear
- Armor piece 58 BeardBear
- Armor piece 102 BeardBear
- Armor piece 100 BeardBear
- Armor piece 101 BeardBear
- Armor piece 99 BeardBear
- Armor piece 97 BeardBear
- Armor piece 98 BeardBear
- Armor piece 65 BeardBear
- Armor piece 67 BeardBear
- Armor piece 40 BeardBear
- Armor piece 41 BeardBear
- Armor piece 42 BeardBear
- Armor piece 87 BeardBear
- Armor piece 88 BeardBear
- Armor piece 89 BeardBear
- Armor piece 28 BeardBear
- Armor piece 29 BeardBear
- Armor piece 30 BeardBear
- Armor piece 51 BeardBear
- Armor piece 49 BeardBear
- Armor piece 50 BeardBear
- Armor piece 17 BeardBear
- Armor piece 18 BeardBear
- Armor piece 16 BeardBear
- Armor piece 60 BeardBear
- Armor piece 59 BeardBear
- Armor piece 61 BeardBear
- Armor piece 62 BeardBear
- Armor piece 43 BeardBear
- Armor piece 44 BeardBear
- Armor piece 45 BeardBear
- Armor piece 53 BeardBear
- Armor piece 54 BeardBear
- Armor piece 52 BeardBear
- Armor piece 38 BeardBear
- Armor piece 39 BeardBear
- Armor piece 37 BeardBear
- Armor piece 64 BeardBear
- Armor piece 86 BeardBear
- Armor piece 85 BeardBear
- Armor piece 84 BeardBear
- Armor piece 33 BeardBear
- Armor piece 31 BeardBear
- Armor piece 32 BeardBear
- Armor piece 69 BeardBear
- Armor piece 6 BeardBear
- Armor piece 4 BeardBear
- Armor piece 5 BeardBear
- Armor piece 70 BeardBear
- Armor piece 25 BeardBear
- Armor piece 26 BeardBear
- Armor piece 27 BeardBear
From other walkthroughs
AbdallahSmash · Shrines, Sage's Wills, Dragon's Tears
Sky 52 pick-ups
- Ukouh Shrine AbdallahSmash
- In-isa Shrine AbdallahSmash
- Gutanbac Shrine AbdallahSmash
- Nachoyah Shrine AbdallahSmash
- Mayaumekis Shrine AbdallahSmash
- Igoshon Shrine AbdallahSmash
- Joku-U Shrine AbdallahSmash
- Taunhiy Shrine AbdallahSmash
- Simosiwak Shrine AbdallahSmash
- Sihajog Shrine AbdallahSmash
- Utsushok Shrine AbdallahSmash
- Ukoojisi Shrine AbdallahSmash
- Yansamin Shrine AbdallahSmash
- Joisu Shrine AbdallahSmash
- Kadaunar Shrine AbdallahSmash
- Natak Shrine AbdallahSmash
- Taninoud Shrine AbdallahSmash
- Tenbez Shrine AbdallahSmash
- Ijo-o Shrine AbdallahSmash
- Ga-ahisas Shrine AbdallahSmash
- Ganos Shrine AbdallahSmash
- Mayasiar Shrine AbdallahSmash
- Rakashog Shrine AbdallahSmash
- Siyamotsus Shrine AbdallahSmash
- Jinodok Shrine AbdallahSmash
- Joku-usin Shrine AbdallahSmash
- Kumamayn Shrine AbdallahSmash
- Mayanas Shrine AbdallahSmash
- Jirutagumac Shrine AbdallahSmash
- Gikaku Shrine AbdallahSmash
- Mogisari Shrine AbdallahSmash
- Mayam Shrine AbdallahSmash
- Sage's Will: Eldin Sky Archipelago AbdallahSmash
- Sage's Will: Sokkala Sky Archipelago AbdallahSmash
- Sage's Will: South Eldin Sky Archipelago AbdallahSmash
- Sage's Will: Wellspring Island AbdallahSmash
- Sage's Will: Jirutagumac Shrine AbdallahSmash
- Sage's Will: Lanayru Sky Archipelago AbdallahSmash
- Sage's Will: North Necluda Sky Archipelago AbdallahSmash
- Sage's Will: Eventide Island Sky AbdallahSmash
- Sage's Will: South Necluda Sky Archipelago AbdallahSmash
- Sage's Will: Dragonhead Island AbdallahSmash
- Sage's Will: Thunderhead Isles AbdallahSmash
- Sage's Will: Faron Sky Archipelago AbdallahSmash
- Sage's Will: South Hyrule Sky Archipelago AbdallahSmash
- Sage's Will: East Gerudo Sky Archipelago AbdallahSmash
- Sage's Will: Gerudo Desert Sky AbdallahSmash
- Sage's Will: North Gerudo Sky Archipelago AbdallahSmash
- Sage's Will: West Hyrule Sky Archipelago AbdallahSmash
- Sage's Will: North Tabantha Sky Archipelago AbdallahSmash
- Sage's Will: South Hebra Sky Archipelago AbdallahSmash
- Sage's Will: West Hebra Sky Archipelago AbdallahSmash
Central Hyrule 15 pick-ups
- Kyononis Shrine AbdallahSmash
- Ishodag Shrine AbdallahSmash
- Mayachin Shrine AbdallahSmash
- Tsutsu-um Shrine AbdallahSmash
- Kamizun Shrine AbdallahSmash
- Sepapa Shrine AbdallahSmash
- Ren-iz Shrine AbdallahSmash
- Jojon Shrine AbdallahSmash
- Kyokugon Shrine AbdallahSmash
- Teniten Shrine AbdallahSmash
- Tajikats Shrine AbdallahSmash
- Susuyai Shrine AbdallahSmash
- Jiosin Shrine AbdallahSmash
- Yamiyo Shrine AbdallahSmash
Other 48 pick-ups
- Gatakis Shrine AbdallahSmash
- Katahanaum Shrine AbdallahSmash
- Mayatat Shrine AbdallahSmash
- Soryotanog Shrine AbdallahSmash
- Ihen-a Shrine AbdallahSmash
- Serutabomac Shrine AbdallahSmash
- Eshos Shrine AbdallahSmash
- Sifumim Shrine AbdallahSmash
- Zanmik Shrine AbdallahSmash
- Morok Shrine AbdallahSmash
- Tukarok Shrine AbdallahSmash
- Jonsau Shrine AbdallahSmash
- Mayahisik Shrine AbdallahSmash
- Oromuwak Shrine AbdallahSmash
- Nouda Shrine AbdallahSmash
- Oshozan-u Shrine AbdallahSmash
- Mayaotaki Shrine AbdallahSmash
- Yomizuk Shrine AbdallahSmash
- Jikais Shrine AbdallahSmash
- Anedamimik Shrine AbdallahSmash
- Jogou Shrine AbdallahSmash
- Zakusu Shrine AbdallahSmash
- O-ogim Shrine AbdallahSmash
- Tokiy Shrine AbdallahSmash
- Bamitok Shrine AbdallahSmash
- Jochisiu Shrine AbdallahSmash
- Susub Shrine AbdallahSmash
- Jiukoum Shrine AbdallahSmash
- Utojis Shrine AbdallahSmash
- Joju-u-u Shrine AbdallahSmash
- Marari-In Shrine AbdallahSmash
- En-Oma Shrine AbdallahSmash
- Ishokin Shrine AbdallahSmash
- Motsusis Shrine AbdallahSmash
- Siwakama Shrine AbdallahSmash
- Chichim Shrine AbdallahSmash
- Karahatag Shrine AbdallahSmash
- Irawak Shrine AbdallahSmash
- Miryotanog Shrine AbdallahSmash
- Kudanisar Shrine AbdallahSmash
- Mayamats Shrine AbdallahSmash
- Otutsum Shrine AbdallahSmash
- Rotsumamu Shrine AbdallahSmash
- Turakamik Shrine AbdallahSmash
- Rakakudaj Shrine AbdallahSmash
- Suariwak Shrine AbdallahSmash
- Kitawak Shrine AbdallahSmash
- Tadarok Shrine AbdallahSmash
Hebra 8 pick-ups
Great Hyrule Forest 9 pick-ups
Eldin 22 pick-ups
- Sikukuu Shrine AbdallahSmash
- Mayachideg Shrine AbdallahSmash
- Timawak Shrine AbdallahSmash
- Marakuguc Shrine AbdallahSmash
- Sitsum Shrine AbdallahSmash
- Minetak Shrine AbdallahSmash
- Mayak Shrine AbdallahSmash
- Isisim Shrine AbdallahSmash
- Sibajitak Shrine AbdallahSmash
- Kimayat Shrine AbdallahSmash
- Momosik Shrine AbdallahSmash
- Tenmaten Shrine AbdallahSmash
- Moshapin Shrine AbdallahSmash
- Kisinona Shrine AbdallahSmash
- Maoikes Shrine AbdallahSmash
- Joniu Shrine AbdallahSmash
- Kurakat Shrine AbdallahSmash
- Riogak Shrine AbdallahSmash
- Jiotak Shrine AbdallahSmash
Lanayru 3 pick-ups
Akkala 10 pick-ups
- Kamatukis Shrine AbdallahSmash
- Igashuk Shrine AbdallahSmash
- Rasiwak Shrine AbdallahSmash
- Jochi-Iu Shrine AbdallahSmash
- Gemimik Shrine AbdallahSmash
- Sinatanika Shrine AbdallahSmash
- Domizuin Shrine AbdallahSmash
- Jochi-Ihiga Shrine AbdallahSmash
- Rasitakiwak Shrine AbdallahSmash
- Gatanisis Shrine AbdallahSmash
Hyrule Ridge 9 pick-ups
Tabantha 8 pick-ups
- Dragon's Tear #2: Tabantha Hills AbdallahSmash
- Dragon's Tear #3: Trilby Plain AbdallahSmash
- Dragon's Tear #4: Baltrea Lake AbdallahSmash
- Dragon's Tear #5: Sapphia’s Table AbdallahSmash
- Dragon's Tear #6: Illumeni Plateau AbdallahSmash
- Dragon's Tear #7: Gogobi Shores AbdallahSmash
- Dragon's Tear #8: North Tabantha Snowfield AbdallahSmash
- Dragon's Tear #9: Talus Plateau AbdallahSmash
Episode 5 1 pick-up
Episode 8 1 pick-up
Episode 9 1 pick-up
Episode 10 1 pick-up
Episode 13 1 pick-up
Episode 15 1 pick-up
Episode 16 1 pick-up
Episode 17 1 pick-up
Episode 18 2 pick-ups
Episode 20 2 pick-ups
Episode 21 2 pick-ups
Episode 24 2 pick-ups
Episode 26 1 pick-up
Episode 29 1 pick-up
Episode 30 2 pick-ups
Episode 32 1 pick-up
Episode 37 1 pick-up
Episode 41 2 pick-ups
Episode 42 1 pick-up
Episode 44 1 pick-up
Episode 45 1 pick-up
Episode 51 1 pick-up
Episode 55 5 pick-ups
Episode 56 2 pick-ups
Episode 57 2 pick-ups
Episode 58 1 pick-up
Episode 61 1 pick-up
Episode 63 1 pick-up
Episode 65 1 pick-up
Episode 68 3 pick-ups
Episode 69 1 pick-up
Episode 71 2 pick-ups
Episode 74 1 pick-up
Episode 76 5 pick-ups
Episode 77 3 pick-ups
Episode 78 1 pick-up
Episode 80 3 pick-ups
Episode 81 2 pick-ups
Episode 87 3 pick-ups
Episode 88 1 pick-up
Episode 89 1 pick-up
Episode 93 1 pick-up
Episode 97 2 pick-ups
Episode 98 3 pick-ups
Episode 99 5 pick-ups
Episode 100 1 pick-up
Episode 101 1 pick-up
Episode 105 4 pick-ups
Episode 106 2 pick-ups
Episode 110 1 pick-up
Episode 112 1 pick-up
Episode 113 3 pick-ups
Episode 114 1 pick-up
Episode 115 1 pick-up
Episode 116 1 pick-up
Episode 122 1 pick-up
Episode 125 1 pick-up
Episode 126 7 pick-ups
Episode 129 1 pick-up
Episode 131 1 pick-up
Episode 133 1 pick-up
Episode 136 1 pick-up
Episode 139 1 pick-up
Episode 141 5 pick-ups
Episode 142 1 pick-up
Episode 143 3 pick-ups
Episode 144 3 pick-ups
Episode 150 2 pick-ups
Episode 154 1 pick-up
Episode 157 2 pick-ups
Episode 158 8 pick-ups
Episode 160 1 pick-up
Episode 164 1 pick-up
Episode 167 2 pick-ups
Episode 168 4 pick-ups
Episode 169 1 pick-up
Episode 176 5 pick-ups
Episode 178 1 pick-up
Episode 184 1 pick-up
Episode 186 1 pick-up
Episode 189 1 pick-up
Episode 191 1 pick-up
Episode 193 12 pick-ups
- Sisustom lightroot ep 193
- Amakawis lightroot ep 193
- Mihcihc lightroot ep 193
- Gataharak lightroot ep 193
- Kasari lightroot ep 193
- Gonatoyrim lightroot ep 193
- Gonatoyros lightroot ep 193
- Rasinaduk lightroot ep 193
- Tatayam lightroot ep 193
- Kimakarut lightroot ep 193
- Jadukakar lightroot ep 193
- Kawatik lightroot ep 193
Episode 198 1 pick-up
Episode 204 1 pick-up
Episode 209 3 pick-ups
Episode 210 3 pick-ups
Episode 211 1 pick-up
Episode 213 1 pick-up
Episode 218 5 pick-ups
Episode 219 1 pick-up
Episode 224 1 pick-up
Episode 227 1 pick-up
From collectibles guides
Game Guides Channel · Korok Seeds
Game Guides Channel 1000 pick-ups
- Korok Seed 1 Game Guides Channel
- Korok Seed 2 Game Guides Channel
- Korok Seed 3 Game Guides Channel
- Korok Seed 4 Game Guides Channel
- Korok Seed 5 Game Guides Channel
- Korok Seed 6 Game Guides Channel
- Korok Seed 7 Game Guides Channel
- Korok Seed 8 Game Guides Channel
- Korok Seed 9 Game Guides Channel
- Korok Seed 10 Game Guides Channel
- Korok Seed 11 Game Guides Channel
- Korok Seed 12 Game Guides Channel
- Korok Seed 13 Game Guides Channel
- Korok Seed 14 Game Guides Channel
- Korok Seed 15 Game Guides Channel
- Korok Seed 16 Game Guides Channel
- Korok Seed 17 Game Guides Channel
- Korok Seed 18 Game Guides Channel
- Korok Seed 19 Game Guides Channel
- Korok Seed 20 Game Guides Channel
- Korok Seed 21 Game Guides Channel
- Korok Seed 22 Game Guides Channel
- Korok Seed 23 Game Guides Channel
- Korok Seed 24 Game Guides Channel
- Korok Seed 25 Game Guides Channel
- Korok Seed 26 Game Guides Channel
- Korok Seed 27 Game Guides Channel
- Korok Seed 28 Game Guides Channel
- Korok Seed 29 Game Guides Channel
- Korok Seed 30 Game Guides Channel
- Korok Seed 31 Game Guides Channel
- Korok Seed 32 Game Guides Channel
- Korok Seed 33 Game Guides Channel
- Korok Seed 34 Game Guides Channel
- Korok Seed 35 Game Guides Channel
- Korok Seed 36 Game Guides Channel
- Korok Seed 37 Game Guides Channel
- Korok Seed 38 Game Guides Channel
- Korok Seed 39 Game Guides Channel
- Korok Seed 40 Game Guides Channel
- Korok Seed 41 Game Guides Channel
- Korok Seed 42 Game Guides Channel
- Korok Seed 43 Game Guides Channel
- Korok Seed 44 Game Guides Channel
- Korok Seed 45 Game Guides Channel
- Korok Seed 46 Game Guides Channel
- Korok Seed 47 Game Guides Channel
- Korok Seed 48 Game Guides Channel
- Korok Seed 49 Game Guides Channel
- Korok Seed 50 Game Guides Channel
- Korok Seed 51 Game Guides Channel
- Korok Seed 52 Game Guides Channel
- Korok Seed 53 Game Guides Channel
- Korok Seed 54 Game Guides Channel
- Korok Seed 55 Game Guides Channel
- Korok Seed 56 Game Guides Channel
- Korok Seed 57 Game Guides Channel
- Korok Seed 58 Game Guides Channel
- Korok Seed 59 Game Guides Channel
- Korok Seed 60 Game Guides Channel
- Korok Seed 61 Game Guides Channel
- Korok Seed 62 Game Guides Channel
- Korok Seed 63 Game Guides Channel
- Korok Seed 64 Game Guides Channel
- Korok Seed 65 Game Guides Channel
- Korok Seed 66 Game Guides Channel
- Korok Seed 67 Game Guides Channel
- Korok Seed 68 Game Guides Channel
- Korok Seed 69 Game Guides Channel
- Korok Seed 70 Game Guides Channel
- Korok Seed 71 Game Guides Channel
- Korok Seed 72 Game Guides Channel
- Korok Seed 73 Game Guides Channel
- Korok Seed 74 Game Guides Channel
- Korok Seed 75 Game Guides Channel
- Korok Seed 76 Game Guides Channel
- Korok Seed 77 Game Guides Channel
- Korok Seed 78 Game Guides Channel
- Korok Seed 79 Game Guides Channel
- Korok Seed 80 Game Guides Channel
- Korok Seed 81 Game Guides Channel
- Korok Seed 82 Game Guides Channel
- Korok Seed 83 Game Guides Channel
- Korok Seed 84 Game Guides Channel
- Korok Seed 85 Game Guides Channel
- Korok Seed 86 Game Guides Channel
- Korok Seed 87 Game Guides Channel
- Korok Seed 88 Game Guides Channel
- Korok Seed 89 Game Guides Channel
- Korok Seed 90 Game Guides Channel
- Korok Seed 91 Game Guides Channel
- Korok Seed 92 Game Guides Channel
- Korok Seed 93 Game Guides Channel
- Korok Seed 94 Game Guides Channel
- Korok Seed 95 Game Guides Channel
- Korok Seed 96 Game Guides Channel
- Korok Seed 97 Game Guides Channel
- Korok Seed 98 Game Guides Channel
- Korok Seed 99 Game Guides Channel
- Korok Seed 100 Game Guides Channel
- Korok Seed 101 Game Guides Channel
- Korok Seed 102 Game Guides Channel
- Korok Seed 103 Game Guides Channel
- Korok Seed 104 Game Guides Channel
- Korok Seed 105 Game Guides Channel
- Korok Seed 106 Game Guides Channel
- Korok Seed 107 Game Guides Channel
- Korok Seed 108 Game Guides Channel
- Korok Seed 109 Game Guides Channel
- Korok Seed 110 Game Guides Channel
- Korok Seed 111 Game Guides Channel
- Korok Seed 112 Game Guides Channel
- Korok Seed 113 Game Guides Channel
- Korok Seed 114 Game Guides Channel
- Korok Seed 115 Game Guides Channel
- Korok Seed 116 Game Guides Channel
- Korok Seed 117 Game Guides Channel
- Korok Seed 118 Game Guides Channel
- Korok Seed 119 Game Guides Channel
- Korok Seed 120 Game Guides Channel
- Korok Seed 121 Game Guides Channel
- Korok Seed 122 Game Guides Channel
- Korok Seed 123 Game Guides Channel
- Korok Seed 124 Game Guides Channel
- Korok Seed 125 Game Guides Channel
- Korok Seed 126 Game Guides Channel
- Korok Seed 127 Game Guides Channel
- Korok Seed 128 Game Guides Channel
- Korok Seed 129 Game Guides Channel
- Korok Seed 130 Game Guides Channel
- Korok Seed 131 Game Guides Channel
- Korok Seed 132 Game Guides Channel
- Korok Seed 133 Game Guides Channel
- Korok Seed 134 Game Guides Channel
- Korok Seed 135 Game Guides Channel
- Korok Seed 136 Game Guides Channel
- Korok Seed 137 Game Guides Channel
- Korok Seed 138 Game Guides Channel
- Korok Seed 139 Game Guides Channel
- Korok Seed 140 Game Guides Channel
- Korok Seed 141 Game Guides Channel
- Korok Seed 142 Game Guides Channel
- Korok Seed 143 Game Guides Channel
- Korok Seed 144 Game Guides Channel
- Korok Seed 145 Game Guides Channel
- Korok Seed 146 Game Guides Channel
- Korok Seed 147 Game Guides Channel
- Korok Seed 148 Game Guides Channel
- Korok Seed 149 Game Guides Channel
- Korok Seed 150 Game Guides Channel
- Korok Seed 151 Game Guides Channel
- Korok Seed 152 Game Guides Channel
- Korok Seed 153 Game Guides Channel
- Korok Seed 154 Game Guides Channel
- Korok Seed 155 Game Guides Channel
- Korok Seed 156 Game Guides Channel
- Korok Seed 157 Game Guides Channel
- Korok Seed 158 Game Guides Channel
- Korok Seed 159 Game Guides Channel
- Korok Seed 160 Game Guides Channel
- Korok Seed 161 Game Guides Channel
- Korok Seed 162 Game Guides Channel
- Korok Seed 163 Game Guides Channel
- Korok Seed 164 Game Guides Channel
- Korok Seed 165 Game Guides Channel
- Korok Seed 166 Game Guides Channel
- Korok Seed 167 Game Guides Channel
- Korok Seed 168 Game Guides Channel
- Korok Seed 169 Game Guides Channel
- Korok Seed 170 Game Guides Channel
- Korok Seed 171 Game Guides Channel
- Korok Seed 172 Game Guides Channel
- Korok Seed 173 Game Guides Channel
- Korok Seed 174 Game Guides Channel
- Korok Seed 175 Game Guides Channel
- Korok Seed 176 Game Guides Channel
- Korok Seed 177 Game Guides Channel
- Korok Seed 178 Game Guides Channel
- Korok Seed 179 Game Guides Channel
- Korok Seed 180 Game Guides Channel
- Korok Seed 181 Game Guides Channel
- Korok Seed 182 Game Guides Channel
- Korok Seed 183 Game Guides Channel
- Korok Seed 184 Game Guides Channel
- Korok Seed 185 Game Guides Channel
- Korok Seed 186 Game Guides Channel
- Korok Seed 187 Game Guides Channel
- Korok Seed 188 Game Guides Channel
- Korok Seed 189 Game Guides Channel
- Korok Seed 190 Game Guides Channel
- Korok Seed 191 Game Guides Channel
- Korok Seed 192 Game Guides Channel
- Korok Seed 193 Game Guides Channel
- Korok Seed 194 Game Guides Channel
- Korok Seed 195 Game Guides Channel
- Korok Seed 196 Game Guides Channel
- Korok Seed 197 Game Guides Channel
- Korok Seed 198 Game Guides Channel
- Korok Seed 199 Game Guides Channel
- Korok Seed 200 Game Guides Channel
- Korok Seed 201 Game Guides Channel
- Korok Seed 202 Game Guides Channel
- Korok Seed 203 Game Guides Channel
- Korok Seed 204 Game Guides Channel
- Korok Seed 205 Game Guides Channel
- Korok Seed 206 Game Guides Channel
- Korok Seed 207 Game Guides Channel
- Korok Seed 208 Game Guides Channel
- Korok Seed 209 Game Guides Channel
- Korok Seed 210 Game Guides Channel
- Korok Seed 211 Game Guides Channel
- Korok Seed 212 Game Guides Channel
- Korok Seed 213 Game Guides Channel
- Korok Seed 214 Game Guides Channel
- Korok Seed 215 Game Guides Channel
- Korok Seed 216 Game Guides Channel
- Korok Seed 217 Game Guides Channel
- Korok Seed 218 Game Guides Channel
- Korok Seed 219 Game Guides Channel
- Korok Seed 220 Game Guides Channel
- Korok Seed 221 Game Guides Channel
- Korok Seed 222 Game Guides Channel
- Korok Seed 223 Game Guides Channel
- Korok Seed 224 Game Guides Channel
- Korok Seed 225 Game Guides Channel
- Korok Seed 226 Game Guides Channel
- Korok Seed 227 Game Guides Channel
- Korok Seed 228 Game Guides Channel
- Korok Seed 229 Game Guides Channel
- Korok Seed 230 Game Guides Channel
- Korok Seed 231 Game Guides Channel
- Korok Seed 232 Game Guides Channel
- Korok Seed 233 Game Guides Channel
- Korok Seed 234 Game Guides Channel
- Korok Seed 235 Game Guides Channel
- Korok Seed 236 Game Guides Channel
- Korok Seed 237 Game Guides Channel
- Korok Seed 238 Game Guides Channel
- Korok Seed 239 Game Guides Channel
- Korok Seed 240 Game Guides Channel
- Korok Seed 241 Game Guides Channel
- Korok Seed 242 Game Guides Channel
- Korok Seed 243 Game Guides Channel
- Korok Seed 244 Game Guides Channel
- Korok Seed 245 Game Guides Channel
- Korok Seed 246 Game Guides Channel
- Korok Seed 247 Game Guides Channel
- Korok Seed 248 Game Guides Channel
- Korok Seed 249 Game Guides Channel
- Korok Seed 250 Game Guides Channel
- Korok Seed 251 Game Guides Channel
- Korok Seed 252 Game Guides Channel
- Korok Seed 253 Game Guides Channel
- Korok Seed 254 Game Guides Channel
- Korok Seed 255 Game Guides Channel
- Korok Seed 256 Game Guides Channel
- Korok Seed 257 Game Guides Channel
- Korok Seed 258 Game Guides Channel
- Korok Seed 259 Game Guides Channel
- Korok Seed 260 Game Guides Channel
- Korok Seed 261 Game Guides Channel
- Korok Seed 262 Game Guides Channel
- Korok Seed 263 Game Guides Channel
- Korok Seed 264 Game Guides Channel
- Korok Seed 265 Game Guides Channel
- Korok Seed 266 Game Guides Channel
- Korok Seed 267 Game Guides Channel
- Korok Seed 268 Game Guides Channel
- Korok Seed 269 Game Guides Channel
- Korok Seed 270 Game Guides Channel
- Korok Seed 271 Game Guides Channel
- Korok Seed 272 Game Guides Channel
- Korok Seed 273 Game Guides Channel
- Korok Seed 274 Game Guides Channel
- Korok Seed 275 Game Guides Channel
- Korok Seed 276 Game Guides Channel
- Korok Seed 277 Game Guides Channel
- Korok Seed 278 Game Guides Channel
- Korok Seed 279 Game Guides Channel
- Korok Seed 280 Game Guides Channel
- Korok Seed 281 Game Guides Channel
- Korok Seed 282 Game Guides Channel
- Korok Seed 283 Game Guides Channel
- Korok Seed 284 Game Guides Channel
- Korok Seed 285 Game Guides Channel
- Korok Seed 286 Game Guides Channel
- Korok Seed 287 Game Guides Channel
- Korok Seed 288 Game Guides Channel
- Korok Seed 289 Game Guides Channel
- Korok Seed 290 Game Guides Channel
- Korok Seed 291 Game Guides Channel
- Korok Seed 292 Game Guides Channel
- Korok Seed 293 Game Guides Channel
- Korok Seed 294 Game Guides Channel
- Korok Seed 295 Game Guides Channel
- Korok Seed 296 Game Guides Channel
- Korok Seed 297 Game Guides Channel
- Korok Seed 298 Game Guides Channel
- Korok Seed 299 Game Guides Channel
- Korok Seed 300 Game Guides Channel
- Korok Seed 301 Game Guides Channel
- Korok Seed 302 Game Guides Channel
- Korok Seed 303 Game Guides Channel
- Korok Seed 304 Game Guides Channel
- Korok Seed 305 Game Guides Channel
- Korok Seed 306 Game Guides Channel
- Korok Seed 307 Game Guides Channel
- Korok Seed 308 Game Guides Channel
- Korok Seed 309 Game Guides Channel
- Korok Seed 310 Game Guides Channel
- Korok Seed 311 Game Guides Channel
- Korok Seed 312 Game Guides Channel
- Korok Seed 313 Game Guides Channel
- Korok Seed 314 Game Guides Channel
- Korok Seed 315 Game Guides Channel
- Korok Seed 316 Game Guides Channel
- Korok Seed 317 Game Guides Channel
- Korok Seed 318 Game Guides Channel
- Korok Seed 319 Game Guides Channel
- Korok Seed 320 Game Guides Channel
- Korok Seed 321 Game Guides Channel
- Korok Seed 322 Game Guides Channel
- Korok Seed 323 Game Guides Channel
- Korok Seed 324 Game Guides Channel
- Korok Seed 325 Game Guides Channel
- Korok Seed 326 Game Guides Channel
- Korok Seed 327 Game Guides Channel
- Korok Seed 328 Game Guides Channel
- Korok Seed 329 Game Guides Channel
- Korok Seed 330 Game Guides Channel
- Korok Seed 331 Game Guides Channel
- Korok Seed 332 Game Guides Channel
- Korok Seed 333 Game Guides Channel
- Korok Seed 334 Game Guides Channel
- Korok Seed 335 Game Guides Channel
- Korok Seed 336 Game Guides Channel
- Korok Seed 337 Game Guides Channel
- Korok Seed 338 Game Guides Channel
- Korok Seed 339 Game Guides Channel
- Korok Seed 340 Game Guides Channel
- Korok Seed 341 Game Guides Channel
- Korok Seed 342 Game Guides Channel
- Korok Seed 343 Game Guides Channel
- Korok Seed 344 Game Guides Channel
- Korok Seed 345 Game Guides Channel
- Korok Seed 346 Game Guides Channel
- Korok Seed 347 Game Guides Channel
- Korok Seed 348 Game Guides Channel
- Korok Seed 349 Game Guides Channel
- Korok Seed 350 Game Guides Channel
- Korok Seed 351 Game Guides Channel
- Korok Seed 352 Game Guides Channel
- Korok Seed 353 Game Guides Channel
- Korok Seed 354 Game Guides Channel
- Korok Seed 355 Game Guides Channel
- Korok Seed 356 Game Guides Channel
- Korok Seed 357 Game Guides Channel
- Korok Seed 358 Game Guides Channel
- Korok Seed 359 Game Guides Channel
- Korok Seed 360 Game Guides Channel
- Korok Seed 361 Game Guides Channel
- Korok Seed 362 Game Guides Channel
- Korok Seed 363 Game Guides Channel
- Korok Seed 364 Game Guides Channel
- Korok Seed 365 Game Guides Channel
- Korok Seed 366 Game Guides Channel
- Korok Seed 367 Game Guides Channel
- Korok Seed 368 Game Guides Channel
- Korok Seed 369 Game Guides Channel
- Korok Seed 370 Game Guides Channel
- Korok Seed 371 Game Guides Channel
- Korok Seed 372 Game Guides Channel
- Korok Seed 373 Game Guides Channel
- Korok Seed 374 Game Guides Channel
- Korok Seed 375 Game Guides Channel
- Korok Seed 376 Game Guides Channel
- Korok Seed 377 Game Guides Channel
- Korok Seed 378 Game Guides Channel
- Korok Seed 379 Game Guides Channel
- Korok Seed 380 Game Guides Channel
- Korok Seed 381 Game Guides Channel
- Korok Seed 382 Game Guides Channel
- Korok Seed 383 Game Guides Channel
- Korok Seed 384 Game Guides Channel
- Korok Seed 385 Game Guides Channel
- Korok Seed 386 Game Guides Channel
- Korok Seed 387 Game Guides Channel
- Korok Seed 388 Game Guides Channel
- Korok Seed 389 Game Guides Channel
- Korok Seed 390 Game Guides Channel
- Korok Seed 391 Game Guides Channel
- Korok Seed 392 Game Guides Channel
- Korok Seed 393 Game Guides Channel
- Korok Seed 394 Game Guides Channel
- Korok Seed 395 Game Guides Channel
- Korok Seed 396 Game Guides Channel
- Korok Seed 397 Game Guides Channel
- Korok Seed 398 Game Guides Channel
- Korok Seed 399 Game Guides Channel
- Korok Seed 400 Game Guides Channel
- Korok Seed 401 Game Guides Channel
- Korok Seed 402 Game Guides Channel
- Korok Seed 403 Game Guides Channel
- Korok Seed 404 Game Guides Channel
- Korok Seed 405 Game Guides Channel
- Korok Seed 406 Game Guides Channel
- Korok Seed 407 Game Guides Channel
- Korok Seed 408 Game Guides Channel
- Korok Seed 409 Game Guides Channel
- Korok Seed 410 Game Guides Channel
- Korok Seed 411 Game Guides Channel
- Korok Seed 412 Game Guides Channel
- Korok Seed 413 Game Guides Channel
- Korok Seed 414 Game Guides Channel
- Korok Seed 415 Game Guides Channel
- Korok Seed 416 Game Guides Channel
- Korok Seed 417 Game Guides Channel
- Korok Seed 418 Game Guides Channel
- Korok Seed 419 Game Guides Channel
- Korok Seed 420 Game Guides Channel
- Korok Seed 421 Game Guides Channel
- Korok Seed 422 Game Guides Channel
- Korok Seed 423 Game Guides Channel
- Korok Seed 424 Game Guides Channel
- Korok Seed 425 Game Guides Channel
- Korok Seed 426 Game Guides Channel
- Korok Seed 427 Game Guides Channel
- Korok Seed 428 Game Guides Channel
- Korok Seed 429 Game Guides Channel
- Korok Seed 430 Game Guides Channel
- Korok Seed 431 Game Guides Channel
- Korok Seed 432 Game Guides Channel
- Korok Seed 433 Game Guides Channel
- Korok Seed 434 Game Guides Channel
- Korok Seed 435 Game Guides Channel
- Korok Seed 436 Game Guides Channel
- Korok Seed 437 Game Guides Channel
- Korok Seed 438 Game Guides Channel
- Korok Seed 439 Game Guides Channel
- Korok Seed 440 Game Guides Channel
- Korok Seed 441 Game Guides Channel
- Korok Seed 442 Game Guides Channel
- Korok Seed 443 Game Guides Channel
- Korok Seed 444 Game Guides Channel
- Korok Seed 445 Game Guides Channel
- Korok Seed 446 Game Guides Channel
- Korok Seed 447 Game Guides Channel
- Korok Seed 448 Game Guides Channel
- Korok Seed 449 Game Guides Channel
- Korok Seed 450 Game Guides Channel
- Korok Seed 451 Game Guides Channel
- Korok Seed 452 Game Guides Channel
- Korok Seed 453 Game Guides Channel
- Korok Seed 454 Game Guides Channel
- Korok Seed 455 Game Guides Channel
- Korok Seed 456 Game Guides Channel
- Korok Seed 457 Game Guides Channel
- Korok Seed 458 Game Guides Channel
- Korok Seed 459 Game Guides Channel
- Korok Seed 460 Game Guides Channel
- Korok Seed 461 Game Guides Channel
- Korok Seed 462 Game Guides Channel
- Korok Seed 463 Game Guides Channel
- Korok Seed 464 Game Guides Channel
- Korok Seed 465 Game Guides Channel
- Korok Seed 466 Game Guides Channel
- Korok Seed 467 Game Guides Channel
- Korok Seed 468 Game Guides Channel
- Korok Seed 469 Game Guides Channel
- Korok Seed 470 Game Guides Channel
- Korok Seed 471 Game Guides Channel
- Korok Seed 472 Game Guides Channel
- Korok Seed 473 Game Guides Channel
- Korok Seed 474 Game Guides Channel
- Korok Seed 475 Game Guides Channel
- Korok Seed 476 Game Guides Channel
- Korok Seed 477 Game Guides Channel
- Korok Seed 478 Game Guides Channel
- Korok Seed 479 Game Guides Channel
- Korok Seed 480 Game Guides Channel
- Korok Seed 481 Game Guides Channel
- Korok Seed 482 Game Guides Channel
- Korok Seed 483 Game Guides Channel
- Korok Seed 484 Game Guides Channel
- Korok Seed 485 Game Guides Channel
- Korok Seed 486 Game Guides Channel
- Korok Seed 487 Game Guides Channel
- Korok Seed 488 Game Guides Channel
- Korok Seed 489 Game Guides Channel
- Korok Seed 490 Game Guides Channel
- Korok Seed 491 Game Guides Channel
- Korok Seed 492 Game Guides Channel
- Korok Seed 493 Game Guides Channel
- Korok Seed 494 Game Guides Channel
- Korok Seed 495 Game Guides Channel
- Korok Seed 496 Game Guides Channel
- Korok Seed 497 Game Guides Channel
- Korok Seed 498 Game Guides Channel
- Korok Seed 499 Game Guides Channel
- Korok Seed 500 Game Guides Channel
- Korok Seed 501 Game Guides Channel
- Korok Seed 502 Game Guides Channel
- Korok Seed 503 Game Guides Channel
- Korok Seed 504 Game Guides Channel
- Korok Seed 505 Game Guides Channel
- Korok Seed 506 Game Guides Channel
- Korok Seed 507 Game Guides Channel
- Korok Seed 508 Game Guides Channel
- Korok Seed 509 Game Guides Channel
- Korok Seed 510 Game Guides Channel
- Korok Seed 511 Game Guides Channel
- Korok Seed 512 Game Guides Channel
- Korok Seed 513 Game Guides Channel
- Korok Seed 514 Game Guides Channel
- Korok Seed 515 Game Guides Channel
- Korok Seed 516 Game Guides Channel
- Korok Seed 517 Game Guides Channel
- Korok Seed 518 Game Guides Channel
- Korok Seed 519 Game Guides Channel
- Korok Seed 520 Game Guides Channel
- Korok Seed 521 Game Guides Channel
- Korok Seed 522 Game Guides Channel
- Korok Seed 523 Game Guides Channel
- Korok Seed 524 Game Guides Channel
- Korok Seed 525 Game Guides Channel
- Korok Seed 526 Game Guides Channel
- Korok Seed 527 Game Guides Channel
- Korok Seed 528 Game Guides Channel
- Korok Seed 529 Game Guides Channel
- Korok Seed 530 Game Guides Channel
- Korok Seed 531 Game Guides Channel
- Korok Seed 532 Game Guides Channel
- Korok Seed 533 Game Guides Channel
- Korok Seed 534 Game Guides Channel
- Korok Seed 535 Game Guides Channel
- Korok Seed 536 Game Guides Channel
- Korok Seed 537 Game Guides Channel
- Korok Seed 538 Game Guides Channel
- Korok Seed 539 Game Guides Channel
- Korok Seed 540 Game Guides Channel
- Korok Seed 541 Game Guides Channel
- Korok Seed 542 Game Guides Channel
- Korok Seed 543 Game Guides Channel
- Korok Seed 544 Game Guides Channel
- Korok Seed 545 Game Guides Channel
- Korok Seed 546 Game Guides Channel
- Korok Seed 547 Game Guides Channel
- Korok Seed 548 Game Guides Channel
- Korok Seed 549 Game Guides Channel
- Korok Seed 550 Game Guides Channel
- Korok Seed 551 Game Guides Channel
- Korok Seed 552 Game Guides Channel
- Korok Seed 553 Game Guides Channel
- Korok Seed 554 Game Guides Channel
- Korok Seed 555 Game Guides Channel
- Korok Seed 556 Game Guides Channel
- Korok Seed 557 Game Guides Channel
- Korok Seed 558 Game Guides Channel
- Korok Seed 559 Game Guides Channel
- Korok Seed 560 Game Guides Channel
- Korok Seed 561 Game Guides Channel
- Korok Seed 562 Game Guides Channel
- Korok Seed 563 Game Guides Channel
- Korok Seed 564 Game Guides Channel
- Korok Seed 565 Game Guides Channel
- Korok Seed 566 Game Guides Channel
- Korok Seed 567 Game Guides Channel
- Korok Seed 568 Game Guides Channel
- Korok Seed 569 Game Guides Channel
- Korok Seed 570 Game Guides Channel
- Korok Seed 571 Game Guides Channel
- Korok Seed 572 Game Guides Channel
- Korok Seed 573 Game Guides Channel
- Korok Seed 574 Game Guides Channel
- Korok Seed 575 Game Guides Channel
- Korok Seed 576 Game Guides Channel
- Korok Seed 577 Game Guides Channel
- Korok Seed 578 Game Guides Channel
- Korok Seed 579 Game Guides Channel
- Korok Seed 580 Game Guides Channel
- Korok Seed 581 Game Guides Channel
- Korok Seed 582 Game Guides Channel
- Korok Seed 583 Game Guides Channel
- Korok Seed 584 Game Guides Channel
- Korok Seed 585 Game Guides Channel
- Korok Seed 586 Game Guides Channel
- Korok Seed 587 Game Guides Channel
- Korok Seed 588 Game Guides Channel
- Korok Seed 589 Game Guides Channel
- Korok Seed 590 Game Guides Channel
- Korok Seed 591 Game Guides Channel
- Korok Seed 592 Game Guides Channel
- Korok Seed 593 Game Guides Channel
- Korok Seed 594 Game Guides Channel
- Korok Seed 595 Game Guides Channel
- Korok Seed 596 Game Guides Channel
- Korok Seed 597 Game Guides Channel
- Korok Seed 598 Game Guides Channel
- Korok Seed 599 Game Guides Channel
- Korok Seed 600 Game Guides Channel
- Korok Seed 601 Game Guides Channel
- Korok Seed 602 Game Guides Channel
- Korok Seed 603 Game Guides Channel
- Korok Seed 604 Game Guides Channel
- Korok Seed 605 Game Guides Channel
- Korok Seed 606 Game Guides Channel
- Korok Seed 607 Game Guides Channel
- Korok Seed 608 Game Guides Channel
- Korok Seed 609 Game Guides Channel
- Korok Seed 610 Game Guides Channel
- Korok Seed 611 Game Guides Channel
- Korok Seed 612 Game Guides Channel
- Korok Seed 613 Game Guides Channel
- Korok Seed 614 Game Guides Channel
- Korok Seed 615 Game Guides Channel
- Korok Seed 616 Game Guides Channel
- Korok Seed 617 Game Guides Channel
- Korok Seed 618 Game Guides Channel
- Korok Seed 619 Game Guides Channel
- Korok Seed 620 Game Guides Channel
- Korok Seed 621 Game Guides Channel
- Korok Seed 622 Game Guides Channel
- Korok Seed 623 Game Guides Channel
- Korok Seed 624 Game Guides Channel
- Korok Seed 625 Game Guides Channel
- Korok Seed 626 Game Guides Channel
- Korok Seed 627 Game Guides Channel
- Korok Seed 628 Game Guides Channel
- Korok Seed 629 Game Guides Channel
- Korok Seed 630 Game Guides Channel
- Korok Seed 631 Game Guides Channel
- Korok Seed 632 Game Guides Channel
- Korok Seed 633 Game Guides Channel
- Korok Seed 634 Game Guides Channel
- Korok Seed 635 Game Guides Channel
- Korok Seed 636 Game Guides Channel
- Korok Seed 637 Game Guides Channel
- Korok Seed 638 Game Guides Channel
- Korok Seed 639 Game Guides Channel
- Korok Seed 640 Game Guides Channel
- Korok Seed 641 Game Guides Channel
- Korok Seed 642 Game Guides Channel
- Korok Seed 643 Game Guides Channel
- Korok Seed 644 Game Guides Channel
- Korok Seed 645 Game Guides Channel
- Korok Seed 646 Game Guides Channel
- Korok Seed 647 Game Guides Channel
- Korok Seed 648 Game Guides Channel
- Korok Seed 649 Game Guides Channel
- Korok Seed 650 Game Guides Channel
- Korok Seed 651 Game Guides Channel
- Korok Seed 652 Game Guides Channel
- Korok Seed 653 Game Guides Channel
- Korok Seed 654 Game Guides Channel
- Korok Seed 655 Game Guides Channel
- Korok Seed 656 Game Guides Channel
- Korok Seed 657 Game Guides Channel
- Korok Seed 658 Game Guides Channel
- Korok Seed 659 Game Guides Channel
- Korok Seed 660 Game Guides Channel
- Korok Seed 661 Game Guides Channel
- Korok Seed 662 Game Guides Channel
- Korok Seed 663 Game Guides Channel
- Korok Seed 664 Game Guides Channel
- Korok Seed 665 Game Guides Channel
- Korok Seed 666 Game Guides Channel
- Korok Seed 667 Game Guides Channel
- Korok Seed 668 Game Guides Channel
- Korok Seed 669 Game Guides Channel
- Korok Seed 670 Game Guides Channel
- Korok Seed 671 Game Guides Channel
- Korok Seed 672 Game Guides Channel
- Korok Seed 673 Game Guides Channel
- Korok Seed 674 Game Guides Channel
- Korok Seed 675 Game Guides Channel
- Korok Seed 676 Game Guides Channel
- Korok Seed 677 Game Guides Channel
- Korok Seed 678 Game Guides Channel
- Korok Seed 679 Game Guides Channel
- Korok Seed 680 Game Guides Channel
- Korok Seed 681 Game Guides Channel
- Korok Seed 682 Game Guides Channel
- Korok Seed 683 Game Guides Channel
- Korok Seed 684 Game Guides Channel
- Korok Seed 685 Game Guides Channel
- Korok Seed 686 Game Guides Channel
- Korok Seed 687 Game Guides Channel
- Korok Seed 688 Game Guides Channel
- Korok Seed 689 Game Guides Channel
- Korok Seed 690 Game Guides Channel
- Korok Seed 691 Game Guides Channel
- Korok Seed 692 Game Guides Channel
- Korok Seed 693 Game Guides Channel
- Korok Seed 694 Game Guides Channel
- Korok Seed 695 Game Guides Channel
- Korok Seed 696 Game Guides Channel
- Korok Seed 697 Game Guides Channel
- Korok Seed 698 Game Guides Channel
- Korok Seed 699 Game Guides Channel
- Korok Seed 700 Game Guides Channel
- Korok Seed 701 Game Guides Channel
- Korok Seed 702 Game Guides Channel
- Korok Seed 703 Game Guides Channel
- Korok Seed 704 Game Guides Channel
- Korok Seed 705 Game Guides Channel
- Korok Seed 706 Game Guides Channel
- Korok Seed 707 Game Guides Channel
- Korok Seed 708 Game Guides Channel
- Korok Seed 709 Game Guides Channel
- Korok Seed 710 Game Guides Channel
- Korok Seed 711 Game Guides Channel
- Korok Seed 712 Game Guides Channel
- Korok Seed 713 Game Guides Channel
- Korok Seed 714 Game Guides Channel
- Korok Seed 715 Game Guides Channel
- Korok Seed 716 Game Guides Channel
- Korok Seed 717 Game Guides Channel
- Korok Seed 718 Game Guides Channel
- Korok Seed 719 Game Guides Channel
- Korok Seed 720 Game Guides Channel
- Korok Seed 721 Game Guides Channel
- Korok Seed 722 Game Guides Channel
- Korok Seed 723 Game Guides Channel
- Korok Seed 724 Game Guides Channel
- Korok Seed 725 Game Guides Channel
- Korok Seed 726 Game Guides Channel
- Korok Seed 728 Game Guides Channel
- Korok Seed 729 Game Guides Channel
- Korok Seed 730 Game Guides Channel
- Korok Seed 731 Game Guides Channel
- Korok Seed 732 Game Guides Channel
- Korok Seed 733 Game Guides Channel
- Korok Seed 734 Game Guides Channel
- Korok Seed 735 Game Guides Channel
- Korok Seed 727 Game Guides Channel
- Korok Seed 736 Game Guides Channel
- Korok Seed 737 Game Guides Channel
- Korok Seed 738 Game Guides Channel
- Korok Seed 739 Game Guides Channel
- Korok Seed 740 Game Guides Channel
- Korok Seed 741 Game Guides Channel
- Korok Seed 742 Game Guides Channel
- Korok Seed 743 Game Guides Channel
- Korok Seed 744 Game Guides Channel
- Korok Seed 745 Game Guides Channel
- Korok Seed 746 Game Guides Channel
- Korok Seed 747 Game Guides Channel
- Korok Seed 748 Game Guides Channel
- Korok Seed 749 Game Guides Channel
- Korok Seed 750 Game Guides Channel
- Korok Seed 751 Game Guides Channel
- Korok Seed 752 Game Guides Channel
- Korok Seed 753 Game Guides Channel
- Korok Seed 754 Game Guides Channel
- Korok Seed 755 Game Guides Channel
- Korok Seed 756 Game Guides Channel
- Korok Seed 757 Game Guides Channel
- Korok Seed 758 Game Guides Channel
- Korok Seed 759 Game Guides Channel
- Korok Seed 760 Game Guides Channel
- Korok Seed 761 Game Guides Channel
- Korok Seed 762 Game Guides Channel
- Korok Seed 763 Game Guides Channel
- Korok Seed 764 Game Guides Channel
- Korok Seed 765 Game Guides Channel
- Korok Seed 766 Game Guides Channel
- Korok Seed 767 Game Guides Channel
- Korok Seed 768 Game Guides Channel
- Korok Seed 769 Game Guides Channel
- Korok Seed 770 Game Guides Channel
- Korok Seed 771 Game Guides Channel
- Korok Seed 772 Game Guides Channel
- Korok Seed 773 Game Guides Channel
- Korok Seed 774 Game Guides Channel
- Korok Seed 775 Game Guides Channel
- Korok Seed 776 Game Guides Channel
- Korok Seed 777 Game Guides Channel
- Korok Seed 778 Game Guides Channel
- Korok Seed 779 Game Guides Channel
- Korok Seed 780 Game Guides Channel
- Korok Seed 781 Game Guides Channel
- Korok Seed 782 Game Guides Channel
- Korok Seed 783 Game Guides Channel
- Korok Seed 784 Game Guides Channel
- Korok Seed 785 Game Guides Channel
- Korok Seed 786 Game Guides Channel
- Korok Seed 787 Game Guides Channel
- Korok Seed 788 Game Guides Channel
- Korok Seed 789 Game Guides Channel
- Korok Seed 790 Game Guides Channel
- Korok Seed 791 Game Guides Channel
- Korok Seed 792 Game Guides Channel
- Korok Seed 793 Game Guides Channel
- Korok Seed 794 Game Guides Channel
- Korok Seed 795 Game Guides Channel
- Korok Seed 796 Game Guides Channel
- Korok Seed 797 Game Guides Channel
- Korok Seed 798 Game Guides Channel
- Korok Seed 799 Game Guides Channel
- Korok Seed 800 Game Guides Channel
- Korok Seed 801 Game Guides Channel
- Korok Seed 802 Game Guides Channel
- Korok Seed 803 Game Guides Channel
- Korok Seed 804 Game Guides Channel
- Korok Seed 805 Game Guides Channel
- Korok Seed 806 Game Guides Channel
- Korok Seed 807 Game Guides Channel
- Korok Seed 808 Game Guides Channel
- Korok Seed 809 Game Guides Channel
- Korok Seed 810 Game Guides Channel
- Korok Seed 811 Game Guides Channel
- Korok Seed 812 Game Guides Channel
- Korok Seed 813 Game Guides Channel
- Korok Seed 814 Game Guides Channel
- Korok Seed 815 Game Guides Channel
- Korok Seed 816 Game Guides Channel
- Korok Seed 817 Game Guides Channel
- Korok Seed 818 Game Guides Channel
- Korok Seed 819 Game Guides Channel
- Korok Seed 820 Game Guides Channel
- Korok Seed 821 Game Guides Channel
- Korok Seed 822 Game Guides Channel
- Korok Seed 823 Game Guides Channel
- Korok Seed 824 Game Guides Channel
- Korok Seed 825 Game Guides Channel
- Korok Seed 826 Game Guides Channel
- Korok Seed 827 Game Guides Channel
- Korok Seed 828 Game Guides Channel
- Korok Seed 829 Game Guides Channel
- Korok Seed 830 Game Guides Channel
- Korok Seed 831 Game Guides Channel
- Korok Seed 832 Game Guides Channel
- Korok Seed 833 Game Guides Channel
- Korok Seed 834 Game Guides Channel
- Korok Seed 835 Game Guides Channel
- Korok Seed 836 Game Guides Channel
- Korok Seed 837 Game Guides Channel
- Korok Seed 838 Game Guides Channel
- Korok Seed 839 Game Guides Channel
- Korok Seed 840 Game Guides Channel
- Korok Seed 841 Game Guides Channel
- Korok Seed 842 Game Guides Channel
- Korok Seed 843 Game Guides Channel
- Korok Seed 844 Game Guides Channel
- Korok Seed 845 Game Guides Channel
- Korok Seed 846 Game Guides Channel
- Korok Seed 847 Game Guides Channel
- Korok Seed 848 Game Guides Channel
- Korok Seed 849 Game Guides Channel
- Korok Seed 850 Game Guides Channel
- Korok Seed 851 Game Guides Channel
- Korok Seed 852 Game Guides Channel
- Korok Seed 853 Game Guides Channel
- Korok Seed 854 Game Guides Channel
- Korok Seed 855 Game Guides Channel
- Korok Seed 856 Game Guides Channel
- Korok Seed 857 Game Guides Channel
- Korok Seed 858 Game Guides Channel
- Korok Seed 859 Game Guides Channel
- Korok Seed 860 Game Guides Channel
- Korok Seed 861 Game Guides Channel
- Korok Seed 862 Game Guides Channel
- Korok Seed 863 Game Guides Channel
- Korok Seed 864 Game Guides Channel
- Korok Seed 865 Game Guides Channel
- Korok Seed 866 Game Guides Channel
- Korok Seed 867 Game Guides Channel
- Korok Seed 868 Game Guides Channel
- Korok Seed 869 Game Guides Channel
- Korok Seed 870 Game Guides Channel
- Korok Seed 871 Game Guides Channel
- Korok Seed 872 Game Guides Channel
- Korok Seed 873 Game Guides Channel
- Korok Seed 874 Game Guides Channel
- Korok Seed 875 Game Guides Channel
- Korok Seed 876 Game Guides Channel
- Korok Seed 877 Game Guides Channel
- Korok Seed 878 Game Guides Channel
- Korok Seed 879 Game Guides Channel
- Korok Seed 880 Game Guides Channel
- Korok Seed 881 Game Guides Channel
- Korok Seed 882 Game Guides Channel
- Korok Seed 883 Game Guides Channel
- Korok Seed 884 Game Guides Channel
- Korok Seed 885 Game Guides Channel
- Korok Seed 886 Game Guides Channel
- Korok Seed 887 Game Guides Channel
- Korok Seed 888 Game Guides Channel
- Korok Seed 889 Game Guides Channel
- Korok Seed 890 Game Guides Channel
- Korok Seed 891 Game Guides Channel
- Korok Seed 892 Game Guides Channel
- Korok Seed 893 Game Guides Channel
- Korok Seed 894 Game Guides Channel
- Korok Seed 895 Game Guides Channel
- Korok Seed 896 Game Guides Channel
- Korok Seed 897 Game Guides Channel
- Korok Seed 898 Game Guides Channel
- Korok Seed 899 Game Guides Channel
- Korok Seed 900 Game Guides Channel
- Korok Seed 901 Game Guides Channel
- Korok Seed 902 Game Guides Channel
- Korok Seed 903 Game Guides Channel
- Korok Seed 904 Game Guides Channel
- Korok Seed 905 Game Guides Channel
- Korok Seed 906 Game Guides Channel
- Korok Seed 907 Game Guides Channel
- Korok Seed 908 Game Guides Channel
- Korok Seed 909 Game Guides Channel
- Korok Seed 910 Game Guides Channel
- Korok Seed 911 Game Guides Channel
- Korok Seed 912 Game Guides Channel
- Korok Seed 913 Game Guides Channel
- Korok Seed 914 Game Guides Channel
- Korok Seed 915 Game Guides Channel
- Korok Seed 916 Game Guides Channel
- Korok Seed 917 Game Guides Channel
- Korok Seed 918 Game Guides Channel
- Korok Seed 919 Game Guides Channel
- Korok Seed 920 Game Guides Channel
- Korok Seed 921 Game Guides Channel
- Korok Seed 922 Game Guides Channel
- Korok Seed 923 Game Guides Channel
- Korok Seed 924 Game Guides Channel
- Korok Seed 925 Game Guides Channel
- Korok Seed 926 Game Guides Channel
- Korok Seed 927 Game Guides Channel
- Korok Seed 928 Game Guides Channel
- Korok Seed 929 Game Guides Channel
- Korok Seed 930 Game Guides Channel
- Korok Seed 931 Game Guides Channel
- Korok Seed 932 Game Guides Channel
- Korok Seed 933 Game Guides Channel
- Korok Seed 934 Game Guides Channel
- Korok Seed 935 Game Guides Channel
- Korok Seed 936 Game Guides Channel
- Korok Seed 937 Game Guides Channel
- Korok Seed 938 Game Guides Channel
- Korok Seed 939 Game Guides Channel
- Korok Seed 940 Game Guides Channel
- Korok Seed 941 Game Guides Channel
- Korok Seed 942 Game Guides Channel
- Korok Seed 943 Game Guides Channel
- Korok Seed 944 Game Guides Channel
- Korok Seed 945 Game Guides Channel
- Korok Seed 946 Game Guides Channel
- Korok Seed 947 Game Guides Channel
- Korok Seed 948 Game Guides Channel
- Korok Seed 949 Game Guides Channel
- Korok Seed 950 Game Guides Channel
- Korok Seed 951 Game Guides Channel
- Korok Seed 952 Game Guides Channel
- Korok Seed 953 Game Guides Channel
- Korok Seed 954 Game Guides Channel
- Korok Seed 955 Game Guides Channel
- Korok Seed 956 Game Guides Channel
- Korok Seed 957 Game Guides Channel
- Korok Seed 958 Game Guides Channel
- Korok Seed 959 Game Guides Channel
- Korok Seed 960 Game Guides Channel
- Korok Seed 961 Game Guides Channel
- Korok Seed 962 Game Guides Channel
- Korok Seed 963 Game Guides Channel
- Korok Seed 964 Game Guides Channel
- Korok Seed 965 Game Guides Channel
- Korok Seed 966 Game Guides Channel
- Korok Seed 967 Game Guides Channel
- Korok Seed 968 Game Guides Channel
- Korok Seed 969 Game Guides Channel
- Korok Seed 970 Game Guides Channel
- Korok Seed 971 Game Guides Channel
- Korok Seed 972 Game Guides Channel
- Korok Seed 973 Game Guides Channel
- Korok Seed 974 Game Guides Channel
- Korok Seed 975 Game Guides Channel
- Korok Seed 976 Game Guides Channel
- Korok Seed 977 Game Guides Channel
- Korok Seed 978 Game Guides Channel
- Korok Seed 979 Game Guides Channel
- Korok Seed 980 Game Guides Channel
- Korok Seed 981 Game Guides Channel
- Korok Seed 982 Game Guides Channel
- Korok Seed 983 Game Guides Channel
- Korok Seed 984 Game Guides Channel
- Korok Seed 985 Game Guides Channel
- Korok Seed 986 Game Guides Channel
- Korok Seed 987 Game Guides Channel
- Korok Seed 988 Game Guides Channel
- Korok Seed 989 Game Guides Channel
- Korok Seed 990 Game Guides Channel
- Korok Seed 991 Game Guides Channel
- Korok Seed 992 Game Guides Channel
- Korok Seed 993 Game Guides Channel
- Korok Seed 994 Game Guides Channel
- Korok Seed 995 Game Guides Channel
- Korok Seed 996 Game Guides Channel
- Korok Seed 997 Game Guides Channel
- Korok Seed 998 Game Guides Channel
- Korok Seed 999 Game Guides Channel
- Korok Seed 1000 Game Guides Channel
100% Guides · Bubbul Gems, Caves
100% Guides 294 pick-ups
- Bubbul Gem: Pondside Cave 100% Guides
- Bubbul Gem: Mining Cave 100% Guides
- Bubbul Gem: Pit Cave 100% Guides
- Bubbul Gem: Bottomless Cave 100% Guides
- Bubbul Gem: Royal Hidden Passage 100% Guides
- Bubbul Gem: Crenel Hills Cave 100% Guides
- Bubbul Gem: Crenel Peak Cave 100% Guides
- Bubbul Gem: Rebonae Bridge Cave 100% Guides
- Bubbul Gem: Ranch Ruins Cave 100% Guides
- Bubbul Gem: Passeri Greenbelt Cave 100% Guides
- Bubbul Gem: Ancient Tree Stump Cave 100% Guides
- Bubbul Gem: Sage Temple Cave 100% Guides
- Bubbul Gem: North Hyrule Plain Cave 100% Guides
- Bubbul Gem: Thundra Plateau Cave 100% Guides
- Bubbul Gem: Tanagar Canyon East Cave 100% Guides
- Bubbul Gem: Lindor's Brow Cave 100% Guides
- Bubbul Gem: Yiga Clan Maritta Branch 100% Guides
- Bubbul Gem: Mount Drena Foothill Cave 100% Guides
- Bubbul Gem: Pikida Stonegrove Northwest Cave 100% Guides
- Bubbul Gem: Hebra Mountains Northwest Cave 100% Guides
- Bubbul Gem: Hebra Great Skeleton 100% Guides
- Bubbul Gem: Icefall Foothills Cave 100% Guides
- Bubbul Gem: North Biron Snowshelf Cave 100% Guides
- Bubbul Gem: Lake Kilsie Cave 100% Guides
- Bubbul Gem: Sturnida Springs Cave 100% Guides
- Bubbul Gem: East Biron Snowshelf Cave 100% Guides
- Bubbul Gem: West Lake Totori Cave 100% Guides
- Bubbul Gem: Rospro Pass Cave 100% Guides
- Bubbul Gem: Hebra South Summit Cave 100% Guides
- Bubbul Gem: Talonto Peak Cave 100% Guides
- Bubbul Gem: Hebra Headspring Cave 100% Guides
- Bubbul Gem: Kopeeki Drifts Cave 100% Guides
- Bubbul Gem: Tabantha Hills Cave 100% Guides
- Bubbul Gem: Brightcap Cave 100% Guides
- Bubbul Gem: Gisa Crater Cave 100% Guides
- Bubbul Gem: Tanagar Canyon West Cave 100% Guides
- Bubbul Gem: Ancient Columns Cave 100% Guides
- Bubbul Gem: Satori Mountain Cave 100% Guides
- Bubbul Gem: Satori Mountain Foothill Cave 100% Guides
- Bubbul Gem: Tamio River Downstream Cave 100% Guides
- Bubbul Gem: Statue Of The Eighth Heroine Cave 100% Guides
- Bubbul Gem: Mystathi's Shelf Cave 100% Guides
- Bubbul Gem: Meadela's Mantle Cave 100% Guides
- Bubbul Gem: West Gerudo Underground Ruins 100% Guides
- Bubbul Gem: Gerudo Great Skeleton 100% Guides
- Bubbul Gem: Central Gerudo Cave 100% Guides
- Bubbul Gem: South Gerudo Cave 100% Guides
- Bubbul Gem: Ancient Altar Ruins 100% Guides
- Bubbul Gem: Ancient Prison Ruins 100% Guides
- Bubbul Gem: Quicksand Lake Cave 100% Guides
- Bubbul Gem: Gerudo Sanctuary 100% Guides
- Bubbul Gem: Valley Of Silent Statues 100% Guides
- Bubbul Gem: Oasis Source 100% Guides
- Bubbul Gem: East Gerudo Ruins 100% Guides
- Bubbul Gem: Gerudo Canyon Mine 100% Guides
- Bubbul Gem: Spectacle Rock Cave 100% Guides
- Bubbul Gem: Yiga Blademaster Station 100% Guides
- Bubbul Gem: Taafei Hill Cave 100% Guides
- Bubbul Gem: Koukot Plateau cave 100% Guides
- Bubbul Gem: Mount Nabooru Cave 100% Guides
- Bubbul Gem: Mount Nabooru South Cave 100% Guides
- Bubbul Gem: Lower Spectacle Rock Cave 100% Guides
- Bubbul Gem: Stalry Plateau Cave 100% Guides
- Bubbul Gem: River Of The Dead Waterfall Cave 100% Guides
- Bubbul Gem: Shrine Of Resurrection 100% Guides
- Bubbul Gem: Great Plateau Foothill Cave 100% Guides
- Bubbul Gem: Coliseum Ruins Cave 100% Guides
- Bubbul Gem: Whistling Hill Cave 100% Guides
- Bubbul Gem: Cora Lakefront Cave 100% Guides
- Bubbul Gem: Puffer Beach Overhead Cave 100% Guides
- Bubbul Gem: Como Shoreline Cave 100% Guides
- Bubbul Gem: Pagos Woods Excavation Site 100% Guides
- Bubbul Gem: Floria River Upstream Excavation 100% Guides
- Bubbul Gem: Finra Woods Excavation Site 100% Guides
- Bubbul Gem: Lake Hylia Whirlpool Cave 100% Guides
- Bubbul Gem: Popla Foothills Excavation Site 100% Guides
- Bubbul Gem: Dueling Peaks North Cave 100% Guides
- Bubbul Gem: Dueling Peaks South Cave 100% Guides
- Bubbul Gem: Tobio's Hollow Cave 100% Guides
- Bubbul Gem: Mount Floria Cave 100% Guides
- Bubbul Gem: Sarjon Woods Cave 100% Guides
- Bubbul Gem: Corta Lake Cave 100% Guides
- Bubbul Gem: Calora Lake Cave 100% Guides
- Bubbul Gem: Rodai Lakefront Tunnel 100% Guides
- Bubbul Gem: Ubota Point Cave 100% Guides
- Bubbul Gem: Rassla Lake Cave 100% Guides
- Bubbul Gem: Atun Valley Cave 100% Guides
- Bubbul Gem: Mount Dunsel Cave 100% Guides
- Bubbul Gem: Cape Cales Cliffbase Cave 100% Guides
- Bubbul Gem: Eventide Island Cave 100% Guides
- Bubbul Gem: Oakle's Navel 100% Guides
- Bubbul Gem: Retsam Forest Cave 100% Guides
- Bubbul Gem: Deepback Bay Cave 100% Guides
- Bubbul Gem: Mapla Point Cave 100% Guides
- Bubbul Gem: Walnot Mountain Cave 100% Guides
- Bubbul Gem: Lanayru Road East Cave 100% Guides
- Bubbul Gem: Lanayru Road South Cave 100% Guides
- Bubbul Gem: Robred Dropoff Cave 100% Guides
- Bubbul Gem: Fort Hateno Cave 100% Guides
- Bubbul Gem: Cucco Hideaway 100% Guides
- Bubbul Gem: Sahasra Slope Cave 100% Guides
- Bubbul Gem: Byroad To Lanayru Wetlands 100% Guides
- Bubbul Gem: Kakariko Village Cave 100% Guides
- Bubbul Gem: Bone Pond East Cave 100% Guides
- Bubbul Gem: Tabahl Woods Cave 100% Guides
- Bubbul Gem: Oren Bridge Cave 100% Guides
- Bubbul Gem: Luto's Channel 100% Guides
- Bubbul Gem: Horon Lagoon Cave 100% Guides
- Bubbul Gem: Tarm Point Cave 100% Guides
- Bubbul Gem: Ulria Grotto East Cave 100% Guides
- Bubbul Gem: Ulria Grotto South Cave 100% Guides
- Bubbul Gem: Reservoir Lakefront Cavern 100% Guides
- Bubbul Gem: Pristine Sanctum 100% Guides
- Bubbul Gem: Ploymus Mountain Cave 100% Guides
- Bubbul Gem: Ancient Zora Waterworks 100% Guides
- Bubbul Gem: Cave Under Zora's Domain 100% Guides
- Bubbul Gem: Ralis Channel 100% Guides
- Bubbul Gem: Upland Zorana Summit Cave 100% Guides
- Bubbul Gem: Upland Zorana Byroad 100% Guides
- Bubbul Gem: Upland Zorana Mountainside Cave 100% Guides
- Bubbul Gem: Upland Zorana Foothill Cave 100% Guides
- Bubbul Gem: Tarrey Town Tunnel 100% Guides
- Bubbul Gem: Construction Site Cave 100% Guides
- Bubbul Gem: Akkala Citadel Ruins Summit Cave 100% Guides
- Bubbul Gem: Akkala Citadel Ruins Cave 100% Guides
- Bubbul Gem: Cephla Lake Cave 100% Guides
- Bubbul Gem: Lake Ferona Cave 100% Guides
- Bubbul Gem: Pico Pond Cave 100% Guides
- Bubbul Gem: Rauru Hillside Cave 100% Guides
- Bubbul Gem: Foorhill Monster Den 100% Guides
- Bubbul Gem: Lake Intenoch Cave 100% Guides
- Bubbul Gem: Gorko Tunnel 100% Guides
- Bubbul Gem: Southern Mine 100% Guides
- Bubbul Gem: East Restaurant Cave 100% Guides
- Bubbul Gem: West Restaurant Cave 100% Guides
- Bubbul Gem: Goronbi River Cave 100% Guides
- Bubbul Gem: YunoboCo HQ South Cave 100% Guides
- Bubbul Gem: YunoboCo HQ East Cave 100% Guides
- Bubbul Gem: Isle Of Rabac Gallery 100% Guides
- Bubbul Gem: Deplian Badlands Cave 100% Guides
- Bubbul Gem: Death Mountain Foothill Cave 100% Guides
- Bubbul Gem: Death Mountain West Tunnel 100% Guides
- Bubbul Gem: Lizard's Burrow 100% Guides
- Bubbul Gem: Lake Darman Monster Den 100% Guides
- Bubbul Gem: Death Mountain East Tunnel 100% Guides
- Bubbul Gem: Skull Lake Cave 100% Guides
- Bubbul Gem: North Akkala Beach Cave 100% Guides
- Pondside Cave 100% Guides
- Mining Cave 100% Guides
- Pit Cave 100% Guides
- Bottomless Cave 100% Guides
- Royal Hidden Passage 100% Guides
- Crenel Hills Cave 100% Guides
- Crenel Peak Cave 100% Guides
- Rebonae Bridge Cave 100% Guides
- Ranch Ruins Cave 100% Guides
- Passeri Greenbelt Cave 100% Guides
- Ancient Tree Stump Cave 100% Guides
- Sage Temple Cave 100% Guides
- North Hyrule Plain Cave 100% Guides
- Thundra Plateau Cave 100% Guides
- Tanagar Canyon East Cave 100% Guides
- Lindor's Brow Cave 100% Guides
- Yiga Clan Maritta Branch 100% Guides
- Mount Drena Foothill Cave 100% Guides
- Pikida Stonegrove Northwest Cave 100% Guides
- Hebra Mountains Northwest Cave 100% Guides
- Hebra Great Skeleton 100% Guides
- Icefall Foothills Cave 100% Guides
- North Biron Snowshelf Cave 100% Guides
- Lake Kilsie Cave 100% Guides
- Sturnida Springs Cave 100% Guides
- East Biron Snowshelf Cave 100% Guides
- West Lake Totori Cave 100% Guides
- Rospro Pass Cave 100% Guides
- Hebra South Summit Cave 100% Guides
- Talonto Peak Cave 100% Guides
- Hebra Headspring Cave 100% Guides
- Kopeeki Drifts Cave 100% Guides
- Tabantha Hills Cave 100% Guides
- Brightcap Cave 100% Guides
- Gisa Crater Cave 100% Guides
- Tanagar Canyon West Cave 100% Guides
- Ancient Columns Cave 100% Guides
- Satori Mountain Cave 100% Guides
- Satori Mountain Foothill Cave 100% Guides
- Tamio River Downstream Cave 100% Guides
- Statue Of The Eighth Heroine Cave 100% Guides
- Mystathi's Shelf Cave 100% Guides
- Meadela's Mantle Cave 100% Guides
- West Gerudo Underground Ruins 100% Guides
- Gerudo Great Skeleton 100% Guides
- Central Gerudo Cave 100% Guides
- South Gerudo Cave 100% Guides
- Ancient Altar Ruins 100% Guides
- Ancient Prison Ruins 100% Guides
- Quicksand Lake Cave 100% Guides
- Gerudo Sanctuary 100% Guides
- Valley Of Silent Statues 100% Guides
- Oasis Source 100% Guides
- East Gerudo Ruins 100% Guides
- Gerudo Canyon Mine 100% Guides
- Spectacle Rock Cave 100% Guides
- Yiga Blademaster Station 100% Guides
- Taafei Hill Cave 100% Guides
- Koukot Plateau cave 100% Guides
- Mount Nabooru Cave 100% Guides
- Mount Nabooru South Cave 100% Guides
- Lower Spectacle Rock Cave 100% Guides
- Stalry Plateau Cave 100% Guides
- River Of The Dead Waterfall Cave 100% Guides
- Shrine Of Resurrection 100% Guides
- Great Plateau Foothill Cave 100% Guides
- Coliseum Ruins Cave 100% Guides
- Whistling Hill Cave 100% Guides
- Cora Lakefront Cave 100% Guides
- Puffer Beach Overhead Cave 100% Guides
- Como Shoreline Cave 100% Guides
- Pagos Woods Excavation Site 100% Guides
- Floria River Upstream Excavation 100% Guides
- Finra Woods Excavation Site 100% Guides
- Lake Hylia Whirlpool Cave 100% Guides
- Popla Foothills Excavation Site 100% Guides
- Dueling Peaks North Cave 100% Guides
- Dueling Peaks South Cave 100% Guides
- Tobio's Hollow Cave 100% Guides
- Mount Floria Cave 100% Guides
- Sarjon Woods Cave 100% Guides
- Corta Lake Cave 100% Guides
- Calora Lake Cave 100% Guides
- Rodai Lakefront Tunnel 100% Guides
- Ubota Point Cave 100% Guides
- Rassla Lake Cave 100% Guides
- Atun Valley Cave 100% Guides
- Mount Dunsel Cave 100% Guides
- Cape Cales Cliffbase Cave 100% Guides
- Eventide Island Cave 100% Guides
- Oakle's Navel 100% Guides
- Retsam Forest Cave 100% Guides
- Deepback Bay Cave 100% Guides
- Mapla Point Cave 100% Guides
- Walnot Mountain Cave 100% Guides
- Lanayru Road East Cave 100% Guides
- Lanayru Road South Cave 100% Guides
- Robred Dropoff Cave 100% Guides
- Fort Hateno Cave 100% Guides
- Cucco Hideaway 100% Guides
- Sahasra Slope Cave 100% Guides
- Byroad To Lanayru Wetlands 100% Guides
- Kakariko Village Cave 100% Guides
- Bone Pond East Cave 100% Guides
- Tabahl Woods Cave 100% Guides
- Oren Bridge Cave 100% Guides
- Luto's Channel 100% Guides
- Horon Lagoon Cave 100% Guides
- Tarm Point Cave 100% Guides
- Ulria Grotto East Cave 100% Guides
- Ulria Grotto South Cave 100% Guides
- Reservoir Lakefront Cavern 100% Guides
- Pristine Sanctum 100% Guides
- Ploymus Mountain Cave 100% Guides
- Ancient Zora Waterworks 100% Guides
- Cave Under Zora's Domain 100% Guides
- Ralis Channel 100% Guides
- Upland Zorana Summit Cave 100% Guides
- Upland Zorana Byroad 100% Guides
- Upland Zorana Mountainside Cave 100% Guides
- Upland Zorana Foothill Cave 100% Guides
- Tarrey Town Tunnel 100% Guides
- Construction Site Cave 100% Guides
- Akkala Citadel Ruins Summit Cave 100% Guides
- Akkala Citadel Ruins Cave 100% Guides
- Cephla Lake Cave 100% Guides
- Lake Ferona Cave 100% Guides
- Pico Pond Cave 100% Guides
- Rauru Hillside Cave 100% Guides
- Foorhill Monster Den 100% Guides
- Lake Intenoch Cave 100% Guides
- Gorko Tunnel 100% Guides
- Southern Mine 100% Guides
- East Restaurant Cave 100% Guides
- West Restaurant Cave 100% Guides
- Goronbi River Cave 100% Guides
- YunoboCo HQ South Cave 100% Guides
- YunoboCo HQ East Cave 100% Guides
- Isle Of Rabac Gallery 100% Guides
- Deplian Badlands Cave 100% Guides
- Death Mountain Foothill Cave 100% Guides
- Death Mountain West Tunnel 100% Guides
- Lizard's Burrow 100% Guides
- Lake Darman Monster Den 100% Guides
- Death Mountain East Tunnel 100% Guides
- Skull Lake Cave 100% Guides
- North Akkala Beach Cave 100% Guides
Game Guides Channel · Wells
Game Guides Channel 58 pick-ups
- Dronoc’s Pass Well Game Guides Channel
- Tabantha Village Ruins Well Game Guides Channel
- Snowfield Stable Well Game Guides Channel
- Rowan Plain Well Game Guides Channel
- Irch Plain Well Game Guides Channel
- Elma Knolls Well Game Guides Channel
- Maritta Exchange Well Game Guides Channel
- Tabantha Bridge Stable Well Game Guides Channel
- New Serenne Stable Well Game Guides Channel
- Mount Gustaf Well Game Guides Channel
- Carok Bridge Well Game Guides Channel
- Hyrule Castle Town Ruins Well Game Guides Channel
- Lookout Landing Well Game Guides Channel
- Mabe Village Ruins Well Game Guides Channel
- Rebonae Bridge Well Game Guides Channel
- Wetland Stable South Well Game Guides Channel
- Wetland Stable Well Game Guides Channel
- Riverside Stable Well Game Guides Channel
- Bottomless Pond Well Game Guides Channel
- South Nabi Lake Well Game Guides Channel
- Popla Foothills North Well Game Guides Channel
- Popla Foothills South Well Game Guides Channel
- Hills of Baumer Well Game Guides Channel
- Deya Village Ruins South Well Game Guides Channel
- Deya Village Ruins Well Game Guides Channel
- Deya Village Ruins North Well Game Guides Channel
- Deya Village Ruins East Well Game Guides Channel
- Aquame Lake Well Game Guides Channel
- Mount Daphnes Well Game Guides Channel
- Outskirt Stable Well Game Guides Channel
- Outskirt Hill Well Game Guides Channel
- Mount Nabooru Well Game Guides Channel
- Gerudo Canyon Well Game Guides Channel
- Kara Kara Bazaar Well Game Guides Channel
- Highland Stable Well Game Guides Channel
- Haran Lakefront Well Game Guides Channel
- Lakeside Stable Well Game Guides Channel
- Lureflin Village Well Game Guides Channel
- Hateno Village East Well Game Guides Channel
- Hateno Village North Well Game Guides Channel
- Hateno Village West Well Game Guides Channel
- Hateno Village South Well Game Guides Channel
- Zelda’s Secret Well Game Guides Channel
- Dueling Peaks Stable Well Game Guides Channel
- Kakariko Village Well Game Guides Channel
- Rikoka Hills Well Game Guides Channel
- Goponga Village Ruins Well Game Guides Channel
- Lanayru Wetlands Well Game Guides Channel
- Zauz Island Well Game Guides Channel
- Moor Garrison Ruins Well Game Guides Channel
- Rauru Settlement Well Game Guides Channel
- Woodland Stable Well Game Guides Channel
- Tabahl Woods Well Game Guides Channel
- Foorhill Stable Well Game Guides Channel
- Shadow Hamlet Ruins Well Game Guides Channel
- South Akkala Stable Well Game Guides Channel
- Construction Site Well Game Guides Channel
- East Akkala Well Game Guides Channel
BeardBear · Armor pieces
BeardBear 108 pick-ups
- Armor piece 72 BeardBear
- Armor piece 71 BeardBear
- Armor piece 73 BeardBear
- Armor piece 68 BeardBear
- Armor piece 13 BeardBear
- Armor piece 14 BeardBear
- Armor piece 15 BeardBear
- Armor piece 22 BeardBear
- Armor piece 23 BeardBear
- Armor piece 24 BeardBear
- Armor piece 63 BeardBear
- Armor piece 107 BeardBear
- Armor piece 108 BeardBear
- Armor piece 106 BeardBear
- Armor piece 82 BeardBear
- Armor piece 35 BeardBear
- Armor piece 83 BeardBear
- Armor piece 36 BeardBear
- Armor piece 81 BeardBear
- Armor piece 34 BeardBear
- Armor piece 11 BeardBear
- Armor piece 10 BeardBear
- Armor piece 12 BeardBear
- Armor piece 7 BeardBear
- Armor piece 8 BeardBear
- Armor piece 9 BeardBear
- Armor piece 95 BeardBear
- Armor piece 94 BeardBear
- Armor piece 93 BeardBear
- Armor piece 3 BeardBear
- Armor piece 2 BeardBear
- Armor piece 1 BeardBear
- Armor piece 96 BeardBear
- Armor piece 105 BeardBear
- Armor piece 104 BeardBear
- Armor piece 103 BeardBear
- Armor piece 91 BeardBear
- Armor piece 90 BeardBear
- Armor piece 92 BeardBear
- Armor piece 20 BeardBear
- Armor piece 21 BeardBear
- Armor piece 19 BeardBear
- Armor piece 79 BeardBear
- Armor piece 77 BeardBear
- Armor piece 78 BeardBear
- Armor piece 66 BeardBear
- Armor piece 80 BeardBear
- Armor piece 75 BeardBear
- Armor piece 76 BeardBear
- Armor piece 74 BeardBear
- Armor piece 46 BeardBear
- Armor piece 47 BeardBear
- Armor piece 48 BeardBear
- Armor piece 55 BeardBear
- Armor piece 56 BeardBear
- Armor piece 57 BeardBear
- Armor piece 58 BeardBear
- Armor piece 102 BeardBear
- Armor piece 100 BeardBear
- Armor piece 101 BeardBear
- Armor piece 99 BeardBear
- Armor piece 97 BeardBear
- Armor piece 98 BeardBear
- Armor piece 65 BeardBear
- Armor piece 67 BeardBear
- Armor piece 40 BeardBear
- Armor piece 41 BeardBear
- Armor piece 42 BeardBear
- Armor piece 87 BeardBear
- Armor piece 88 BeardBear
- Armor piece 89 BeardBear
- Armor piece 28 BeardBear
- Armor piece 29 BeardBear
- Armor piece 30 BeardBear
- Armor piece 51 BeardBear
- Armor piece 49 BeardBear
- Armor piece 50 BeardBear
- Armor piece 17 BeardBear
- Armor piece 18 BeardBear
- Armor piece 16 BeardBear
- Armor piece 60 BeardBear
- Armor piece 59 BeardBear
- Armor piece 61 BeardBear
- Armor piece 62 BeardBear
- Armor piece 43 BeardBear
- Armor piece 44 BeardBear
- Armor piece 45 BeardBear
- Armor piece 53 BeardBear
- Armor piece 54 BeardBear
- Armor piece 52 BeardBear
- Armor piece 38 BeardBear
- Armor piece 39 BeardBear
- Armor piece 37 BeardBear
- Armor piece 64 BeardBear
- Armor piece 86 BeardBear
- Armor piece 85 BeardBear
- Armor piece 84 BeardBear
- Armor piece 33 BeardBear
- Armor piece 31 BeardBear
- Armor piece 32 BeardBear
- Armor piece 69 BeardBear
- Armor piece 6 BeardBear
- Armor piece 4 BeardBear
- Armor piece 5 BeardBear
- Armor piece 70 BeardBear
- Armor piece 25 BeardBear
- Armor piece 26 BeardBear
- Armor piece 27 BeardBear
From other walkthroughs
AbdallahSmash · Shrines, Sage's Wills, Dragon's Tears
AbdallahSmash 184 pick-ups
- Ukouh Shrine AbdallahSmash
- In-isa Shrine AbdallahSmash
- Gutanbac Shrine AbdallahSmash
- Nachoyah Shrine AbdallahSmash
- Kyononis Shrine AbdallahSmash
- Ishodag Shrine AbdallahSmash
- Gatakis Shrine AbdallahSmash
- Mayaumekis Shrine AbdallahSmash
- Katahanaum Shrine AbdallahSmash
- Mayachin Shrine AbdallahSmash
- Tsutsu-um Shrine AbdallahSmash
- Mayatat Shrine AbdallahSmash
- Soryotanog Shrine AbdallahSmash
- Sahirow Shrine AbdallahSmash
- Orochium Shrine AbdallahSmash
- Sikukuu Shrine AbdallahSmash
- Mayachideg Shrine AbdallahSmash
- Makasura Shrine AbdallahSmash
- Mogawak Shrine AbdallahSmash
- Ihen-a Shrine AbdallahSmash
- Igoshon Shrine AbdallahSmash
- Timawak Shrine AbdallahSmash
- Marakuguc Shrine AbdallahSmash
- Sitsum Shrine AbdallahSmash
- Serutabomac Shrine AbdallahSmash
- Kamizun Shrine AbdallahSmash
- Joku-U Shrine AbdallahSmash
- Ekochiu Shrine AbdallahSmash
- Musanokir Shrine AbdallahSmash
- Eshos Shrine AbdallahSmash
- Sifumim Shrine AbdallahSmash
- Zanmik Shrine AbdallahSmash
- Taunhiy Shrine AbdallahSmash
- Simosiwak Shrine AbdallahSmash
- Sihajog Shrine AbdallahSmash
- Utsushok Shrine AbdallahSmash
- Ukoojisi Shrine AbdallahSmash
- Yansamin Shrine AbdallahSmash
- Joisu Shrine AbdallahSmash
- Morok Shrine AbdallahSmash
- Tukarok Shrine AbdallahSmash
- Jonsau Shrine AbdallahSmash
- Kadaunar Shrine AbdallahSmash
- Natak Shrine AbdallahSmash
- Mayahisik Shrine AbdallahSmash
- Tauyosipun Shrine AbdallahSmash
- Otak Shrine AbdallahSmash
- Eutoum Shrine AbdallahSmash
- Rutafu-um Shrine AbdallahSmash
- Sisuran Shrine AbdallahSmash
- Wao-os Shrine AbdallahSmash
- Ikatak Shrine AbdallahSmash
- Oromuwak Shrine AbdallahSmash
- Nouda Shrine AbdallahSmash
- Oshozan-u Shrine AbdallahSmash
- Mayaotaki Shrine AbdallahSmash
- Mayausiy Shrine AbdallahSmash
- Kiuyoyou Shrine AbdallahSmash
- Kikakin Shrine AbdallahSmash
- Minetak Shrine AbdallahSmash
- Mayak Shrine AbdallahSmash
- Sakunbomar Shrine AbdallahSmash
- Ninjis Shrine AbdallahSmash
- Pupunke Shrine AbdallahSmash
- Isisim Shrine AbdallahSmash
- Sibajitak Shrine AbdallahSmash
- Kimayat Shrine AbdallahSmash
- Kamatukis Shrine AbdallahSmash
- Momosik Shrine AbdallahSmash
- Tenmaten Shrine AbdallahSmash
- Igashuk Shrine AbdallahSmash
- Rasiwak Shrine AbdallahSmash
- Jochi-Iu Shrine AbdallahSmash
- Gemimik Shrine AbdallahSmash
- Sinatanika Shrine AbdallahSmash
- Domizuin Shrine AbdallahSmash
- Jochi-Ihiga Shrine AbdallahSmash
- Moshapin Shrine AbdallahSmash
- Kisinona Shrine AbdallahSmash
- Maoikes Shrine AbdallahSmash
- Joniu Shrine AbdallahSmash
- Kurakat Shrine AbdallahSmash
- Sepapa Shrine AbdallahSmash
- Ren-iz Shrine AbdallahSmash
- Jojon Shrine AbdallahSmash
- Apogek Shrine AbdallahSmash
- Yomizuk Shrine AbdallahSmash
- Jikais Shrine AbdallahSmash
- Anedamimik Shrine AbdallahSmash
- Jogou Shrine AbdallahSmash
- Zakusu Shrine AbdallahSmash
- O-ogim Shrine AbdallahSmash
- Tokiy Shrine AbdallahSmash
- Bamitok Shrine AbdallahSmash
- Jochisiu Shrine AbdallahSmash
- Susub Shrine AbdallahSmash
- Jiukoum Shrine AbdallahSmash
- Utojis Shrine AbdallahSmash
- Joju-u-u Shrine AbdallahSmash
- Marari-In Shrine AbdallahSmash
- En-Oma Shrine AbdallahSmash
- Ishokin Shrine AbdallahSmash
- Motsusis Shrine AbdallahSmash
- Siwakama Shrine AbdallahSmash
- Chichim Shrine AbdallahSmash
- Karahatag Shrine AbdallahSmash
- Irawak Shrine AbdallahSmash
- Miryotanog Shrine AbdallahSmash
- Kudanisar Shrine AbdallahSmash
- Mayamats Shrine AbdallahSmash
- Otutsum Shrine AbdallahSmash
- Rotsumamu Shrine AbdallahSmash
- Turakamik Shrine AbdallahSmash
- Rakakudaj Shrine AbdallahSmash
- Suariwak Shrine AbdallahSmash
- Kitawak Shrine AbdallahSmash
- Tadarok Shrine AbdallahSmash
- Kyokugon Shrine AbdallahSmash
- Teniten Shrine AbdallahSmash
- Tajikats Shrine AbdallahSmash
- Susuyai Shrine AbdallahSmash
- Sonapan Shrine AbdallahSmash
- Usazum Shrine AbdallahSmash
- Sinakawak Shrine AbdallahSmash
- Taki-ihaban Shrine AbdallahSmash
- Runakit Shrine AbdallahSmash
- Makurukis Shrine AbdallahSmash
- Iun-orok Shrine AbdallahSmash
- Gasas Shrine AbdallahSmash
- Turakawak Shrine AbdallahSmash
- Rasitakiwak Shrine AbdallahSmash
- Jiosin Shrine AbdallahSmash
- Yamiyo Shrine AbdallahSmash
- Taninoud Shrine AbdallahSmash
- Tenbez Shrine AbdallahSmash
- Gatanisis Shrine AbdallahSmash
- Riogak Shrine AbdallahSmash
- Jiotak Shrine AbdallahSmash
- Ijo-o Shrine AbdallahSmash
- Ga-ahisas Shrine AbdallahSmash
- Ganos Shrine AbdallahSmash
- Mayasiar Shrine AbdallahSmash
- Rakashog Shrine AbdallahSmash
- Siyamotsus Shrine AbdallahSmash
- Jinodok Shrine AbdallahSmash
- Joku-usin Shrine AbdallahSmash
- Kumamayn Shrine AbdallahSmash
- Mayanas Shrine AbdallahSmash
- Jirutagumac Shrine AbdallahSmash
- Gikaku Shrine AbdallahSmash
- Mogisari Shrine AbdallahSmash
- Mayam Shrine AbdallahSmash
- Sage's Will: Eldin Sky Archipelago AbdallahSmash
- Sage's Will: Sokkala Sky Archipelago AbdallahSmash
- Sage's Will: South Eldin Sky Archipelago AbdallahSmash
- Sage's Will: Wellspring Island AbdallahSmash
- Sage's Will: Jirutagumac Shrine AbdallahSmash
- Sage's Will: Lanayru Sky Archipelago AbdallahSmash
- Sage's Will: North Necluda Sky Archipelago AbdallahSmash
- Sage's Will: Eventide Island Sky AbdallahSmash
- Sage's Will: South Necluda Sky Archipelago AbdallahSmash
- Sage's Will: Dragonhead Island AbdallahSmash
- Sage's Will: Thunderhead Isles AbdallahSmash
- Sage's Will: Faron Sky Archipelago AbdallahSmash
- Sage's Will: South Hyrule Sky Archipelago AbdallahSmash
- Sage's Will: East Gerudo Sky Archipelago AbdallahSmash
- Sage's Will: Gerudo Desert Sky AbdallahSmash
- Sage's Will: North Gerudo Sky Archipelago AbdallahSmash
- Sage's Will: West Hyrule Sky Archipelago AbdallahSmash
- Sage's Will: North Tabantha Sky Archipelago AbdallahSmash
- Sage's Will: South Hebra Sky Archipelago AbdallahSmash
- Sage's Will: West Hebra Sky Archipelago AbdallahSmash
- Dragon's Tear #1 (The Dragon's Tears) AbdallahSmash
- Dragon's Tear #2: Tabantha Hills AbdallahSmash
- Dragon's Tear #3: Trilby Plain AbdallahSmash
- Dragon's Tear #4: Baltrea Lake AbdallahSmash
- Dragon's Tear #5: Sapphia’s Table AbdallahSmash
- Dragon's Tear #6: Illumeni Plateau AbdallahSmash
- Dragon's Tear #7: Gogobi Shores AbdallahSmash
- Dragon's Tear #8: North Tabantha Snowfield AbdallahSmash
- Dragon's Tear #9: Talus Plateau AbdallahSmash
- Dragon's Tear #10: Grinnden Plains AbdallahSmash
- Dragon's Tear #11: Eldin Mountains AbdallahSmash
- Dragon's Tear #12: Rist Penisula AbdallahSmash
No pick-ups listed for this episode yet.
More clips separate short clips for this game
Where to find the collectible items of this game, each with a short clip. Click one and it plays in the player above.
-
 33:58
Zelda Tears of the Kingdom - All 20 Sage's Will Locations (Guide)
-
 38:44
Zelda Tears of The Kingdom All Korok Seeds Part 1 - Hebra Mountains
Game Guides Channel
-
 20:43
Zelda Tears of The Kingdom All Korok Seeds Part 2 - Tabantha Tundra
Game Guides Channel
-
 28:51
Zelda Tears of The Kingdom All Korok Seeds Part 3 - Tabantha Frontier
Game Guides Channel
-
 43:16
Zelda Tears of The Kingdom All Korok Seeds Part 4 - Gerudo Highlands
Game Guides Channel
-
 25:49
Zelda Tears of The Kingdom All Korok Seeds Part 5 - Gerudo Desert
Game Guides Channel
-
 35:42
Zelda Tears of The Kingdom All Korok Seeds Part 6 - Hyrule Ridge
Game Guides Channel
-
 36:44
Zelda Tears of The Kingdom All Korok Seeds Part 7 - Lookout Landing & Castle
Game Guides Channel
-
 14:11
All Great Sky Island Korok Seeds Zelda Tears of The Kingdom
Game Guides Channel
-
 23:57
Zelda Tears of The Kingdom All Korok Seeds Part 8 - Great Hyrule Forest & Surroundings
Game Guides Channel
-
 15:51
Zelda Tears of The Kingdom All Korok Seeds Part 9 - Eldin Mountains
Game Guides Channel
-
 9:27
Zelda Tears of The Kingdom All Korok Seeds Part 10 - Death Mountain
Game Guides Channel
-
 19:25
Zelda Tears of The Kingdom All Korok Seeds Part 11 - Deep Akkala
Game Guides Channel
-
 18:10
Zelda Tears of The Kingdom All Korok Seeds Part 12 - Akkala Highlands
Game Guides Channel
-
 27:11
Zelda Tears of The Kingdom All Korok Seeds Part 13 - Lanayru Great Spring
Game Guides Channel
-
 10:02
Zelda Tears of The Kingdom All Korok Seeds Part 14 - Eldin Canyon
Game Guides Channel
-
 31:46
Zelda Tears of The Kingdom All Korok Seeds Part 15 - Lanayru Wetlands
Game Guides Channel
-
 29:52
Zelda Tears of The Kingdom All Korok Seeds Part 16 - Mount Lanayru
Game Guides Channel
-
 26:20
Zelda Tears of The Kingdom All Korok Seeds Part 17 - West Necluda
Game Guides Channel
-
 35:38
Zelda Tears of The Kingdom All Korok Seeds Part 18 - East Necluda
Game Guides Channel
-
 32:55
Zelda Tears of The Kingdom All Korok Seeds Part 19 - Hyrule Field
Game Guides Channel
-
 40:04
Zelda Tears of The Kingdom All Korok Seeds Part 20 - Faron Grasslands
Game Guides Channel
-
 39:30
Zelda Tears of The Kingdom All Korok Seeds Part 21 - Sky
Game Guides Channel
-
 9:41:25
All 1000 Korok Seeds Zelda Tears of The Kingdom
Game Guides Channel
-
 2:10:47
Zelda Tears Of The Kingdom All 147 Bubbulfrog Locations (All Bubbul Gems)
100% Guides
-
 24:10
All 58 Wells Zelda Tears of The Kingdom - Where Are The Wells? Quest
Game Guides Channel
-
 8:53
Zelda: Tears of the Kingdom - Tingle Armor Set Location
BeardBear
-
 1:01
Zelda: Tears of the Kingdom - Island Lobster Shirt Location
BeardBear
-
 7:19
How to Get Stealth & Radiant Armor Cheaper - Zelda Tears of the Kingdom
BeardBear
-
 23:05
How to Get Secret Tunic of Memories - Zelda Tears of the Kingdom
BeardBear
-
 10:08
Zelda: Tears of the Kingdom - Sky Armor Set Location
BeardBear
-
 6:43
Zelda: Tears of the Kingdom - Depths Armor & Dark Armor Set Location
BeardBear
-
 6:13
Zelda: Tears of the Kingdom - Rubber Armor Set Location
BeardBear
-
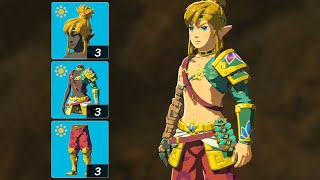 2:34
Zelda: Tears of the Kingdom - Desert Voe Armor Set Location
BeardBear
-
 2:28
Zelda: Tears of the Kingdom - Hero Armor Set Location
BeardBear
-
 6:29
Zelda: Tears of the Kingdom - Soldier Armor Set Location
BeardBear
-
 2:28
Zelda: Tears of the Kingdom - Ancient Hero's Aspect Location
BeardBear
-
 12:46
Zelda: Tears of the Kingdom - Twilight Armor Set Location
BeardBear
-
 2:04
Zelda: Tears of the Kingdom - Wild Armor Set Location
BeardBear
-
 4:11
Zelda: Tears of the Kingdom - Barbarian Armor Set Location
BeardBear
-
 33:29
Zelda: Tears of the Kingdom - Evil Spirit Armor Set Location
BeardBear
-
 4:44
Zelda: Tears of the Kingdom - Ravio's Hood Location
BeardBear
-
 4:30
Zelda: Tears of the Kingdom - Sheik's Mask Location
BeardBear
-
 3:38
Zelda: Tears of the Kingdom - Phantom Armor Set Location
BeardBear
-
 2:47
Zelda: Tears of the Kingdom - Charged Armor Set Location
BeardBear
-
 10:30
Zelda: Tears of the Kingdom - All Divine Beast Helm Locations
BeardBear
-
 6:17
Zelda: Tears of the Kingdom - Wind Armor Set Location
BeardBear
-
 4:59
Zelda: Tears of the Kingdom - Time Armor Set Location
BeardBear
-
 3:16
Zelda: Tears of the Kingdom - Zant's Helmet Location
BeardBear
-
 3:32
Zelda: Tears of the Kingdom - Midna's Helmet Location
BeardBear
-
 16:28
Zelda: Tears of the Kingdom - How to Get Mystic Armor Set
BeardBear
-
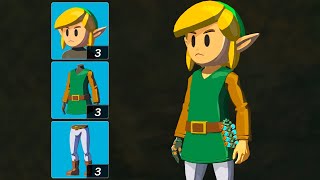 12:17
Zelda: Tears of the Kingdom - Awakening Armor Set Location
BeardBear
-
 1:22:02
How to Get Froggy Armor Set - Zelda Tears of the Kingdom
BeardBear
-
 8:40
Zelda: Tears of the Kingdom - Frostbite Armor Set Location
BeardBear
-
 11:44
Zelda: Tears of the Kingdom - Climbing Armor Set Location
BeardBear
-
 19:54
Zelda: Tears of the Kingdom - Zonaite Armor Set Location
BeardBear
-
 13:10
Zelda: Tears of the Kingdom - Lightning Helm Location
BeardBear
-
 5:34
Zelda: Tears of the Kingdom - Ember Armor Set Location
BeardBear
-
 5:28
Zelda: Tears of the Kingdom - Yiga Armor Set Location
BeardBear
-
 2:55
Zelda: Tears of the Kingdom - Miner's Armor Set Location
BeardBear
-
 4:13
Zelda: Tears of the Kingdom - Champion's Leathers Location
BeardBear
-
 8:30
Zelda: Tears of the Kingdom - Fierce Deity Armor Set Location
BeardBear
-
 11:56
Zelda: Tears of the Kingdom - Glide Armor Set Location
BeardBear
-
 4:12
Zelda: Tears of the Kingdom - Majora's Mask Location
BeardBear
-
 11:08
Zelda: Tears of the Kingdom - Zora Armor Set Location
BeardBear
-
 2:11
Zelda: Tears of the Kingdom - Korok Mask Location
BeardBear
-
 7:06
Zelda: Tears of the Kingdom - Royal Guard Armor Set Location
BeardBear
Quests
Quests from the playlist you are watching
Every quest in this playlist, with its episode and moment. Click one and the video above jumps to that episode, a few seconds before it.
In this walkthrough
Lookout Landing 5 pick-ups
Sky 16 pick-ups
- The Tabantha Sky Crystal ep 40
- The East Hebra Sky Crystal ep 63
- The North Hyrule Sky Crystal ep 72
- The South Hyrule Sky Crystal ep 112
- The West Necluda Sky Crystal ep 130
- The North Necluda Sky Crystal ep 131
- The High Spring and the Light Rings ep 160
- The South Lanayru Sky Crystal ep 160
- The Necluda Sky Crystal ep 176
- The Sky Mine Crystal ep 209
- The Sokkala Sky Crystal ep 209
Depths 9 pick-ups
Lanayru Wetlands 17 pick-ups
Hyrule Field 22 pick-ups
- The Rito Rope Bridge ep 55
- WANTED: Hinox ep 101
- A Picture for Riverside Stable ep 102
- Feathered Fugitives ep 102
- Misko's Treasure of Awakening III ep 108
- Disaster in Gerudo Canyon ep 109
- The Horse Guard's Request ep 109
- A Picture for Outskirt Stable ep 111
- A Picture for Highland Stable ep 114
- A New Champion's Tunic ep 224
- Ancient Blades Below ep 228
- The Shrine Explorer ep 228
Hyrule Ridge 9 pick-ups
Tabantha Frontier 8 pick-ups
Hebra Mountains 10 pick-ups
Tabantha Tundra 6 pick-ups
Great Hyrule Forest & Surroundings 10 pick-ups
Eldin Canyon 29 pick-ups
- A Picture for Woodland Stable ep 81
- Meat for Meat ep 82
- Cash In on Ripened Flint ep 83
- Amber Dealer ep 84
- The Ancient City Gorondia! ep 84
- The Abandoned Laborer ep 87
- The Hidden Treasure at Lizard Lakes ep 89
- Moon-Gazing Gorons ep 89
- Soul of the Gorons ep 89
- Village Attacked by Pirates ep 89
- Rock Roast or Dust ep 90
- Mine-Cart Land: Open for Business! ep 93
- Mine-Cart Land: Quickshot Course ep 93
- Mine-Cart Land: Death Mountain ep 93
- A Picture for Foothill Stable ep 94
- Misko's Cave of Chests ep 95
- Misko's Treasure: The Fierce Deity ep 95
- Misko's Treasure: Twins Manuscript ep 95
- Misko's Treasure: Pirate Manuscript ep 95
- Misko's Treasure: Heroines Manuscript ep 95
Eldin Mountains 2 pick-ups
Death Mountain 1 pick-up
Faron Grasslands 9 pick-ups
West Necluda 5 pick-ups
East Necluda 16 pick-ups
Lanayru Great Spring 17 pick-ups
Mount Lanayru 3 pick-ups
Gerudo Desert 22 pick-ups
- Piaffe, Packed Away ep 181
- A Picture for the Closed Stable I ep 182
- A Picture for the Closed Stable II ep 182
- Gleeok Guts ep 182
- Decorate with Passion ep 183
- The Missing Owner ep 184
- The Heroines' Secret ep 184
- To the Ruins! ep 187
- The Mysterious Eighth ep 187
- Dalia's Game ep 187
- Lost in the Dunes ep 187
- Treasure of the Gerudo Desert ep 188
- The Iceless Icehouse ep 188
- Pride of the Gerudo ep 190
- WANTED: Molduga ep 191
- Cold-Endurance Contest! ep 192
- Heat-Endurance Contest! ep 192
- The Great Tumbleweed Purge ep 192
- The South Lomei Prophecy ep 193
Deep Akkala 26 pick-ups
- Home on Arrange ep 200
- Secrets Within ep 200
- Master the Vehicle Prototype ep 200
- The Tarrey Town Race Is On! ep 201
- One-Hit Wonder! ep 202
- A Picture for South Akkala Stable ep 203
- Goddess Statue of Power ep 204
- The Mother Goddess Statue ep 204
- WANTED: Stone Talus ep 205
- Unknown Sky Giant ep 205
- Unknown Three-Headed Monster ep 205
- Unknown Huge Silhouette ep 205
- Strongest in the World ep 205
- The Gathering Pirates ep 205
- A Picture for East Akkala Stable ep 205
- Eldin's Colossal Fossil ep 206
- Hebra's Colossal Fossil ep 206
- Gerudo's Colossal Fossil ep 206
Gerudo Highlands 2 pick-ups
Other 4 pick-ups
In this walkthrough
Episode 1 3 pick-ups
Episode 5 1 pick-up
Episode 7 2 pick-ups
Episode 9 2 pick-ups
Episode 13 1 pick-up
Episode 15 3 pick-ups
Episode 21 2 pick-ups
Episode 23 1 pick-up
Episode 37 2 pick-ups
Episode 38 2 pick-ups
Episode 39 2 pick-ups
Episode 40 1 pick-up
Episode 41 4 pick-ups
Episode 42 1 pick-up
Episode 43 1 pick-up
Episode 46 4 pick-ups
Episode 47 5 pick-ups
Episode 49 1 pick-up
Episode 51 1 pick-up
Episode 52 1 pick-up
Episode 55 1 pick-up
Episode 62 3 pick-ups
Episode 63 2 pick-ups
Episode 64 4 pick-ups
Episode 66 1 pick-up
Episode 67 1 pick-up
Episode 72 1 pick-up
Episode 73 2 pick-ups
Episode 74 1 pick-up
Episode 78 7 pick-ups
Episode 80 1 pick-up
Episode 81 4 pick-ups
Episode 82 2 pick-ups
Episode 83 1 pick-up
Episode 84 4 pick-ups
Episode 87 1 pick-up
Episode 89 4 pick-ups
Episode 90 3 pick-ups
Episode 91 1 pick-up
Episode 93 3 pick-ups
Episode 94 3 pick-ups
Episode 95 5 pick-ups
Episode 97 2 pick-ups
Episode 101 1 pick-up
Episode 102 3 pick-ups
Episode 103 1 pick-up
Episode 106 1 pick-up
Episode 108 1 pick-up
Episode 109 2 pick-ups
Episode 111 3 pick-ups
Episode 112 1 pick-up
Episode 114 2 pick-ups
Episode 115 3 pick-ups
Episode 117 2 pick-ups
Episode 119 1 pick-up
Episode 122 1 pick-up
Episode 123 1 pick-up
Episode 124 1 pick-up
Episode 126 1 pick-up
Episode 130 1 pick-up
Episode 131 5 pick-ups
Episode 132 1 pick-up
Episode 133 4 pick-ups
Episode 135 1 pick-up
Episode 136 2 pick-ups
Episode 139 2 pick-ups
Episode 140 1 pick-up
Episode 144 1 pick-up
Episode 147 3 pick-ups
Episode 148 3 pick-ups
Episode 150 1 pick-up
Episode 151 8 pick-ups
Episode 152 1 pick-up
Episode 153 1 pick-up
Episode 157 1 pick-up
Episode 160 2 pick-ups
Episode 161 1 pick-up
Episode 163 8 pick-ups
Episode 164 6 pick-ups
Episode 165 3 pick-ups
Episode 167 1 pick-up
Episode 171 2 pick-ups
Episode 172 2 pick-ups
Episode 175 1 pick-up
Episode 176 1 pick-up
Episode 179 1 pick-up
Episode 181 1 pick-up
Episode 182 4 pick-ups
Episode 183 2 pick-ups
Episode 184 2 pick-ups
Episode 187 4 pick-ups
Episode 188 2 pick-ups
Episode 190 1 pick-up
Episode 191 1 pick-up
Episode 192 3 pick-ups
Episode 193 1 pick-up
Episode 198 1 pick-up
Episode 199 3 pick-ups
Episode 200 3 pick-ups
Episode 201 5 pick-ups
Episode 202 1 pick-up
Episode 203 2 pick-ups
Episode 204 2 pick-ups
Episode 205 7 pick-ups
Episode 206 3 pick-ups
Episode 208 1 pick-up
Episode 209 2 pick-ups
Episode 212 1 pick-up
Episode 214 1 pick-up
Episode 220 2 pick-ups
Episode 224 1 pick-up
Episode 225 2 pick-ups
Episode 226 1 pick-up
Episode 228 2 pick-ups
Episode 234 1 pick-up
No pick-ups listed for this episode yet.